
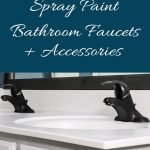
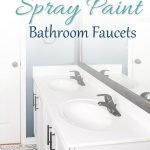
How to Spray Paint the Bathroom Faucet + Accessories
Want to save cash upgrading your bathroom? Spray paint the faucet to spruce things up until you’re ready for new! I'll show you how in today's post
Alright people, it's week 3 of the $100 room challenge and I am cooking with gas!
I spent probably 2 hours one day debating whether or not I should leave the bathroom faucets chrome or spray them.
You'll be happy to know, I decide to spray paint the faucets and the accessories.
I will preface this post by letting you know this is probably not a permanent fix and I plan to do a “how's it holding up” post in a couple months.
However, I am very glad that I got bold and gave it a try because I'm so in love with the change in look for little to no cost.
If you need to catch up on any of the other projects for the $100 room challenge, you can click the links below.
(Mood Board)
(Spray Paint Counter)
(Spray Paint Faucets)
(Spray Paint Vanity)
(Final Reveal)
Let's get to the tips!
Table of contents
- Materials
- Step 1: Clean the faucet
- Step 2: Tape around the faucet
- Step 3: Create a dome to contain overspray
- Step 4: Spray accessories outside
- Step 5: Follow the directions on the can exactly
- Step 6: Spray the top coat following the can instructions
- Step 7: Remove tape 20 minutes after last coat
- After Photos
Disclaimer: This post does include affiliate links for your convenience. This is at NO additional cost to you but earns me a small commission. To read more, check out our disclosure policy. As an
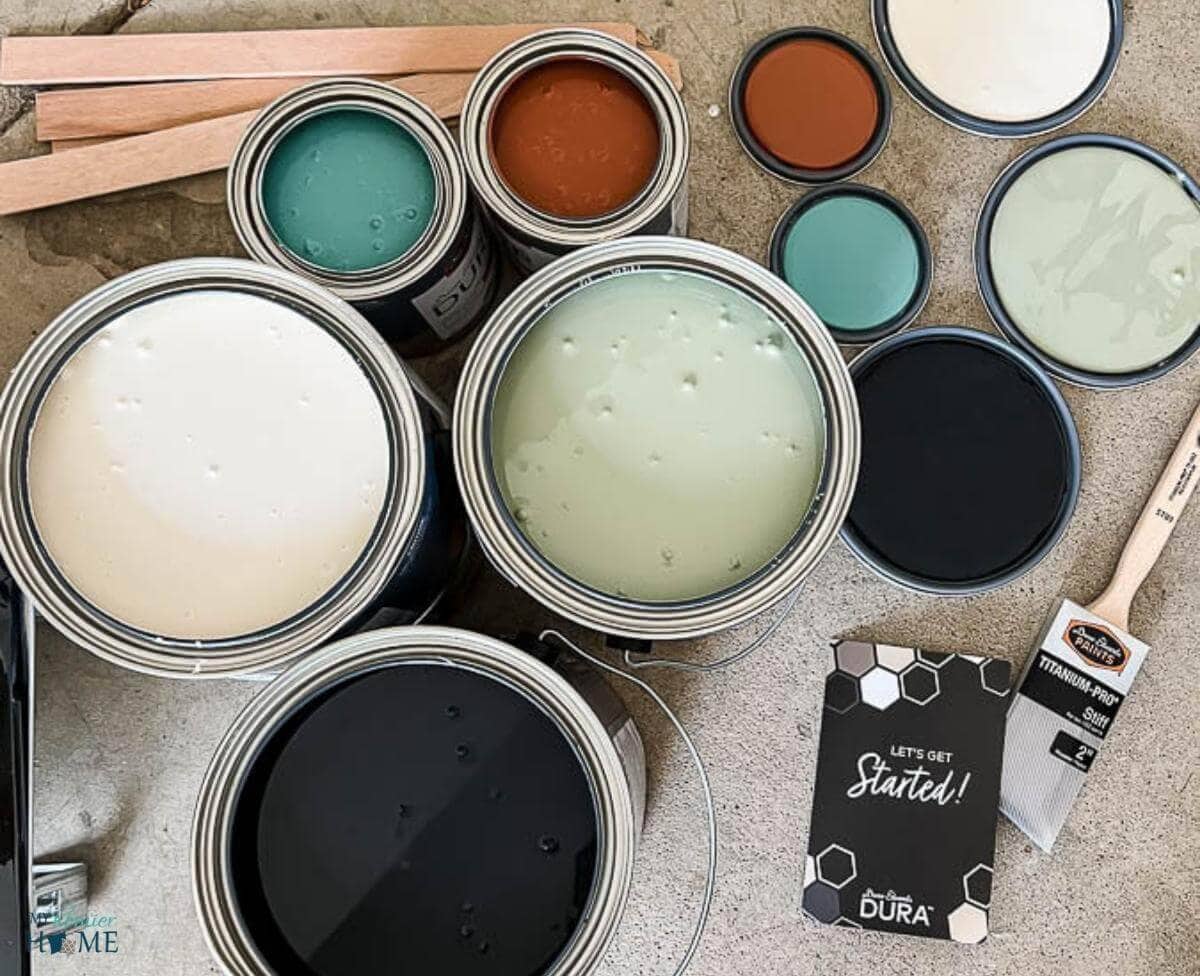
Materials
Here are all the materials you will need to give this project a go at your house.
- Automotive Primer (I used dark gray which gave a black finish)
- Lacquer top coat
- Frogtape (regular & delicate)
- Brown paper to cover areas you don't want to spray
- Drop cloth for floor and other areas
- Goggles to protect your eyes

(click on any of the images to shop the products)
Psst… Catch up on my past $100 Room Challenge | Small Bathroom Room here if you're looking for more bathroom inspo on a dime.

Step 1: Clean the faucet
I cleaned the bathroom like I would normally.
Then, I roughed up the chrome with a sanding sponge.
This created a bunch of dust, so I used a microfiber cloth to clean up the rest.
Step 2: Tape around the faucet
I used delicate Frogtape because I recently spray painted the bathroom countertops.
If you also end up doing the same, be careful because the automotive primer seemed to migrate – or at least the dust of it did.
I would suggest adding another layer of tape and brown paper over the top to ensure the primer doesn't bleed through to your countertops.
I did not do this, but I am happy to say with a little bleach cleaner and catching it before the primer cured, it came up no problem. And the countertops held up great!
Step 3: Create a dome to contain overspray
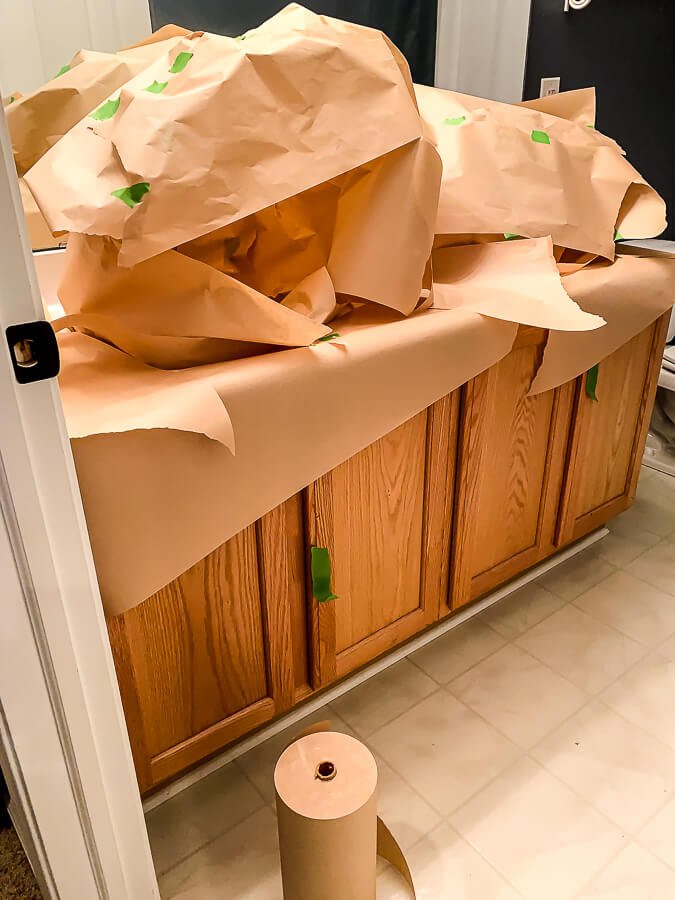
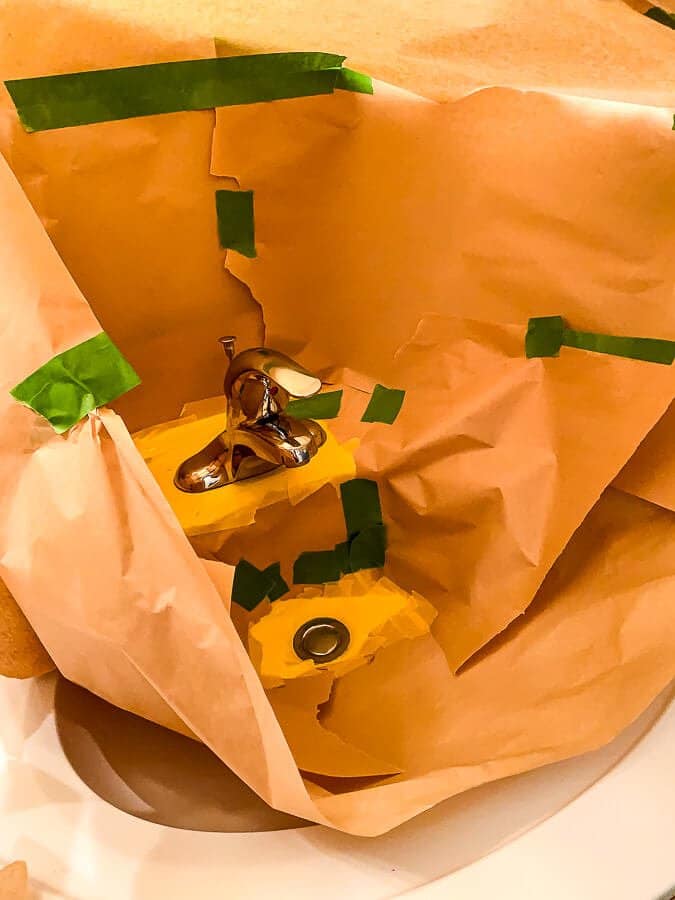
Use your creativity and create a little dome to prevent any overspray from reaching unwanted areas of your bathroom.
You can see what I did in the above pictures, but I would suggest that you tape off any creases so the overspray doesn't blow back up from your dome and sneak out.
Step 4: Spray accessories outside
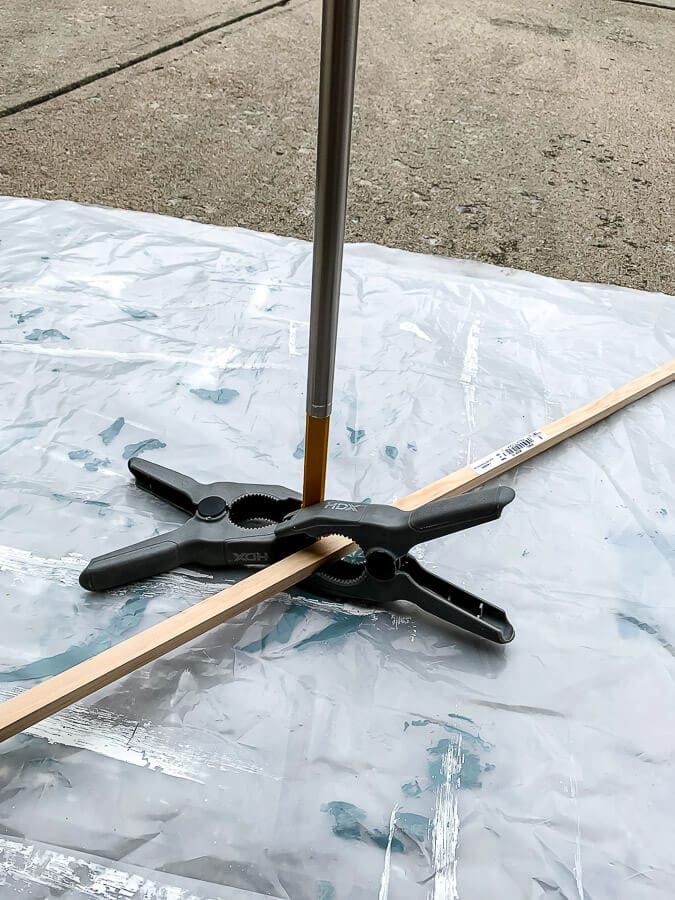
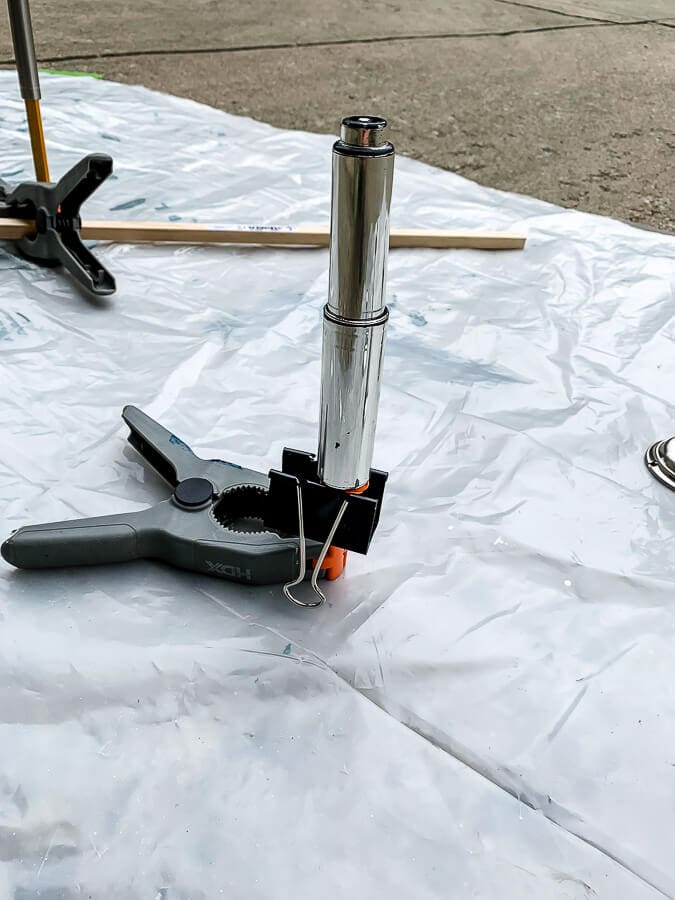
Definitely spray anything you can outside.
I left the faucets attached because I didn't want to mess with all that, but I have read a few others that removed them to spray outside with a lot of success.
You'll see at the end how mine turned out at the end, but I am not a perfectionist when it comes to DIYs, so this does not bother me in the least.
When I set up my spray station outside, I was able to rig a contraption that held the poles straight up so I didn't have to do one side at a time.
I highly recommend using some ingenuity to setup something like this because it saved me a ton of time not having to worry about doing one side at a time.
Step 5: Follow the directions on the can exactly
Definitely follow all directions on the can.
I sprayed the first coat to the best coverage I could tell. I think let it dry 5 minutes before applying the second coat.
This let me see what I missed after it dried a bit.
After 20 minutes, I examined the accessories from all angles to see if I had fully covered all areas.
I actually missed some of the detailed areas, so I turned them over and sprayed what I had missed.
I followed these same guidelines for the faucet, but obviously I couldn't flip them over.
I did try to look at the faucet from all kinds of angles.
Check out my tips at the end of this post to make sure you set yourself up right.
Step 6: Spray the top coat following the can instructions
Once you are good with the automotive primer steps, it's time for the top coat.
This is one of the most important pieces to this whole project in my opinion.
It gave it the finish I was looking for and will help it to last.
You will probably need more coats than you think to get the top coat to go on evenly.
Step 7: Remove tape 20 minutes after last coat
Don't wait until everything is fully dried and cured because the tape my get stuck to something you don't want it to.
Therefore, I would suggest removing the tape 20 minutes after your last top coat.
This way you can also see if you need to wipe up any accidental over-sprays before it is too late.
After Photos
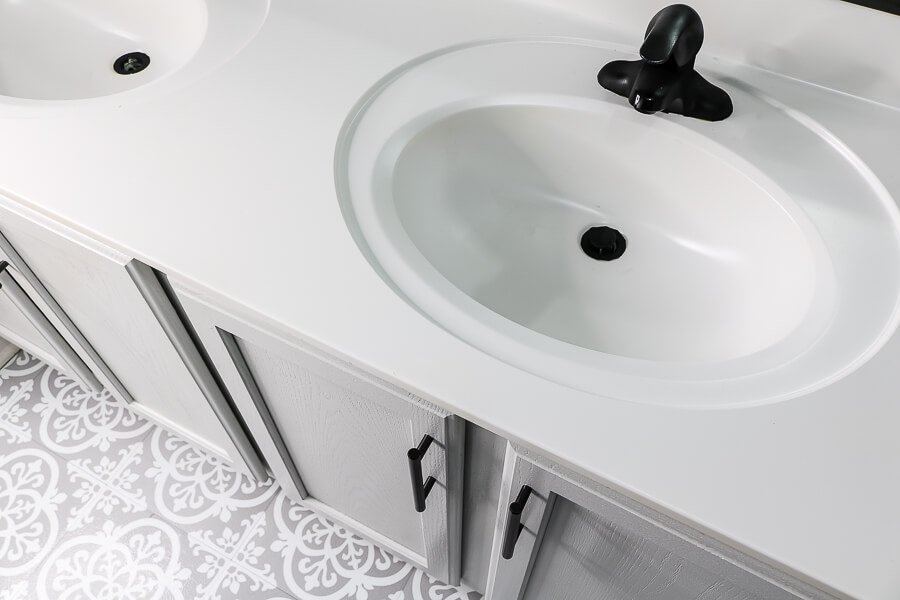
I even gave you a sneak peek of the painted vanity!! You can check out that tutorial here.
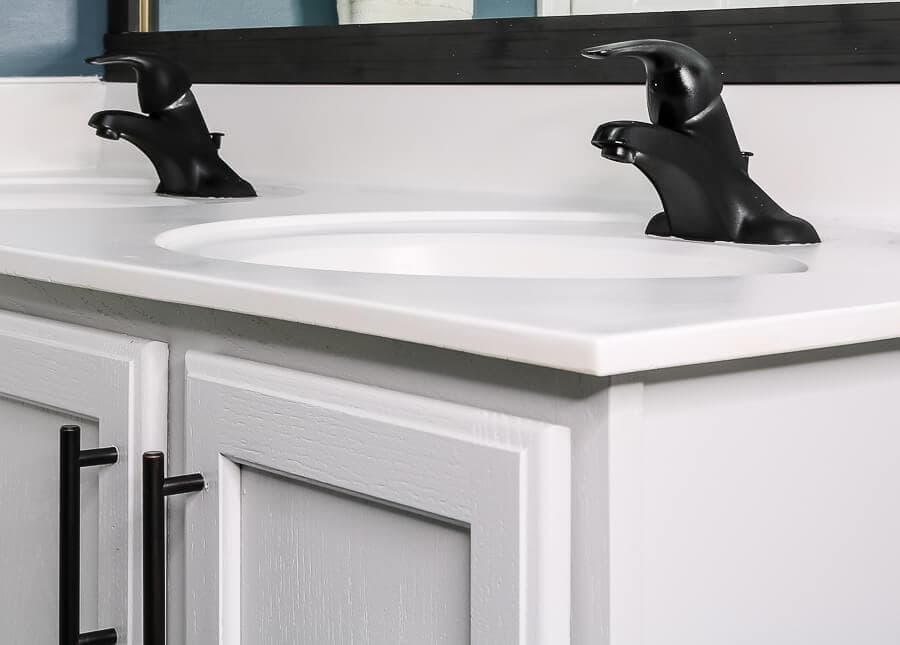
As you can see in the faucets, these are not perfect.
I'm not big on DIY perfect though, so this doesn't bother me.
So if you are, you will have to follow my tips below to ensure you don't leave any unsprayed areas.
Personally, I kind of like the silver showing underneath the handle. I may even have just started a new trend!
I don't know if you caught this from my previous posts for this challenge, but I originally set out to make these oil rubbed bronze. I was going to do a primer, then the oil-rubbed bronze, then the top coat.
When I realized that the automotive primer was going to give me such a deep colored finish, I skipped the added step of having another spray session.
What do you think?
Tips for Spraying Accessories Outside
1. Tape down your plastic sheeting outside in case the wind blows.
2. Before starting the second (and possibly third) coat of primer, look at the items at different angles to see if you missed anything.
3. Try not to pick a super windy or hot day… for obvious reasons.
4. Top coat layers are key.
Tips for Spraying Faucets Still Attached
1. It's probably better to detach the faucet elements to spray outside if you can. I didn't, but it would have been easier to make sure I covered every angle.
2. If the knob is like mine, turn it to expose the side you will see most often.
3. Multiple coats of top coat are key to getting the look you want.
4. Try to view it at different angles to make sure you covered all areas.
5. Pull the drain stopper up to spray that fully and to stop any drip from going down the drain.
What's Next?
Paint the vanityPaint the countertop whitePaint the faucets oil-rubbed bronze.Paint the bathroom towel hangers oil-rubbed bronze- Build and hang the mirror frame
- Spray paint the vanity light with oil-rubbed bronze spray paint
- Add pulls to the cabinets
- Change the flooring to a fun pattern
- Decorate/
Hang Shelves
While you wait for next week's update, go check out all the other participants in the $100 room challenge (links below).
Then, mark your calendar for next Wednesday for my next update on how the progress of this project is going with the big reveal happening Wednesday, September 30th. UPDATE – See the Guest Bathroom Makeover Reveal here.

I am with you- a DIY complete is just a good as a DIY perfect. The faucets look great! Good tips on painting inside and out. Can’t wait to see how this all comes together for you
Heck yes! Next week’s the big reveal!
It’s looking so good!!!
Thanks Tracy!
Love the way it turned out. I’m converting my late husbands office and bathroom to a playroom for my grandsons. I had forgotten that he had replaced the sink faucet with a REALLY nice faucet. Unfortunately in my idiotic hurry to reinvent the wheel I had replaced the shower curtain rod, towel rod, hand towel thing and toilet paper holder in bronze. Completely forgot to look at the other fixtures. Sooo, now I’m really wanting to paint the sink faucet and the bath stuff in the bronze. It just bothers me to have to ‘ruff up’ that lovely sink faucet. Do you think it would work even if I didn’t sand the sink faucet? The other thing I was wondering if you have a way to ‘save’ your tutorials, I couldn’t find a ‘save’ button. Thank you for sharing your wonderful ideas!
I definitely think you could get away with not sand if you are using the automotive primer. I also think you could probably pick any color for over the top of that too, but the key is going to be the top coat I mentioned in the post. That made it look legit. As for a save button, the best way is to probably pin the image to a folder on Pinterest. If you hover over any picture, it should work. Let me know if you need more help on that or the faucet!! 🙂