• Shop With Me
  • Learn With Me
  • Login
  • Nav Social Menu

    • Bloglovin
    • Facebook
    • Instagram
    • Pinterest
    • Twitter
    • YouTube

My Homier Home

  • DIY
    • DIY Projects
    • Recommended Tools
    • Organization
  • Decorating
    • Decorating Tips
    • Before & Afters
    • Get C.O.N.F.I.D.E.N.T.
  • Start Here

How to Easily Paint an Arch on your Wall

Published: February 12, 2022 | Updated Aug 05, 2022

Spread the love

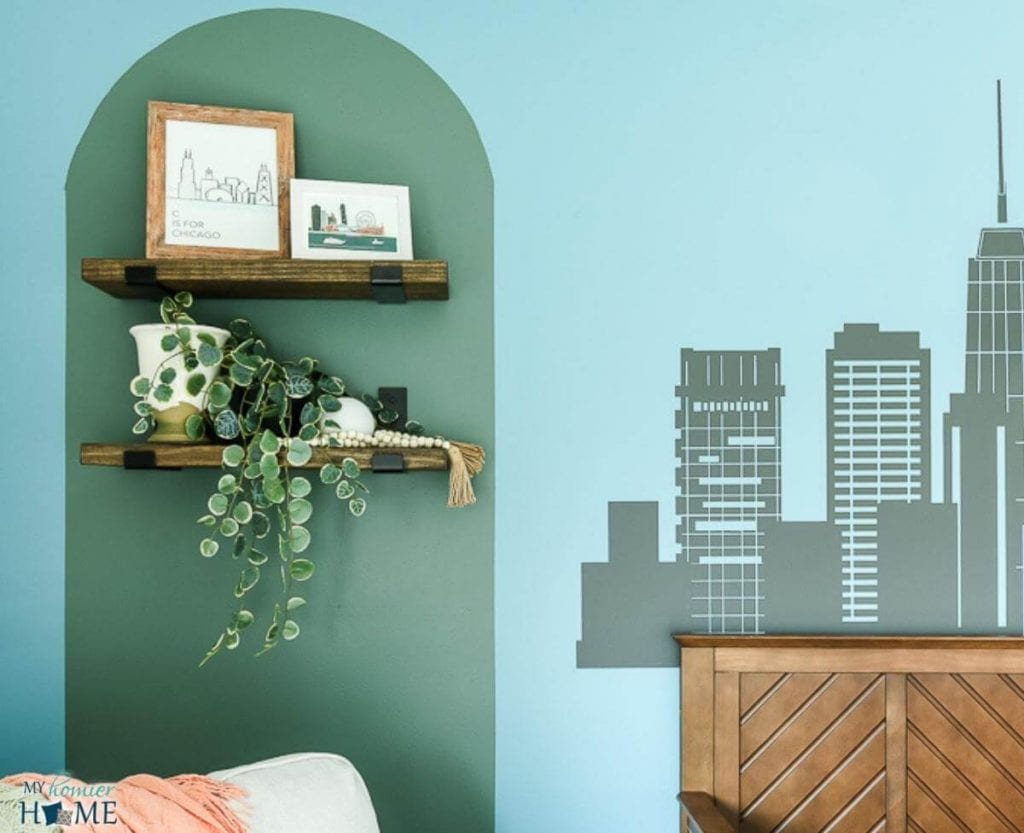
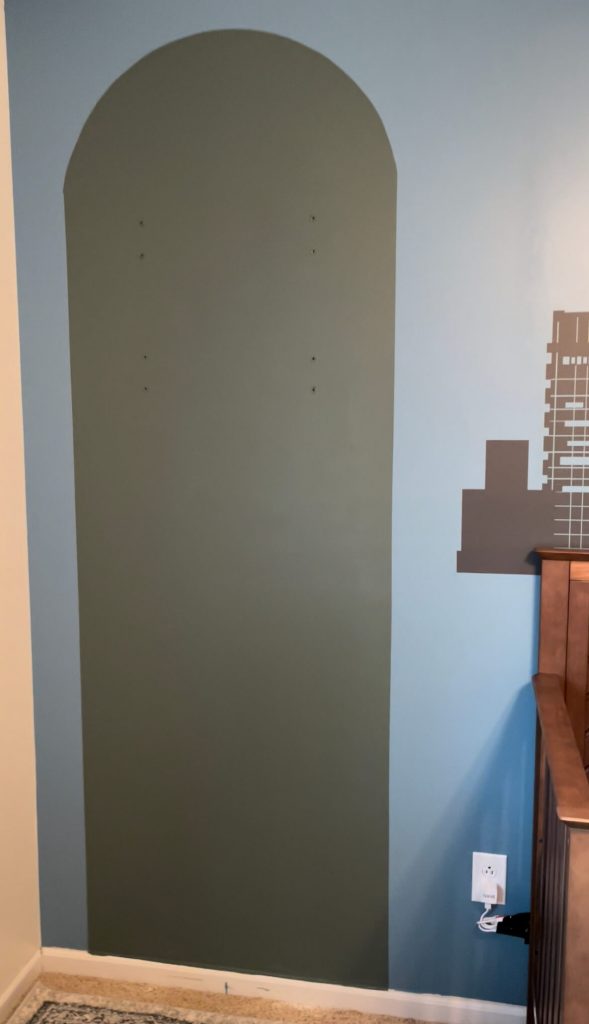
Add character to any room by learning how to paint an arch on your wall the easy way. Learn how here.

Add character to any room by learning how to paint an arch on your wall the easy way.

Have you seen this trend popping up?

I usually could careless about most trends, but this one I am highly on board with.

Not only is it super easy, but it will add so much for very little effort.

So, without further ado, let me share with you why your room needs a painted arch and exactly how to do it simply.

Let’s do it!

Jump to…

  • Why your room needs a painted arch
  • Materials List
  • How to Paint an Arch
    • 1. Measure where your arch will go.
    • 2. Draw your arch.
    • 3. Paint inside the lines.
    • 4. Add accent pieces and enjoy!
  • Want to watch the video for this post?

Why your room needs a painted arch

Add character to any room by learning how to paint an arch on your wall the easy way. Learn how here.

Fist of all, I want to take a second to share with you why you should consider this trend.

Not only are curves totally in right now, but they are timeless.

If you were to research arches on the goog’s, you’d find them in so many iconic places in history.

Granted, most of these historical arches are actual architectural structures, but we’re new age, baby!

We can take an old idea and reinvent it just like that.

Also, I found that painting an arch on your wall gives awesome dimension and creates interest in your room design.

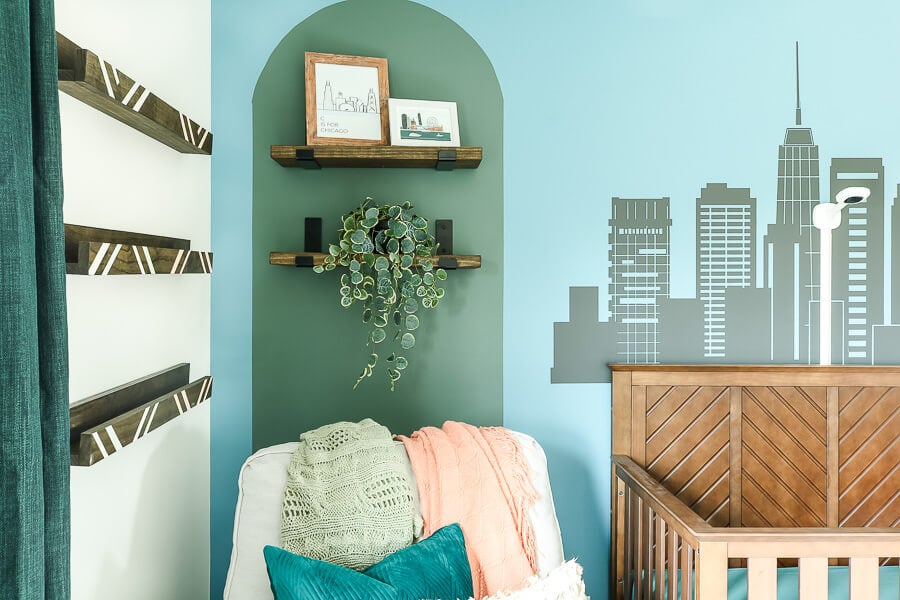
For our gender neutral nursery, I wanted to break up the wall into sections without it being too busy or overpowering considering it is such a small room.

Enter the painted arch!

This was the perfect solution to creating a pseudo reading nook in a room that barely has room for a bed and a chair.

In addition to everything I just mentioned, my absolute favorite part of adding a painted arch?

It’s ridiculously easy and super quick to complete with a whole lot of impact – especially when paired with floating shelves.

Disclaimer: This post does include affiliate links for your convenience. This is at NO additional cost to you but earns me a small commission. To read more, check out our disclosure policy. As an Amazon associate, I earn from qualifying purchases.

Materials List

Now that I’ve convinced you to add a painted arch to your room, let’s gather our materials.

To complete this painted arch, you’ll need…

  • Tape measure
  • Laser level
  • Pencil (for lighter walls) or Chalk (for darker walls)
  • Thick string (you could use old gift wrap string, hemp, or anything that can stay taut)
  • Push pin
  • Frogtape
  • Plastic credit card
  • Your Paint of Choice
  • Angled paint brush
  • Paint roller

(click on any of the images to shop the products)

Want a home that flows?

Snag our quick-start checklist as a free gift for opting in to our VIP newsletter below.

    We respect your privacy. Unsubscribe at anytime.
    Built with ConvertKit

    How to Paint an Arch

    Nursery Bookshelves in room no books

    Now that we have all of our materials ready to go, let’s talk about how exactly to set up this arch before painting.

    1. Measure where your arch will go.
    Add character to any room by learning how to paint an arch on your wall the easy way. Learn how here.

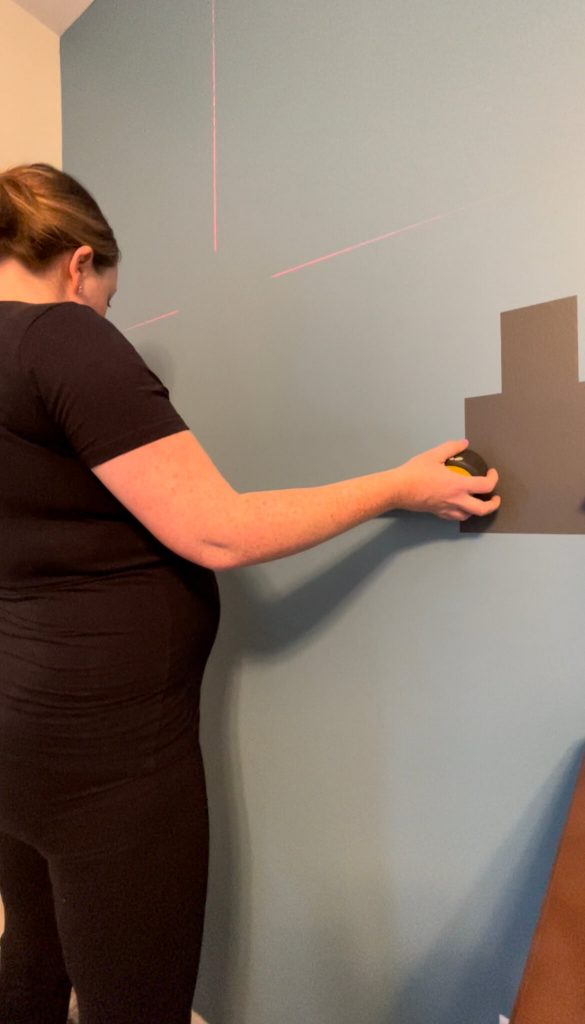
    You want to start by measuring where the straight edges of your archway will go.

    When you measure, consider how far you want to leave blank on either side of the straight edges as well as how high you want the straight edges to go before starting the curved part of the arch.

    Once you get the width of your archway, cut it in half.

    This will be the radius (or the length of string) you’ll use to draw your arch.

    Move your laser level to the center of your archway (which is this half way measurement you just found).
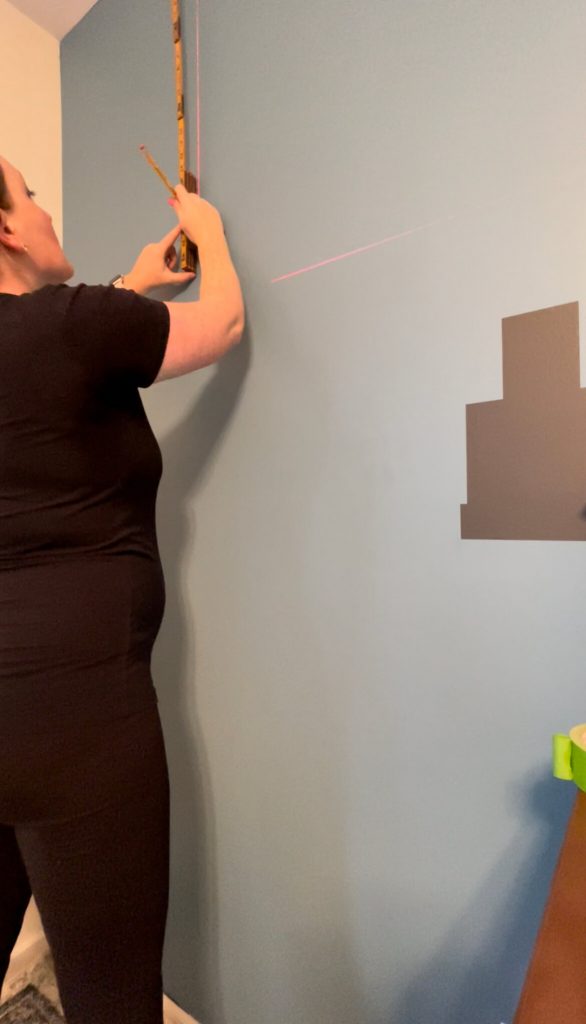
    Next, you want to determine the height of actual curved portion of the arch.

    Don’t forget to take into account that the measurement of your half-width (the radius) is also how tall the curved portion of the arch will be.

    So, be careful not to position the start of your arch too high.

    If you’re a numbers person, measure how much space you want from the ceiling to the top of the arch and add it to the radius measurement.

    This will tell you how far down to put your push pin to start drawing your arch.

    2. Draw your arch.
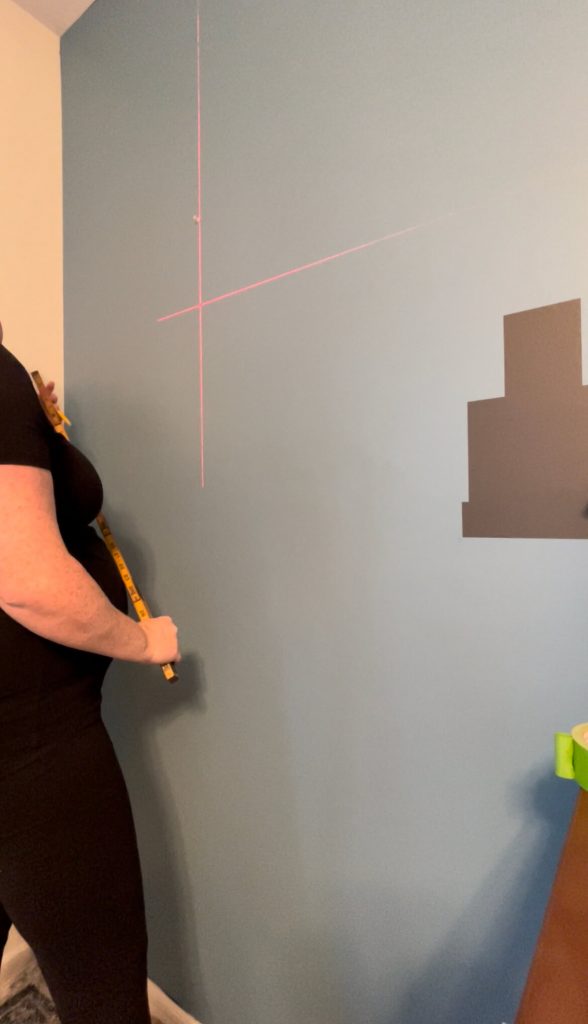
    Add character to any room by learning how to paint an arch on your wall the easy way. Learn how here.

    Once you’ve determined where the curved part of the arch will start, add your push pin at the center at this measurement.
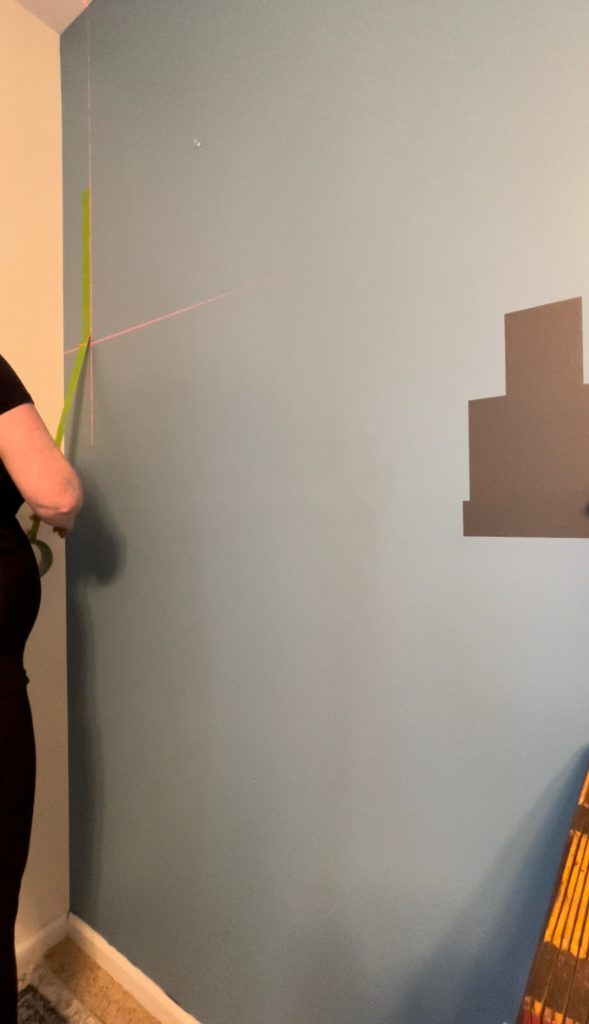
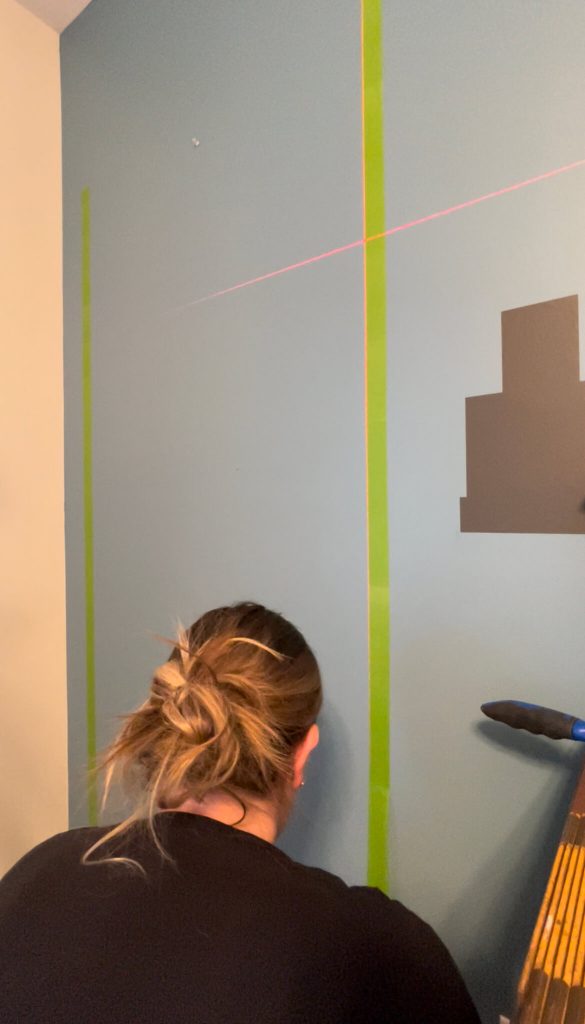
    • Add character to any room by learning how to paint an arch on your wall the easy way. Learn how here.
    • Add character to any room by learning how to paint an arch on your wall the easy way. Learn how here.

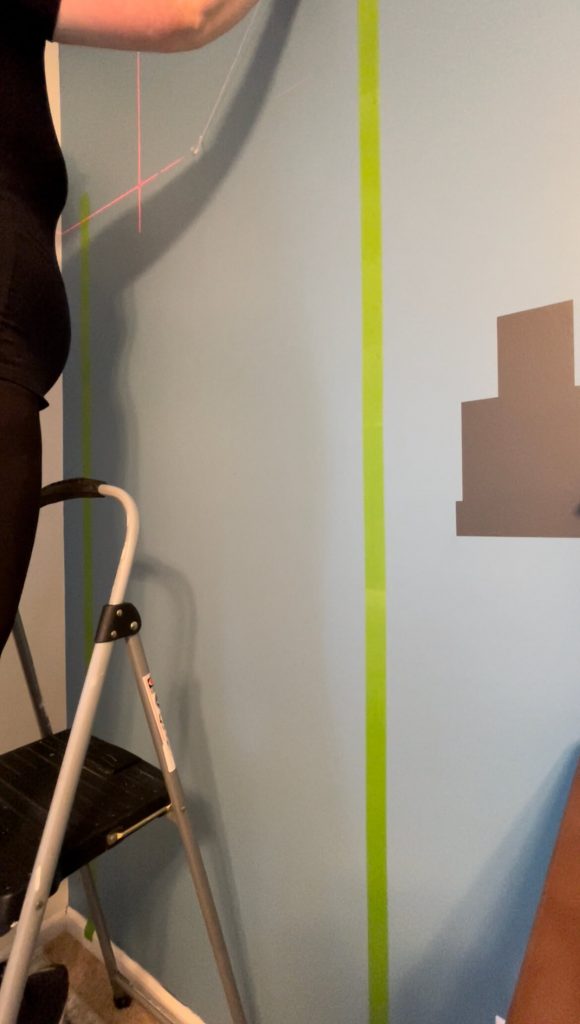
    Next, you’ll want to move your laser level to one side of the archway and add your Frogtape straight down.

    Repeat on the other side of the arch.

    This will be your boundaries for the straight areas of the archway.

    Use your plastic credit card to run over the top of the tape to make sure it adheres fully.
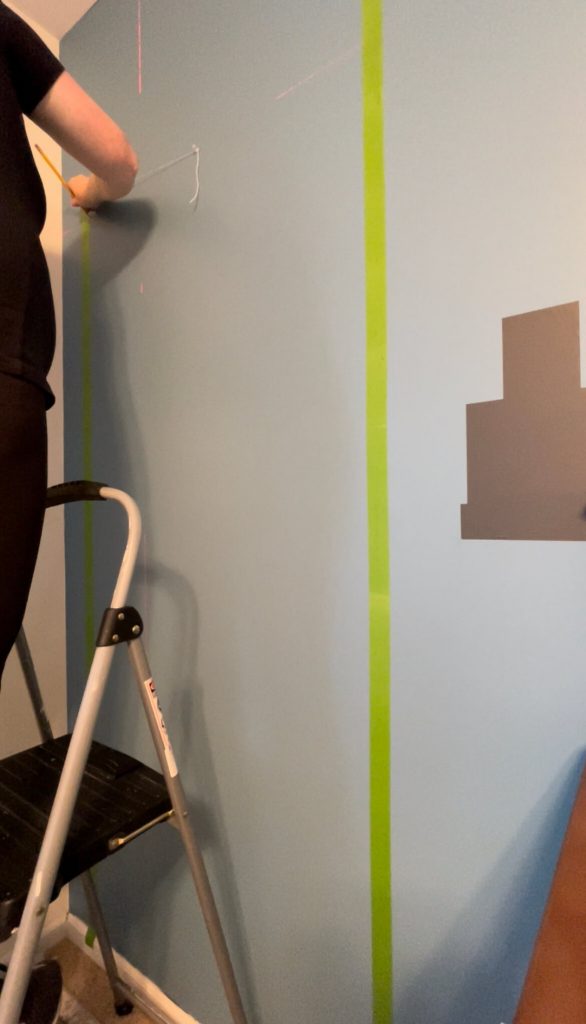
    • Add character to any room by learning how to paint an arch on your wall the easy way. Learn how here.
    • Add character to any room by learning how to paint an arch on your wall the easy way. Learn how here.

    Now it’s time to draw the arch.

    Tie a string to your push pin and attach a pencil (or chalk) to the other end of the string the same distance of your radius.

    Align your laser level with the push pin so you know where to start and stop the arch.

    Be sure to begin the arch where the wall meets the tape to make the straight edge and the circular part of the arch seamless.

    Don’t forget that you want the string to be pulled taut and the pencil (or chalk) to stay in the same position as you draw your half circle.

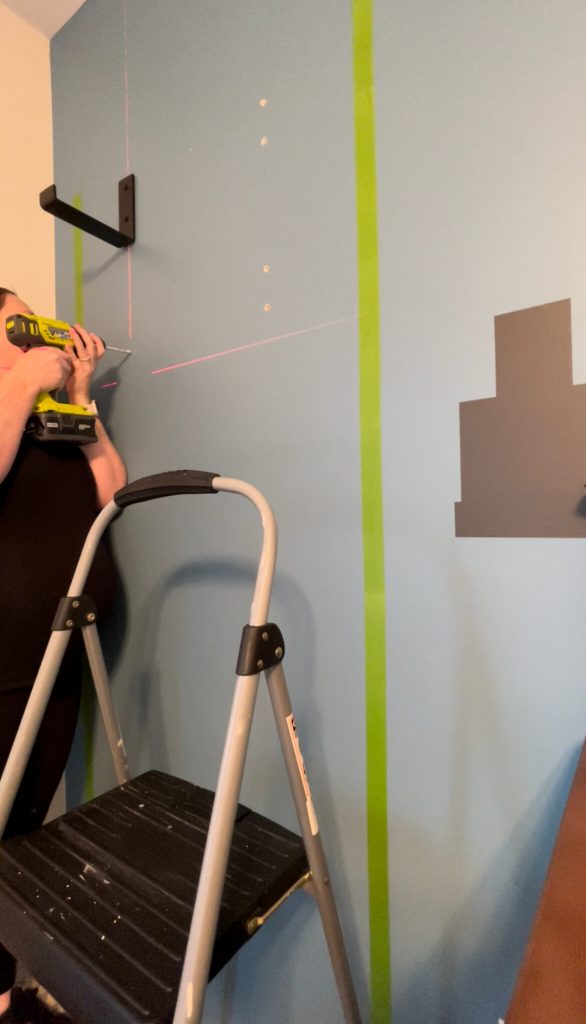
    You can see in the pictures above that I’m simply using the push pin, the string, and the pencil to draw my perfect arch.
    Add character to any room by learning how to paint an arch on your wall the easy way. Learn how here.

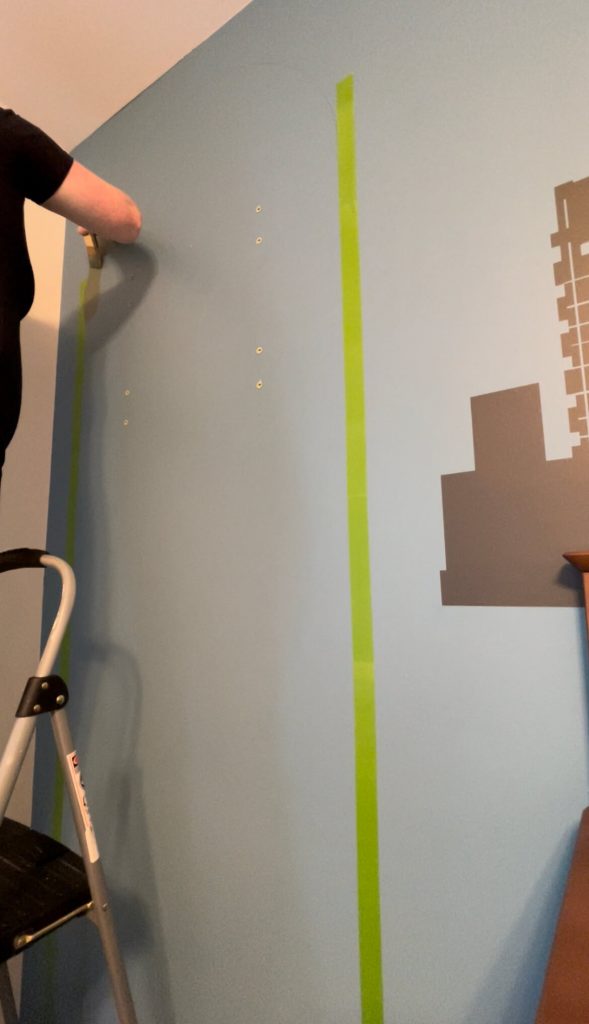
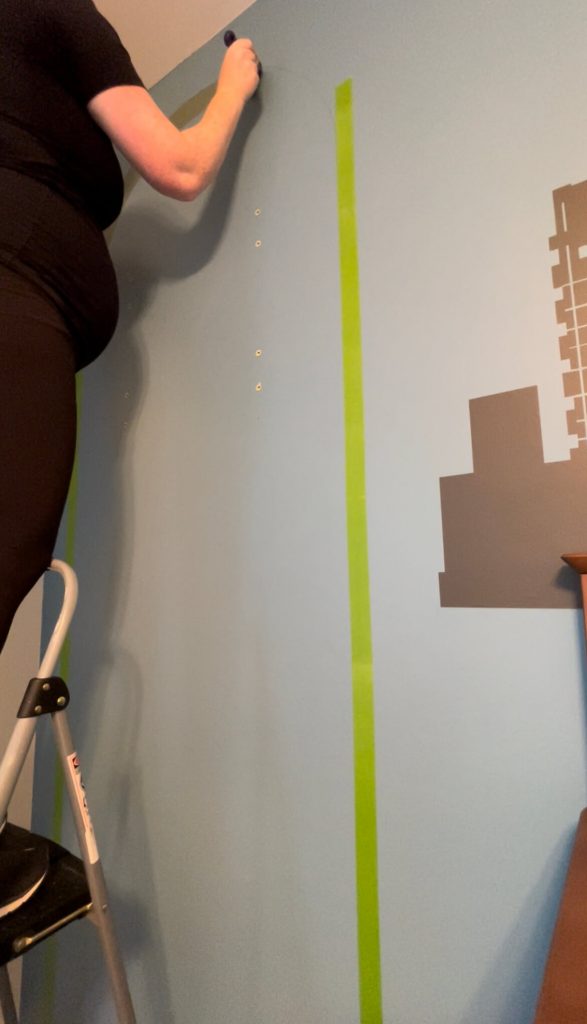
    Before you get to the painting portion of this tutorial, if you have shelves to hang or anything that requires drilling, I suggest doing that before you paint.

    You don’t have to, but it will save you time and not mess up your newly painted surface when you go to attach the shelves or whatever else you’re hanging.

    Want a home that flows?

    Snag our quick-start checklist as a free gift for opting in to our VIP newsletter below.

      We respect your privacy. Unsubscribe at anytime.
      Built with ConvertKit

      3. Paint inside the lines.

      • Add character to any room by learning how to paint an arch on your wall the easy way. Learn how here.
      • Add character to any room by learning how to paint an arch on your wall the easy way. Learn how here.
      • Add character to any room by learning how to paint an arch on your wall the easy way. Learn how here.
      • Add character to any room by learning how to paint an arch on your wall the easy way. Learn how here.

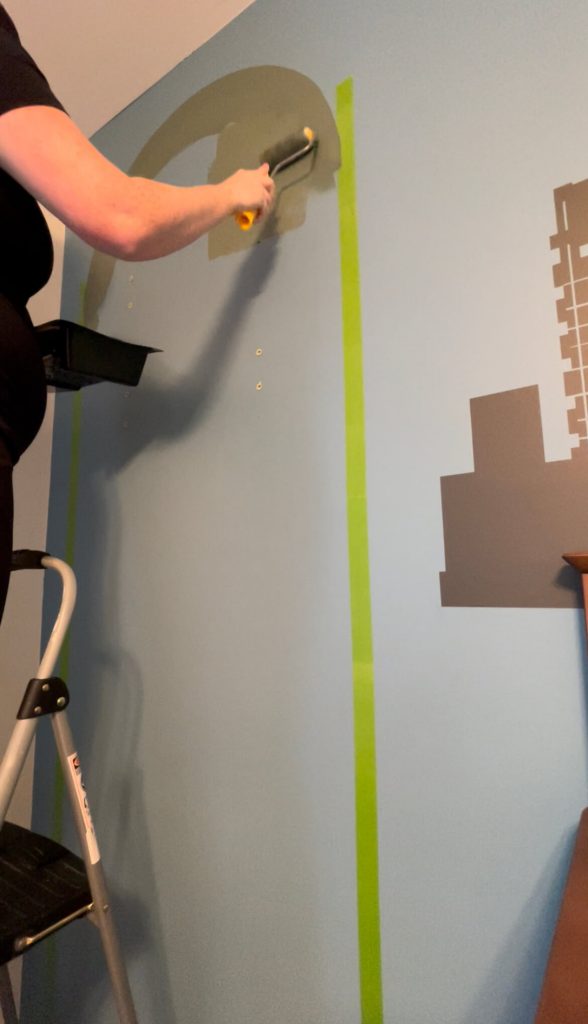
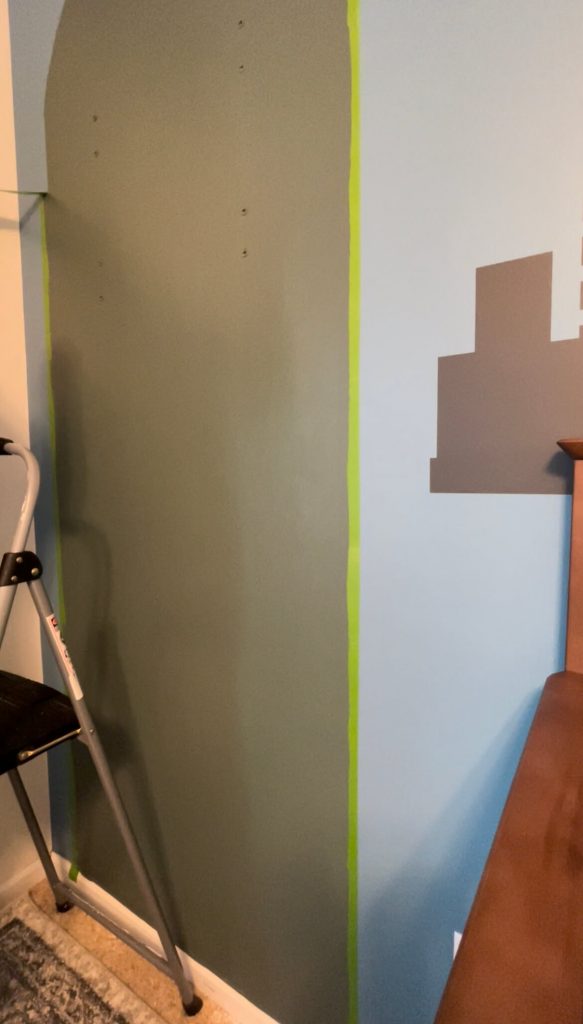
      The last step in this process is to grab your paint and angled paint brush to begin painting inside the lines.

      Follow the markings you made to paint the outline of the curve first.

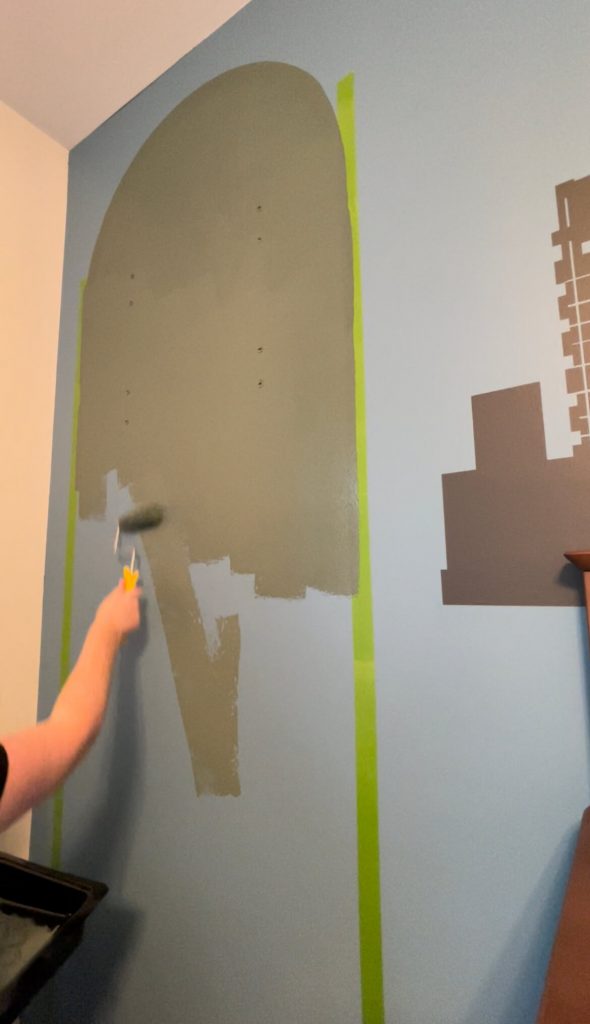
      Once you have the outline of the arch, use your roller to paint the rest of the arch.

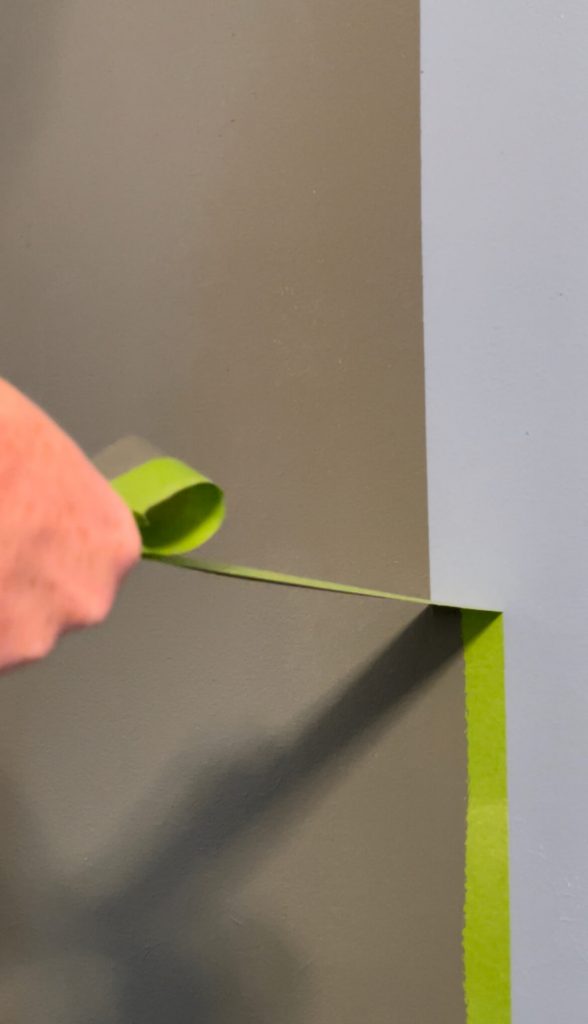
      For super crisp lines, roller over the Frogtape. The wetness of the paint helps the tape lock in.
      • Add character to any room by learning how to paint an arch on your wall the easy way. Learn how here.
      • Add character to any room by learning how to paint an arch on your wall the easy way. Learn how here.
      • Add character to any room by learning how to paint an arch on your wall the easy way. Learn how here.

      While the paint is still wet, remove your tape.

      4. Add accent pieces and enjoy!
      Learn how to hang floating shelves perfectly straight every time with this quick and easy method. Read how here.

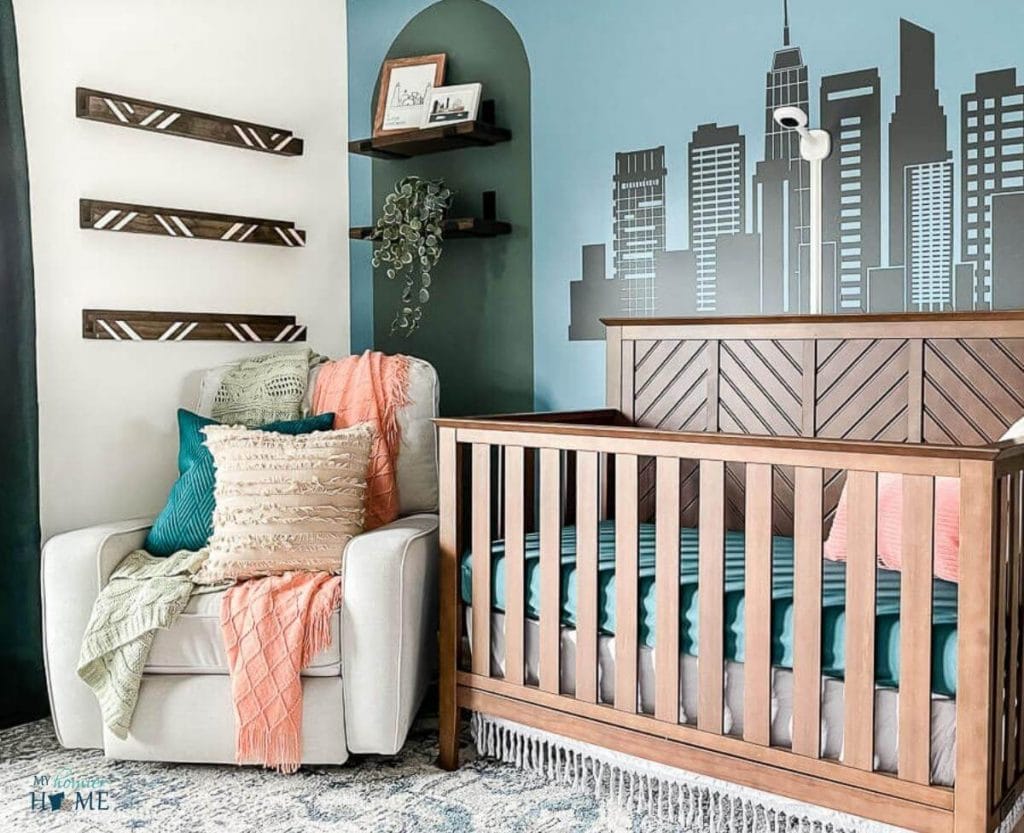
      We added more floating shelves to this area of the nursery.

      In hindsight, I would have hung these shelves a little lower so they sat more in the base of the arch and were in between the gaps of the other shelves to the left.

      But all in all, I love the added character this arch brings for little to no effort.

      What do you think?

      Be sure to tag me @myhomierhome on socials with your painted arch project.

      Happy painting!

      Want to watch the video for this post?

      You’re in luck!

      I put together a video tutorial to add to this post, so you can see the full scope in real time!

      Check it out below and while you’re there, be sure to hit the subscribe button and turn on the bell notifications to make sure you never miss a new My Homier Home video!

      Get the Cohesive Home Quick-Start Checklist!

      Wanna know where to start in creating your own homier home? Snag our quick-start checklist as a free gift for opting in to our newsletter below.

        We won’t send you spam. Unsubscribe at any time.
        Built with ConvertKit
        Save for later.
        Add character to any room by learning how to paint an arch on your wall the easy way. Learn how here.

        Other Posts You May Like:

        Garage Accent Wall for Tools Using Frogtape®
        How to Spray Paint the Ugly Light Fixture in your Bathroom
        How to Make a DIY Cornice Box | Step-by-Step Tutorial
        How to Make Wood Herringbone Pattern using MakerX

        Spread the love

        7 Comments

        About Christin

        Christin lives in central Indiana with her husband, daughter, son, and fur-baby, Lambeau. Her mission is to help you become a confident DIY decorator, so you can reach dream home status with the home you have. At My Homier Home, you'll find time-saving tips to rescue any room and DIY tutorials to keep the cost down. Christin also offers affordable virtual workshops for the do-it-yourselfer that needs a little extra guidance visualizing and completing their home projects. Be sure to grab your quick start checklist at promos.myhomierhome.com/quick-start today!
        Previous Post: « How to Hang Floating Shelves Perfectly the First Time
        Next Post: How to Hang Artwork Like an Interior Design Pro »

        Reader Interactions

        Comments

        1. Diane says

          at

          This looks amazing Christin! Funny, the first couple of pictures I thought the arch filled the corner and the shelves were corner shelves. With that. perception planted in my head, I thought your tutorial was nuts. But I hung in there and at the end saw that it really is all on one wall.

          Amazing how much that paint totally altered the architecture of the room for me.

          Reply
          • Christin | My Homier Home says

            at

            I know, right?? Such a simple project too!!

            Reply
        2. Linda says

          at

          That arch looks great!! It looks so real from any angle. Great job!

          Reply
          • Christin | My Homier Home says

            at

            Thank you! I can’t get over how easy it was too!

            Reply
          • Christin | My Homier Home says

            at

            Thanks Linda!

            Reply
        3. Cara says

          at

          Painted arches are perfect to add dimension without commitment!! Love how well you laid it out, makes it seem effortless!

          Reply
          • Christin | My Homier Home says

            at

            Thanks Cara! I can’t wait to add an arch somewhere else in the house!

            Reply

        Leave a Reply Cancel reply

        Your email address will not be published. Required fields are marked *

        This site uses Akismet to reduce spam. Learn how your comment data is processed.

        Primary Sidebar

        🥂 Welcome 🥂

        Christin from My Homier Home

        Hi, I’m Christin, a DIY decoratin’ mama of two under two who believes anything is possible with the right plan and a little determination.

        My mission is to help you become a confident DIY decorator so you can create a cohesive home that enhances your daily life.

        Let’s get C.O.N.F.I.D.E.N.T.!

        LEARN MORE

        Let’s Connect

        • Facebook
        • Instagram
        • Pinterest
        • Twitter
        • YouTube

        Tour My Homier Home

        Spring Decor Ideas for the front entry

        Spring Home Tour
        Fall Home Tour
        Christmas Home Tour

        Check out my latest posts…

        • 5 Reasons You Need a Garage Ceiling Storage Lift
        • The Best Garage Organization System for your Home
        • How to Support Small Business and My Favorite Small Home Decor Shops

        Let’s go shopping! 🛍

        Wanna shop all my favorite picks from all my favorite stores? See something you like in one of my room designs? Girl trip! Come shop with me!

        Shop My Home Decor Favs

        My Secret Weapon for Picking Paint Colors

        Benjamin Moore Paint Colors


        Samplize is the best way to test paint colors in your home from all different paint companies using their peel-and-stick samples. Read more below.
        Our Review

        🤓 Content Creator?

        Access the Content Creation Organization Shop Here

        Disclaimer: This site does include affiliate links for your convenience. This is at NO additional cost to you but earns me a small commission. Also, as an Amazon Associate I earn from qualifying purchases. To read more, check out our disclosure policy.
        About
        Contact / Advertise
        FAQ
        Consulting Services

        Keep In Touch

        • Bloglovin
        • Facebook
        • Instagram
        • Pinterest
        • YouTube
        Shop With Me
        Get C.O.N.F.I.D.E.N.T.
        Learn With Me
        Course Login

        Copyright © 2023 My Homier Home · Sitemap · Policies

        My Homier Home logo
        • DIY
          • DIY Projects
          • Recommended Tools
          • Organization
        • Decorating
          • Decorating Tips
          • Before & Afters
          • Get C.O.N.F.I.D.E.N.T.
        • Start Here