
DIY Nursery Bookshelves Design Using Frogtape®
Inspired by the “Embrace” trend, I used Frogtape® to paint my nursery bookshelves. There is no better time than the present to snuggle up and embrace all that is good in your life.
I'm so excited to bring you the next installment of our gender neutral nursery progress!
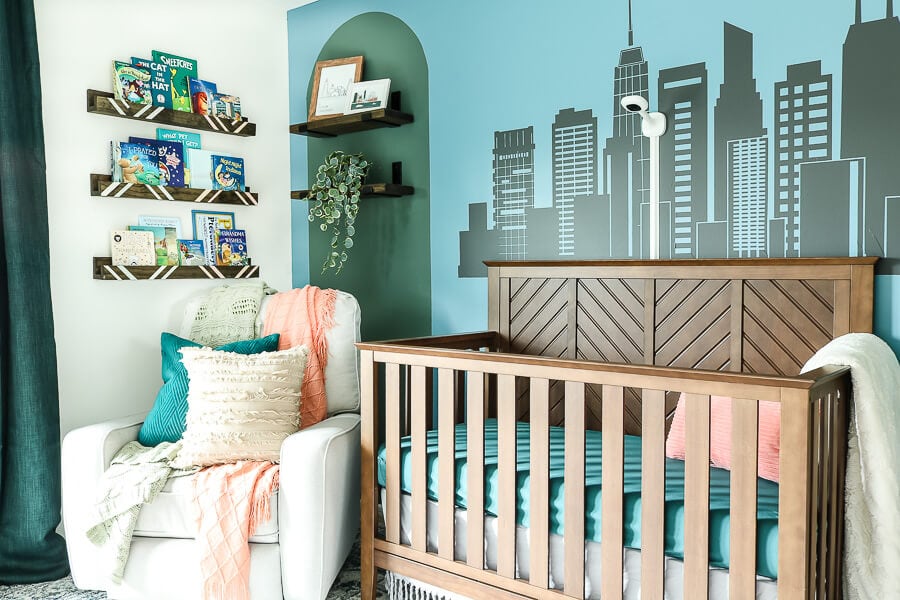
It took a bit to get the nursery bookshelves in because of all the supply chain shortages, but they were worth the wait.
Since we have a lot of deeper wood tones in this room, I wanted to add a little color and character to the shelves to bring them to life, so this DIY design idea was born – and it was so easy!
To make it happen, I teamed up with FrogTape® to showcase the trend “Embrace.”
If you've been around awhile, you know FrogTape® is my favorite tool in my toolbox for all my painting projects, but did you know about these yearly design trends?
Every year HGTV designer and FrogTape® spokesperson, Taniya Nayak, puts together the five trends for the coming year.
For 2022, the design trends are Embrace, Rise, Gather, Revive, and Shine. You can find all the details for each design trend here.
These design trends are always my favorite each year because they always help me get centered on what to focus on and helps drown out the trending noise.
And given I'm about to embark upon a two under two situation, Embrace is the perfect design trend for me to focus on.
The Embrace trend is all about focusing on all the goodness in your life and embracing all the people in your life that matter most.
That snuggly, warm, cozy feeling you get all huddled under the blankets together with a good book in hand is what it's all about.
With that in mind and the perfect color palette assigned to this trend, the nursery bookshelves and cozy corner were curated.
Here's how I did it…
DIY steps
This post is sponsored by Frogtape®. All opinions are my own.
Disclaimer: This post does include affiliate links for your convenience. This is at NO additional cost to you but earns me a small commission. To read more, check out our disclosure policy. As an
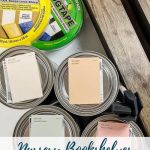
Step 1: Gather your materials.
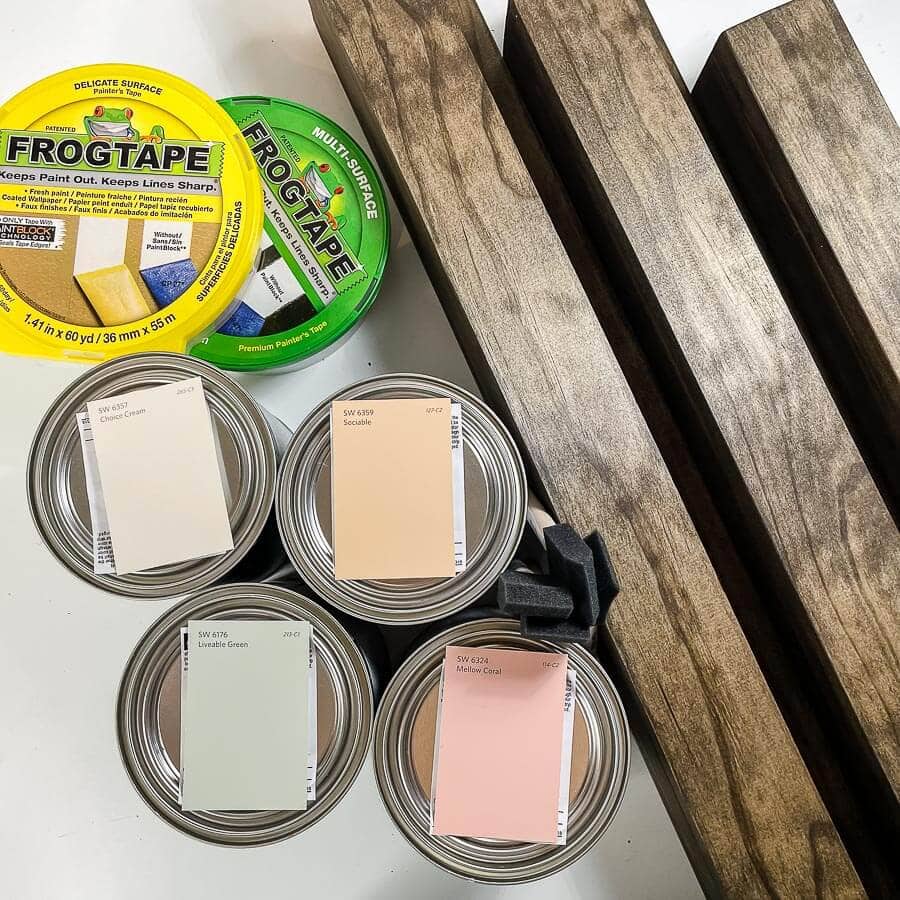
First things first, you want to gather your materials.
Here is a list of everything I used, but keep in mind, I ordered the shelves stained already, so this is just for the added design.
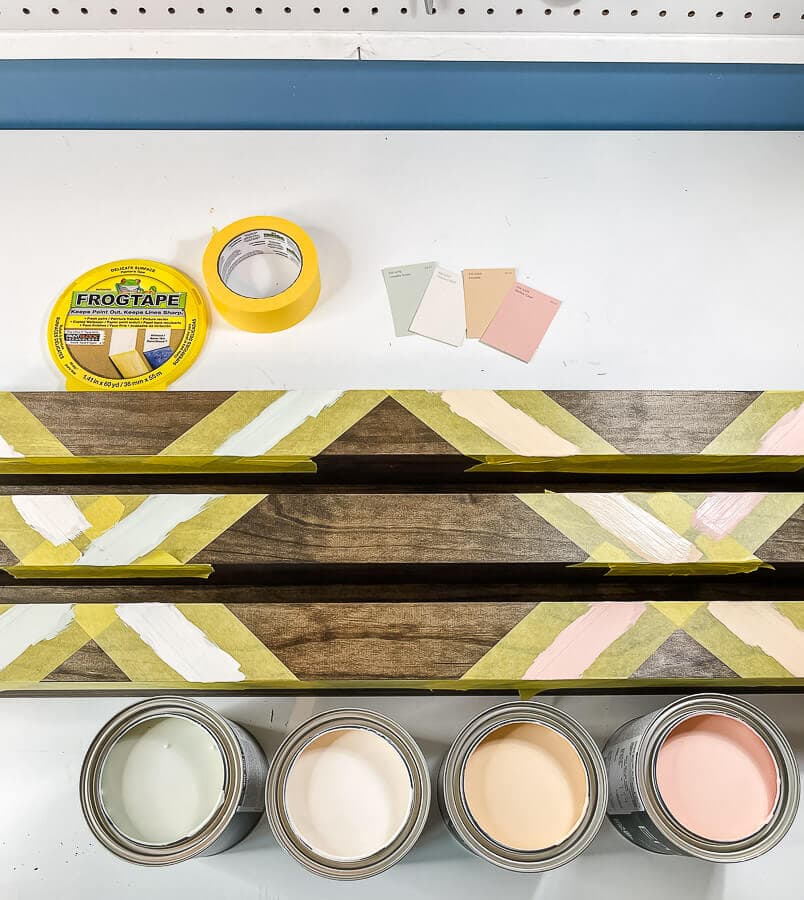
- Delicate FrogTape®
- I was considering just using regular Frogtape, but I ended up only using the delicate version since I was using it over some of the freshly painted areas throughout the design.
- Sanding block
- I used a 120 grit I had on hand. You just need something to rough it up a bit.
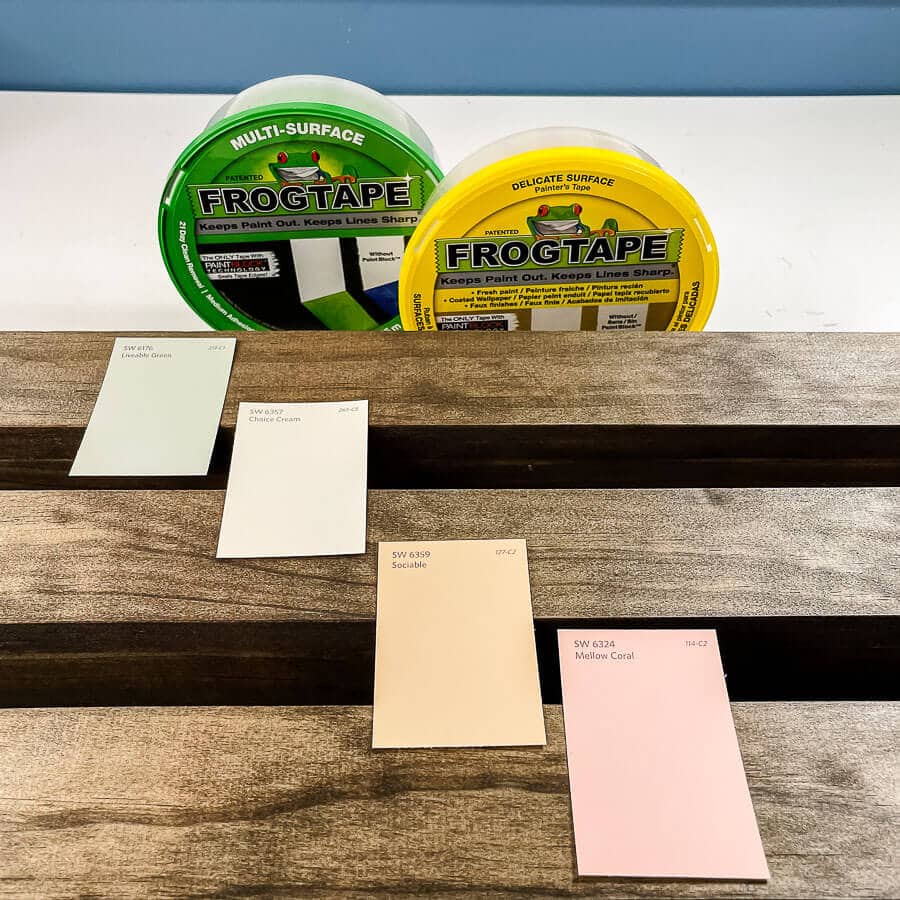
- Sherwin-Williams Livable Green (SW 6176)
- Sherwin-Williams Choice Cream (SW 6357)
- Sherwin-Williams Sociable (SW 6359)
- Sherwin-Williams Mellow Coral (SW 6324)
- I got one quart of each, but I plan to use these colors for my next project (Chicago street sign) in the nursery too.
- Foam paint brushes
- I used one for each paint
- Scissors
- Ruler
- Plastic card
- I have a faux plastic credit card thing I use to smooth down my FrogTape® edges.
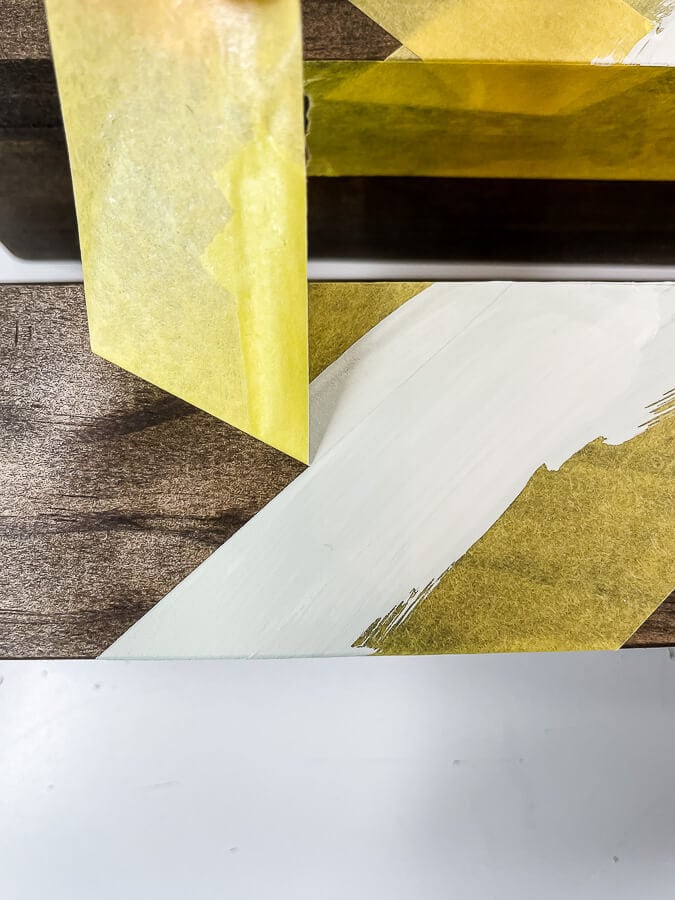
Step 2: Tape off your pattern.
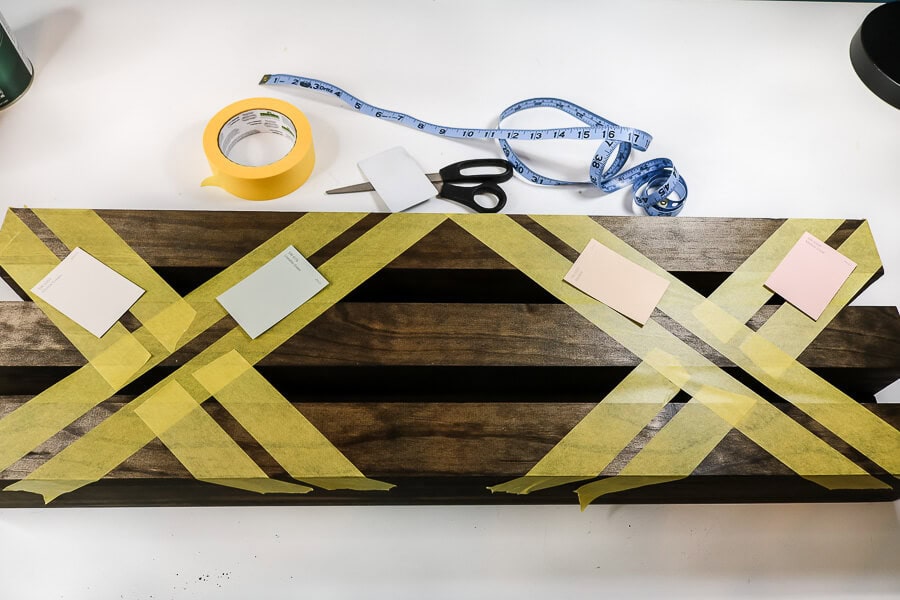
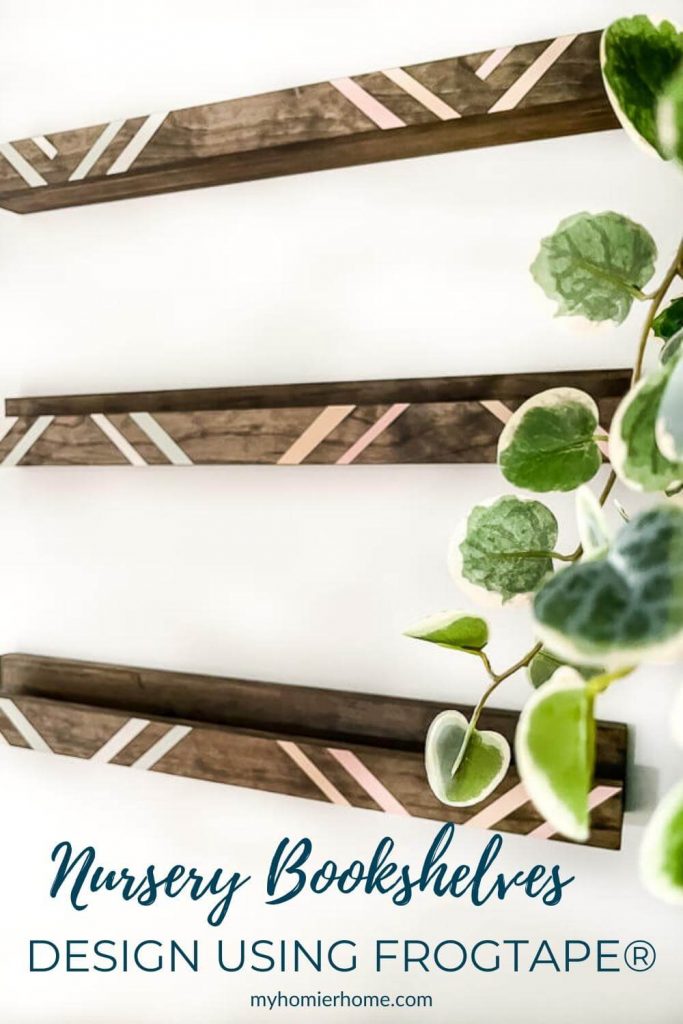
The next step is to decide what kind of pattern you want.
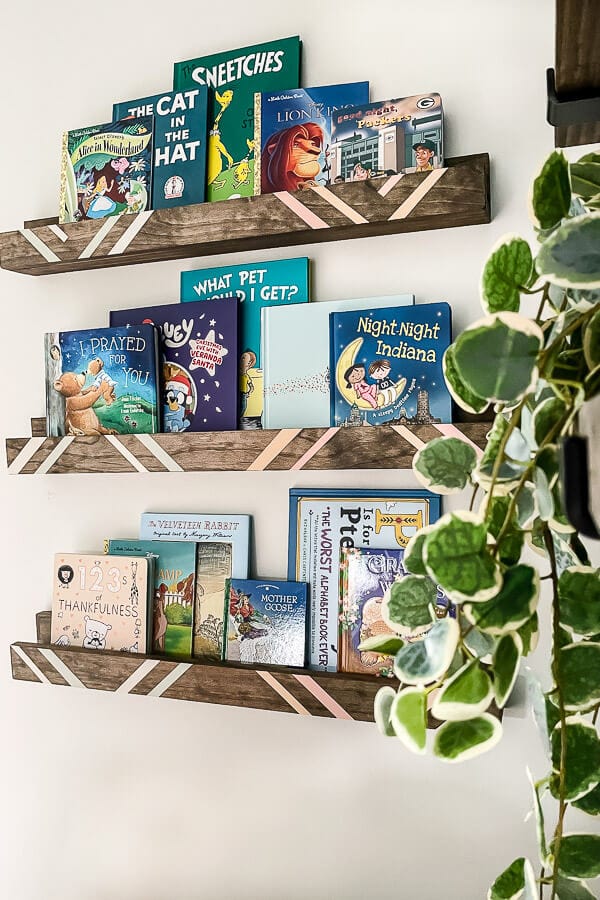
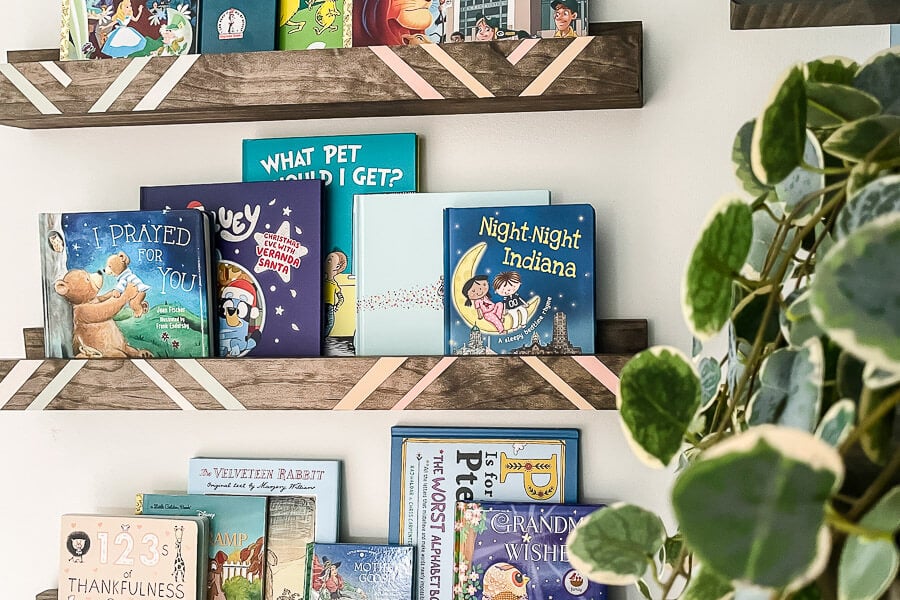
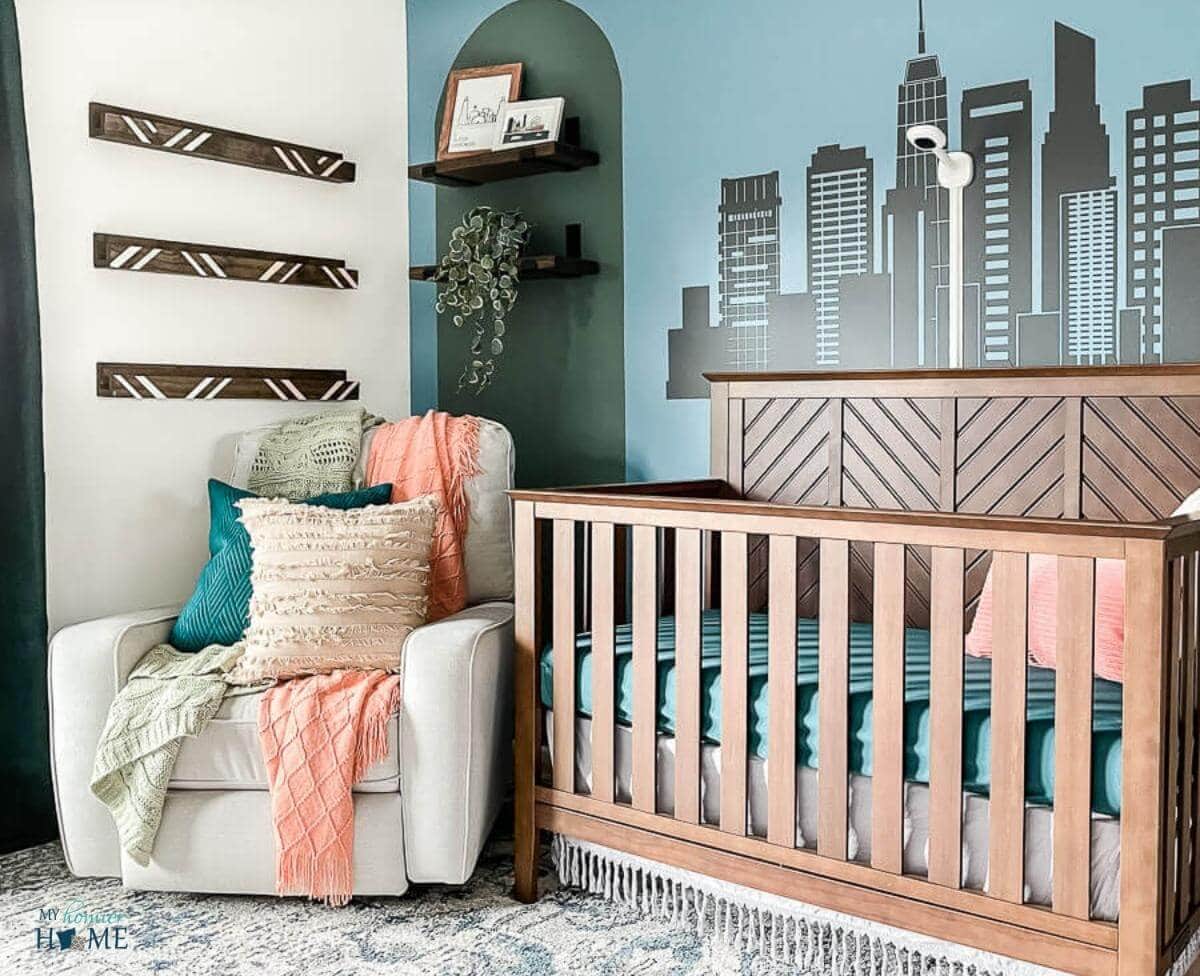
The dresser and crib have a chevron pattern, so I decided on a variation of that.
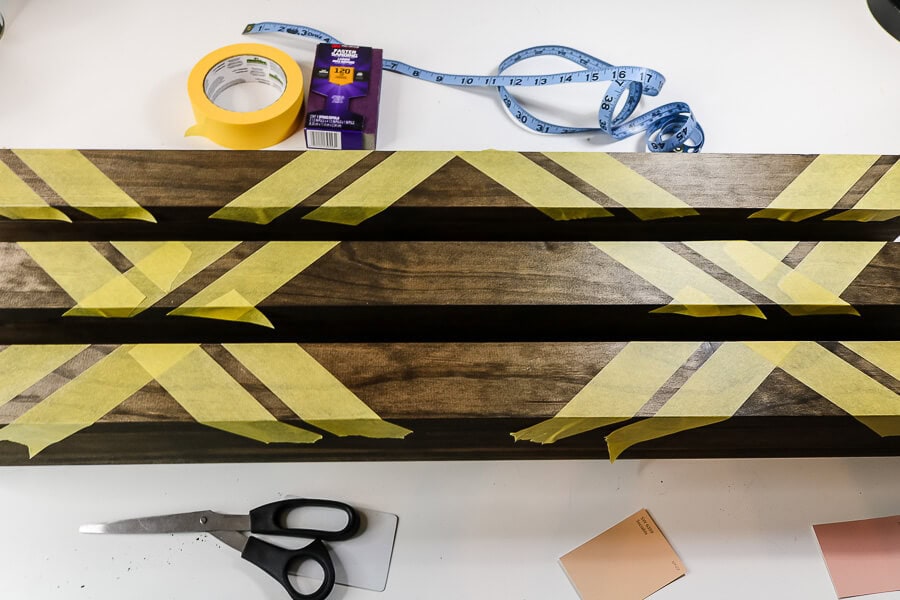
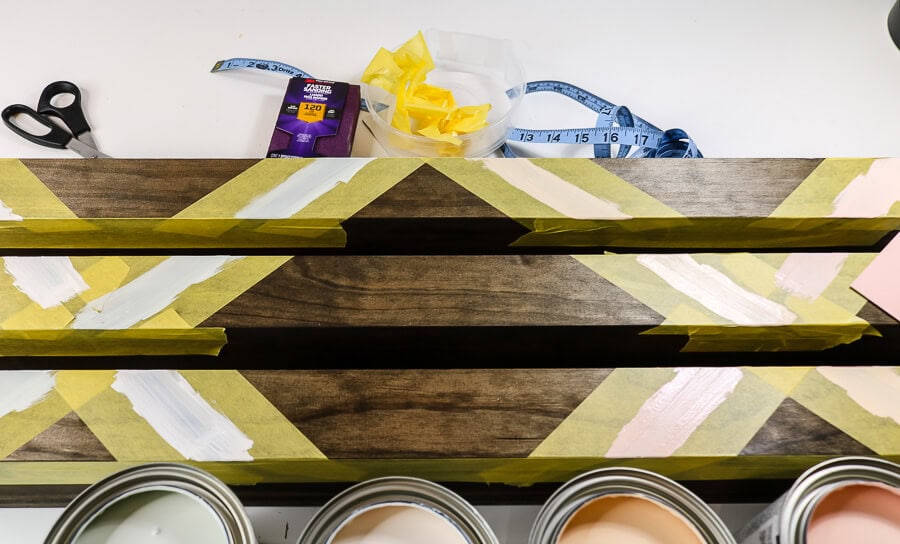
I found it easier to put all three shelves stacked together and tape off the pattern as if they were one unit.
I also wanted to alternate the colors on each shelf, so this worked out perfectly.
I laid the first piece on an angle lining it up with one of the shelves corners and then followed that angle for the rest.
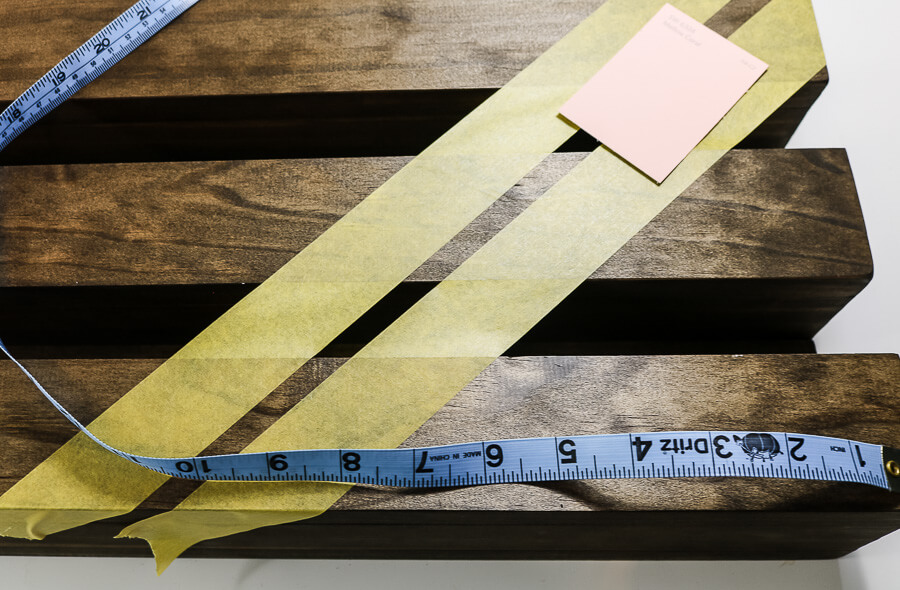
When I repeated the pattern on the other side, I used my ruler to make sure I had it even.

You'll notice my middle shelf has a partial line that doesn't go all the way.
I did this to keep the two colors separate, but also give it some character

It was helpful to lay the color cards down so I didn't get confused on what color to paint which section.
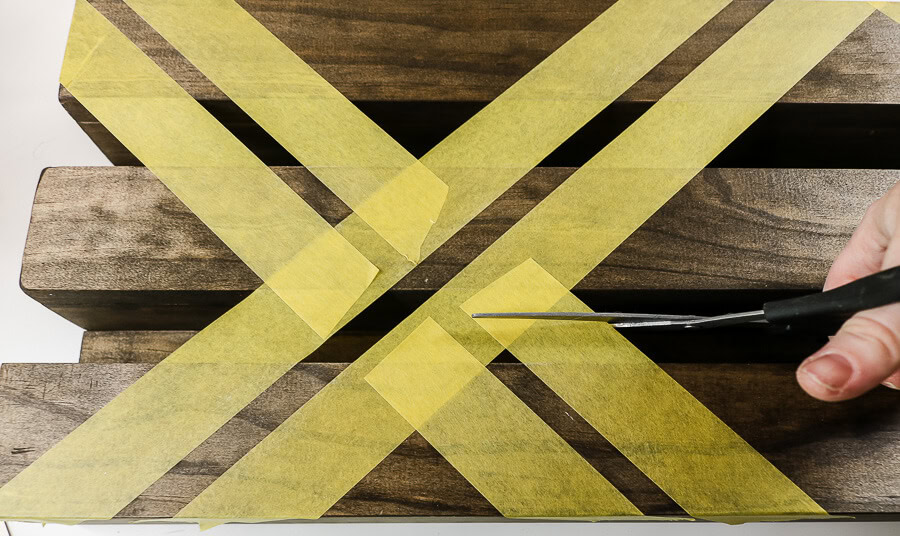
Since the bookshelves are separate and I didn't want to paint the other sides of the bookshelves, I used my scissors to separate the pattern and fold it down.
Step 3: Lightly sand the area you'll paint.
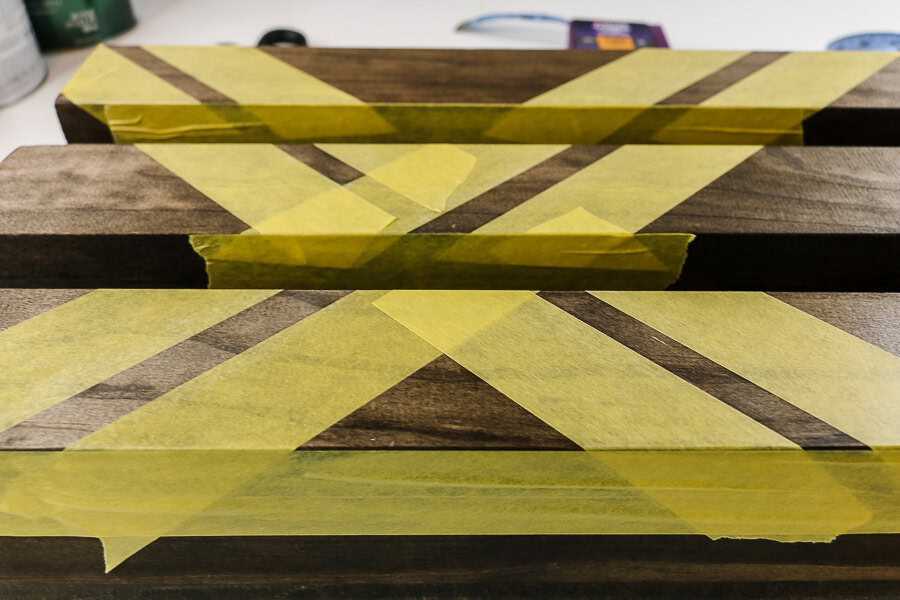
Before taping all the edges, I took my 120 grit sanding block and lightly sanded the areas I was going to paint.
Step 4: Tape edges.
The last step before painting is to seal off the sides on either edge of the pattern so you only paint the section you want.
I almost forgot to do this before painting, but I'm glad I remembered because it would have been a mess otherwise.
After you've sanded each spot, use your plastic card to smooth out all the FrogTape® so the seal is as secure as possible.
Step 5: Paint your pattern.
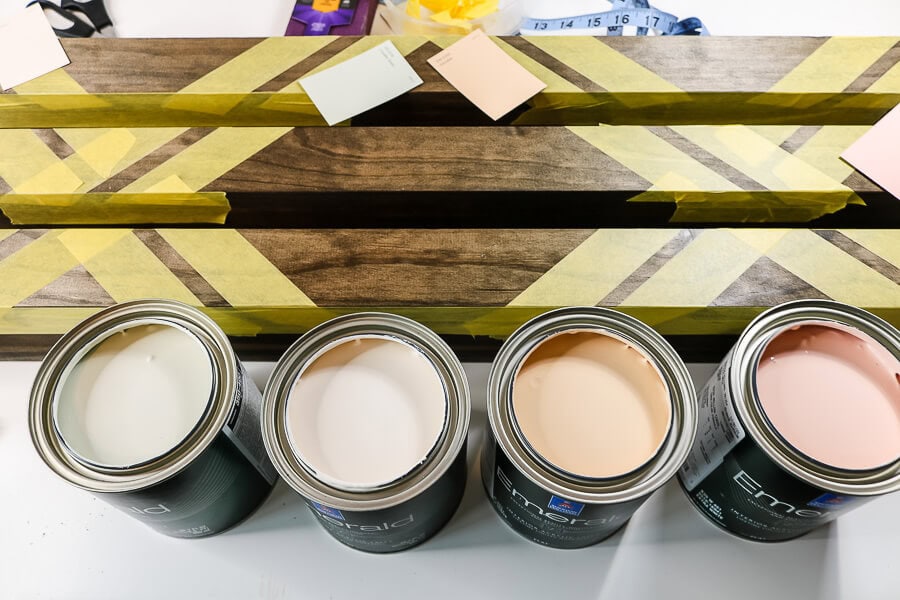
Once you're all taped up, crack open those paint colors and get to painting.

Leaving the little color cards in their spot helped make sure I picked the right color for each section.
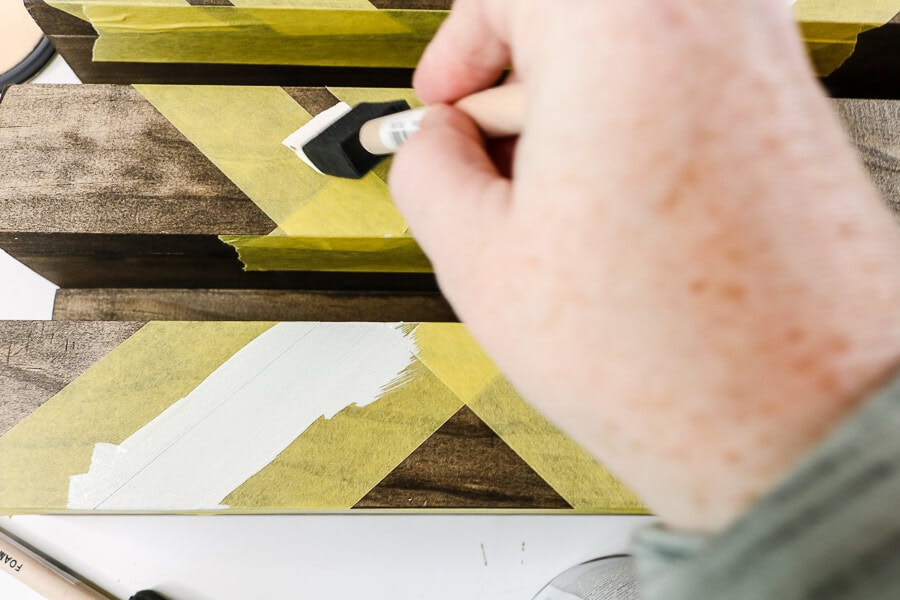
I used a different foam brush for each color.
Once I had one coat on, I went back over each color a second time with only a few minutes wait time in between.
And keep in mind, you do not need a lot of paint on your brush to get a smooth finish.
Less is more.
Step 6: Remove tape while still wet.
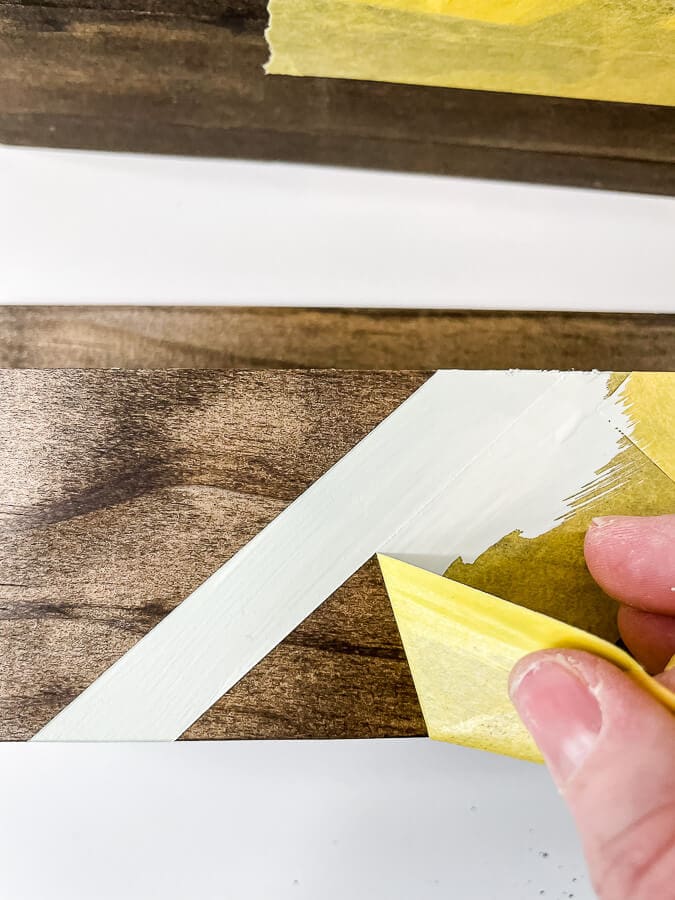
While the paint is still wet, you'll want to remove your tape to make sure it doesn't dry stuck together and pull your pattern.
Couldn't you just watch people pull FrogTape® up on repeat?
So satisfying.
One thing to be cautious of is if you put too much paint on your brush, it may start to pool over the edges, so keep an eye out for possible drips on the edges and wipe them off before you remove all the FrogTape®.
Once these sections were fully dry (24 hours), I went back and added a second stripe to make my chevron pattern using the same technique as explained above.
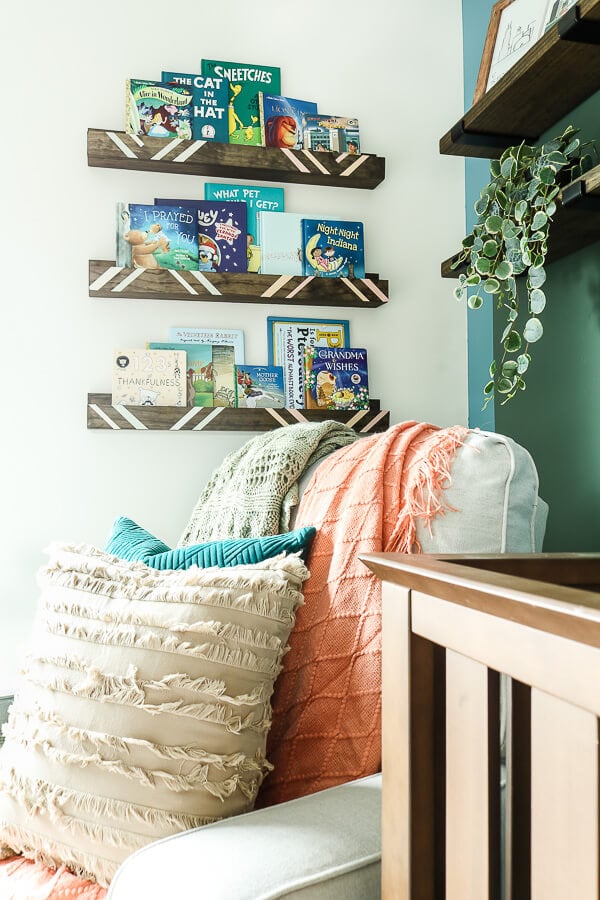
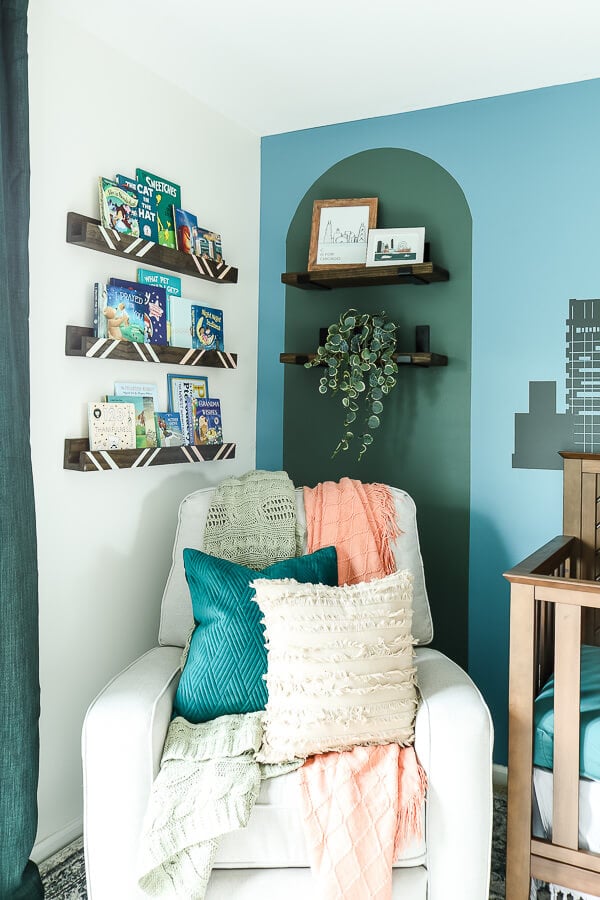
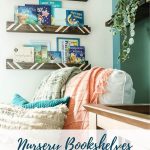
Step 7: Hang the bookshelves and snuggle up!

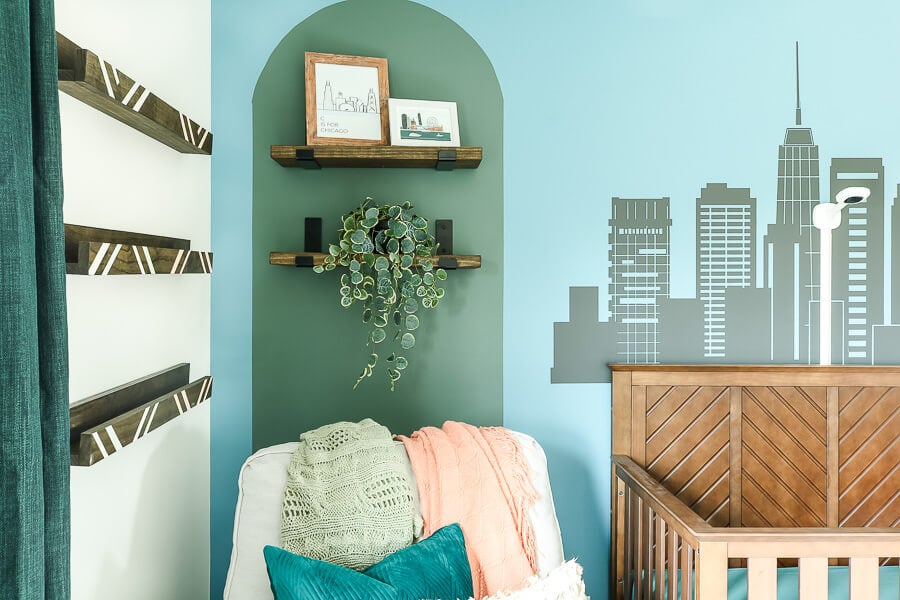
I'll be sharing my tried-and-true tricks for hanging floating shelves perfectly in a few weeks, but in the meantime, we get to embrace these cozy colors and character in the nursery.
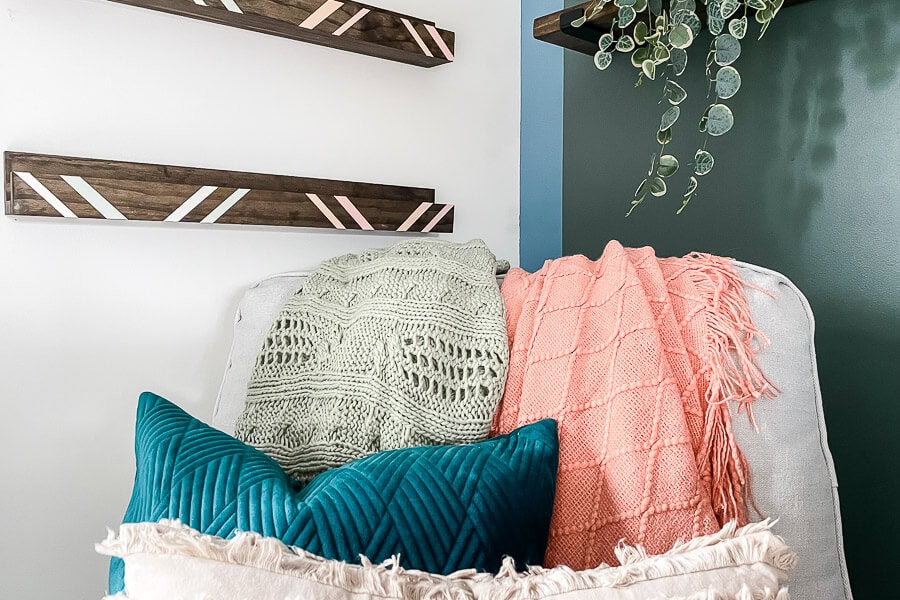
These blankets and pillows in the same colors as the bookshelf design brings the embrace cozy factor full circle.
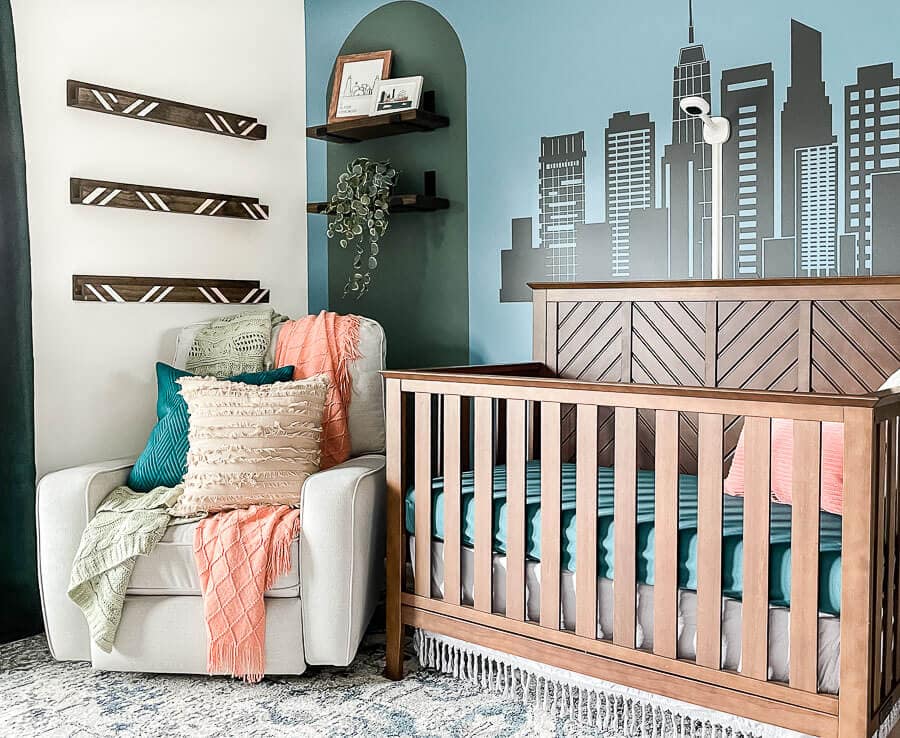
I love how the pattern on the bookshelves plays with the pattern on the crib.
I considered painting the inside lines of the crib, but I'm gonna live with this for a few and reassess.
I think the only thing missing from these bookshelves are some books to cozy up and read!
And there you go!
A fun and simple way to bring color and character to a cozy little corner of the room.
We've got our blankets and pillows ready to embrace this little baby and give him or her all the love in the world!
And don't forget, embrace all the goodness this year and find a cozy spot in your home to enjoy it.

Disclaimer: This post does include affiliate links for your convenience. This is at NO additional cost to you but earns me a small commission. To read more, check out our disclosure policy. As an

(click on any of the images to shop the products)


I love how they turned out!! The nursery looks so good…getting close!!!
Thanks Jennifer!
The bookshelves look amazing!
Thanks Renae!! <3
I love the bookshelves.. This nursery is beautiful.
I can’t believe the baby us almost here.
Thank you Cindy!! Now we just need this cutie to arrive!
Oh my! This is so adorable! The addition of the books and chevron-style pattern on the shelves really locked this up a notch! Love how you picked up the pattern from the bed and cleverly repeated it on the bookshelf. Well done, Momma!
Aww thanks Cheryl!! Putting my stamp on it one project at a time lol
That’s some pro-level frogtaping! Love the shelves, perfect colour choices.
Thanks Rachel!!
Your nursery bookshelves look amazing! I also love the cityscape behind the crib.
The shelves look great and I know you must be excited about using the room soon! Such a cozy space to read to your new baby!