
How to Decorate a Skinny Christmas Tree with Ribbon Like a Pro
Need a skinny tree to save space, but struggling on how to decorate it? In this post, learn how to decorate a skinny tree so it looks like a pro did it in no time flat.
Key Takeaways
- Skinny Christmas trees save space and are generally less expensive than regular-sized ones.
- Consider a cohesive color scheme and theme before decorating to enhance creativity and visual appeal.
- Gather essential decor items like a pre-lit tree, tree topper, ribbons, and varied ornaments for your skinny tree.
- Follow a step-by-step process: assemble the tree, fluff branches, add ribbon, then finish with ornaments and unique elements.
- For a beautiful finish, ensure to create depth with varying sizes of ornaments and incorporate unique decorations.
If you've ever considered a skinny tree, but were hesitant because you weren't sure how to decorate it, today's your lucky day!
I created the most detailed recap of how I decorated our skinny tree in this post and the best part?
It was so easy!!
Way easier than I thought it was going to be.
Before I get started, I just wanted to remind you that I have an entire library of Christmas prep resources ready and waiting for you.
It has over 15 resources and counting to help you make this holiday extra special without all the stress.
You can learn more by clicking the button I'm pointing to below!
Now on to the tutorial!
jump to…
Disclaimer: This post does include affiliate links for your convenience. This is at NO additional cost to you but earns me a small commission. To read more, check out our disclosure policy. As an
Why Choose a Skinny Christmas Tree
Skinny trees are awesome because not only do they take up less space, but they are not as expensive as regular-sized trees.
In fact, we only have one regular sized tree in our collection of six Christmas trees.
I prefer the skinny tree because it allows me to get taller trees and more trees to disperse around the house.
Types of Skinny Christmas Trees
There are a bunch of different kinds of skinny trees.
They sell slim trees, pencil trees, half trees, and even corner trees.
Disclaimer: This post does include affiliate links for your convenience. This is at NO additional cost to you but earns me a small commission. To read more, check out our disclosure policy. As an
Slim Tree
The slim trees still get the height of a normal Christmas tree, but are about half as wide.
Pencil Tree

Pencil trees are even narrower than slim trees and look like a #2 pencil as the name implies.
Half Tree
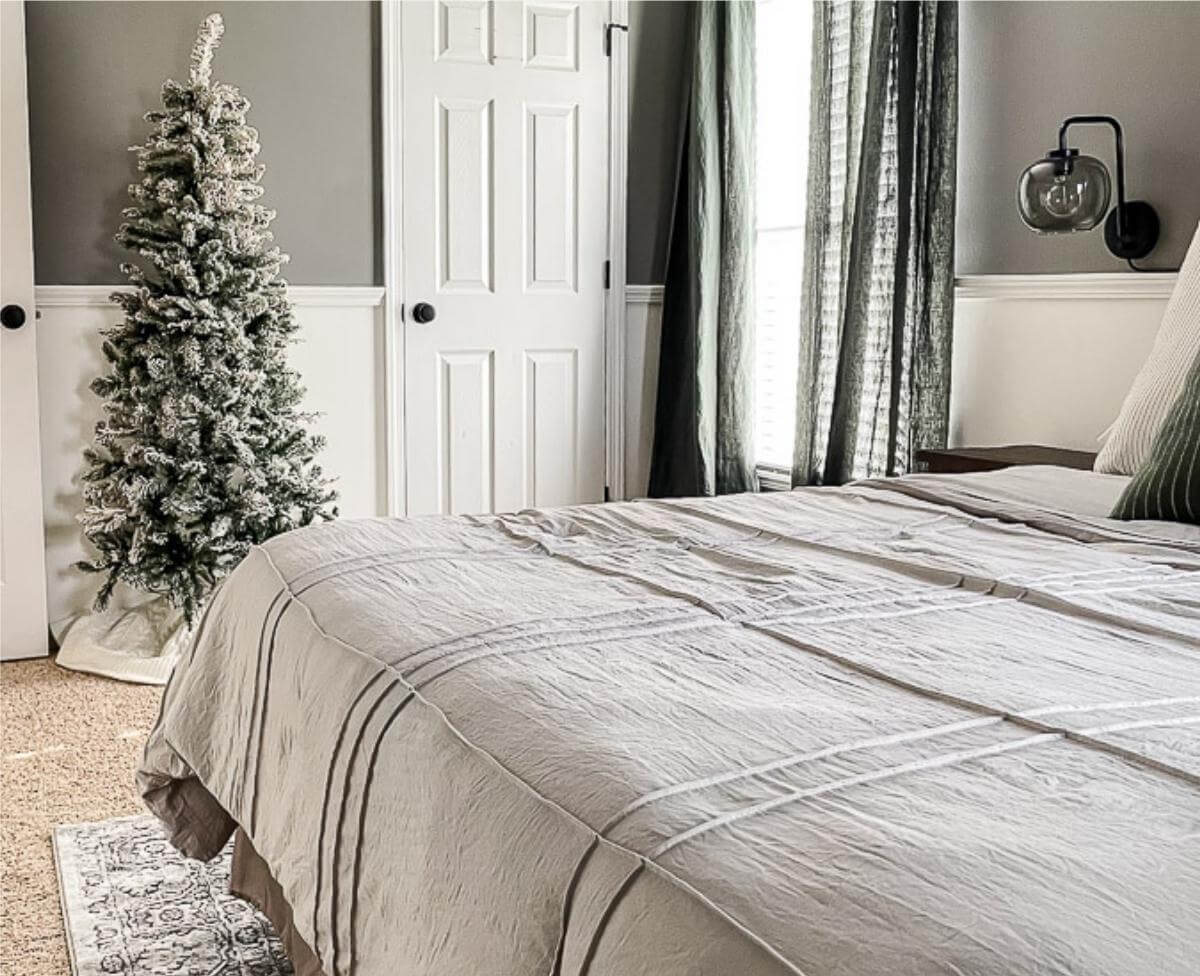
Half trees are literally only half the tree. This is similar to the one we have in our guest bedroom.
I just bought one of these for the guest bedroom since we are short on space, but I still wanted a tree in there.
They sell these for corners too.
Pre-Decorating Tips
There are a couple of things to consider before you dive into decorating your tree.
First things first, you want to pick a Christmas color scheme.
This will help you create a cohesive look, even if it's just for one room of your home.
You also may want to consider a specific theme for your tree, too.
This is where your creativity can really come to life.
Remember their are no rules for a Christmas tree theme, so go wild!
And be sure to tag me @myhomierhome on Instagram or at My Homier Home on Facebook, so I can see it!
What to Buy to Decorate your Skinny Tree
Once you've decided on colors and a possible theme, it's time to gather all your goodies.
Here is the list of items to look for to get your skinny tree decorating game ready to rock.
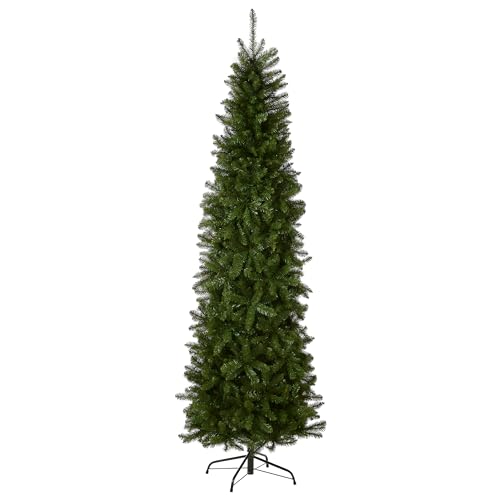
- Pre-Lit Skinny Christmas Tree
- These are similar to the one I bought, but mine is 9 feet tall
- Tree Collar or Skirt
- I'm eyeing these types of tree collars because the dog has been scratching his back under the tree lol
- Large Tree Topper
- This is the one I used on this tree
- Garland (optional)
- Ribbon
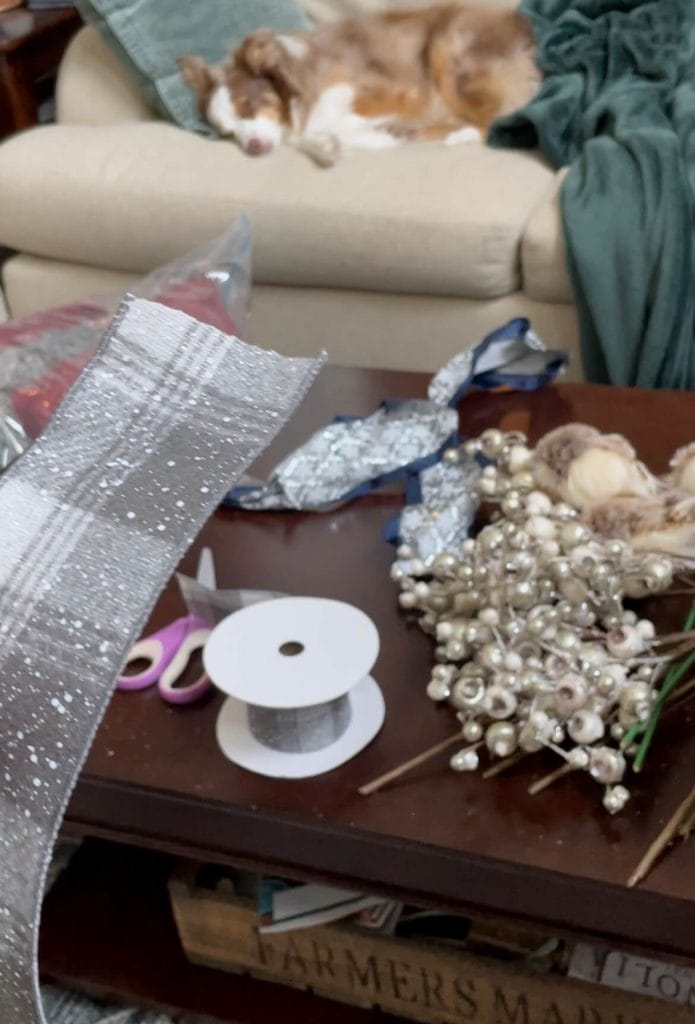
- Stems and/or Florals
- I used 8 stems throughout the tree.
- Unique Elements
- These are similar to the owls I used on this tree
- At Least Two Different Sized Ball Ornaments
- Other Ornaments
- I used these snowflakes on this tree
- Scissors
- Extra Ornament Hooks
- Extension cords
- I used these kind for the tree topper
- Smart plug
- These are my absolute favorite because it doesn't block the other plug
You can shop all my Christmas finds on my Amazon Storefront.
How to Decorate a Skinny Christmas Tree
Once you have all your items, it's time to get to decoratin'!
Here is the step by step tutorial of how I decorated this skinny tree in our living room.
Assemble your Skinny Tree


Start by setting up your smart plug so you can control the tree from your phone or smart home device.
There are few things better than coming home and the tree is already on awaiting your arrival into the winter wonderland.
Next you want to get your stand and tree collar setup, if you're using a tree collar.
If you're using a tree skirt, you can do this at any time, but I like to get it setup whenever the tree is in the place it's going to stay.
Next assemble your tree.
I highly recommend pre-lit trees because it is insanely convenient, but if you don't have a pre-lit tree, now would be the time to add your lights.
Fluff all the Branches
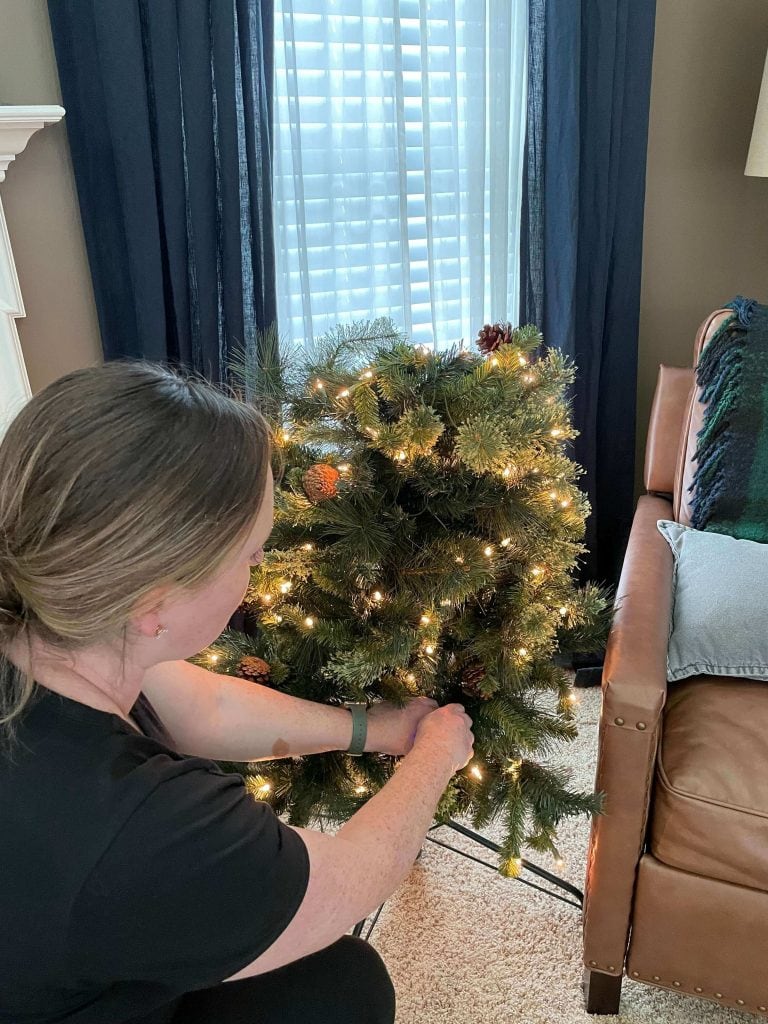
Next, you want to work on fluffing all the branches.
I like to fluff as I assemble and then continue to fluff once it is all put together.
Regardless of when you fluff, you've gotta fluff.
The best way to fluff is to just get in there and start spreading the branches up and down and side to side.
Once you've done one round, step back and assess.
Chances are you'll need to re-fluff a few areas.
Fluffing is not the most fun, but it really makes a huge difference to the overall look of the tree.
Add the Tree Topper
You might notice the tree is way more decorated here, but that's because I waited to put the tree topper on until after I decorated most of it.
Don't do that.
Definitely add the tree topper, especially if it lights up, to the tree at this stage of the game so you can hide the cord, if there is one, more easily.
My way worked sort of, but I had to redo some of the ribbons because the cord knocked them.
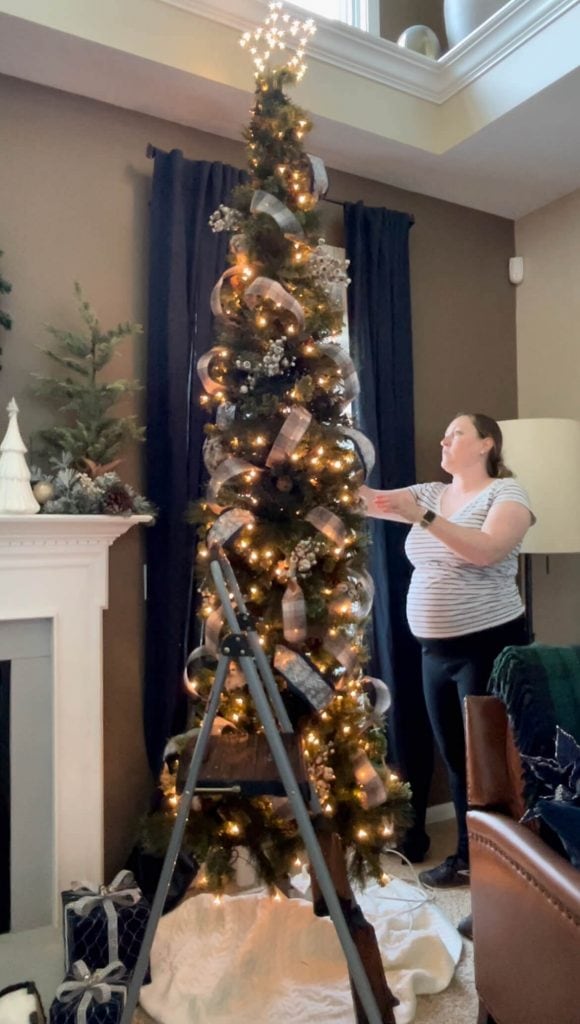
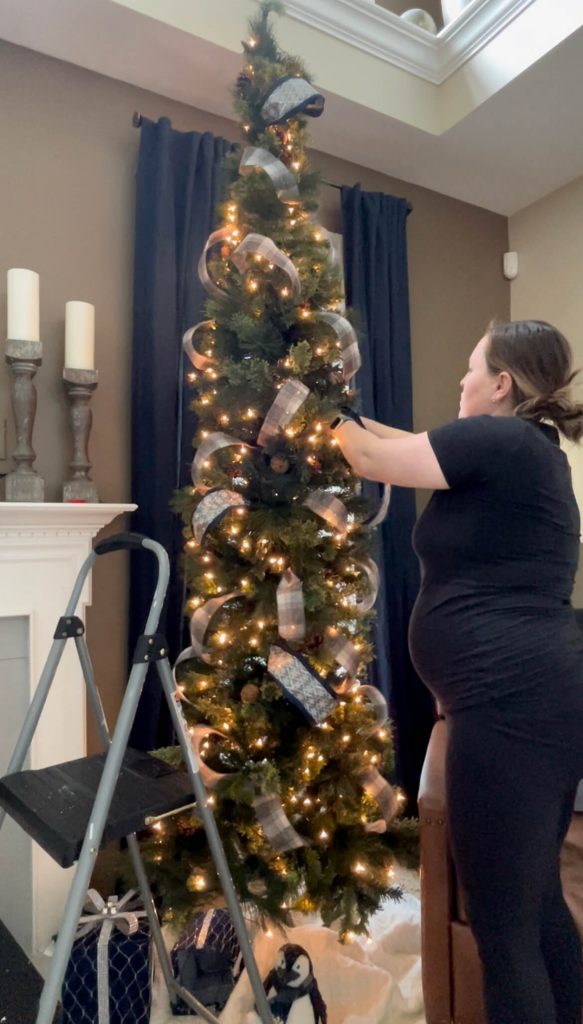
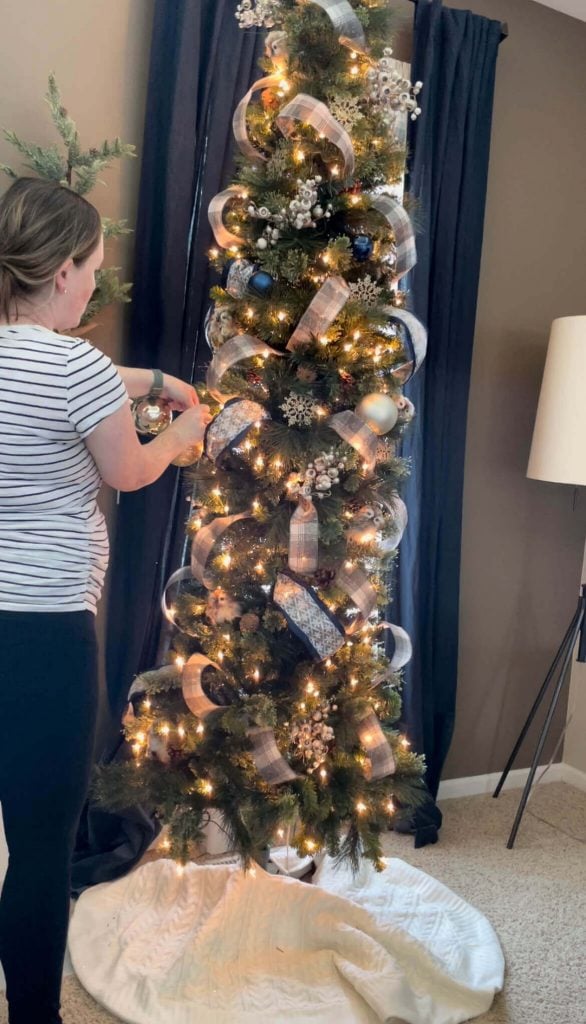
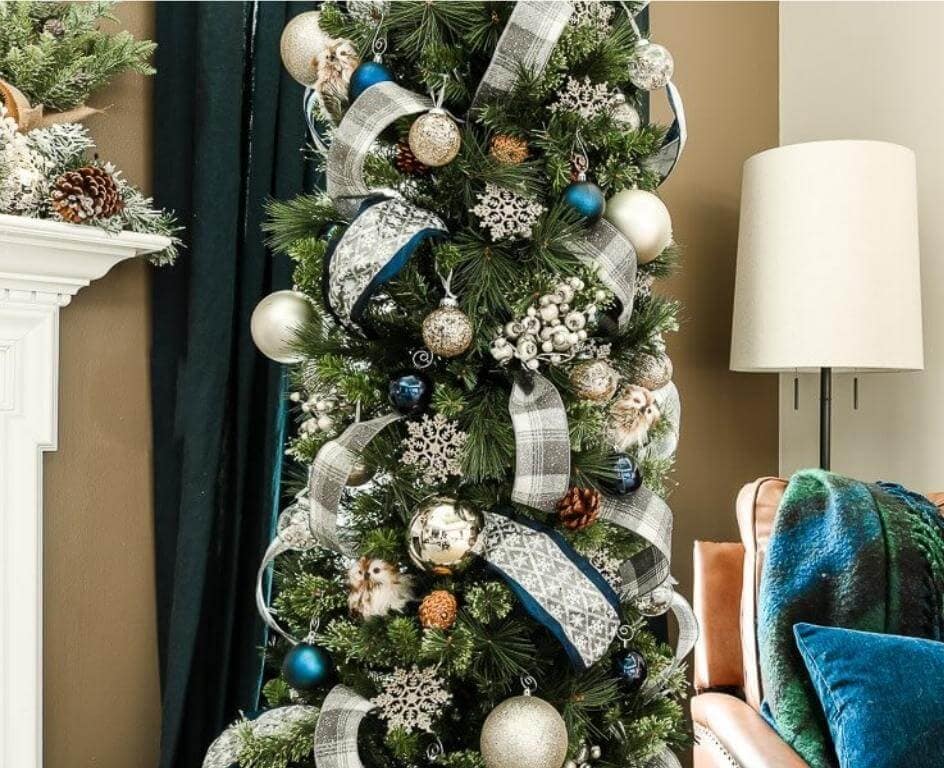
Add First Round of ribbon
This is the first year I put ribbon on the tree and let me tell you…
I'm never going back.
Both my husband and I were so impressed at how ribbon really upgraded this tree.
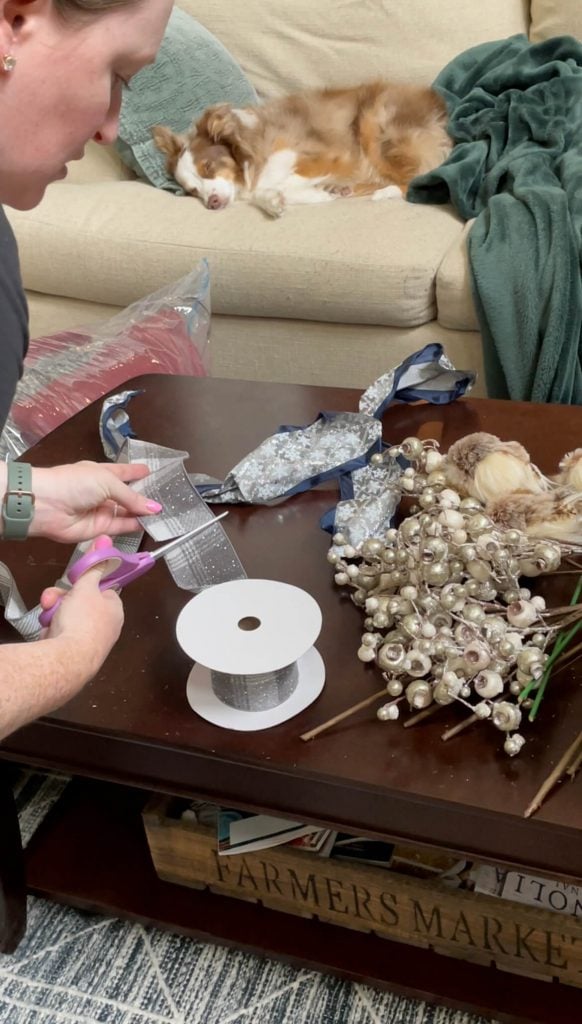
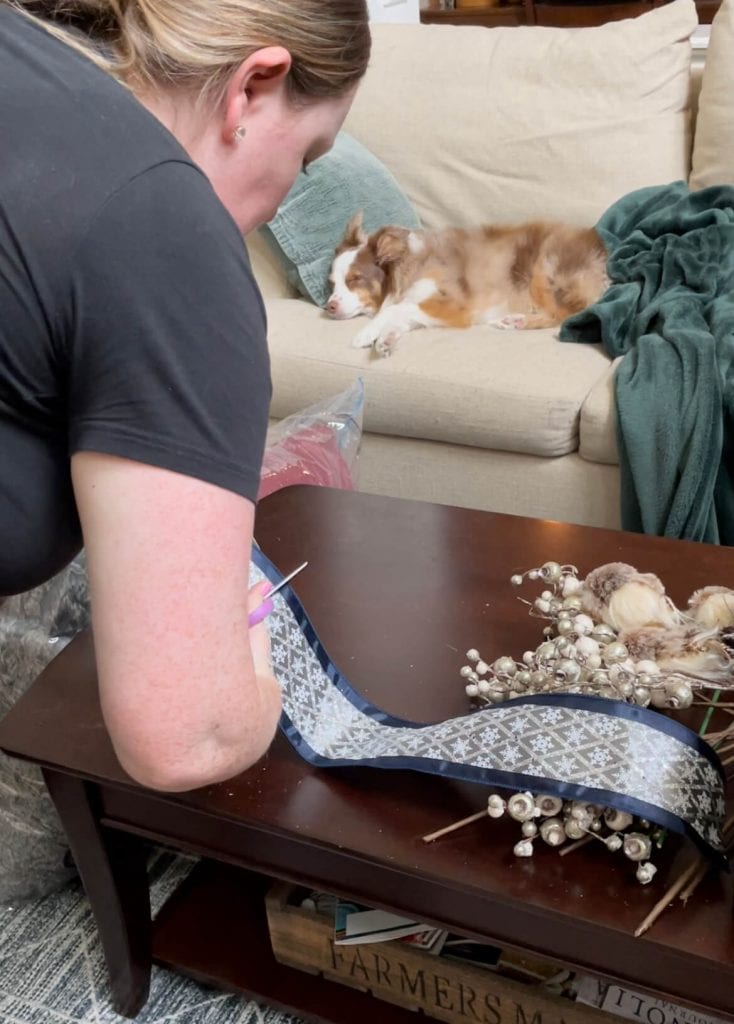
I started by cutting pieces of 2-2.5″ wire ribbon into 3 foot pieces.
I read a few tutorials and the best technique I found went like this…


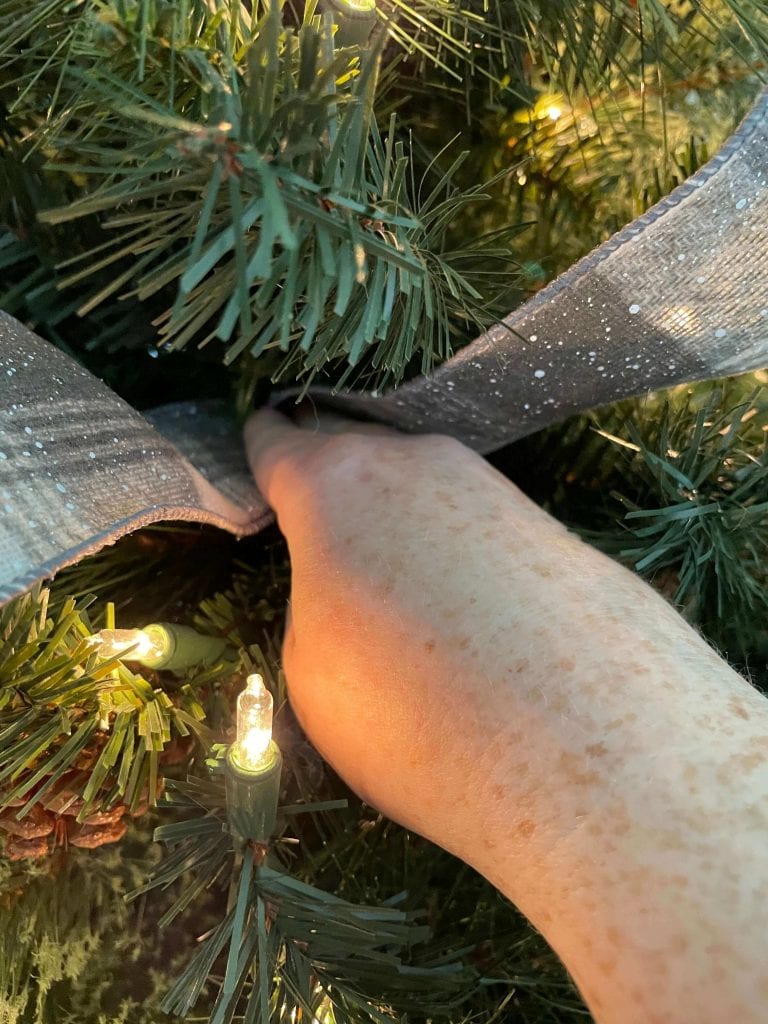
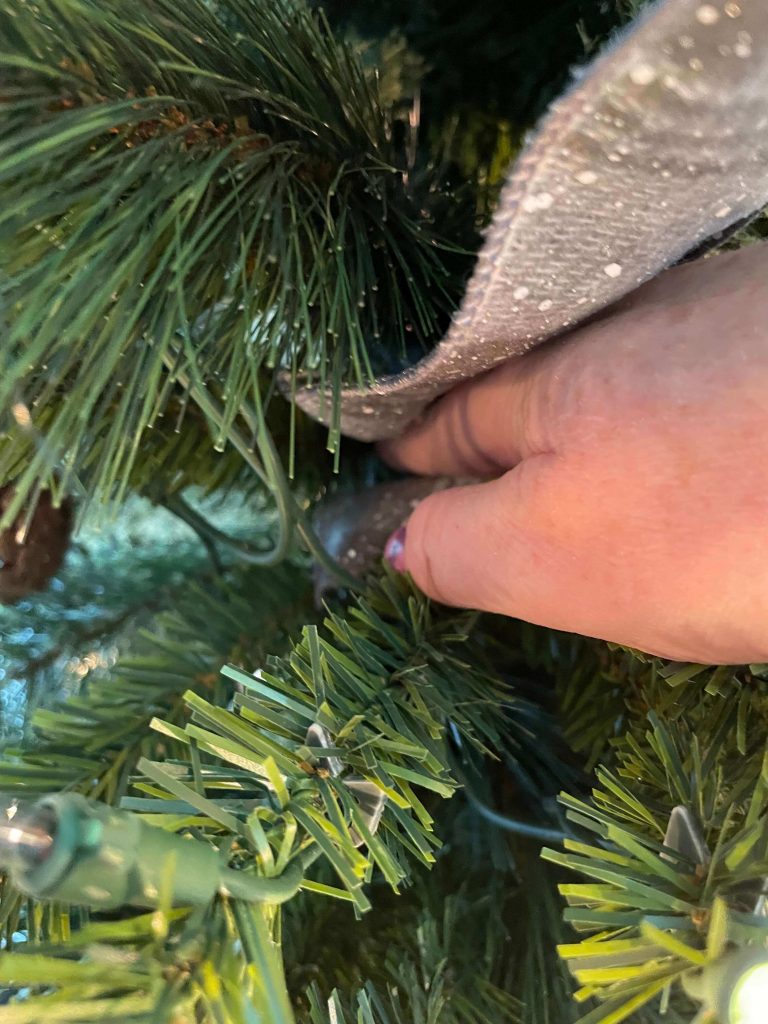

The key is to start in the middle of the tree and add the ribbon on the diagonal.
Basically, you start by tucking one end of the ribbon into the tree around a branch or the lights cord towards the middle of the tree.
Then, you loop the ribbon out over the branches.
Try to make it so the ribbon is puffed out enough to not touch the branches its poofing over.
Then, tuck the middle into to the tree on an angle and create a second loop the same way you created the first.
Once that loop is made, tuck the other end into the tree like you did with the first end.
As you make your loops, pull the ribbon loop up to shape it.

Continue to do this all around the tree keeping your loops at the diagonal.
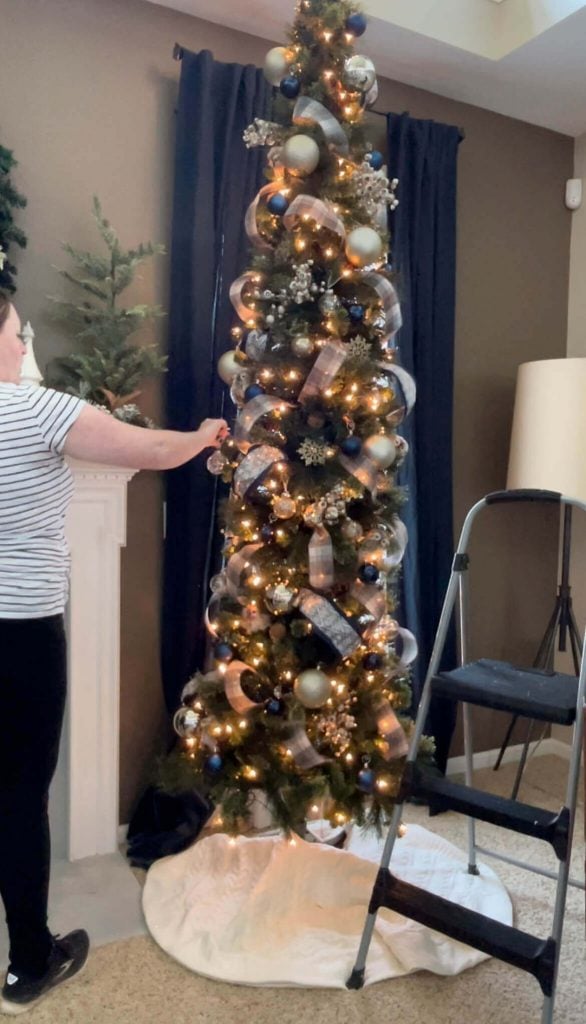
Add a Second Round of Ribbon (optional)
After you've added one set of a ribbon, consider adding a second round of ribbon.
I had this larger ribbon from a couple years ago I never used, so I used it this year to add in more blue to the tree.
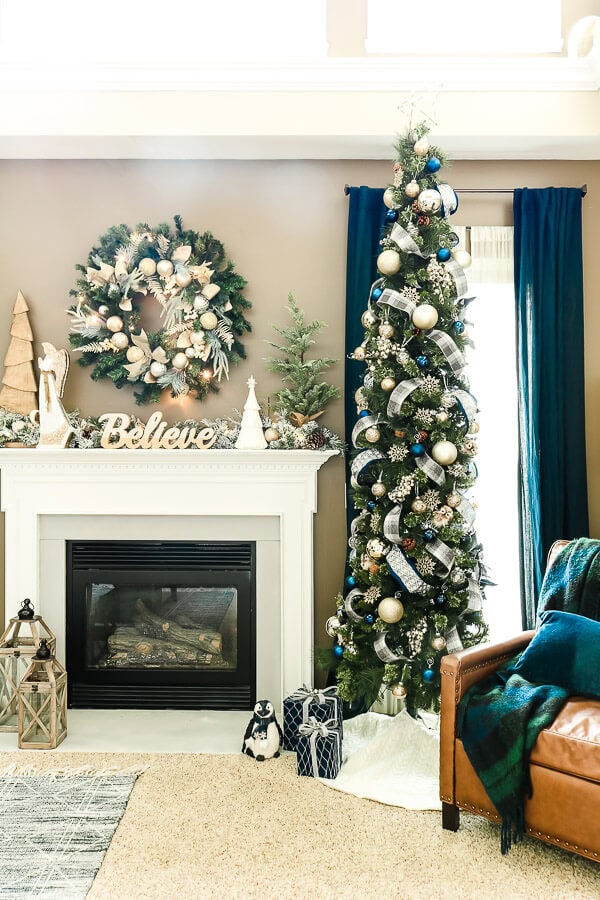
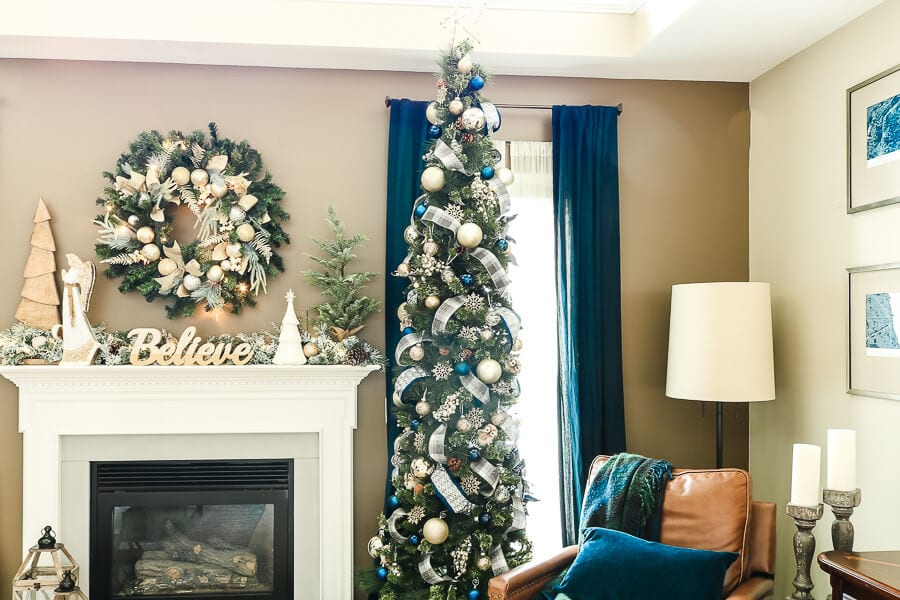
My Christmas color scheme this year is navy blue, forest green, and gold with hints of white snow.

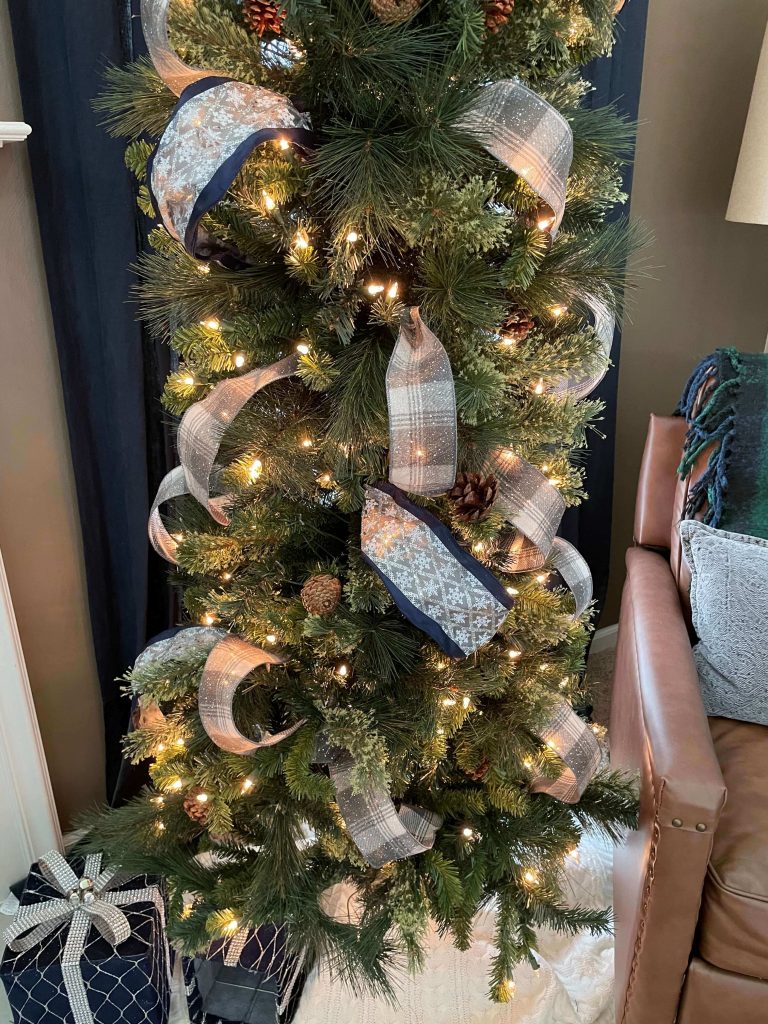
For this round of ribbon, I didn't do as much.
You really can make this round of ribbon any width from my research.
For this round, I cut these down to 2 foot pieces and did mostly one loop instead of two.
However, I did occasionally do two smaller loops to keep it interesting.
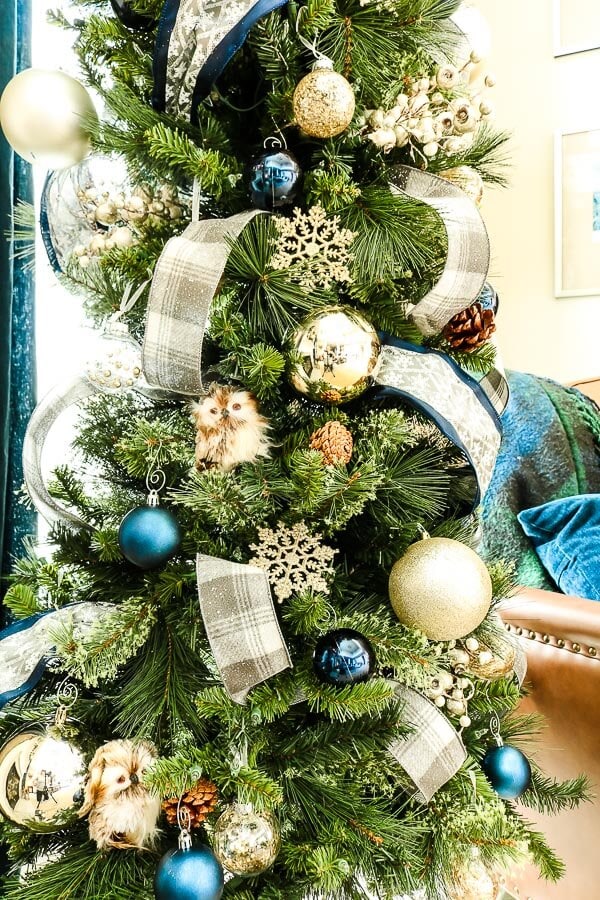
Add Stems and/or Florals and/or Unique Elements
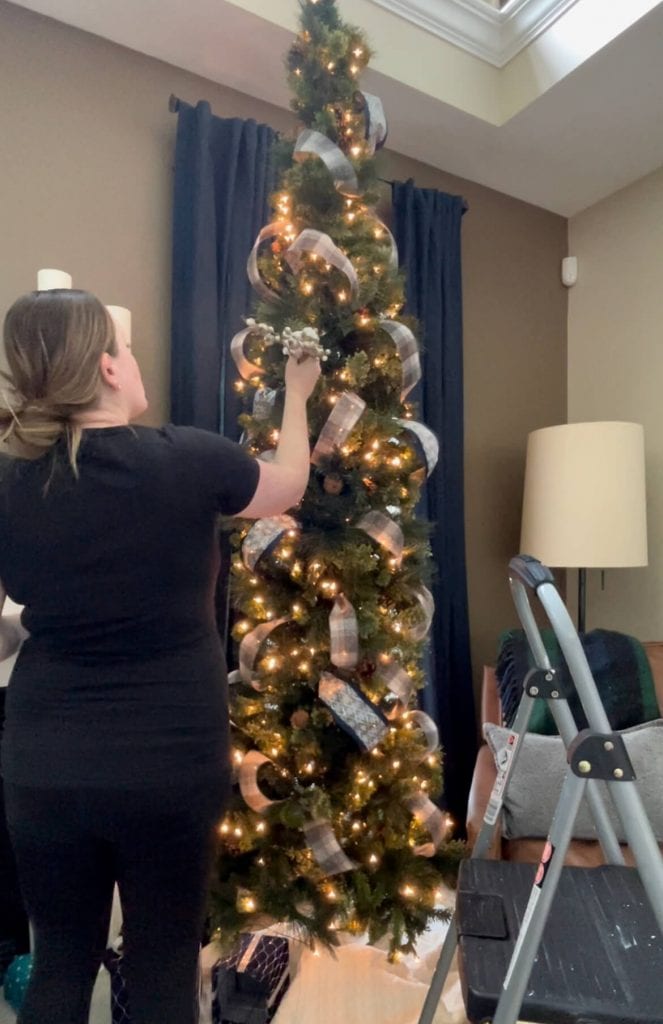

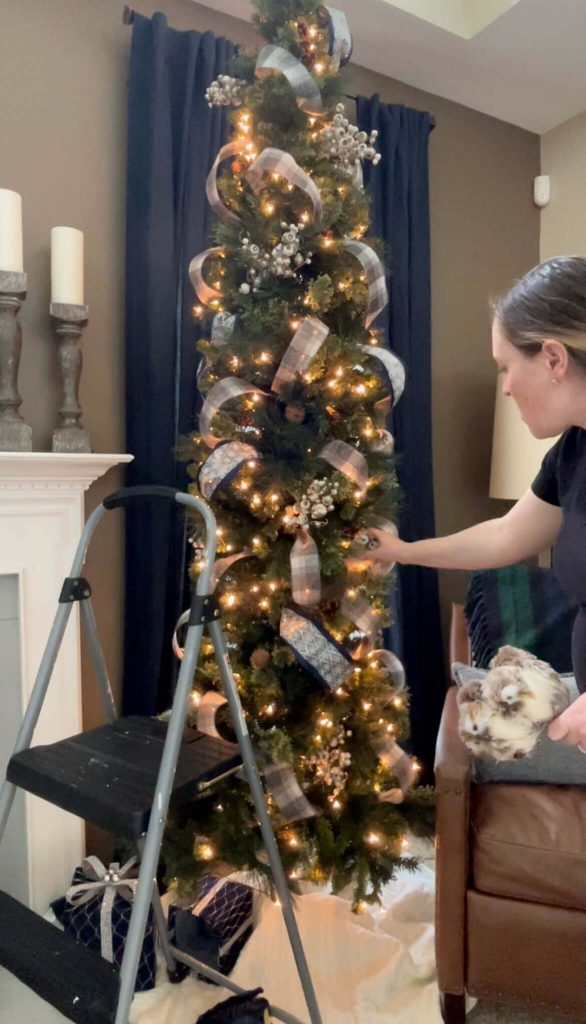
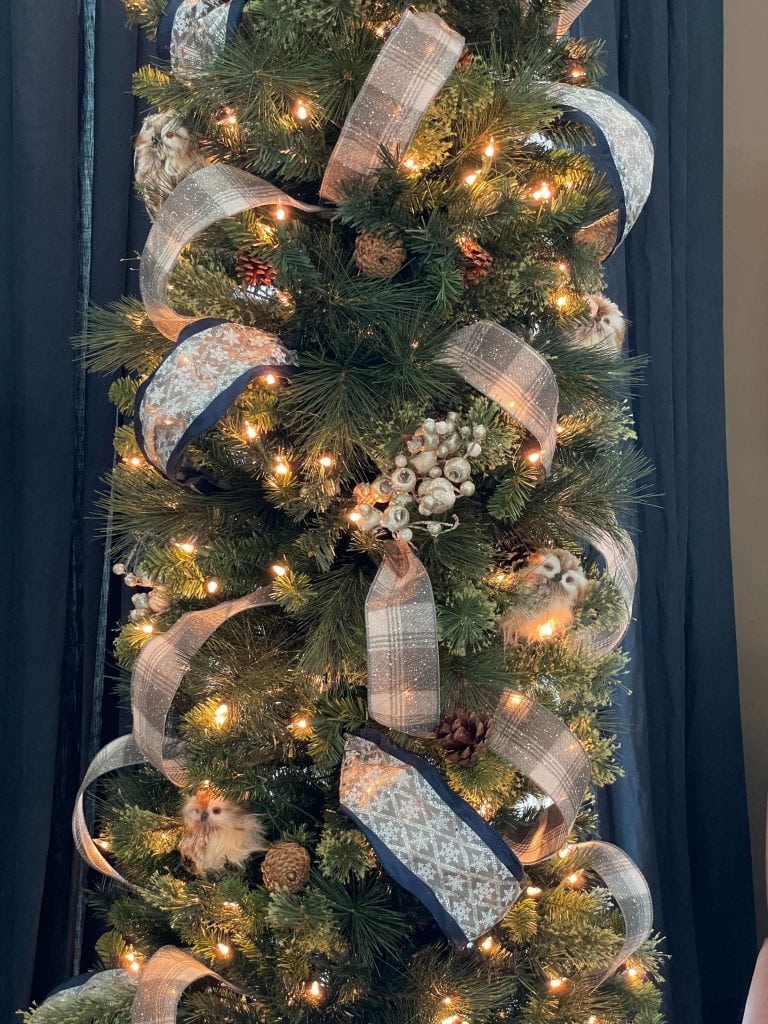
Once you feel good about the ribbon placement, it's time for the stems and/or florals.
Disperse them in any gaps around the ribbon or to hide certain awkward parts of the ribbon.
I only had 8 stems from a previous tree setup that I used here.
I would say you could probably add in a few more, but you really don't need any more than 8-12 stems or florals.
Once you get your stems/florals in place, add in your unique elements.
My unique elements for this tree were owl figurines.
Again, I think I only used a handful of these figurines, but consider your tree's theme and go with something fun and unique to make the tree stand out.
Add Varying Sizes and Colors of Ornaments

The last step of the process is to add your ball ornaments, sometimes referred to as baubles.
Some advice I read in my research is to put the larger balls on first in a Z pattern.
Then go back with your smaller ones and cluster them in groups of three.
Once you feel like you have enough clusters, or you run out of larger baubles like I did, fill in the rest of the gaps with other abstract ornaments.
I added glittery gold snowflakes to bring the sparkle as my additional ornaments.
The After

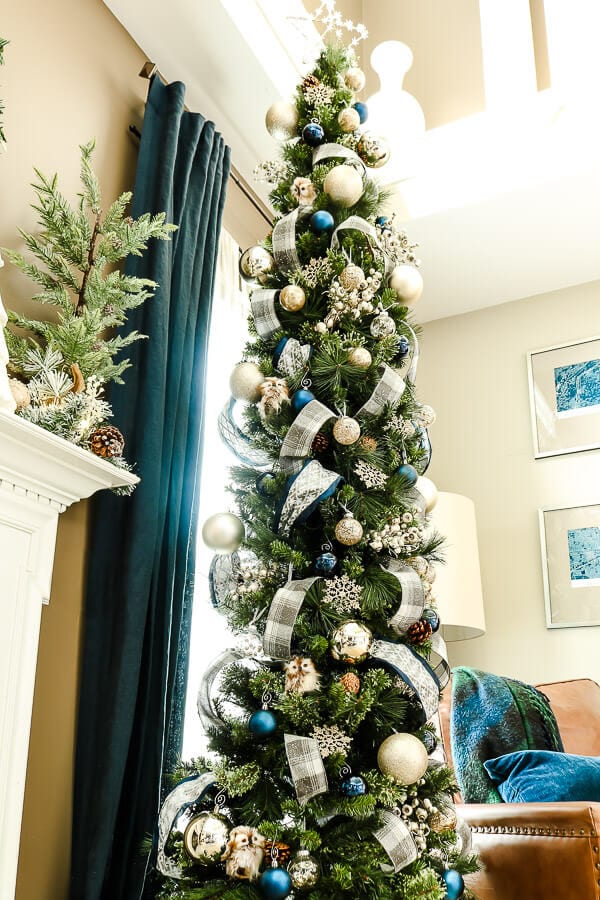
And there you go!
A beautifully decorated skinny tree with ribbon looking like the pros did it!
Don't forget to snag our countdown to Christmas checklist below, too!
Happy Decorating and Merry Christmas!
Frequently Asked Questions
The best way to make your skinny Christmas tree look bigger is to add ribbon and stems. Ribbon and stems allows the tree to extend past the branches. Once you have your ribbon and stems in place, don't forget to add some larger ornaments to add even more substance.
The skinny Christmas tree is the best! Not only is it a total space saver without sacrificing looks, but it is cheaper too! Win-win!
I used 12 larger baubles, 30 smaller baubles of one color, and 30 baubles of another color. I did also include about 12 snowflake ornaments as well.
Step one is to cut your ribbon into three foot sections. Then, tuck one end into the tree, fluff out the loop on a diagonal, tuck the middle into the center of the tree, fluff out another loop on a diagonal, and tuck the other end back into the tree. Repeat all around the tree!
Want to watch the video for this post?
You're in luck!
I put together a video tutorial to add to this post, so you can see the full scope in real time!
Check it out below and while you're there, be sure to hit the subscribe button and turn on the bell notifications to make sure you never miss a new My Homier Home video!


This looks so beautiful, Christin! I haven’t ever considered a skinny tree, but I love how it can save so much space. Smart to put the large ornaments on in a “Z” pattern for sure, they look really nice that way. Love it!
Aww thanks Stacey!! I’m in love!
I’ve never heard of a skinny tree! So clever. The ribbon is a great addition.
It looks amazing! Tree decorating is one of my all-time favorite things to do but I am intimidated by ribbon. It just never feels right. Maybe one day I’ll master it.
I’m telling you the ribbon was way easier than I thought doing it this way! You can do it!
How many rolls of 2.5 ribbon did you use on the pencil tree and how tall was it?
It is 7′ tall and I used two rolls. 🙂
Your tree is beautiful, and the skinny tree is a great idea for tight spaces. I love your suggestion to use a smart plug for the tree!
Thanks Kim!! This tree is definitely one of my favorites!!
Your skinny Christmas tree looks fabulous! Thank you for your great ribbon tips.
These are great tips! Your tree looks beautiful!
Love these ideas – I need to read again. We have a slim tree and I’m putting a pencil tree in the bedroom this year.
I’m saving this for when I decorate in a few weeks! Thanks for the great info.