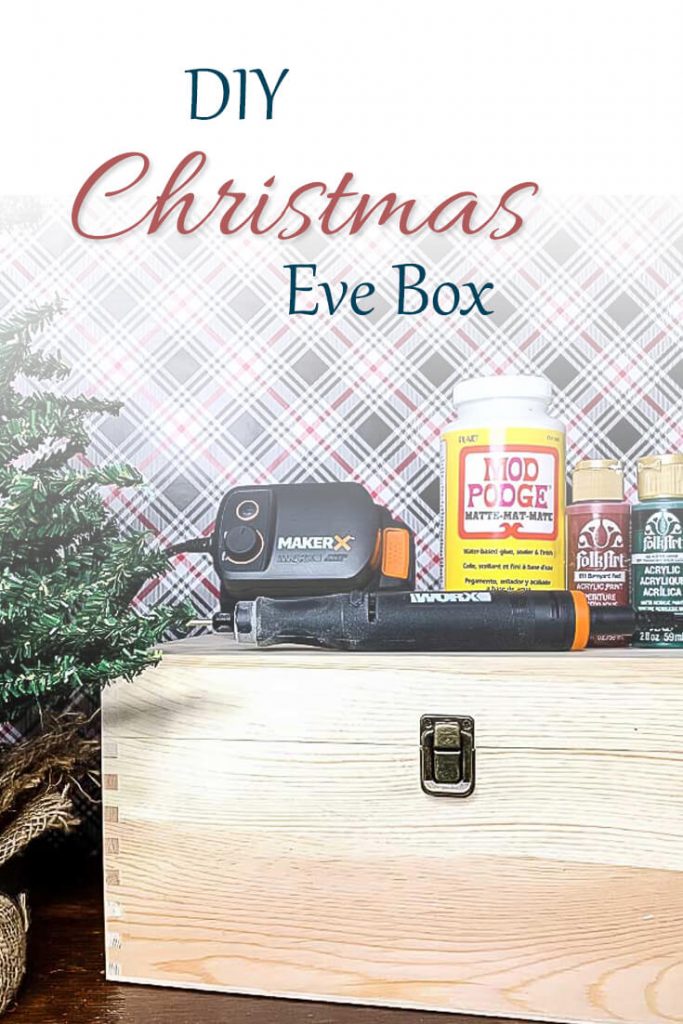
DIY Christmas Eve Box
Start a new tradition this year and create your very own DIY Christmas Eve box full of fun and activities for you and your family to enjoy.
With virtual Christmas right around the corner, I am counting down the days. In my Christmas activities and traditions brainstorm, Christmas Eve has always been a special time, so this year we're making it even more special with this project.
I don't normally showcase craft projects, but as we were searching for ways to spruce up this virtual holiday, I came across a fun idea to create a Christmas Eve box.
Rather than order one, we decided to make our very own family crest and engrave it onto our own box for a DIY Christmas Eve box to use year over year. Here's how we did it:
Table of contents
- 1. Gather your materials.
- 2. Create your family crest.
- 3. Use carbon paper to trace it on to wood.
- 4. Use MakerX tool to engrave your family crest.
- 5. Spray layers of shellac.
- 6. Paint color over your engraving.
- 7. Wipe away the Excess.
- 8. Decoupage wrapping paper inside.
- 9. Fill with Christmas Eve goodies!
Disclaimer: This post does include affiliate links for your convenience. This is at NO additional cost to you but earns me a small commission. To read more, check out our disclosure policy. As an
1. Gather your materials.
Here is the list with some links of all the materials you will need for this project.
- Wood box
- The one I used is 13.8×9.9×6.7 Inches
- Family crest image
- Carbon paper
- Pencil
- MakerX Rotary tool
- Eye glasses
- Mask
- Shellac spray
- Acrylic Paint
- I used Folk Art brand in Barnyard Red, Wicker White, and Hunter Green
- Paint brush
- Matte Mod Podge
- Foam brush
- Wrapping paper
- Fun items to fill your box
- Here are the family pajamas we bought to wear (even on for the dog!)
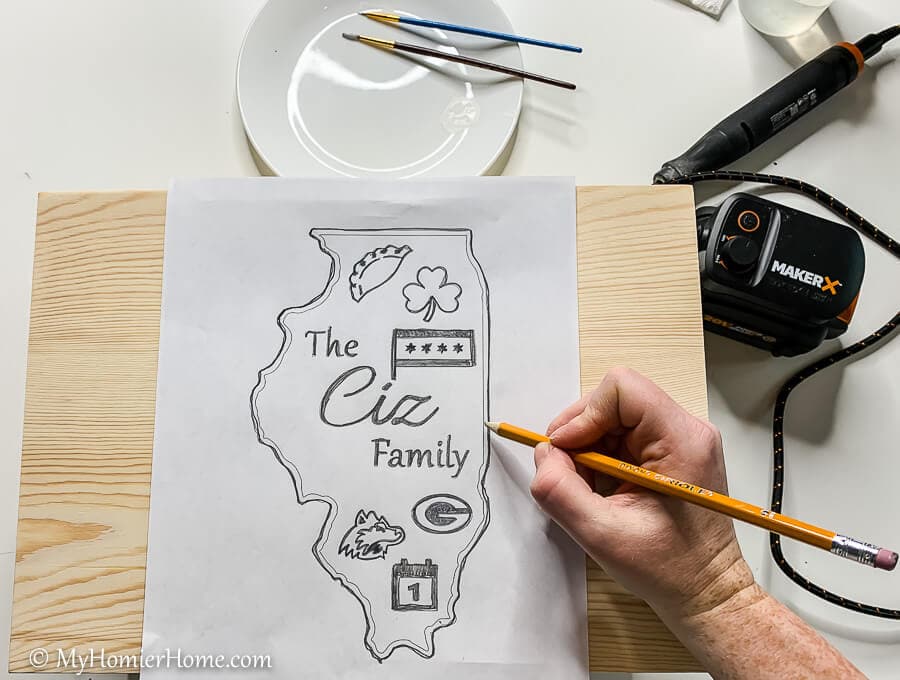
2. Create your family crest.
While you're waiting for these materials to arrive, you can start creating your family crest!
We picked things that represented our family and had significant meaning to us.
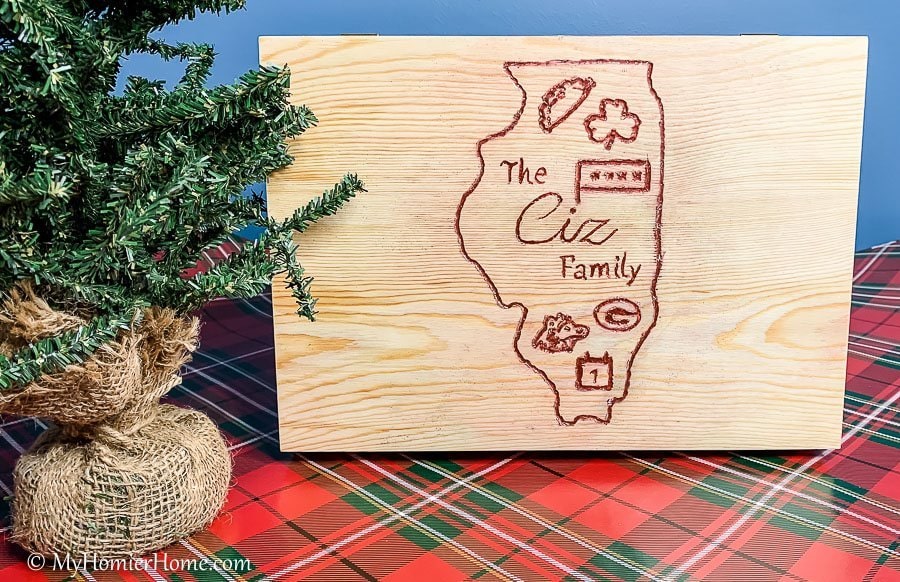
We chose the state of Illinois as our crest outline because we were both born and raised there. That is also why we have the Chicago flag (under the shamrock in the picture below). We are Southside Chi kids… probably why our parents get along so well… nothin' quite like Southside Chi.
We also chose a pierogi, one because the hubby is more than half polish, but also because we love them lol. The shamrock is because I am nearly 100% Irish. Ciz is short for our real long last name, we are Green Bay Packer fans, the husky is our college's symbol (NIU! Go huskies!), and the calendar with the 1st on it is for our little missy's birthday!
Find the things that represent your family and pull them into Microsoft Word, Canva, or Photoshop. I used Photoshop because I use it for a lot of other things, but Word and Canva will remove background on images, too!
3. Use carbon paper to trace it on to wood.
I linked the carbon paper I used from
Make sure the carbon paper is carbon side down – you'll know it needs to be flipped over if nothing transfers lol. Darken anything you will want to make a valley when you go to engrave.
Watch the video tutorial here!
4. Use MakerX tool to engrave your family crest.
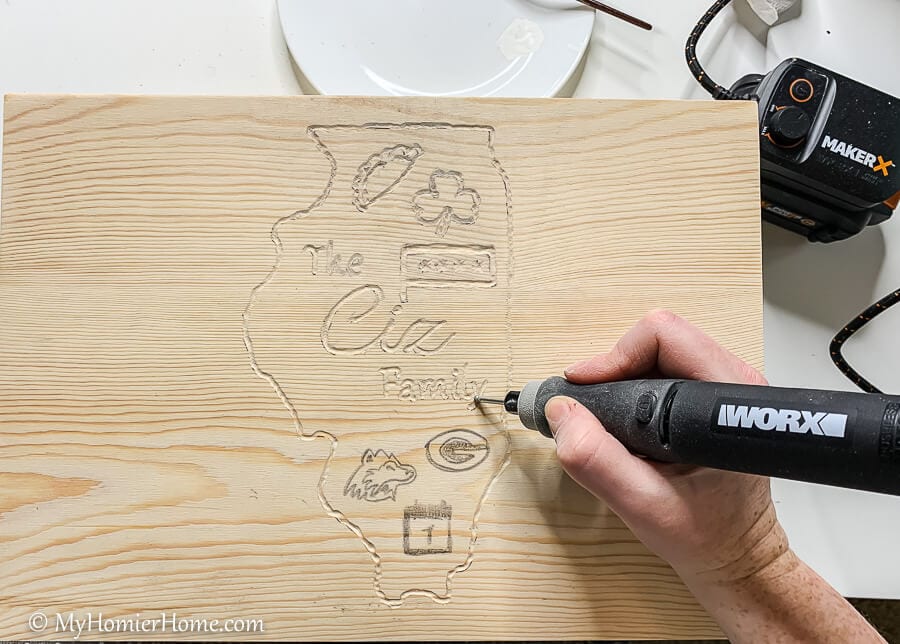
After lightly sanding the top, Use your MakerX rotary tool to trace over the lines. The carbon print will get rotaried away as you follow over the top of it.
A few tips…
- Make sure you go deep enough to make sure the paint has a valley to rest in.
- If you find after the next step that it wasn't deep enough, you can go back over it.
- When you go with the spin, it smooths it out in case you have uneven lines.
- I used just a little turn under half way.
5. Spray layers of shellac.
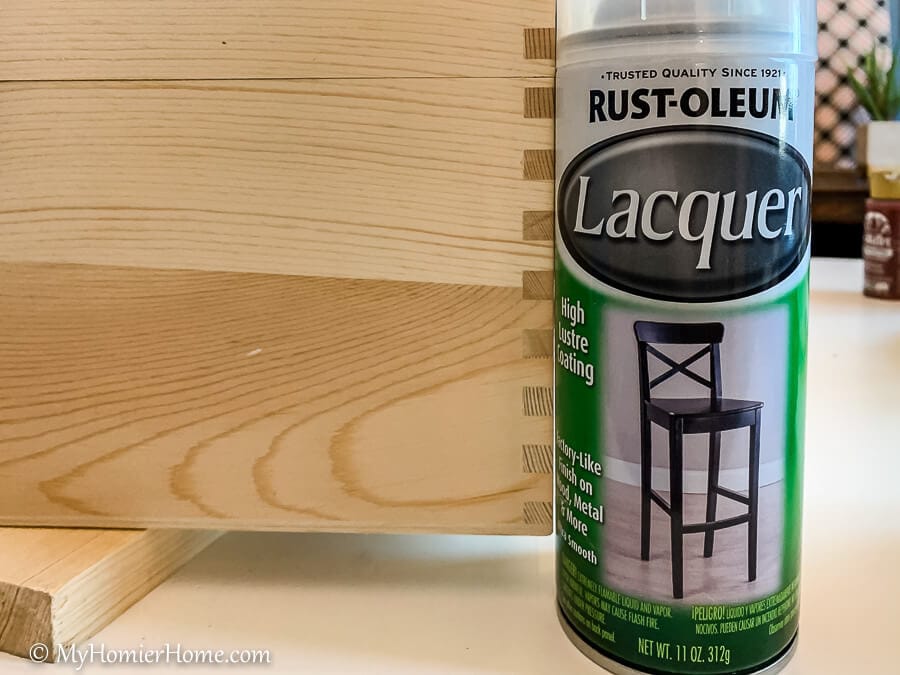
I linked a different version than what is pictured above because actual “Shellac” is what was recommended when I was doing my research, but I only had this Lacquer.
The whole reason for this step is so you can paint over the engraving without needing to stay within the lines and wipe the access away. This lacquer (or shellac) will make a wipeable surface rather than the paint spreading all over the place.
6. Paint color over your engraving.
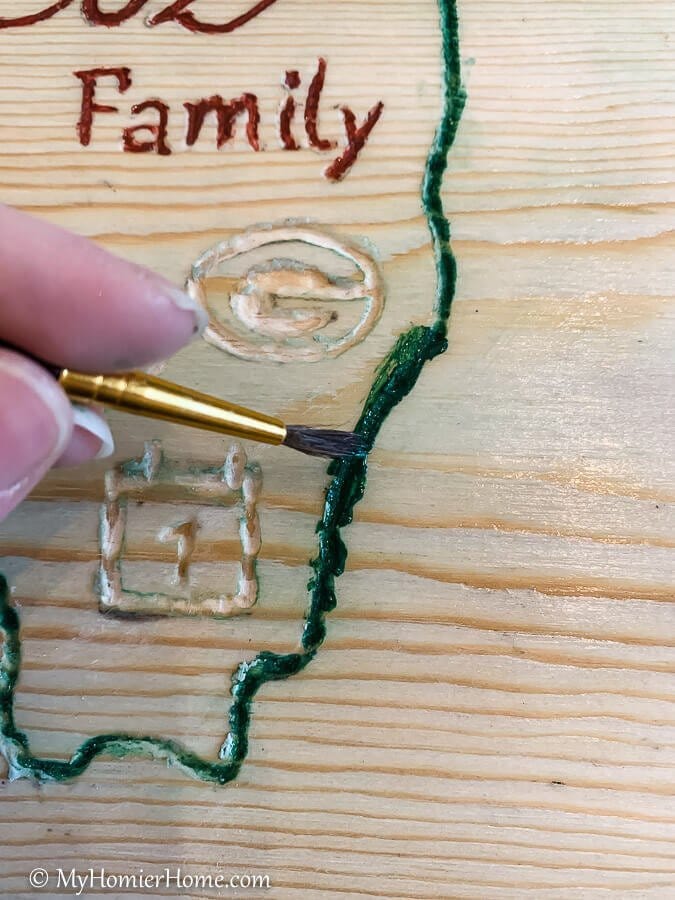
Don't worry about staying in the lines because we are going to wipe away the access in the next step. I would go back over this a few times letting the paint dry in between this step and the next step.
Paint in circles and get in the creases as best you can to make sure it fills the valley. Don't let the paint dry without wiping the access away first (see next step).
7. Wipe away the Excess.
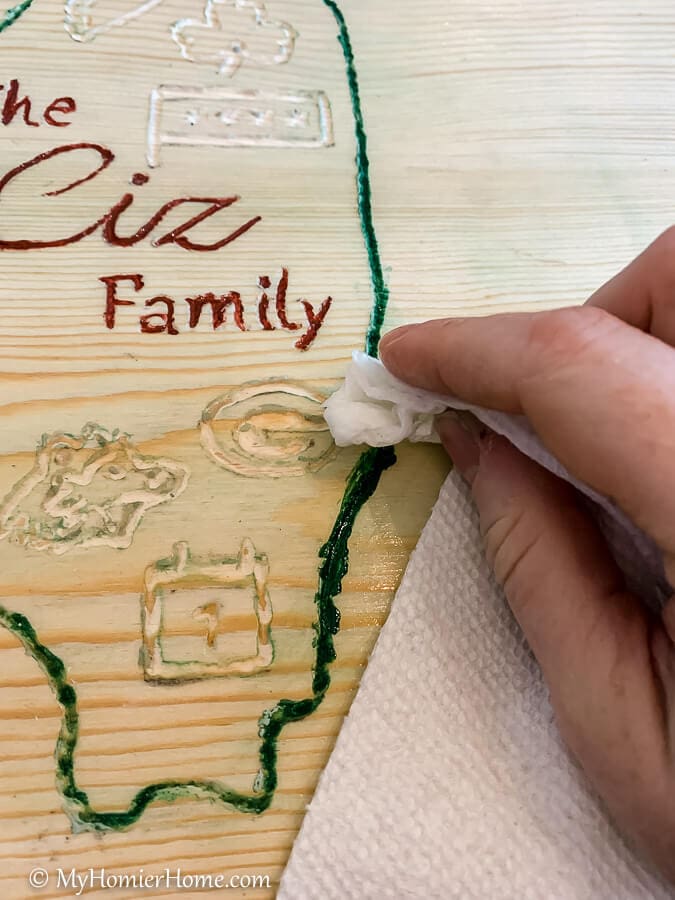
When you wipe the excess paint away, use a circle motion. Just be careful not to go over any engravings you plan to use a different color with.
You can see I have a few twinges of green over these symbols in the picture above. I'm going to go over these in white to make them pop… or red… or white.. or…
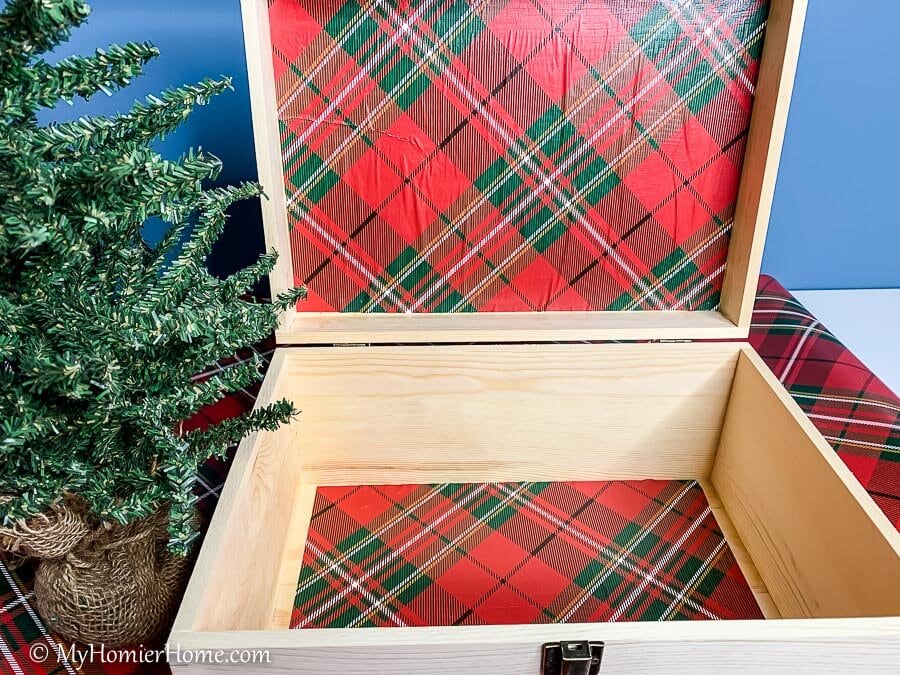
8. Decoupage wrapping paper inside.
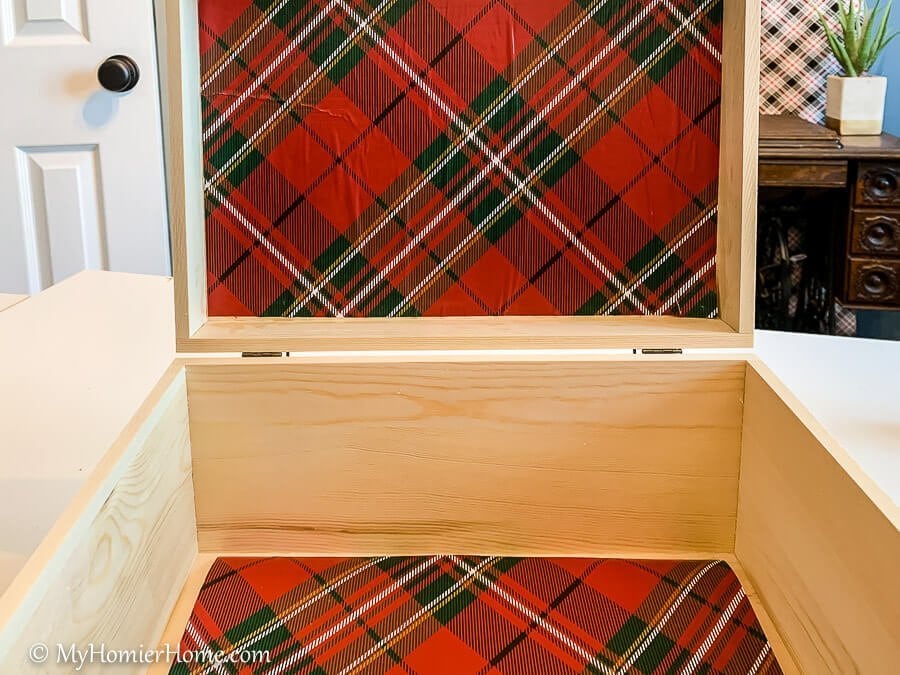
Turns out I'm the worst decoupager ever, but a few tips I've read (that I found after doing this top part) include painting the wood, then applying a light coat of matte mod podge over the wood and then placing the paper on the wood and using a piece of cling wrap to smooth out.
Then, you can apply a light layer of mod podge over the top to seal it. Would you do the whole inside of the box or just the bottom and top like I have it?
9. Fill with Christmas Eve goodies!
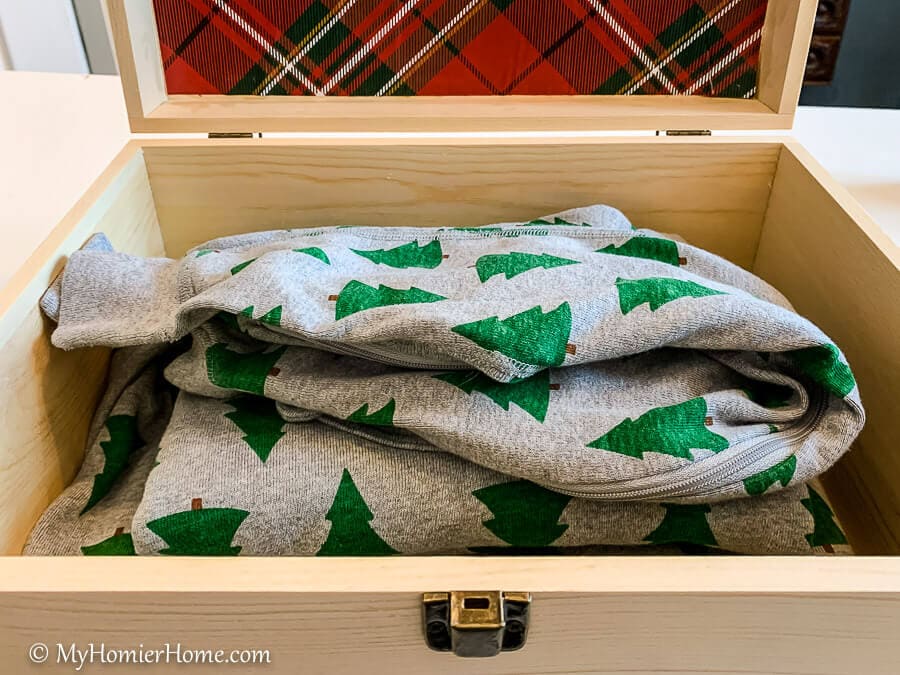
And last, but not least, all the fun goodies!! The purpose of the Christmas Eve box is to have something to open on Christmas Eve that has fun activities and things to wear that night.
Here are some of my ideas for what I'm going to put in this box.
- Matching family pajamas/outfit (already got these – shown above!)
- Specialty ornament for each kid
- Picture from the year (great memory) and then add a picture to it each year
- Family activity, like a movie or game
- Snack/Food for the activity
Basically, the idea is to pick something with significance, a type of activity, a fun tradition to look forward to each year, and some festive food!
What will you put in your Christmas Eve box?