
DIY Christmas Wood Signs | Holiday DIY Tour
Welcome to the Inspired by the Holidays DIY tour! If you’re coming from Chica & Jo, welcome! Isn’t there Pottery Barn glitter santa knock-off amazing? They are so talented!
When I suggested we get together for a DIY Christmas tour, my blog besties were all about it! Probably because this year has been so ridiculous and we need some Christmas joy to look forward to even if it is only October!
This is the first tour in our “Stay at Home for the Holidays” series and I am so excited to share all the fun ideas we have throughout November.
What better way to kick off the holidays than some DIY, right?
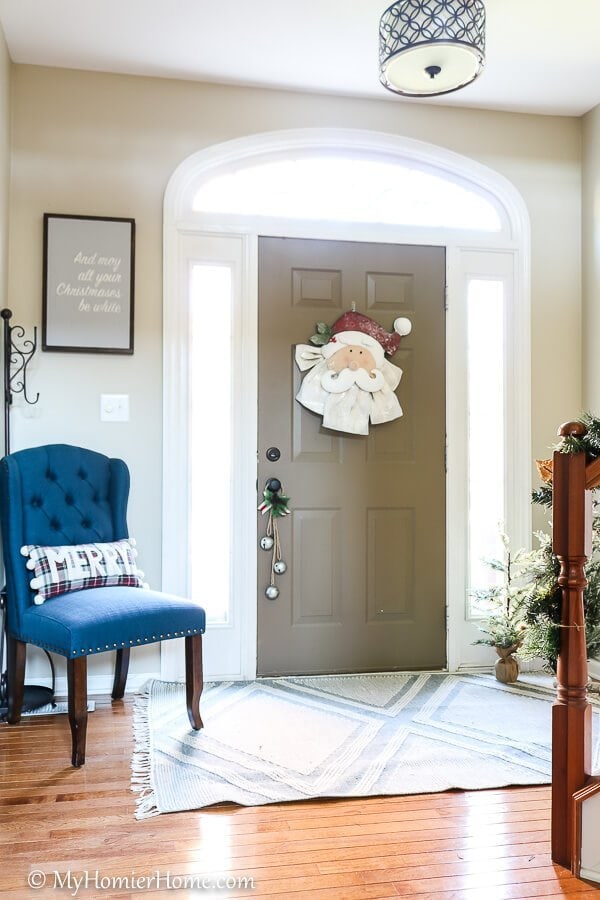
Let me take you through how I created my very own rustic Christmas wood sign for my front entry.
Table of contents
- Step 1: Gather your materials
- Step 3: Lightly sand each piece of wood.
- Step 4: Paint the plywood & stain the frame pieces.
- Step 5: Create vinyl stencil with Silhouette Cameo
- Step 6: Transfer your stencil to your dry wood piece
- Step 7: Apply matte Mod Podge over the stencil
- Step 8: Apply the paint color over the stencil
- Step 9: Nail the frame pieces to the sign
- Step 10: Hang your artwork
- What's Next?
Disclaimer: This post does include affiliate links for your convenience. This is at NO additional cost to you but earns me a small commission. To read more, check out our disclosure policy. As an
Step 1: Gather your materials
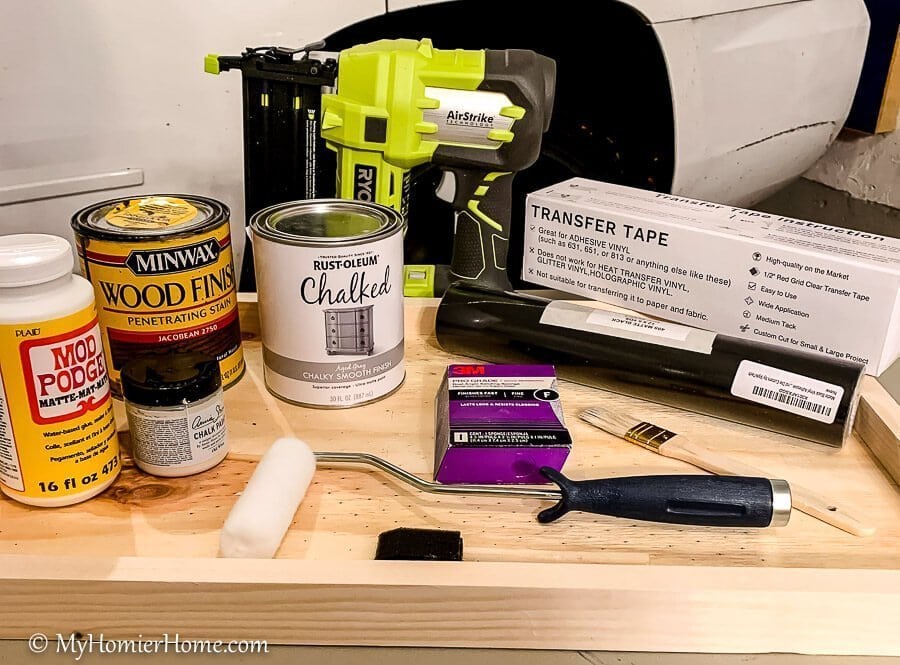
Here is the list of all the items I used with links to purchase below:
- 1-1/4” brad nails
- 18 Gauge Brad Nailer
- Piece of Plywood cut to 13-3/4”x 21-3/4” and 1/2” thick
- 1 – 1x2x8 cut into 2 – 21-⅝” and 2 – 15-3/16”
- 12in. Miter Saw (optional)
- Rustoleum Chalk Spray Paint in Aged Gray
- I used a small can of this same paint because they were out of spray paint, but spray paint is much cheaper & easier.
- I love this color so much, I even used it on my front porch and my fireplace.
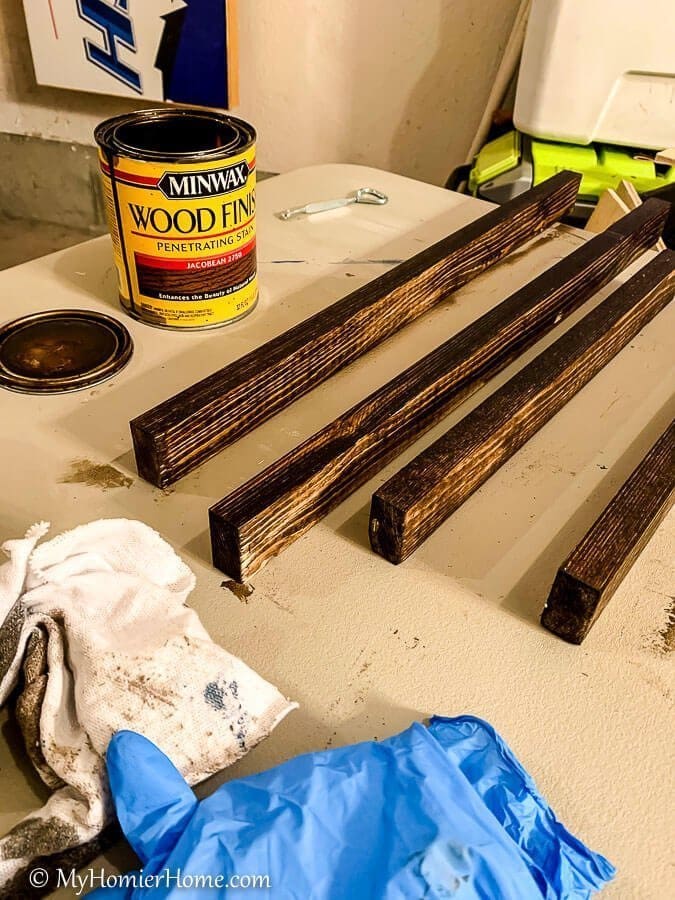
- Minwax Jacobean Stain and a rag
- Sanding Sponge
- Mod Podge in Matte
- White Chalk Paint
- I used Annie Sloan Old White Chalk Paint
- Transfer tape
- Vinyl any color for creating your stencil
- Vinyl pick and scraper
- Clamps (I used two 12″ and two 24″)
(click on any of the images to shop the products)

Step 2: Check the length of your frame.
If you don’t have a miter saw, I would recommend having your wood cut at Home Depot.
Before I got my saw, I would head to the store with my exact measurements, so they could make all my cuts. I still do this for any rip cuts because I don’t have a table saw yet.
If you do have the Home Depot cut the wood, complete this step in the store.
Either way, you want to make sure the frame pieces fit snugly around your piece of plywood so you don’t have any gaps when you attach your frame.
Step 3: Lightly sand each piece of wood.
Before doing any painting, give a light sanding with a sanding sponge to take care of any rough edges and prep your wood for paint.
I also took a close look at the sides of the plywood piece and the frame pieces after sanding. This helped me decide which side I wanted to paint or stain so I could make sure the nicer, cleaner side faced outwards.
Step 4: Paint the plywood & stain the frame pieces.
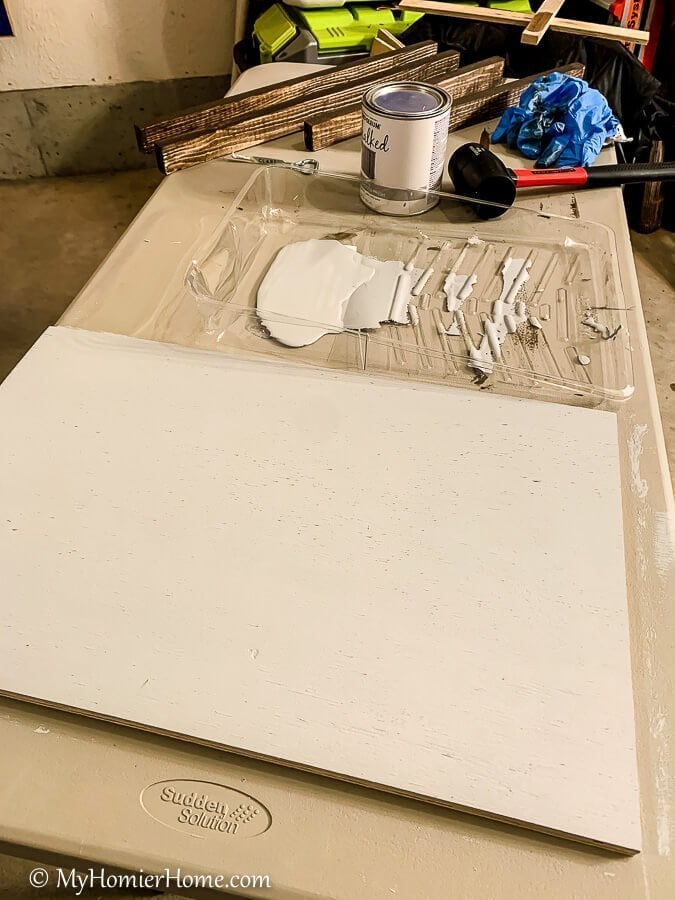
You can choose any color you want, but as for type of paint, I prefer chalk paint because I don’t need to worry about any base or top coats.
For the frame, I used a white rag and Jacobean stain by Minwax to stain three sides of the frame. I didn’t stain the very back, but you could do that if you wanted to as well.
I let both the plywood piece and frame pieces dry for about two hours. If you are not going for a rustic, worn look, I would suggest another coat of the chalk paint on the plywood.
I wanted a rustic look, so it was fine that when I put the vinyl on for the stencil portion of this project, the paint came up a bit.
Step 5: Create vinyl stencil with Silhouette Cameo
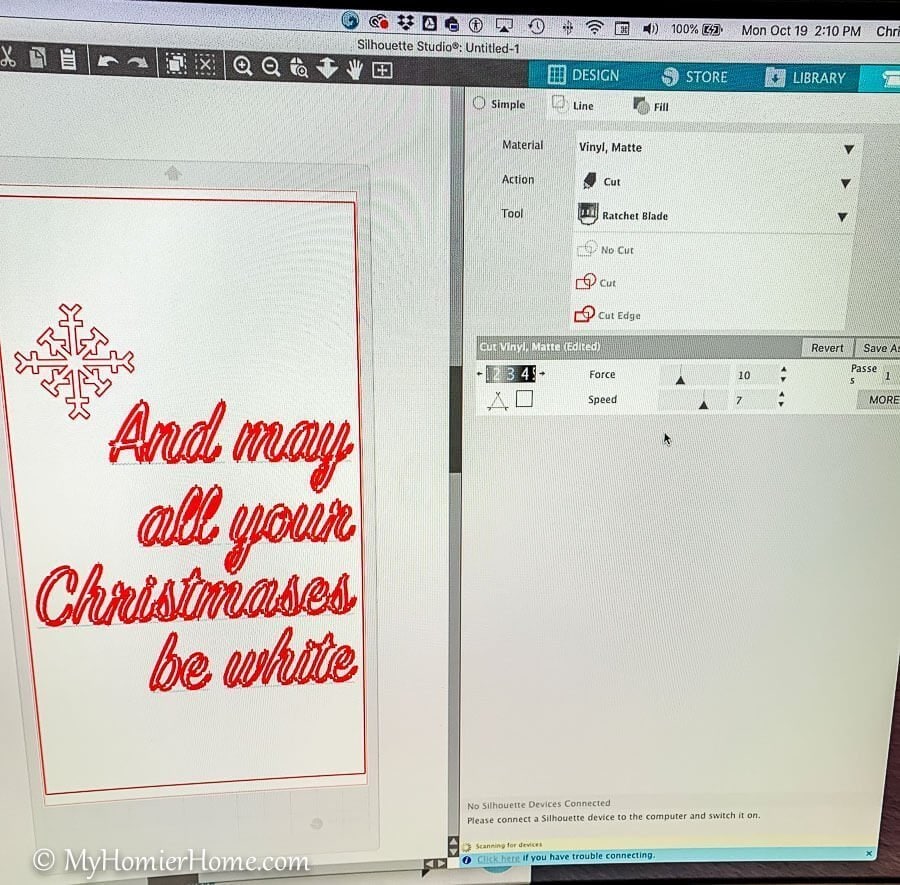
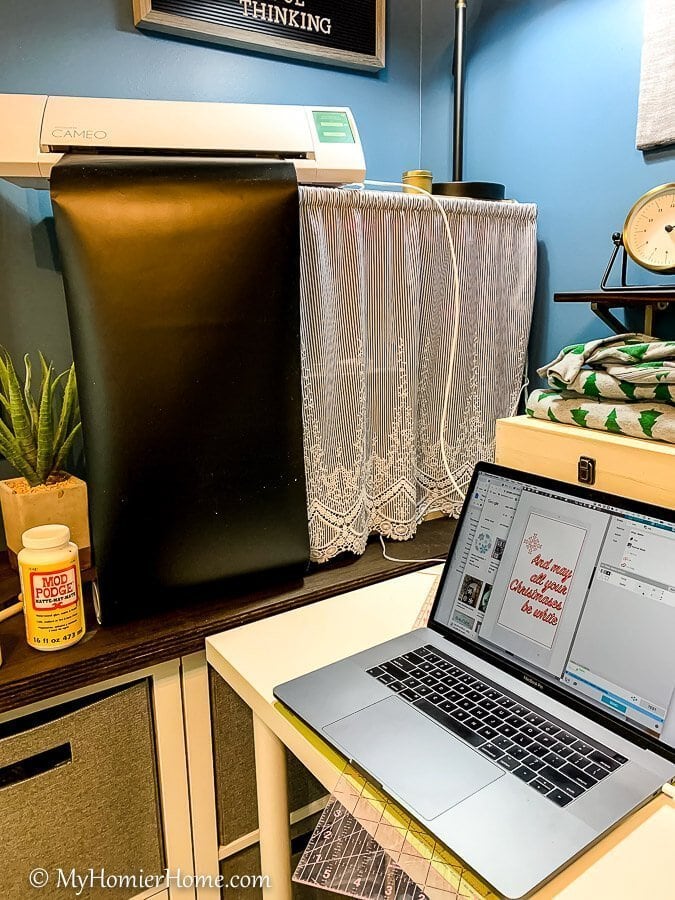
While the paint and stain was drying, I went into the craft room to create my stencil design using the Silhouette software.
The SignPainter script seemed to be the best one for the stencil. There may be a better script to use, but I liked it for a stencil because it made the letters look connected when I painted it on the sign.
My Silhouette Cameo has been hanging out in the craft room for a million years, so it took me a few tries to figure out exactly the settings I wanted to use.
I ended up using the lowest setting and it still cut through the vinyl, which it wasn’t supposed to do, so I would consult good ole YouTube for some guidance if you need help setting your stencil settings.
It does take a little trial and error from what I read, but even if you mess it up, like I did, it can still work well, just not as easy to transfer it off the cut mat and onto your wood.
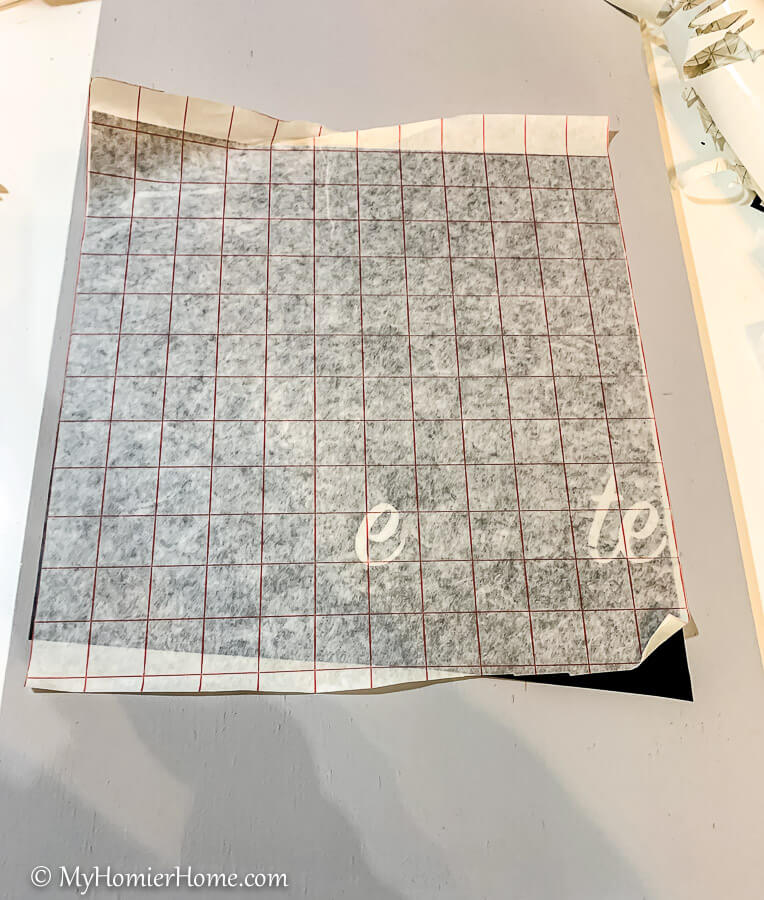
After running the design through the Silhouette, I added transfer paper to the top of the design, removed the vinyl from the cutting mat, removed the backing of the vinyl, and used my pick and scraper tool that came with the silhouette to remove the inside lettering pieces to form my stencil.
Step 6: Transfer your stencil to your dry wood piece
Be sure your paint is fully dry. Again, I waited the two hours and then applied my stencil, but I wanted it to have a rustic vibe.
If you don't want that, I would suggest waiting for the paint to dry overnight after adding second coat before moving on to this step.
It will be helpful to use a ruler to align your stencil words appropriately.
Once it aligned, make sure there are no bubbles and that it adheres to the wood.
Step 7: Apply matte Mod Podge over the stencil

I found this tip while researching my project and it is a good one!
With a foam brush or any kind of paint brush, apply a thin layer of matte mod podge (not the glossy kind) over the top of the stencil where you plan to paint it.
This helps the paint to go on evenly and not seep under the stencil.
Step 8: Apply the paint color over the stencil
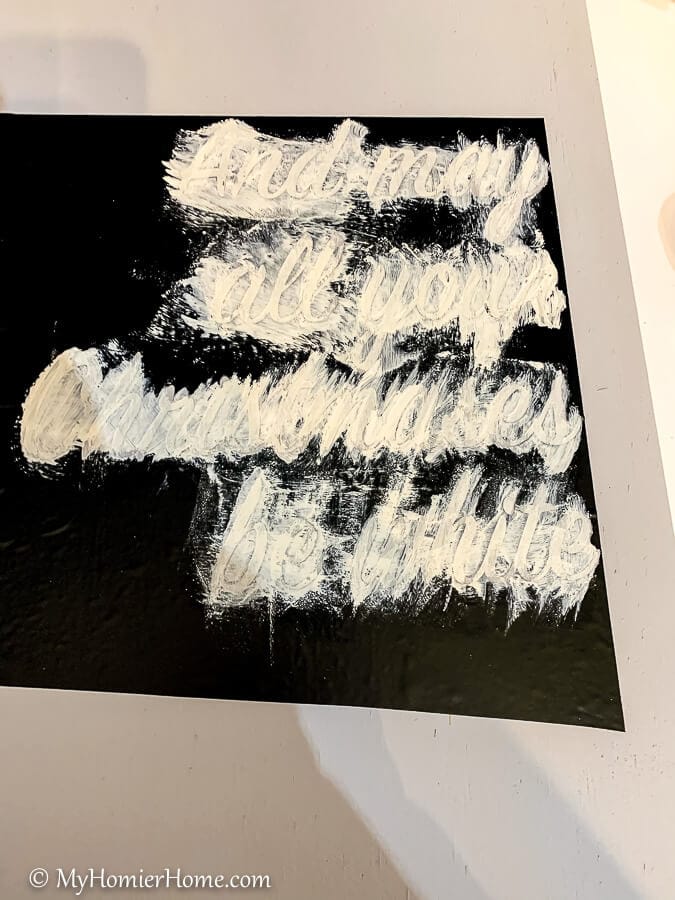
I chose white chalk paint because I had it on hand, but I would recommend chalk paint.
It goes on so easily and doesn't require a lot of extra steps. The paint I had on hand was Old White by Annie Sloan.
I only painted one coat of white over the stencil because, again, I was going for a more worn, rustic vibe.
Apply as many coats as you feel you need before moving on to the next step.
Because I was using permanent adhesive vinyl, I didn't want it to sit too long on there.
I removed the stencil right away and then let the paint dry before applying the frame.
Step 9: Nail the frame pieces to the sign
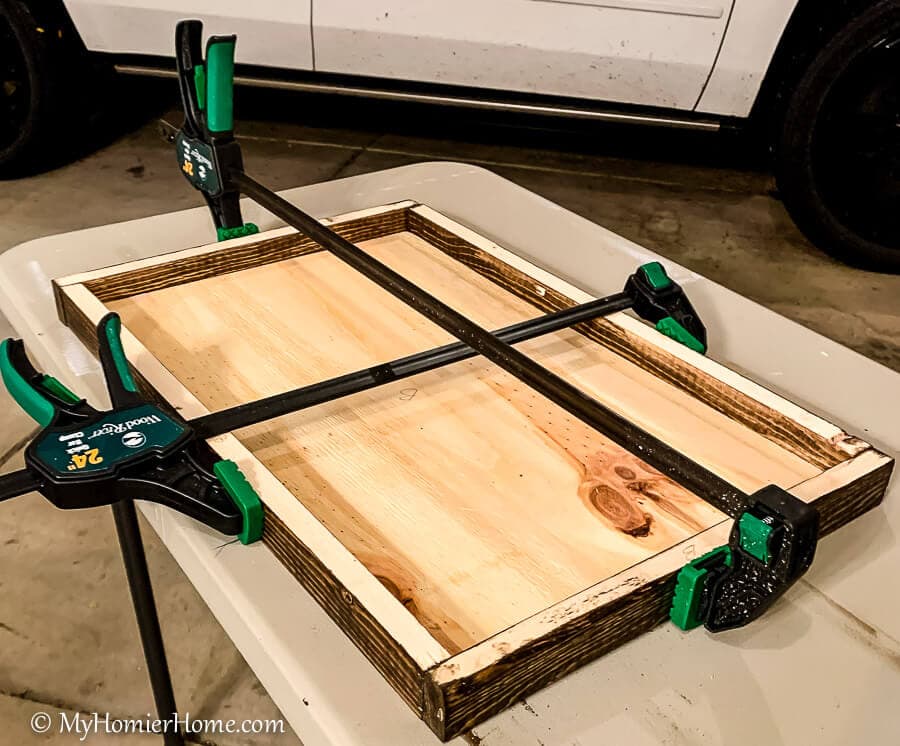
Once the paint was dry, I went back to the garage and laid out the frame with everything face down.
I made sure to check which sides were facing outwards and then clamped the frame to the sign.
With my brad nail gun, I nailed the top piece to the frame first. Be careful that you are lining it up as best you can with the middle of the plywood piece.
Then I nailed the sides to the top and then the bottom. I spaced my nails out about 2″ apart across all four sides.
Step 10: Hang your artwork
The last step, and the most fun, is to hang your artwork!
This Christmas sign gives me all the feels. I love personalized art!
What's Next?
Now it is time to head over to Amy's Holiday DIY. She made a dried fruit wreath! It is so gorgeous!
You can see everyone's Holiday DIY on the tour! These ladies are so talented!

- Jenna's Christmas Tree Wood and Yarn
- Lindsey's Christmas Countdown
- Morgan's Magnolia Wreath
- Chica & Jo's Pottery Barn Glitter Santa Knock-off
Did you enjoy this post?
Never miss another post again by joining the homier home squad. We'll even give you a free gift just ‘cuz. Simply opt in below.


What a cute sign! This is a great DIY!