
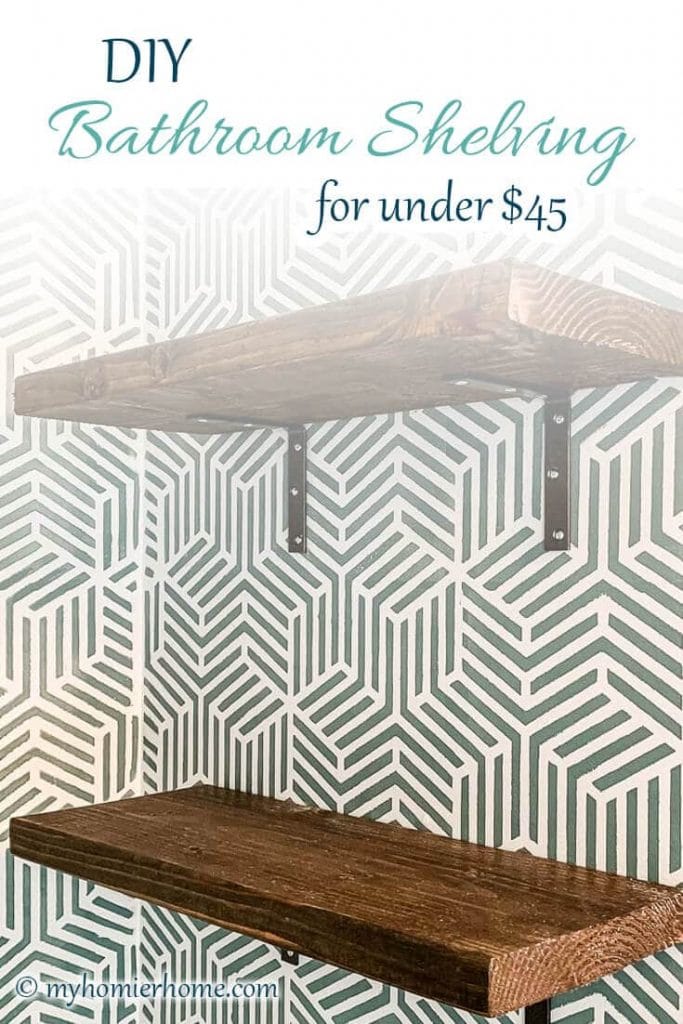
How to DIY Bathroom Shelving for Under $45
Looking to upgrade your bathroom on a budget? Make these DIY bathroom shelves for under $45.
It's week two of the $100 room challenge… and a challenge it is!
If you are just joining me, don't forget to check out my initial plan on how I'm going to transform my small bathroom makeover.
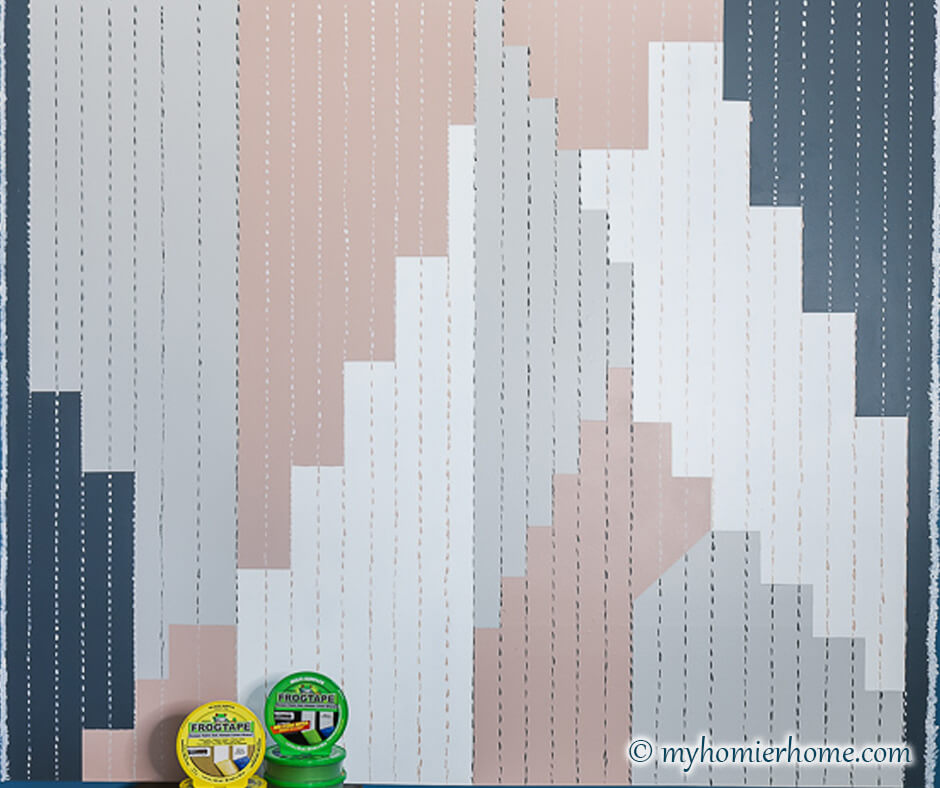
As of writing this post, I'm in the process of fixing my stencil, so stay tuned for next week when I share all the details on how I completed the stencil.
Week 1: Project Plan | Week 2: DIY Shelves | Week 3: Tips for Stenciling | Week 4: Final Reveal
Today, I'm sharing with you how I created DIY bathroom shelving for my small bathroom makeover for under $45.
Now I actually did this for around $20 because I had leftover stain and top coat from a previous project, so be sure to check your inventory before making all the purchases.
I included below a few optional items that make life easier, but aren't necessarily needed.
Some of those items you may have on hand too.
If nothing else, I would highly recommend the painter’s pyramid stands because they allow you to stain all the sides of your shelves at one time… genius!
Let's dive in to the steps on how to DIY bathroom shelving.
Table of contents
Disclaimer: This post does include affiliate links for your convenience. This is at NO additional cost to you but earns me a small commission. To read more, check out our disclosure policy. As an
Step 1: Purchase your materials
Necessary Materials
- 2″x12″ Piece of Wood
- Minwax Stain (Jacobean)
- Miniwax Polyurethane
- Foam Brushes
- L Shelf Brackets (I wish I bought these because I could saved some money on screws and spray paint)
- Or these L Brackets if you plan to spray paint them yourself
Note: You may have some of these items at home (i.e. foam brushes, stain, top coat) like I did and save yourself even more money!!
Optional Materials that Make Life Easier (not included in original cost)
- Sand Paper (Just to clean up the wood a bit if there are rough edges)
- Clean, Dry Cloth (Used to wipe excess stain from wood)
- Painter’s Pyramid Stands (Well worth the small cost)
- Gloves (optional to protect your hands when staining)
- Rustoleum Spray Paint (optional if you choose to spray paint your own)
- HomeRight Spray Shelter (Only if you end up buying metal L brackets from the hardware store and spray painting them)
- Circular Saw (Only needed if you buy your wood from a place that doesn't cut it for you – Home Depot cut mine to size in store)
- Multipurpose Laser Level (for this price, its worth making your life a little easier)
STEP 2: CUT YOUR WOOD TO SIZE (IF NEEDED)
Depending on where you purchase your wood, you may need to cut your shelves to size.
I had home depot cut the wood for me, so I didn’t need this step.
However, if you plan to cut the wood yourself, this would be the time to do it.
I chose to make my shelves 2″ x 12″ x 24″ because they are going over the toilet, but you can make them any size you want.
I would just make sure to allow a gap on either side so nothing is bunched up together.
STEP 3: LIGHTLY SAND THE WOOD
Depending on the state of your wood, you may not need to do this.
However, lightly sanding the wood does help ensure the wood is clean and smooth before applying your stain.
I used this step to make sure I was able to get rid of any sharp edges I saw.
If you do more than a light sanding, you may need a tacky cloth to remove the particles leftover before staining, but you could wipe your wood down with any cloth to make sure it is clean and smooth before applying your stain.
STEP 4: STAIN ALL SIDES OF THE WOOD SHELVES
Using your foam brush, apply the stain to all sides of the wood shelves.
Try to coat an even, thin coat of stain to start.
You may want to apply another layer of stain once it has dried, but I find with the Jacobean stain, one layer is perfect.
I was able to stain all sides at once because I was using the painter’s pyramid stands, but if you do not invest in these low-cost amazements, you may need to wait for one side to dry before staining the other side.
I also wore gloves, so I didn’t get stain on my hands when I was flipping the wood piece.
Before flipping the wood, be sure to let the stain soak in for the amount of time they suggest on the can before wiping the excess off with a clean dry cloth.
Step 5: Spray brackets (if needed)
If you go with the L brackets I have linked in the materials list, you will not need to do this step.
However, if you want to save a few extra bucks, you can purchase these brackets (affiliate link) and spray paint them any color you'd like.
This was cheaper for me because I already had the spray on hand, but I do think it would be worth the extra few bucks to buy the already done ones from the materials list if you don't already own spray.
For my shelves, I used Rustoleum spray paint (affiliate link) I already had in dark bronze and my HomeRight spray shelter (affiliate link).
If spraying, make sure to spray all sides of the brackets except the two sides that will be attached to the wall. I did this in one go, but be careful to really get the sides of the brackets.
I would double check with a good lighting to make sure before calling it done.
STEP 6: APPLY A CLEAR COAT TO THE WOOD SHELVES
After allowing the stain to dry according to the back of the can, it's time to put a polyurethane finish on the wood to seal it.
Using a spray or liquid, apply a top layer to all sides of the wood shelves.
Again, you may need to do this in two steps if you do not use the painter’s pyramid stands.
The top coat is to give it that finished look and seal the wood.
Allow the time necessary for the top coat to dry before attaching your brackets and hanging your shelves.
Keep in mind, it may require more than one layer of clear top coat depending on your desired look.
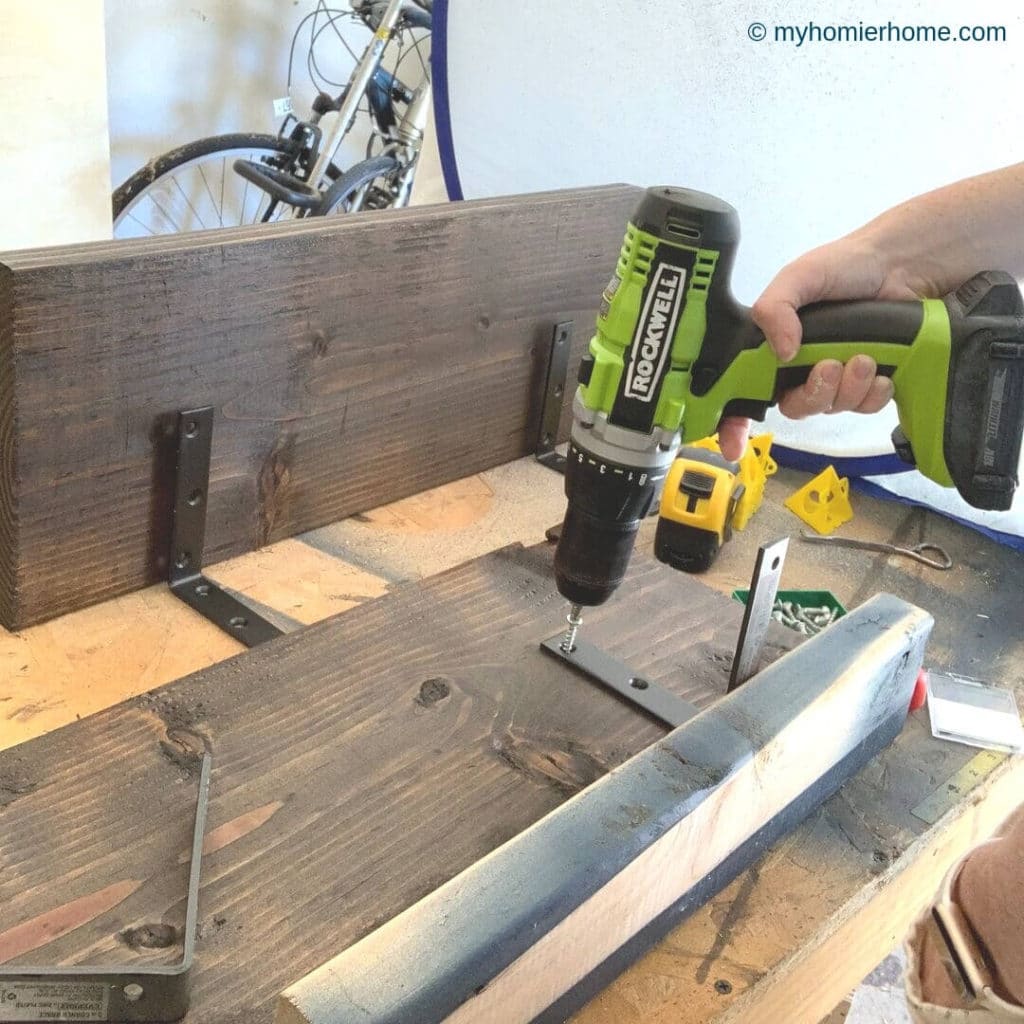
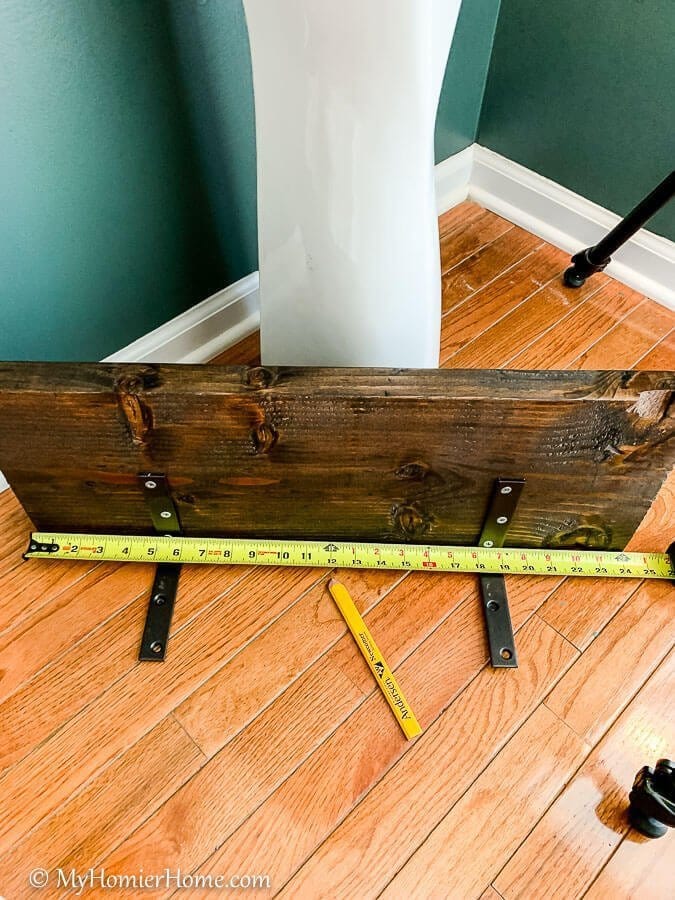
Step 7: Attach brackets to shelves
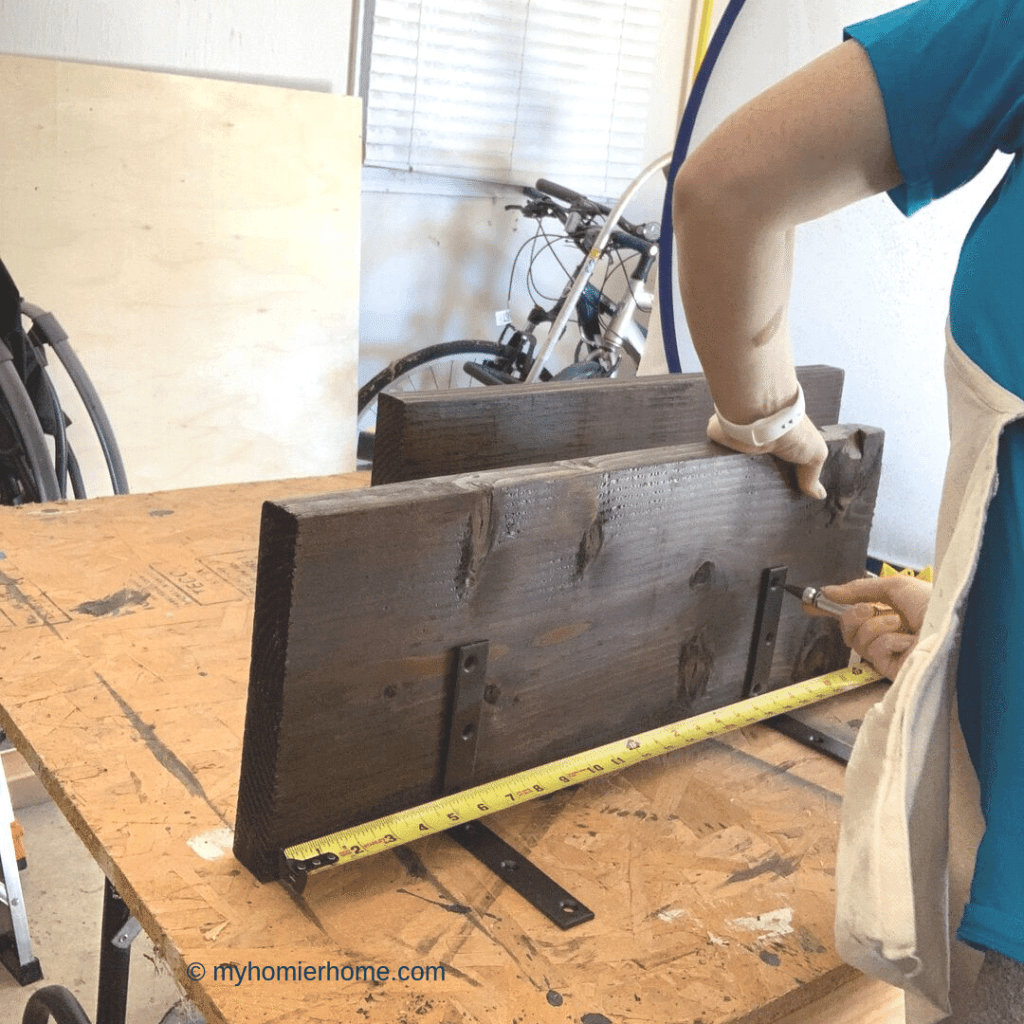
Place your shelf on the side that will be attached to the wall (the long small edge – see above picture).
Lay your brackets in front and measure the spacing you would like them to be from either end.
Mark the holes on the wood with a pencil. Once your holes are marked where they are supposed to be, use your short screws to screw the brackets into the wood.
Be sure to keep the brackets flush with the back of the shelf so they are aligned appropriately for hanging.
Step 8: Hang your shelves
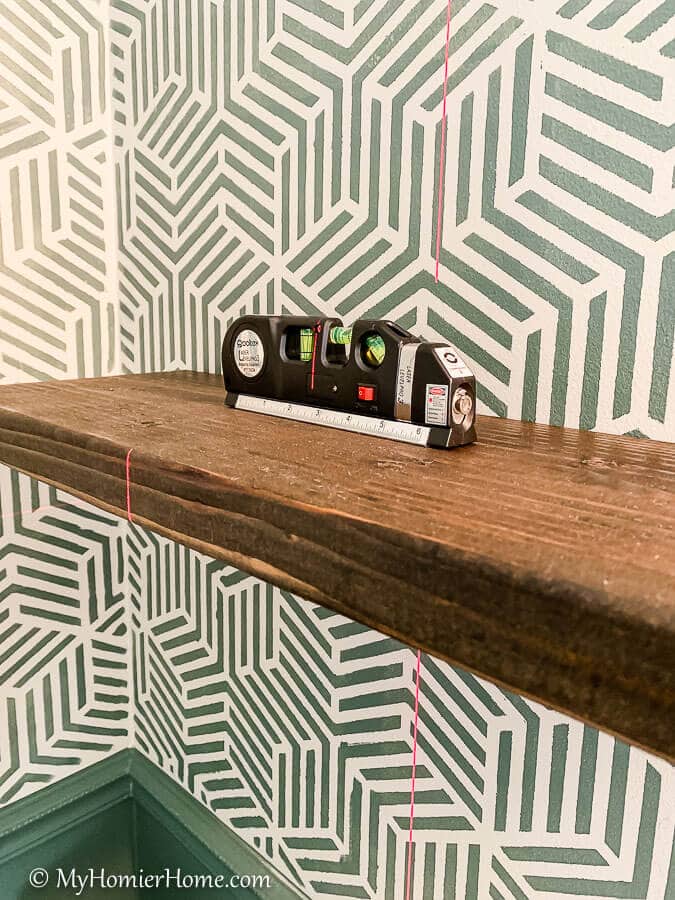
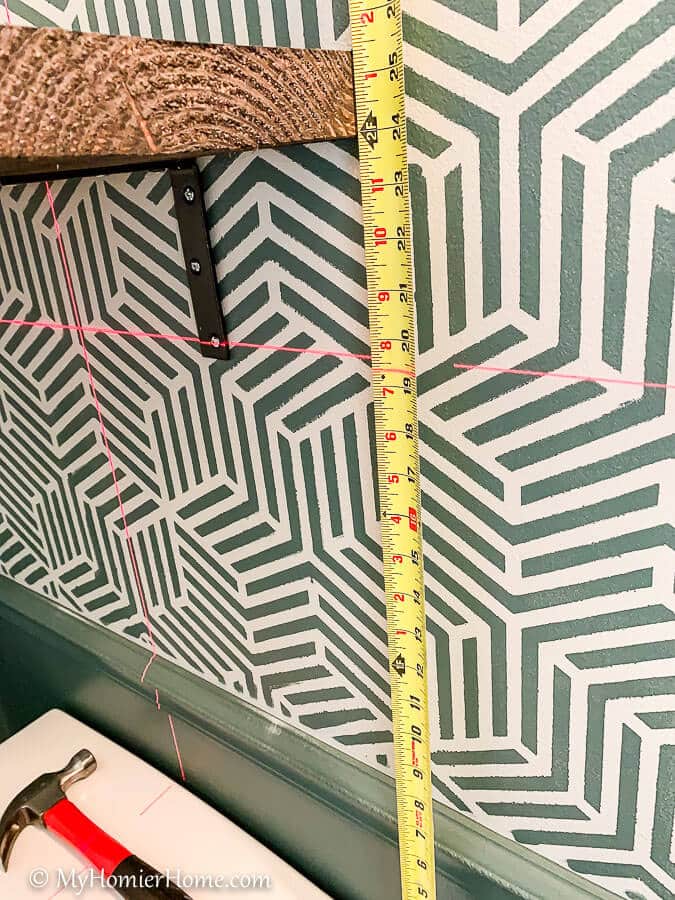
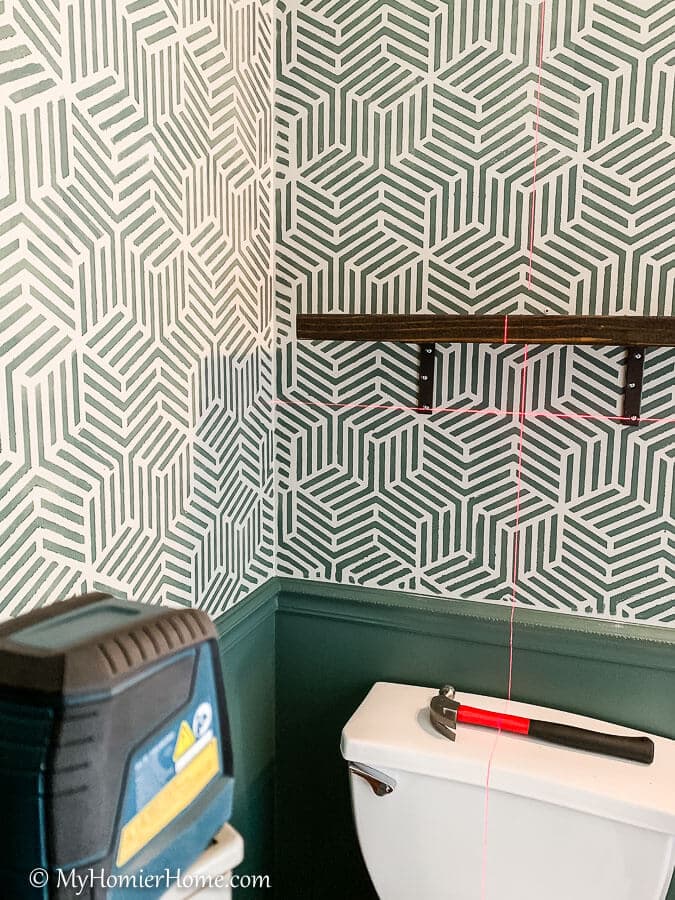
Once your brackets are attached, it’s time to hang these bad boys! I used a multipurpose laser level (affiliate link) that really helped make hanging the shelves straight much easier.
The key is to make sure you align the middle of your shelf with the middle of whatever you are hanging it over – in my case, the toilet.
According to Google, your first shelf should be about 2 feet above the top of your toilet and the second shelf 15″ above that.
I used a laser level to line up my shelves with the center of the toilet.
You can see a video tutorial of me hanging my shelves here starting at highlight #10.
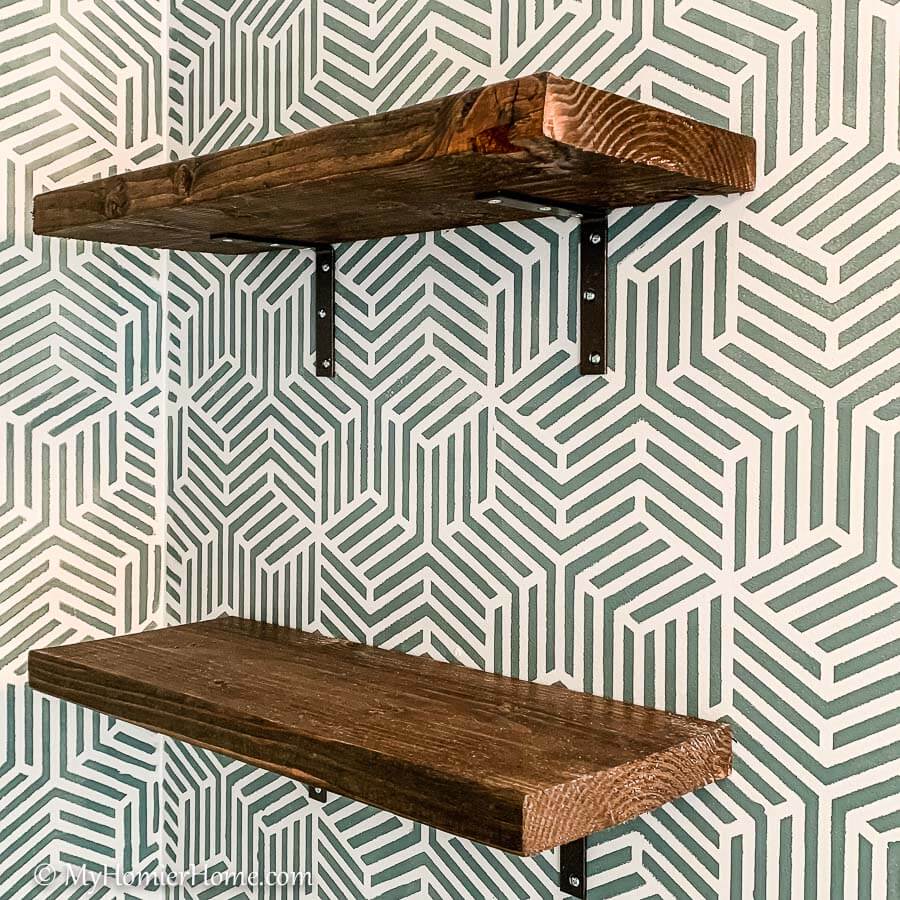
Aww ya, we’re done!
DIY bathroom shelves for under $45? Crushed it.
What do you think of the finished product?
Be sure to tag @myhomierhome on Instagram if you decide to give this a try! Stay tuned for next week's tips and tricks for stenciling and then the final $100 reveal coming soon!
Here's what I have left to do before calling this challenge complete:
TO-DO LIST
Clear out the bathroomTape the edges for paintingBuy paint and stencilPaint the top with Mindful Gray by Sherwin WilliamsPaint the bottom with Current Mood by ClareStencil the top part with Current Mood by ClareGet wood pieces cut to size for the shelves at Home DepotPurchase brackets for the shelvesStain the shelves (I already have leftover stain in Jacobean)Spray brackets (I already have oil-rubbed bronze Rust-o-leum spray)Apply top coat to shelvesAttach bracketsHang shelves- Fix the smudges from the stencil
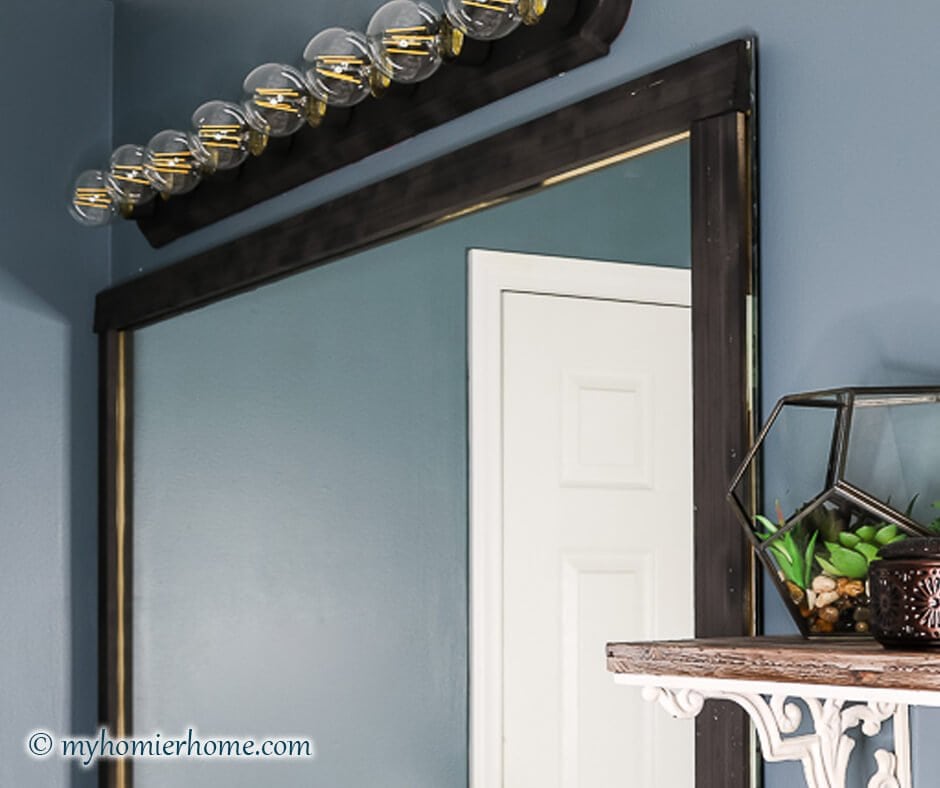
- Re-hang mirror
- Re-hang light fixture


I plan to make something similar for my room challenge bathroom as well. You make it look easy and they turned out looking so good! Thanks.
Aw, thanks! The shelves were super easy, but the stencil was somewhat of a labor of love considering my lack of knowledge going into it lol… Can’t wait to see your’s too!!
Wow. This is looking amazing, and I cant believe how much you have already accomplished! I’m making some similar shelves for our bathroom, but I havent really started yet. ? I can’t wait to see your reveal next week!
Thanks so much!! I did two weekends of serious head down to business lol, but I’m loving the results. Can’t wait to see yours too!
I’m obsessed with this pattern!!
I know, right? Etsy with the win!