
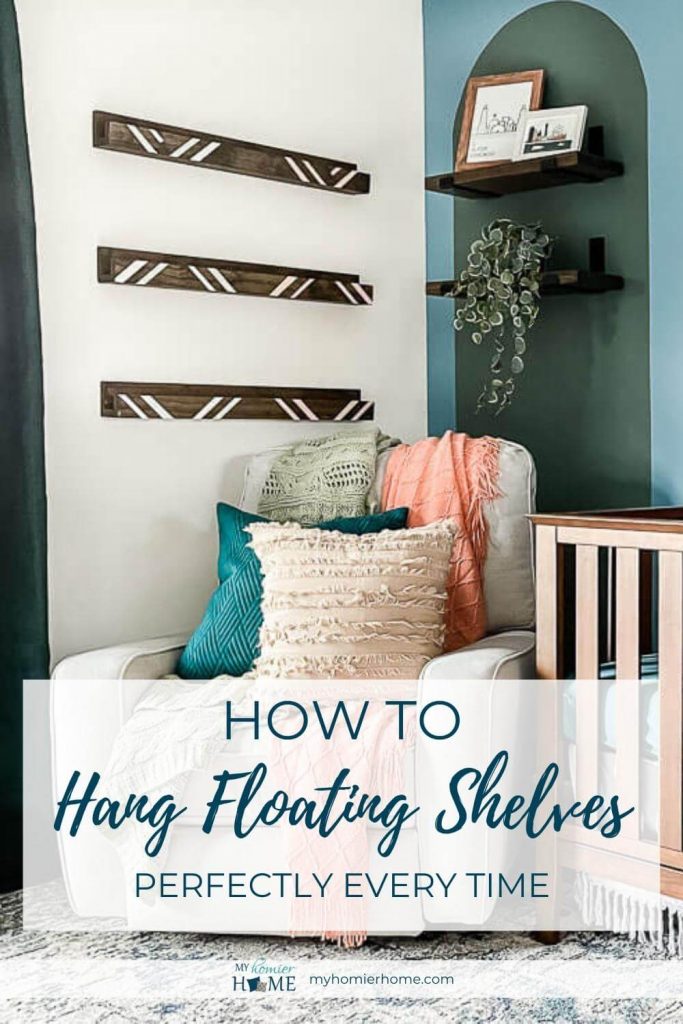
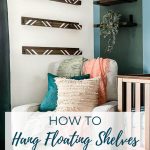
How to Hang Floating Shelves Perfectly the First Time
Learn how to hang floating shelves perfectly straight every time with this quick and easy method. Read how here.
Let me be honest.
I have a degree in mathematics.
I've taught every level of high school math over the course of the last 15 years.
And I'm terrible at measuring things lol.
I don't know what it is, but if I try to hang anything by using measurements alone, I'm doomed.
So today, I'm sharing with you my steps on how I cracked the code of hanging shelves, specifically floating shelves.
Literally I have hung five sets so far with this method and haven't messed up once.
WINNER!!
Now I get to share with you my tried-and-true process.
Let's get started!
Table of contents
Disclaimer: This post does include affiliate links for your convenience. This is at NO additional cost to you but earns me a small commission. To read more, check out our disclosure policy. As an
Materials List
Per usual, your first step is to gather all your materials.
- Drill
- Drill bits
- Laser level
- Stud finder
- Punch tool
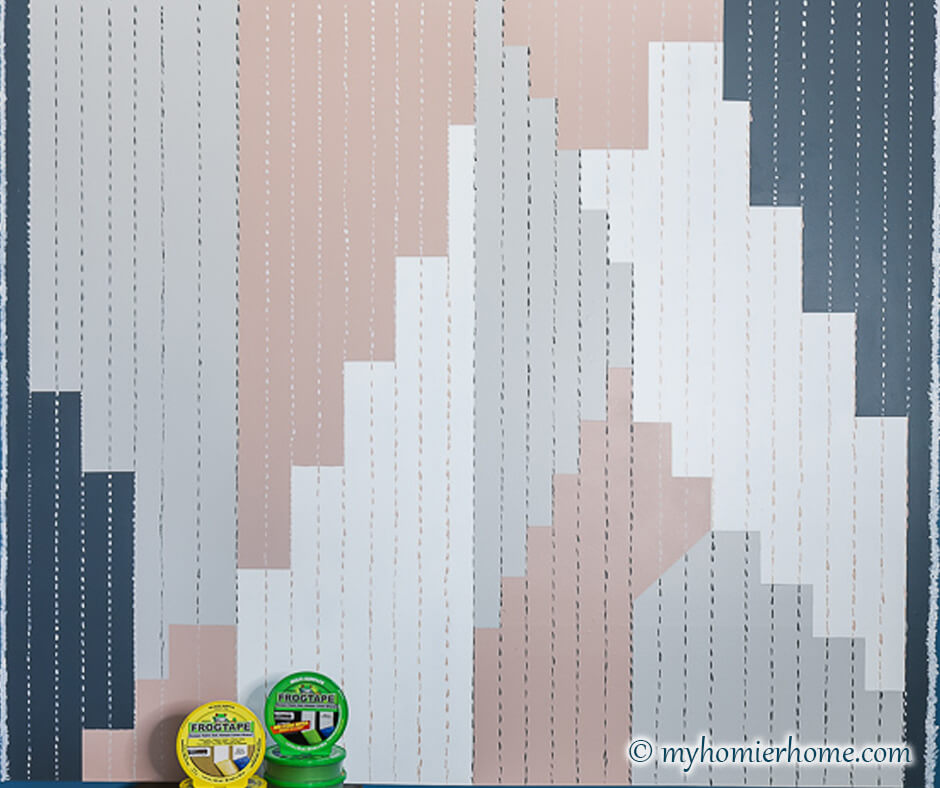
- Frogtape
- Mounting hardware
(click on any of the images to shop the products)

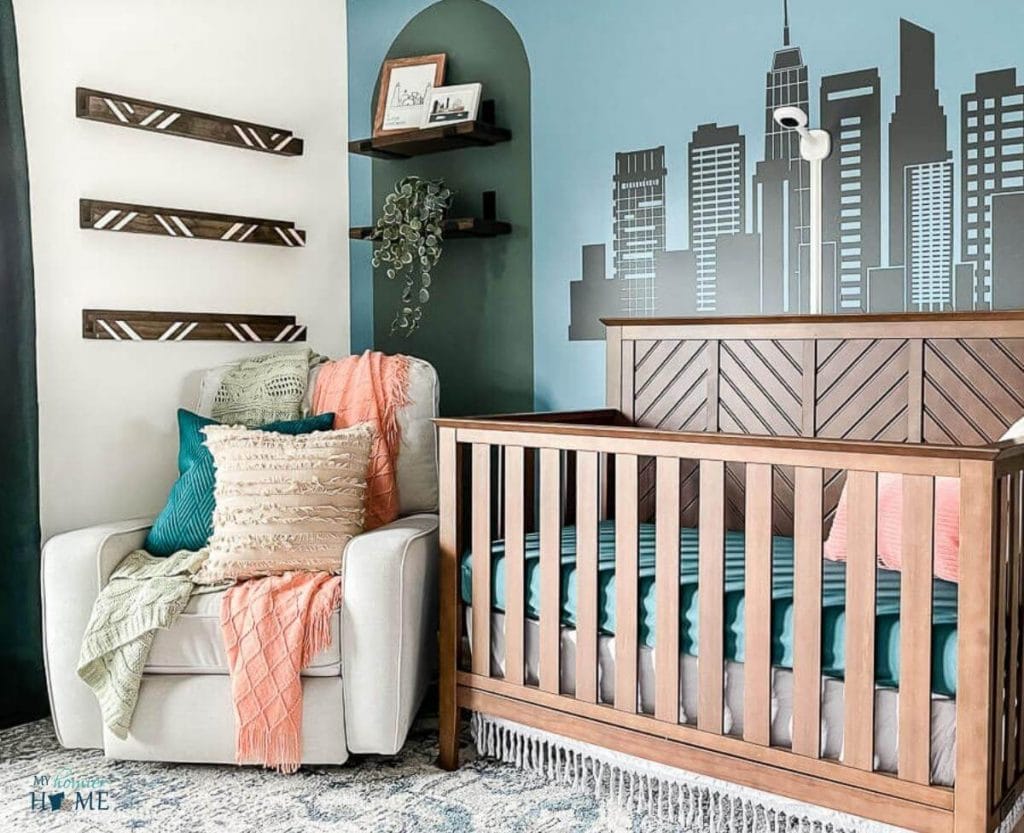
1. Use Frogtape to measure.
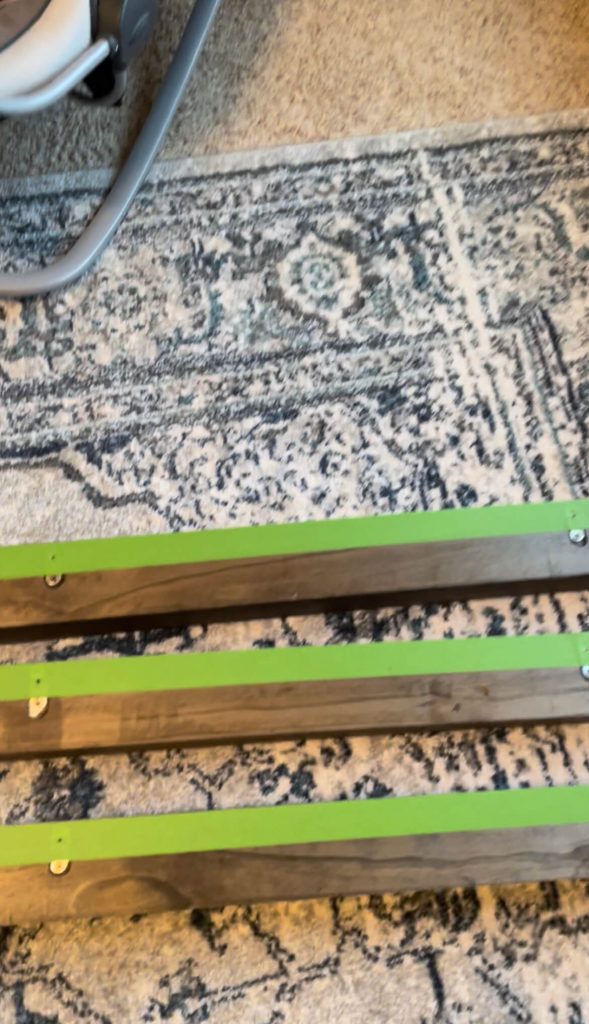
The easiest and most effective way to hang basically anything is to use Frogtape to measure the distance between the two holes.
Then you can take the tape off and put it on the wall to get the perfect distance.
Start by adding a full strip of tape aligned with the top of the shelf, edge to edge, and poke a hole where the mounting bracket screws will go.
Then add another piece of tape down one of the sides to get an idea of how much space length-wise the shelf will take up on the wall.
2. Mark all measurements.

Once you have the tape configured, remove it place it on the wall.
Determine the position of the shelves by measuring where you want the first shelf to go.
I started with the bottom shelf first and made my measurement 44″ from the ground to the lowest part of the shelf.
I then decided with the space I had to hang these that I wanted the shelves to be 10.5″ away from the wall.
Once I determined the distance from the ground and the distance from the side wall, I determined I liked the look of 9.75″ in between the shelves, from the top of one shelf to the bottom of the next.
3. Use laser level to align the holes in the tape.
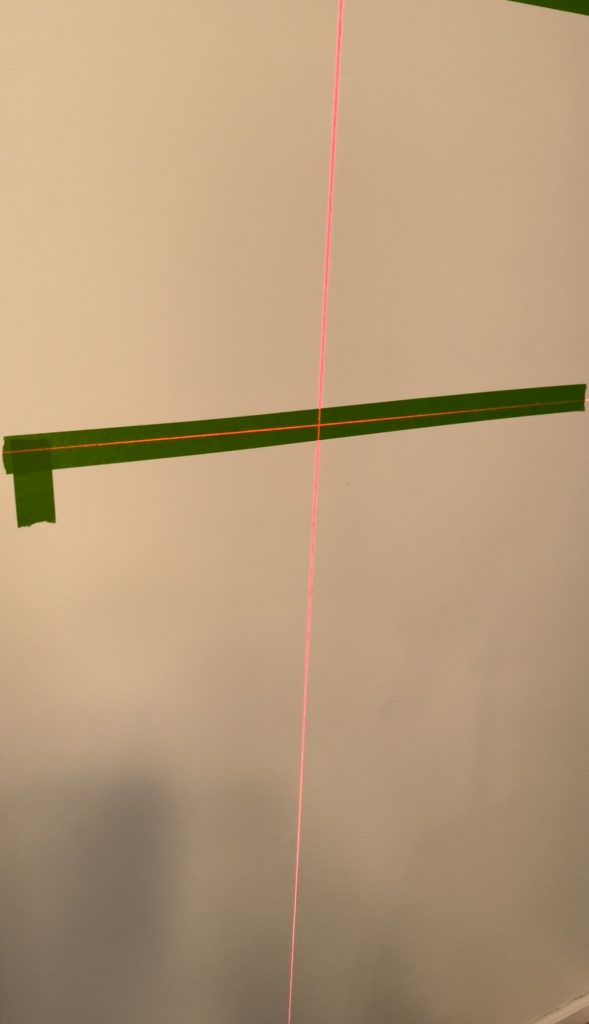
With your measurements written down, it's time to align the first shelf's tape using your laser level.
Be sure to align the screw holes with the laser line, not the actual pieces of tape.
I started with the bottom shelf first and used my measurements from the last step to get the right distance width-wise and length-wise.
Once you have your base shelf in the right position, use your measurements from step two to repeat with the next couple of shelves.
4. Double check the layout on the wall.
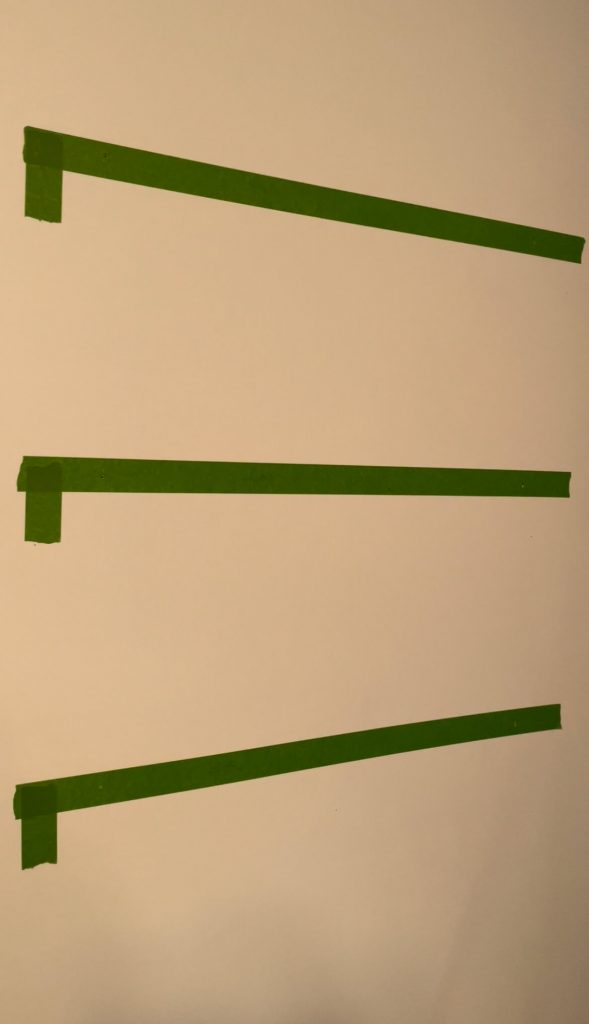
Before making any punch marks for the holes, step back and make sure you like the layout.
If anything seems office, change it now before you're left with 18 holes in your wall lol.
5. Use punch tool to mark holes.
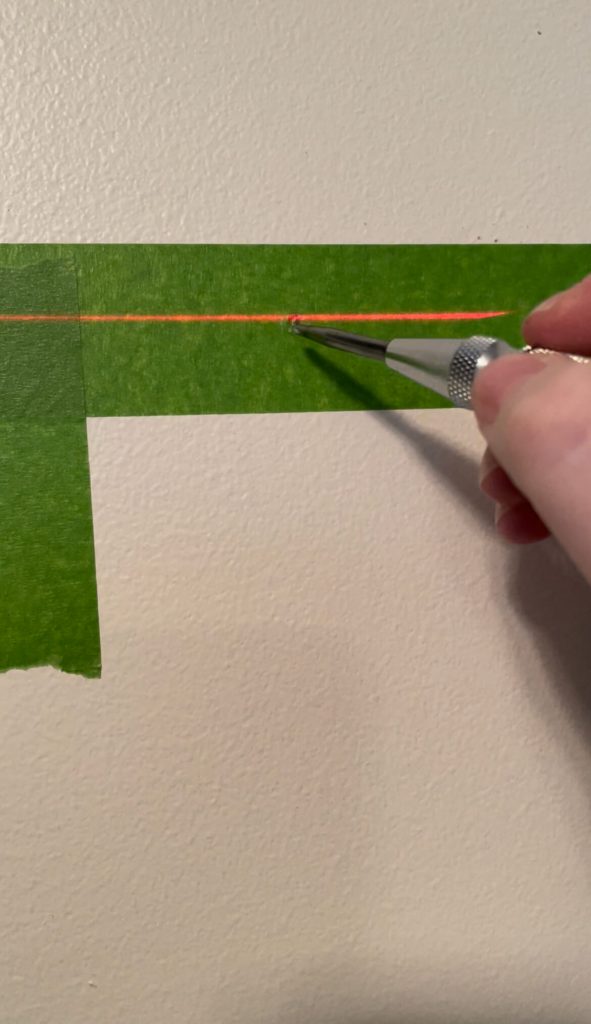
Once the layout is set, use your handy-dandy punch tool to mark the holes in the wall where your anchors (if not a stud) or screws will go once you've settled on the look.
6. Drill pilot holes to add anchors and screws.
Once you mark the holes with your punch tool, drilling the pilot holes is easy.
I started by removing the tape, but you could easily drill your pilot holes with the tape still on there if you don't have a punch tool.
Before you drill anything though, make sure you check if where you'll be drilling has a stud behind it.
I use my stud finder to double check.
If there is no stud, I pick a drill bit that is slightly smaller than my wall anchors.
If it is a stud, I pick a drill bit that is slightly smaller than the screws I'll be using.
Either way, you'll start by drilling your pilot hole and then add in your anchor, if needed, and then drilling in your screws.
I did all three shelves at once with this process because all that's left is to hang your shelves!
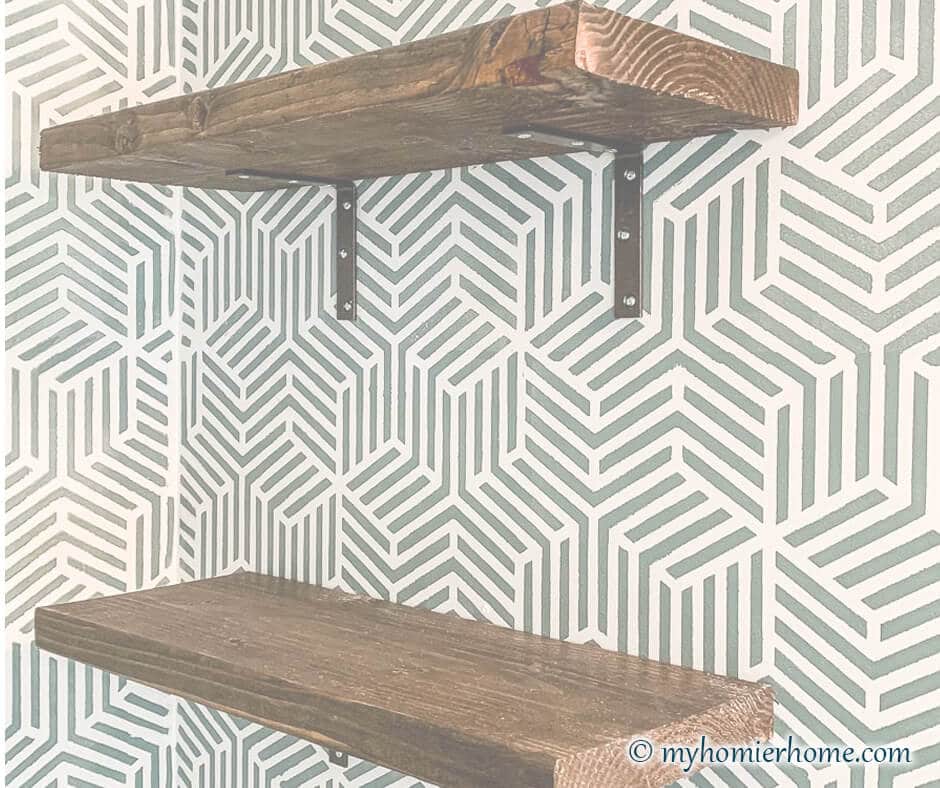
7. Hang your perfectly level floating shelves!
There is nothing better than drilling holes in the wall and the item your hanging actually fits perfectly in it's place.
One thing to be on the lookout for…
If you find that your holes and screws aren't matching up, it could be that you screwed the screws in on a slant.
Be sure to get your drill and screw square with the wall instead of coming at it from an angle.
If this happens, you'll have to back the screw out again and try to make it straight, but it's a lot easier to catch this at the beginning, so be aware my friend!
Disclaimer: This post does include affiliate links for your convenience. This is at NO additional cost to you but earns me a small commission. To read more, check out our disclosure policy. As an
Click any image below to shop it directly!
You can find links for everything in this room including the tools I used and the shelves I used in the pictures below.
(click on any of the images to shop the products)

This is awesome! Thank you so much for sharing these tips. Hugs to you.
Great tips! I recently started using frog tape to drill handle holes and it’s brilliant. Thanks for sharing.