
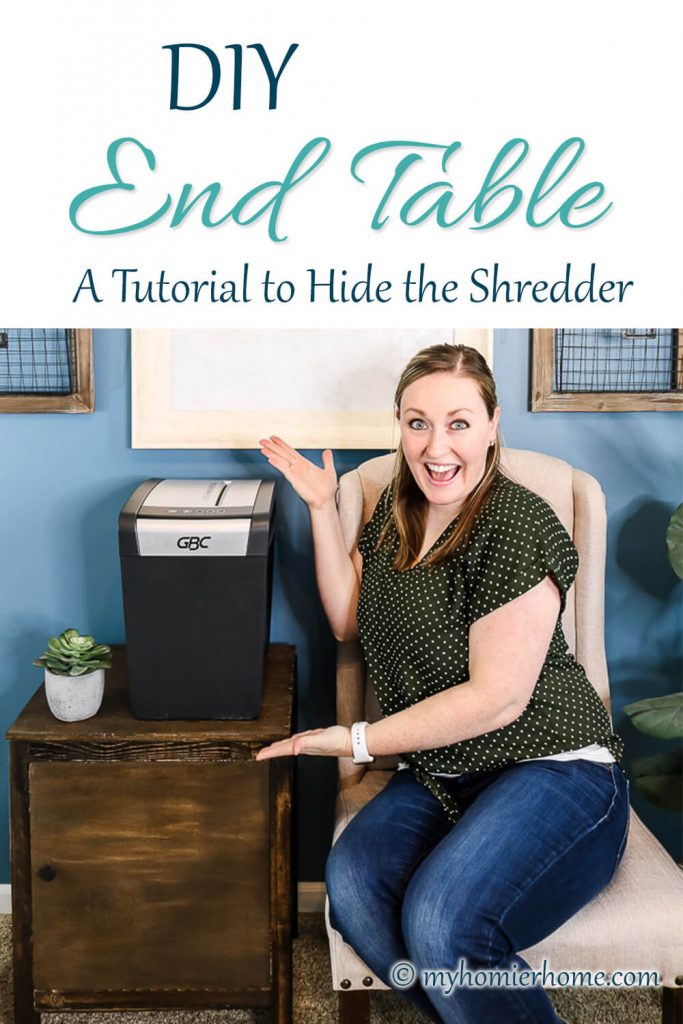
A DIY End Table Tutorial to Hide the Shredder
Want to hide your shredder? Create a DIY end table! This step-by-step tutorial will show you the exact way I created one to do just that.
Shredders are a fantastic way to get rid of secure materials, but they aren't always the best looking or fit nicely into the decor.
Since I'm all about beauty AND function over here, I decided to create a much cuter way to house my function driven shredder.
Here is the tutorial of how I made a DIY end table to house my new shredder. This tutorial is a spin off of the original tutorial from Woodshop Diaries. Let's get started!
Table of contents
- Before: The reason for building the DIY end table.
- 1. Measure the size you need to cover your shredder.
- 2. Gather your materials.
- 3. Cut all wood to size.
- 4. Build the two larger sides.
- 5. Build the smaller side off of one larger side.
- 6. Attach the third side.
- 7. Attach the bottom.
- 8. Attach the fourth side.
- 9. Build the top.
- 10. Sand the end table.
- 11. Stain & Seal the end table
- 12. setup & enjoy!
- Want to watch the video for this post?
Disclaimer: This post does include affiliate links for your convenience. This is at NO additional cost to you but earns me a small commission. To read more, check out our disclosure policy. As an
Before: The reason for building the DIY end table.
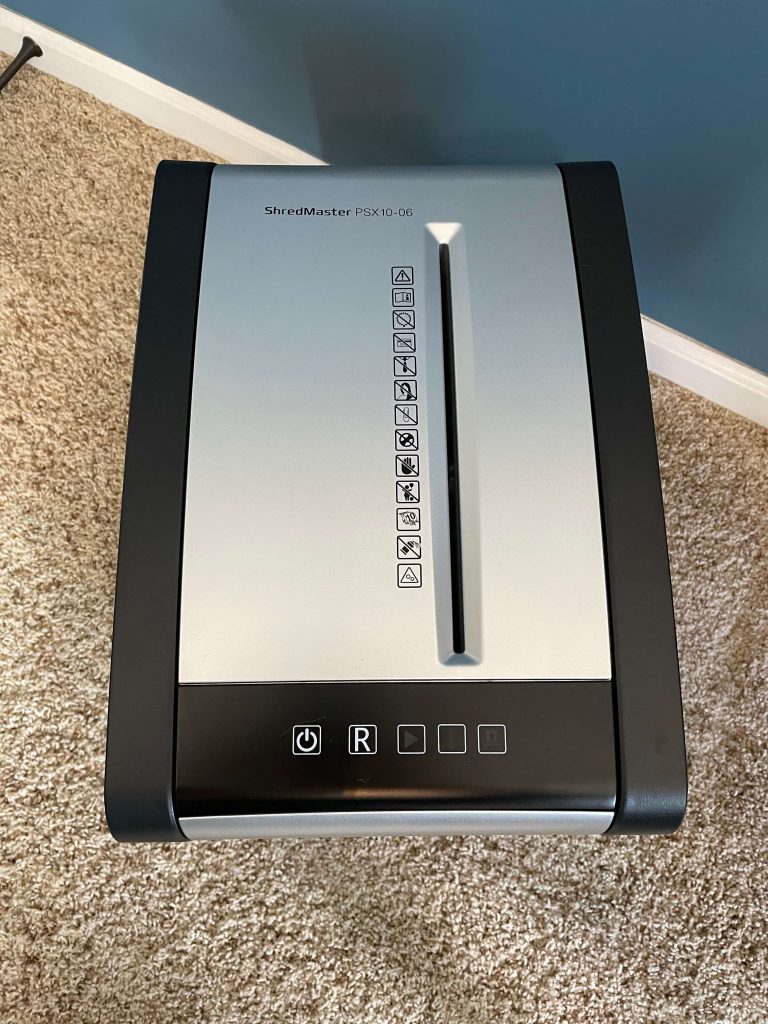
This is what we were working with before creating the DIY end table.
I was definitely ready to shred, but not ready to share beautiful pictures with the world.
Then I created some grand plans!
1. Measure the size you need to cover your shredder.
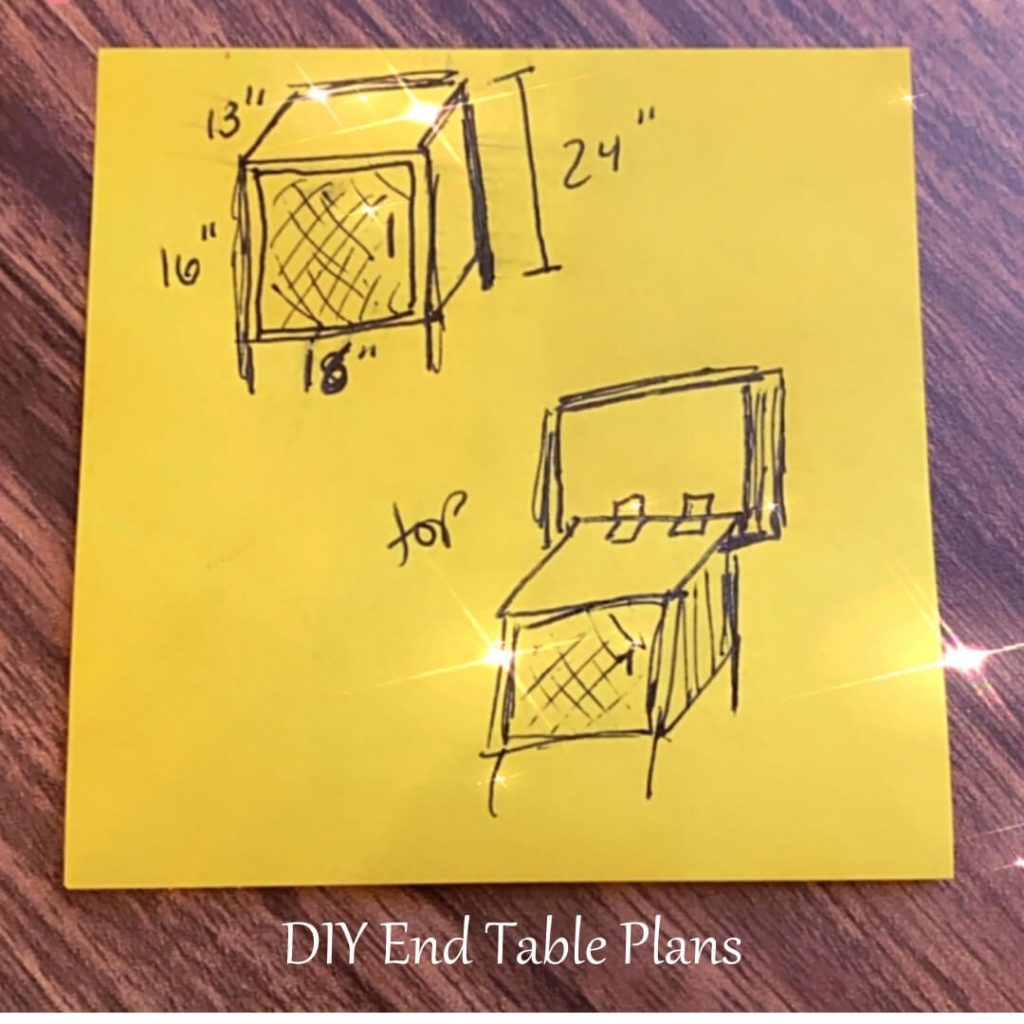
Of course, my grand plans started on a sticky note and a trip to Home Depot.
After measuring the width, length, and height of the shredder, we decided the DIY end table was going to have 24″ legs to give a proper height for an end table.
It was also going to need to be at least 16″ wide and 13″ long.
And, to make it still fully functional, a hinged top to access the shredder easily.
2. Gather your materials.
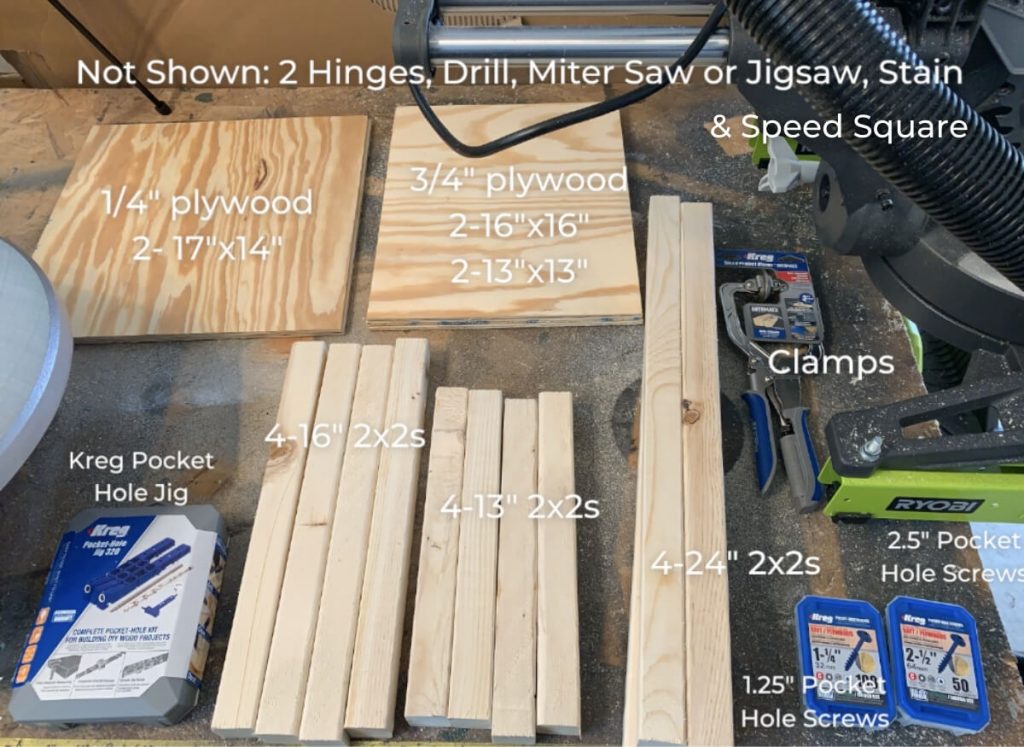
Listed above are all the materials we used to create this DIY end table with the exception of a 17″x14″ piece of 1/2″ plywood that I also used for the top portion as well as the stain and protective finish.
But, for good measure, here are links to items I used:
Note: You will need three 2x2x8's and at least one sheet of 3/4″ plywood and one sheet of 1/4″ plywood.

(click on any of the images to shop the products)
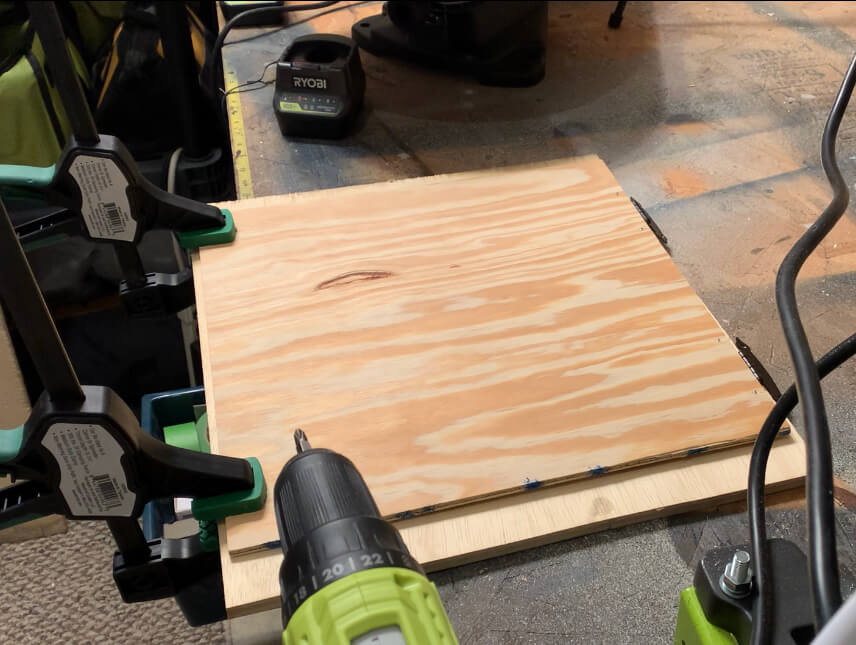
3. Cut all wood to size.
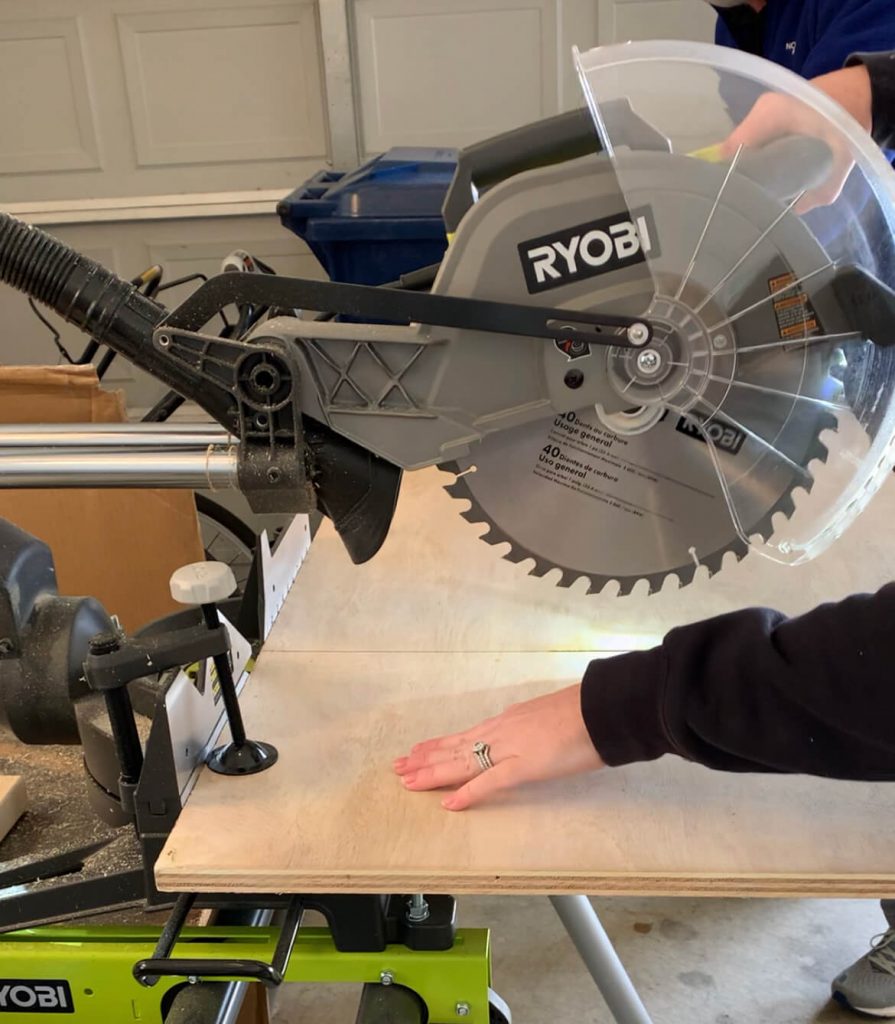
I would probably have Home Depot do this for you, but if you need or want to do this at home, here are the sizes you'll need for this project.
- 4 – 24″ 2x2s
- 4 – 16″ 2x2s
- 4 – 13″ 2x2s
- 2 – 16″x16″ pieces of 3/4″ plywood for the longer sides
- 2 – 13″x13″ pieces of 3/4″ plywood for the shorter sides
- 2 – 17″x14″ pieces of 1/4″ plywood for the top and bottom (you could use 3/4″ for the bottom as well)
- 1 – 18.75″x16.5″ piece of 3/4″ (or 1/2″) plywood for the top cover
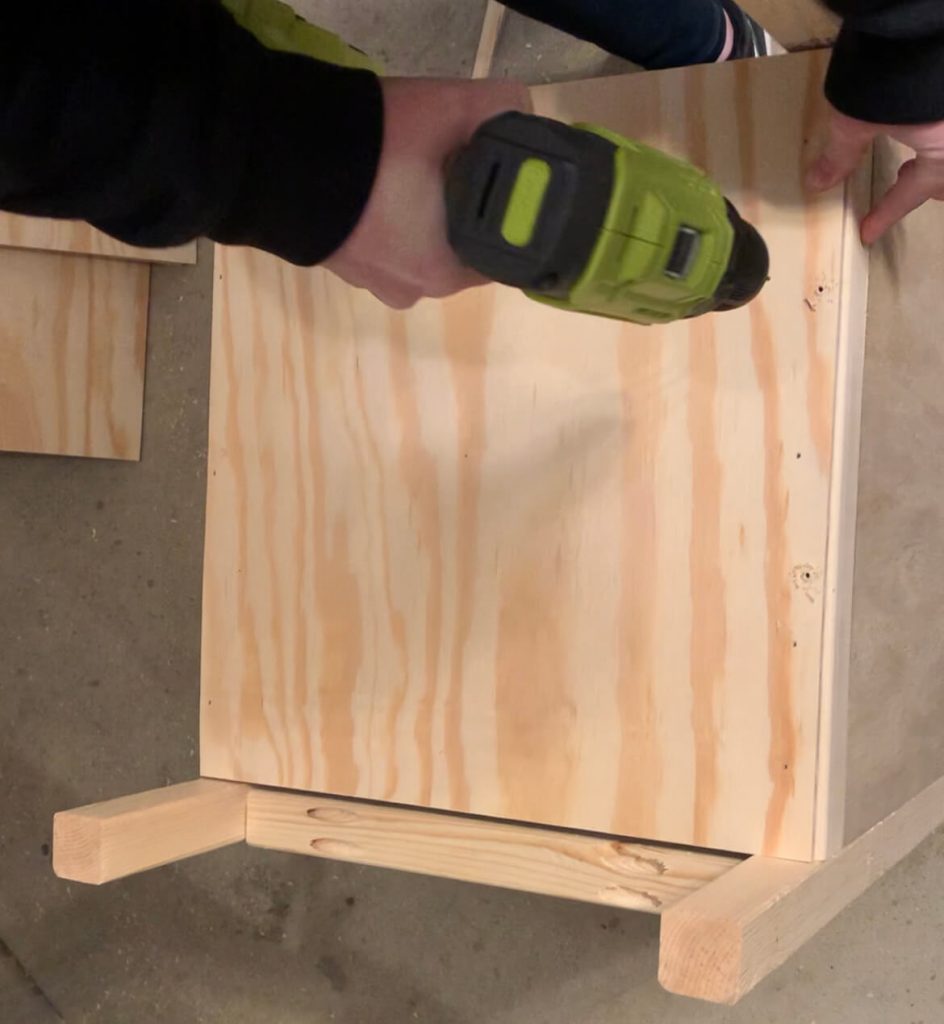
4. Build the two larger sides.
First, lay out the two 24″ 2×2 legs and one 16″ 2×2 with the 16″x16″ plywood piece to make sure everything will fit snuggly.
If it doesn't, now is the time to make adjustments with your miter or jig saw.
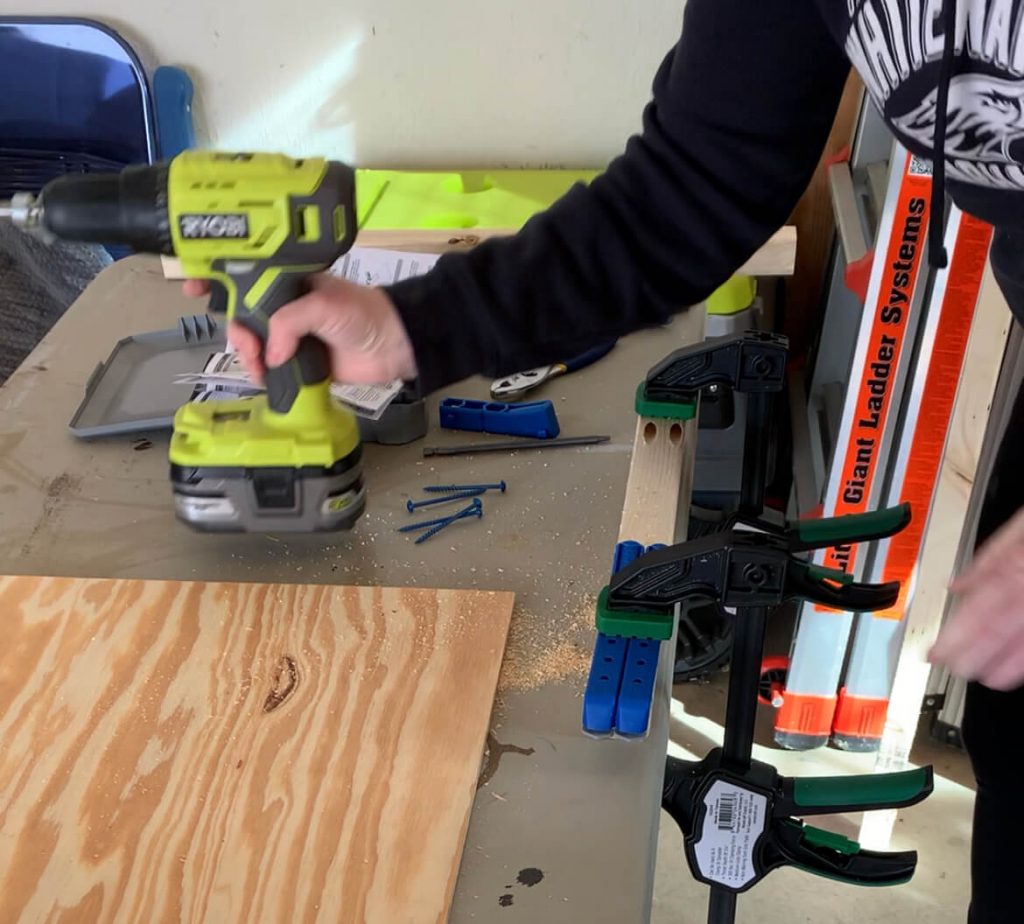
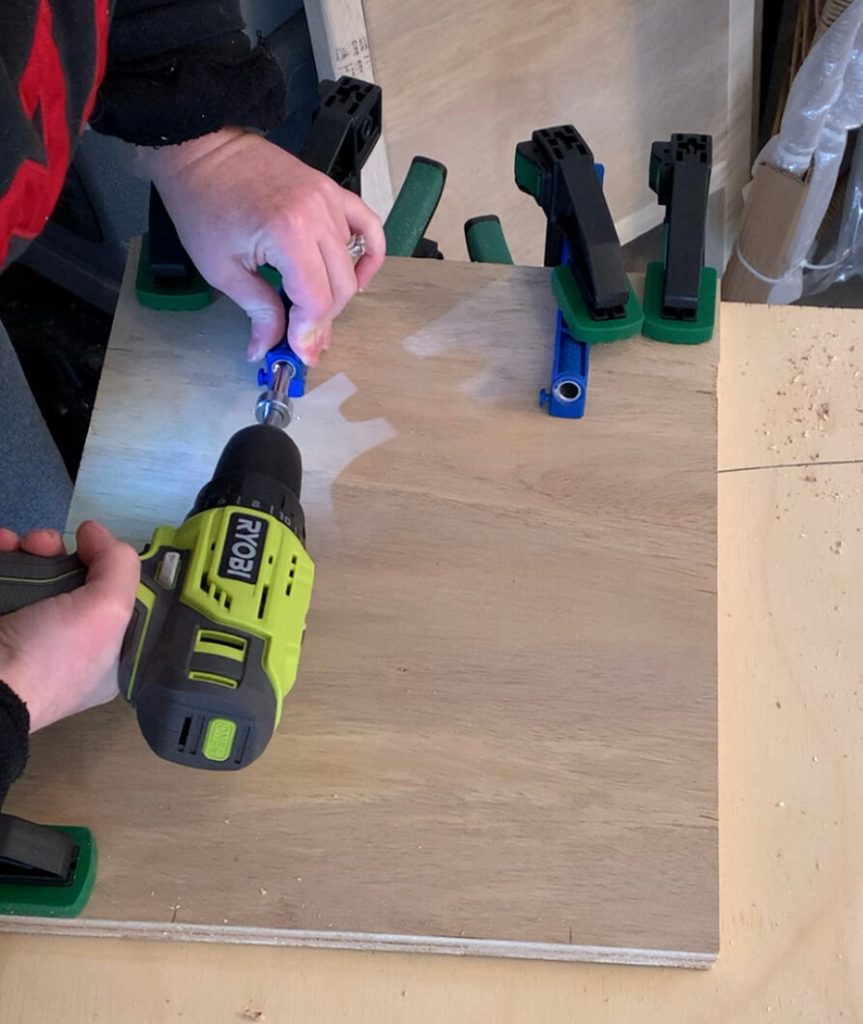
Next, adjust the pocket hole jig and the drill bit to the 1-1/2″ setting. The video gives a more detailed visual on how to do this, but remember for all pocket holes on the 2x2s, you will use the 1-1/2″ setting.
Create two pocket holes, side by side, on both ends of each 16″ 2×2.

Next, you will want to drill single pocket holes at setting 3/4″ on both 16″x16″ pieces of plywood.
Don't forget to adjust the pocket hole jig AND the drill bit.
I did 3 pocket holes on every side.
Next, you'll want to lay it out as shown above and use your 2-1/2″ screws to secure the middle 2×2 to each of the legs.
I would suggest using clamps to make sure it doesn't move on you as you are drilling.
Once the outer edge is affixed, use your 1-1/4″ screws to secure the plywood to the legs as well.
Repeat for both 16 inch side panels as shown below.

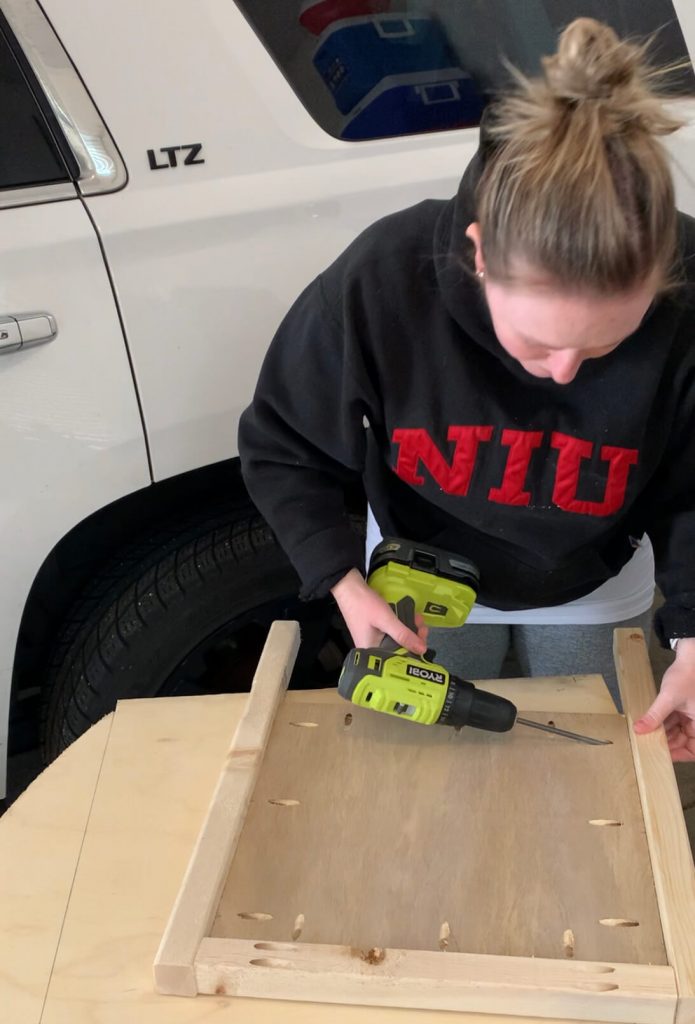
5. Build the smaller side off of one larger side.
Your pocket hole jig and drill bit should still be set to the 3/4″ setting.
Use this setting to drill your pocket holes into the 13″x16″ sides.
For these smaller sides, I did 3 pocket holes along the 16″ sides and 2 pocket holes along the 13″ sides.
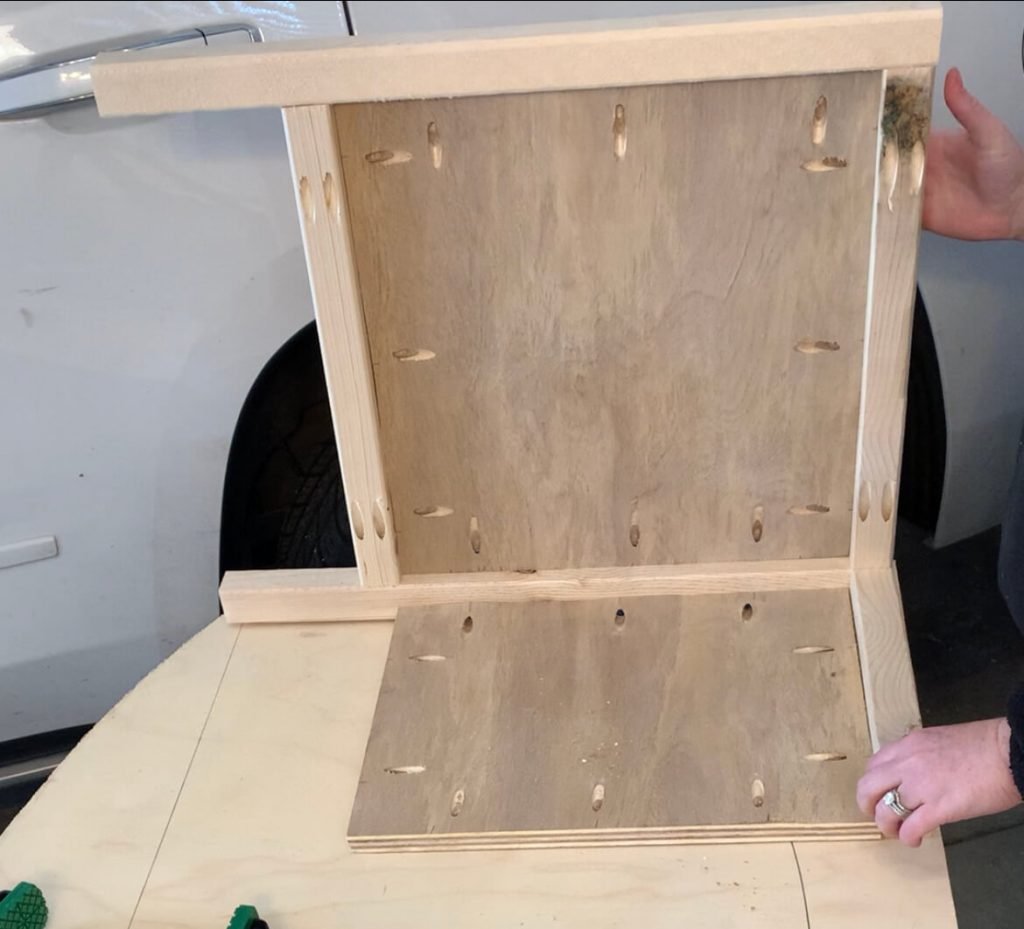
Use your 2-1/2″ screws to secure the 13″ 2×2 to the 16″ side panel as shown. (Note: the pocket holes should be facing up on that 2×2 – I made a mistake there where my hand is).
Then, use your 1-1/4″ screws to secure the 13″x16″ plywood to the leg as shown above.
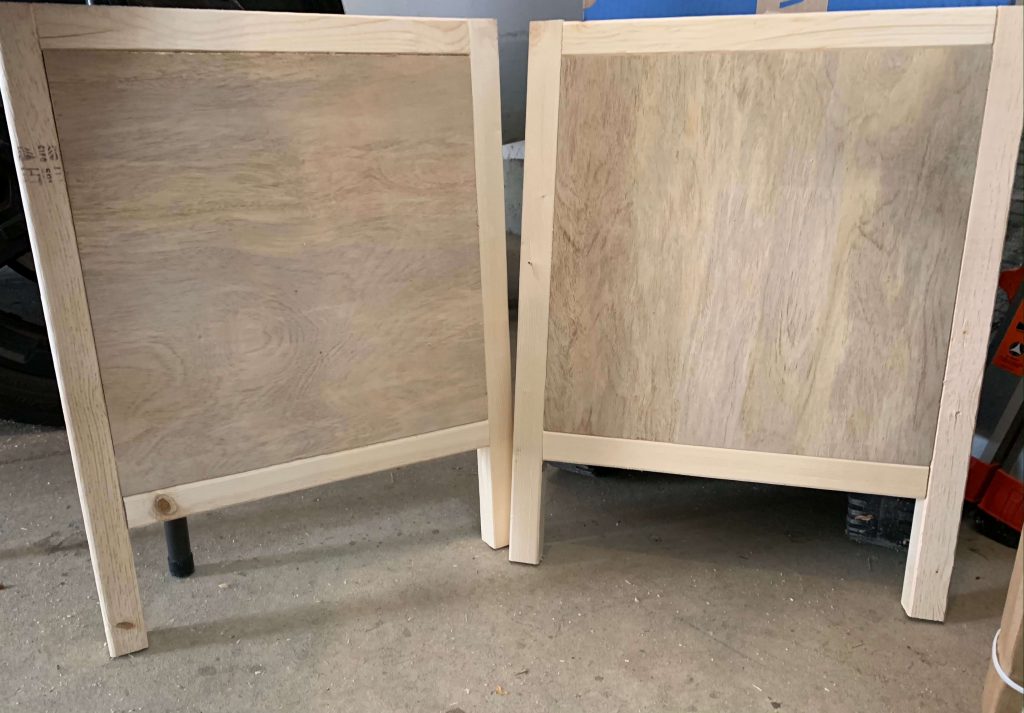
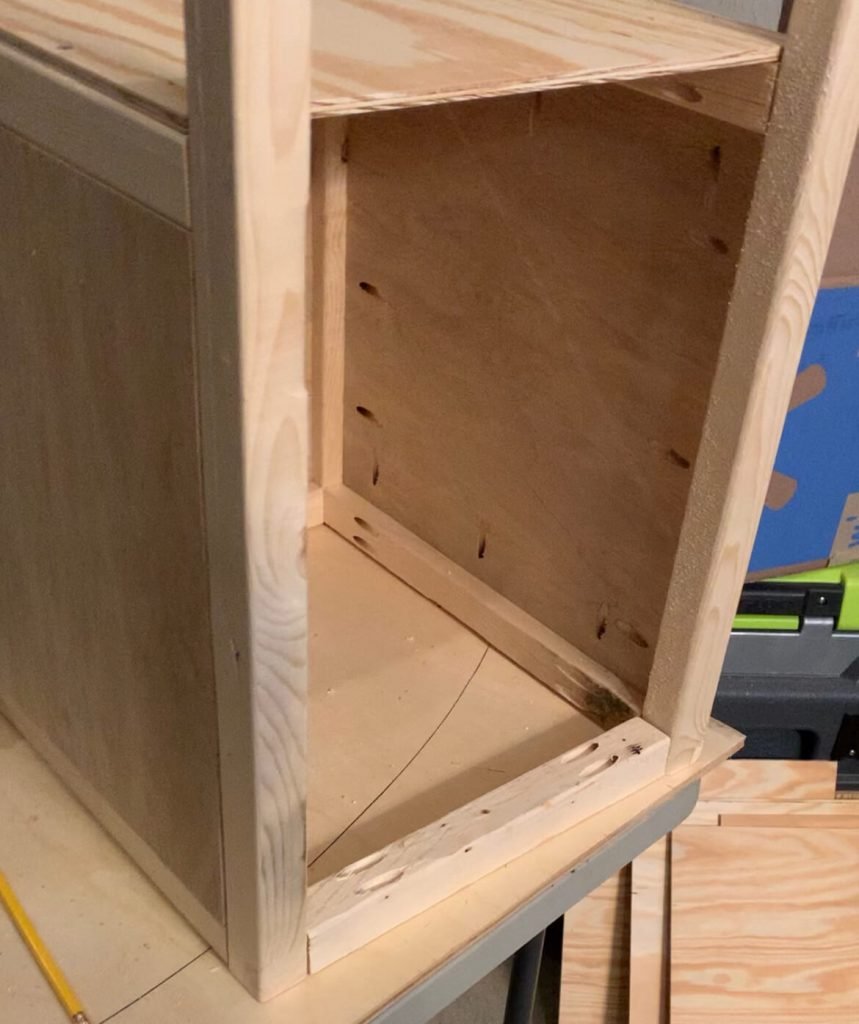
6. Attach the third side.
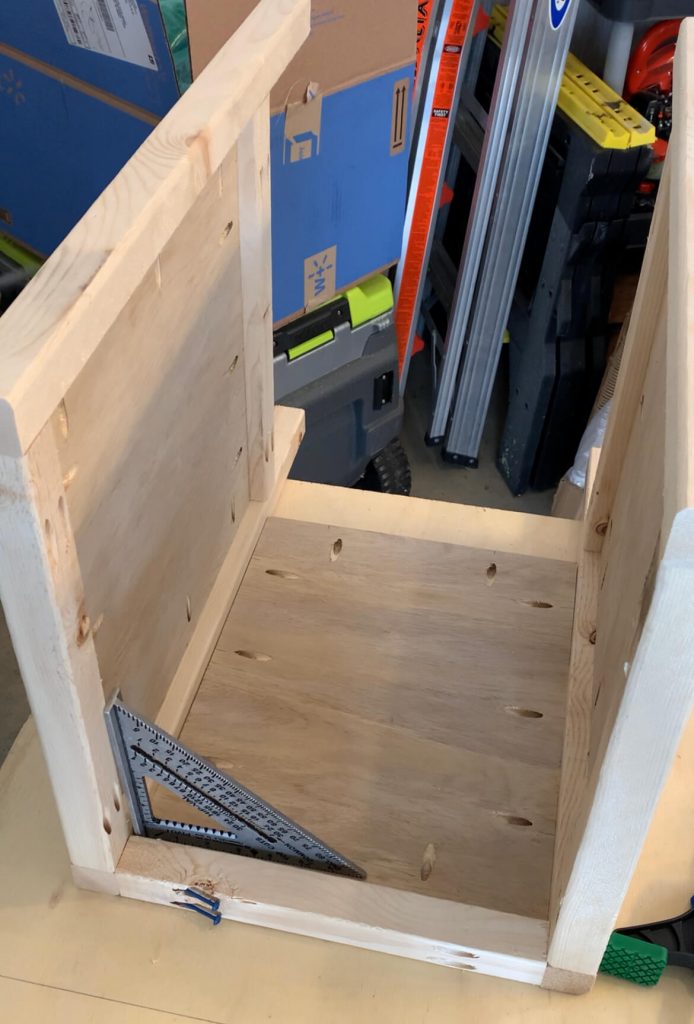
After you connect two sides, you are going to take the other 16″x16″ side you built and secure it to the 13″x16″ side.
I used my speed square to help me keep these sides square.
Again the pocket holes and screws on the 2×2 at the bottom of the picture above should be facing up.
Using your 2-1/2″ screws, secure the 2x2s together and then using your 1-1/4″ screws, secure the 13″x16″ plywood bottom piece to the leg on the left.
Lastly, for this side, you'll use your 2-1/2″ screws to attach the bottom 2×2 to each leg.
7. Attach the bottom.
I paused here and added my bottom piece. I used a piece of 1/4″ plywood, but you could use 3/4″ if that's what you have (you can watch the video for my reason).
I used my nail gun to secure it to the outer legs and then used four 3/4″ screws to make sure it wasn't going to go anywhere.
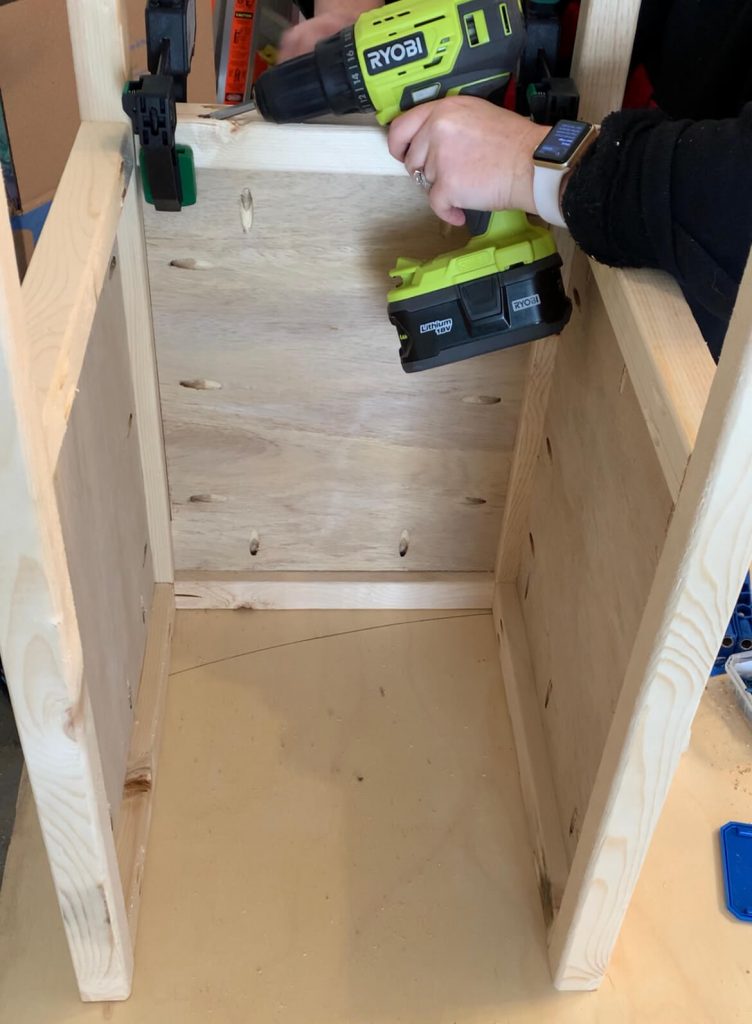
8. Attach the fourth side.
After you secure the bottom, it's time to attach the last side.
Attach the 13″ 2×2 to the legs using your 2-1/2″ screws.

Then attach the 13″x16″ piece of plywood to the legs and the top 2×2 using your 1-1/4″ screws.
You'll notice I do not have the last 2×2 attached on the other side in the above picture. I actually opted to not attach it to make room for the plug to come through.
You definitely could attach it and then make a hole in the bottom or side for the plug, too.
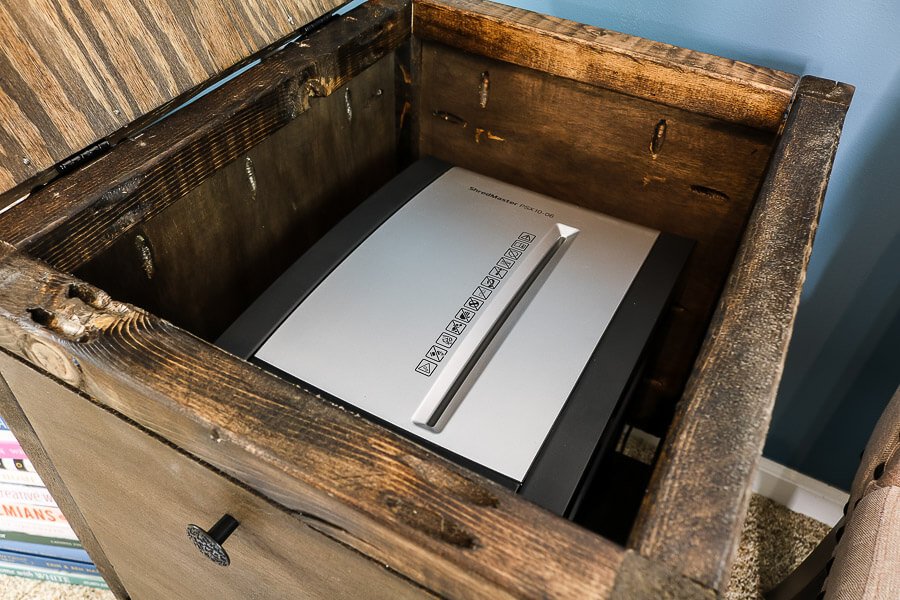
9. Build the top.
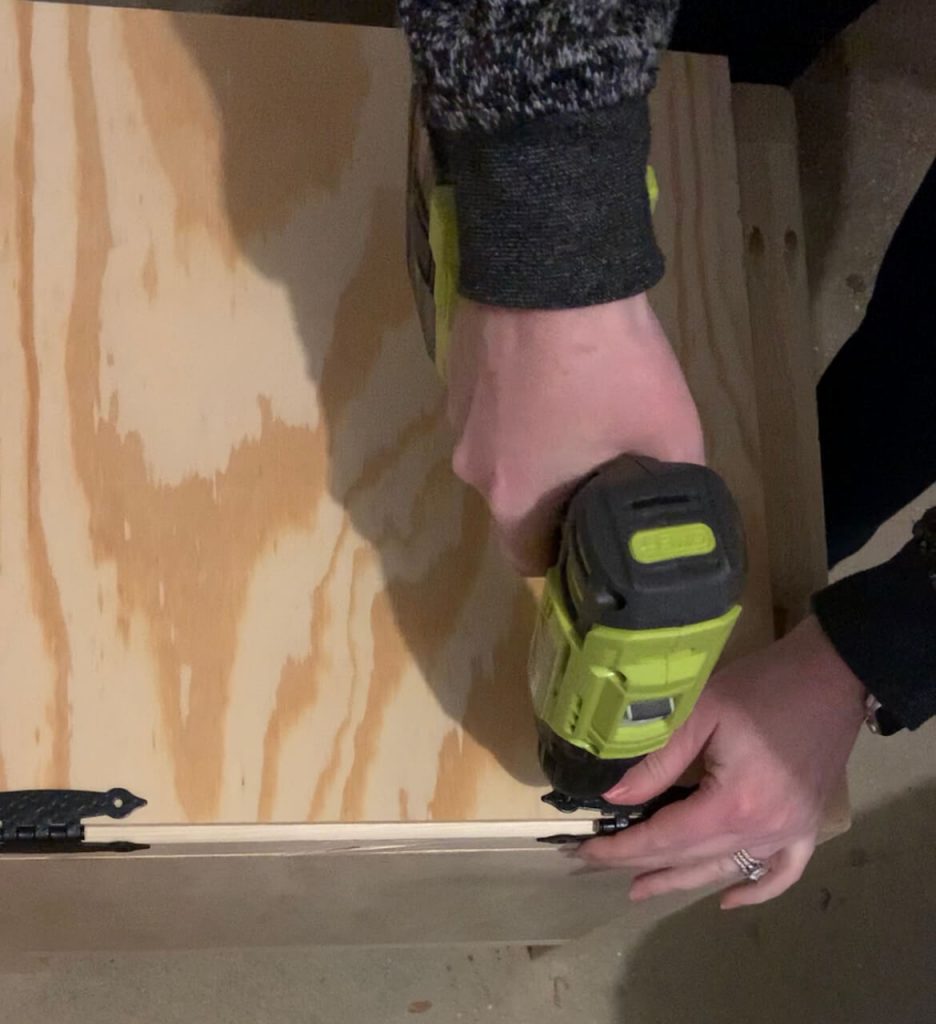
Building the top was kind of an “on they fly” portion of this DIY end table.
I started by attaching the 17″x14″ piece of 1/4″ plywood to the base using two hinges.
I chose the flattest cabinet hinges I could find.
Then I took a scrap piece of 1/2″ plywood (because I ran out of 3/4″ plywood) and cut it to a size of 18.75″x16.5″ – basically just a little bit bigger on each side.
I positioned it the way I wanted it to look and then clamped it to the 1/4″ piece with the hinges.
I could have probably also used some wood glue, but I ended up unscrewing the hinges from the base and took four 1/2″ screws and drilled them in from the underneath to secure the two pieces.
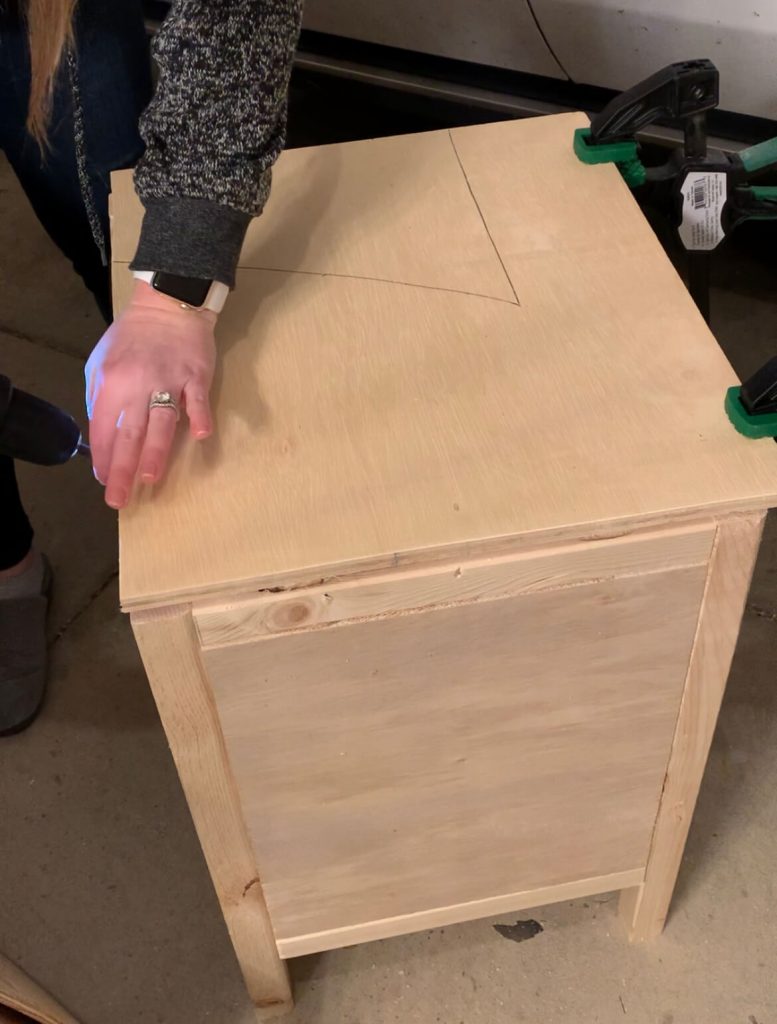
10. Sand the end table.
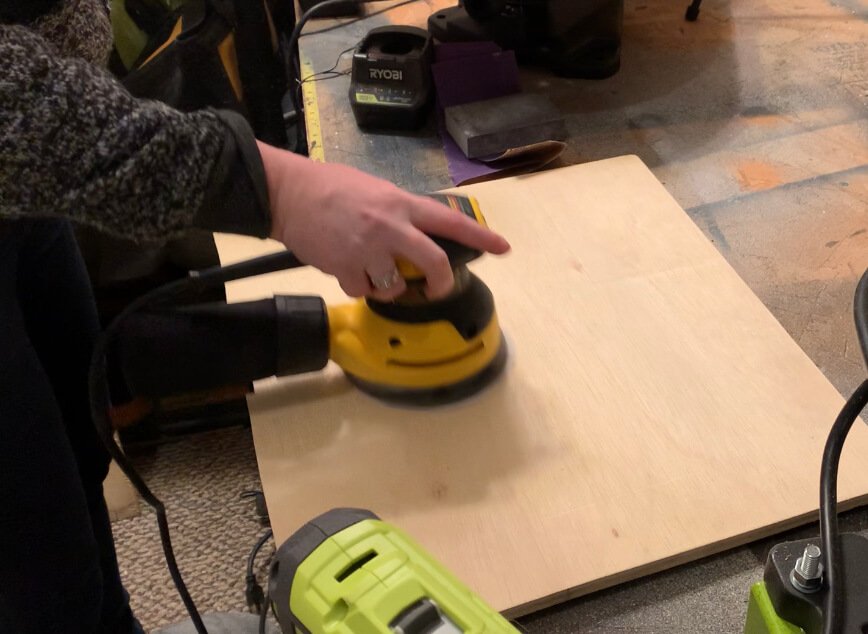
Once everything was built, I took my sander and lightly sanded both the top and the base using 220 grit sandpaper.
11. Stain & Seal the end table
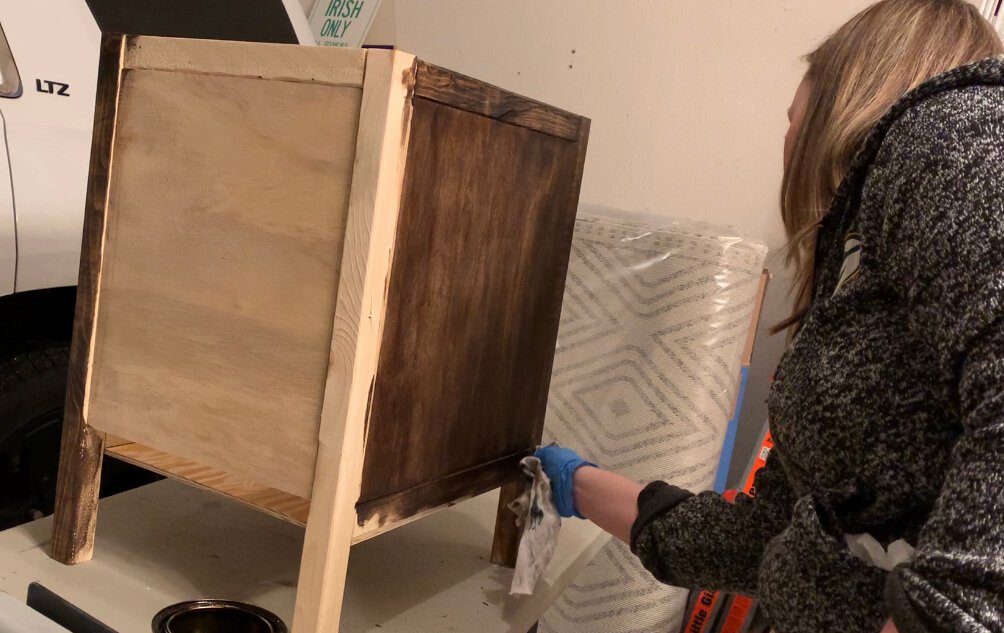
I wiped everything down with a tacky cloth before taking a clean cloth and my favorite Minwax stain, Jacobean, along with my gloves and wiped the stain on both the inside and outside of the base and the top piece.
I did only one coat to achieve this color.

Last, but not least, I took the Minwax polycrylic protective finish in clear matte and applied three coats following the directions and using a synthetic paint brush.
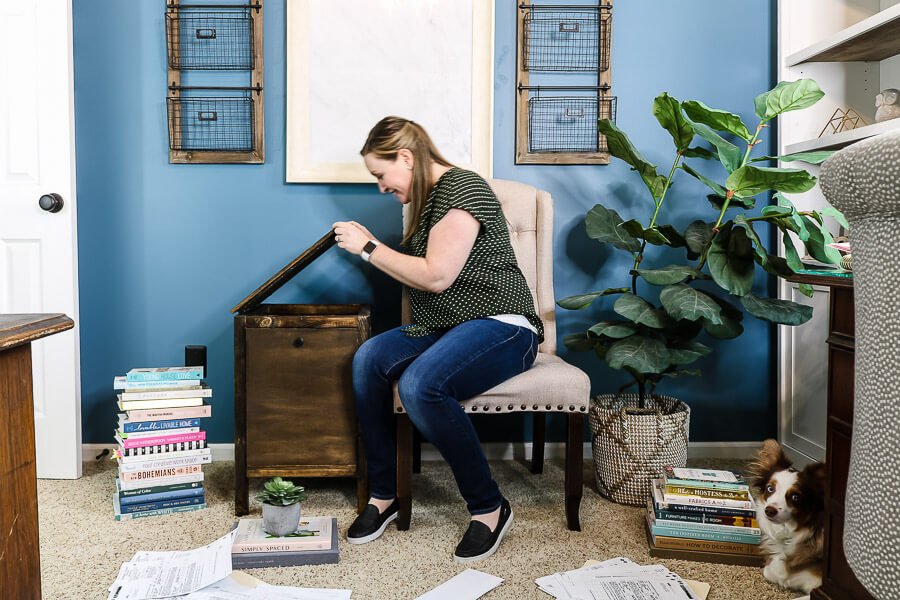
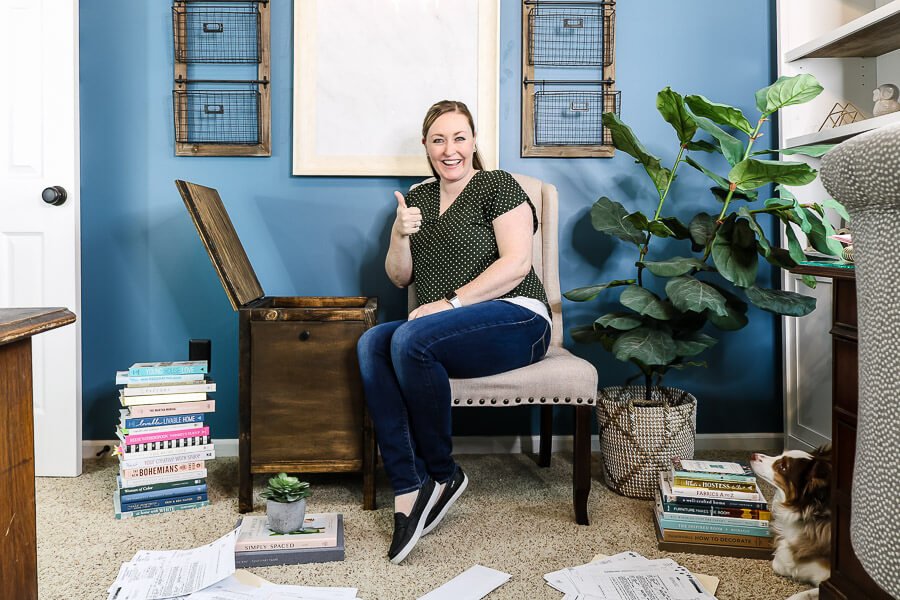
12. setup & enjoy!
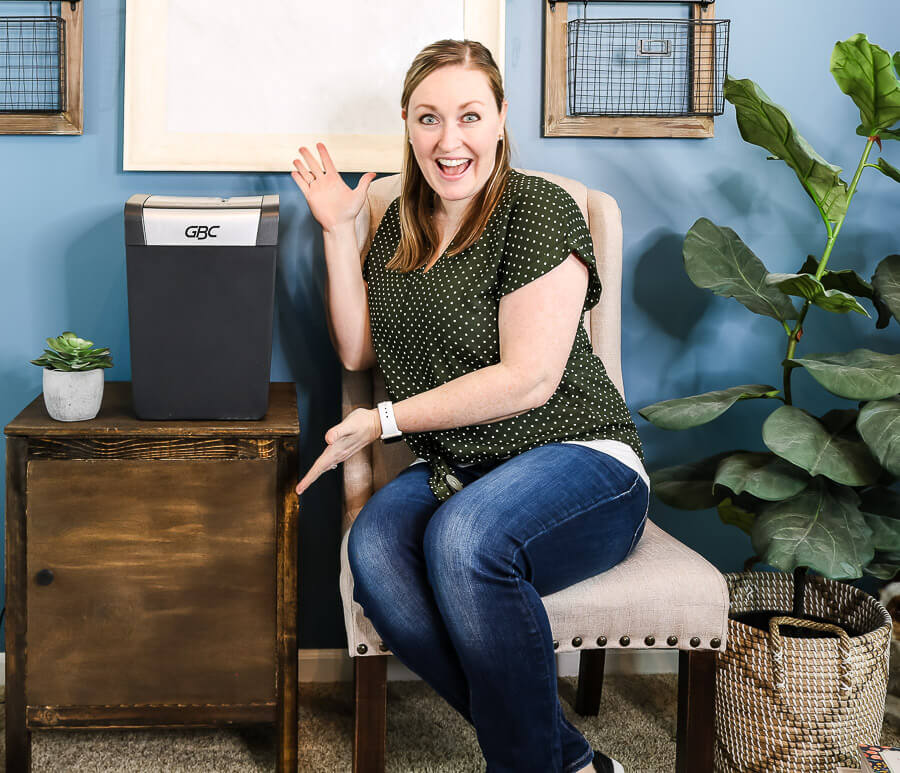
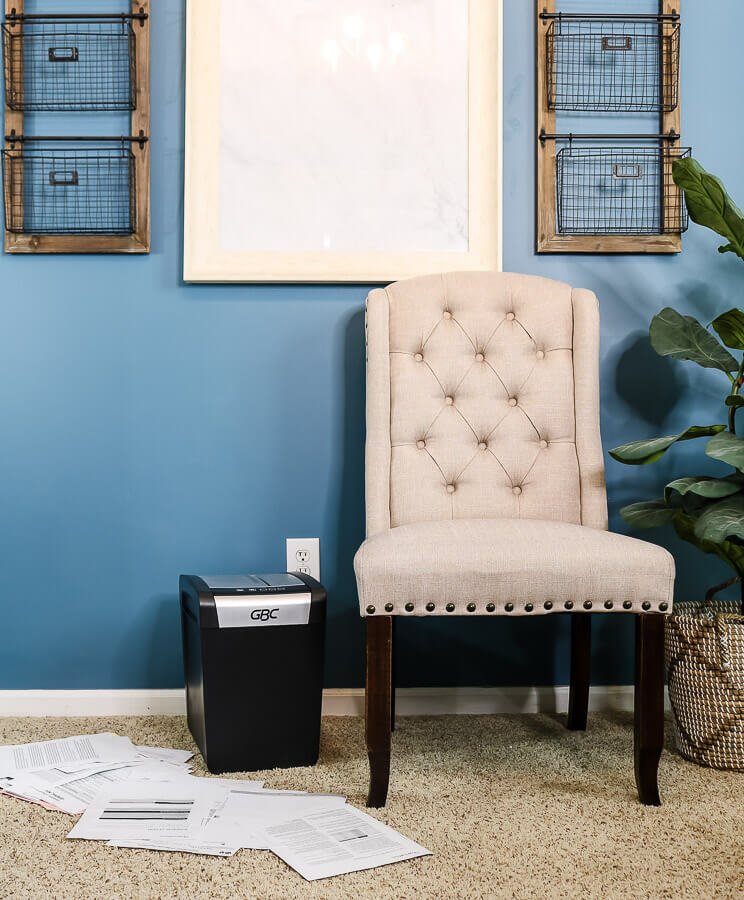
Once everything was dry, I brought the DIY end table back into the office, snagged my GBC shredder, and set it all up.
Now all these papers I need to shred can get gone!
I did attach two small knobs to both the front and the side to make it look like a cabinet that opened.
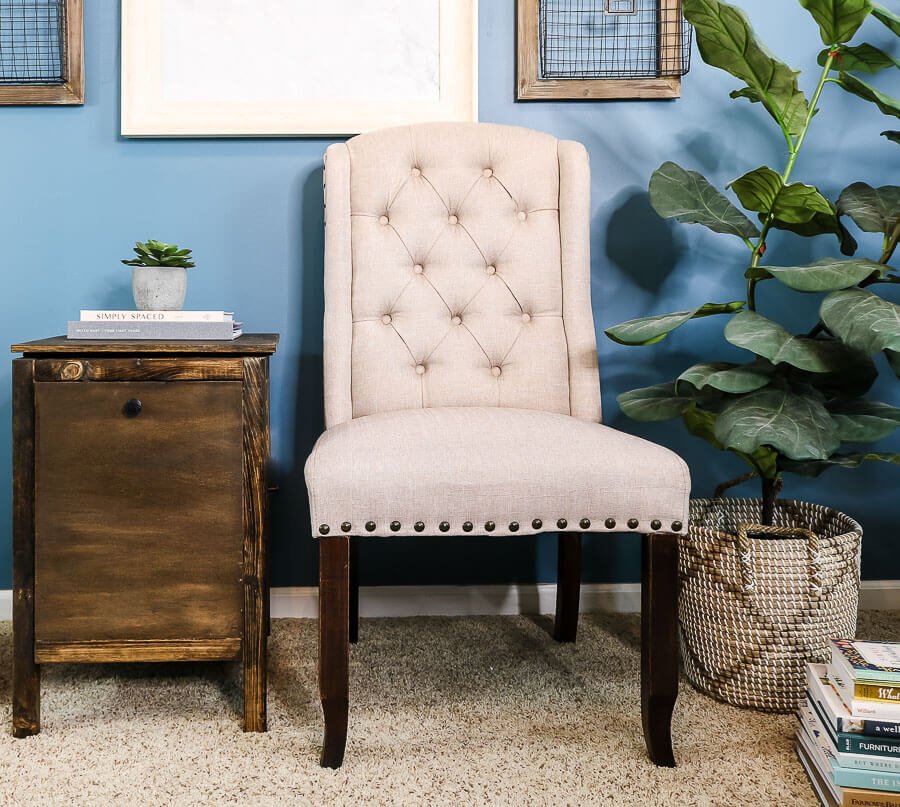
This is the view of the 13″x16″ side where I put the knob up at the top.
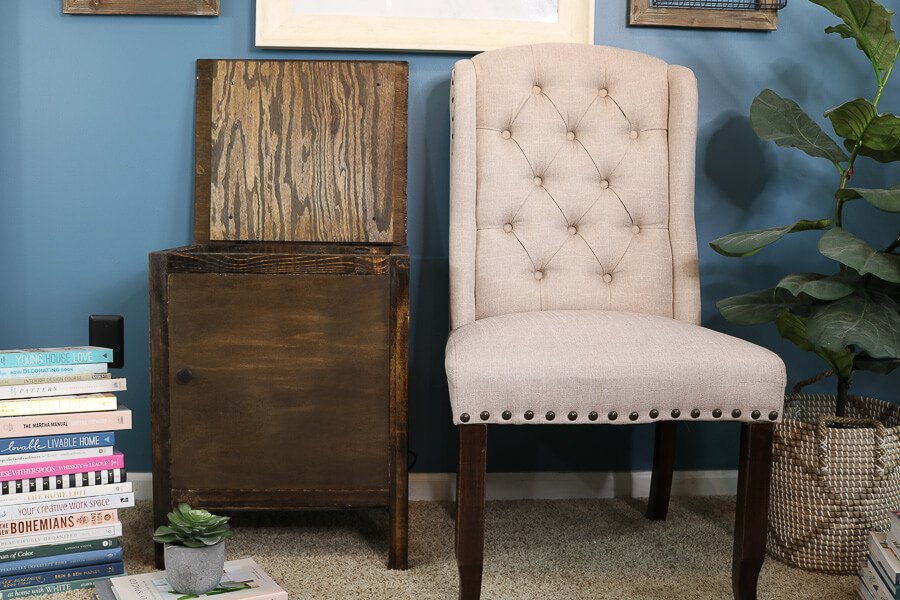

And this is the view of the 16″x16″ side where I put the knob on the side.
What do you think of the finished product?
Want to watch the video for this post?
You're in luck!
I put together a video tutorial to add to this post, so you can see the full scope in real time!
Check it out below and while you're there, be sure to hit the subscribe button and turn on the bell notifications to make sure you never miss a new My Homier Home video!


This is such a great idea. Mine sits quietly in the corner but I would love to disguise it. That’s not the worst thing in my office though. It really needs an entire makeover but I haven’t yet figured out how to fit everything in there that I need to and make it look stylish.
I have a love hate relationship with shredders. Hate because they always seem to break lol. This tutorial could be applied to many ugly appliances! Amazing work!
I hear ya!! Thank you Marie!
What a great idea! Believe it or not, my husband and I were just recently talking about a place to hide the shredder. Super good tutorial. Thanks for sharing!
That’s awesome!! I’m glad I could help!
Genius, Christin! Love this idea.
Thanks Misty!
This is too clever! I think I have that same shredder … and its an eye sore for sure. You’re DIY skills are unmatched. Brilliant! xo
You’re so sweet Juliet!! If I can do it, anyone can do it!
This is such a good idea. I need to re-do our office and this is such a great idea for our shredder. That thing is necessary, but such an eye sore. I love the tutorial!
Yay!! I’m so glad you found it helpful! It does make the shredder level up it’s look for sure lol!
Love the end table! Great way to hide the shredder! And isn’t the pocket jig tool the best!?!?!
It really is! I keep wondering where has this been all my life lol
what a clever and genuis way to dsiguise this necessary piece of equipement!
This is so smart! The shredder is a necessary, but ugly part of my office!
I totally agree!! it is wonderful to have it hidden, but still functional!