
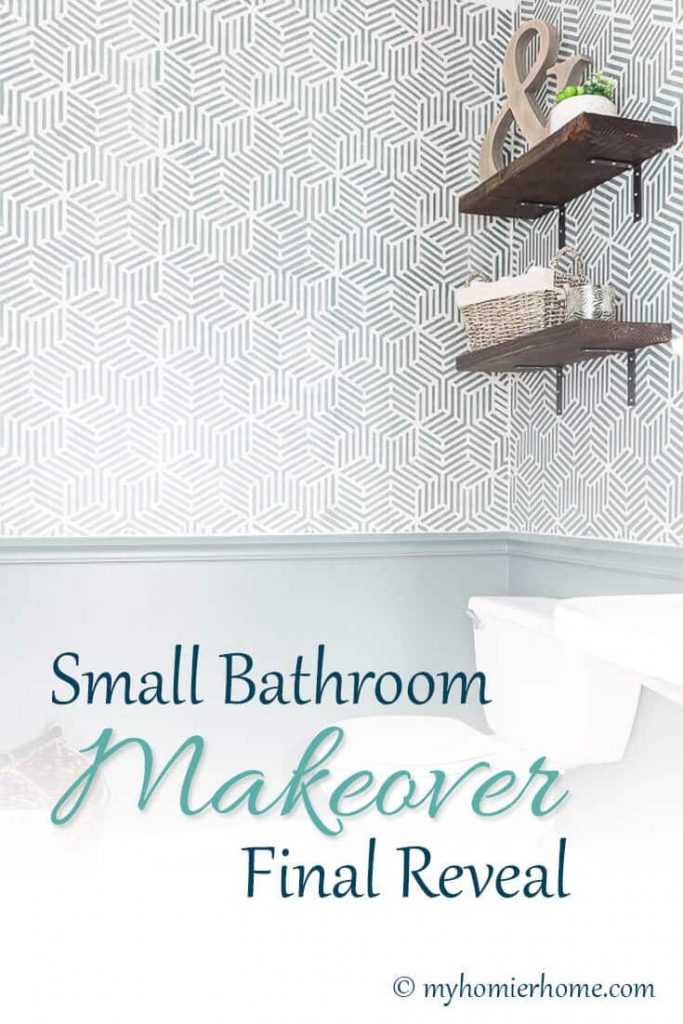
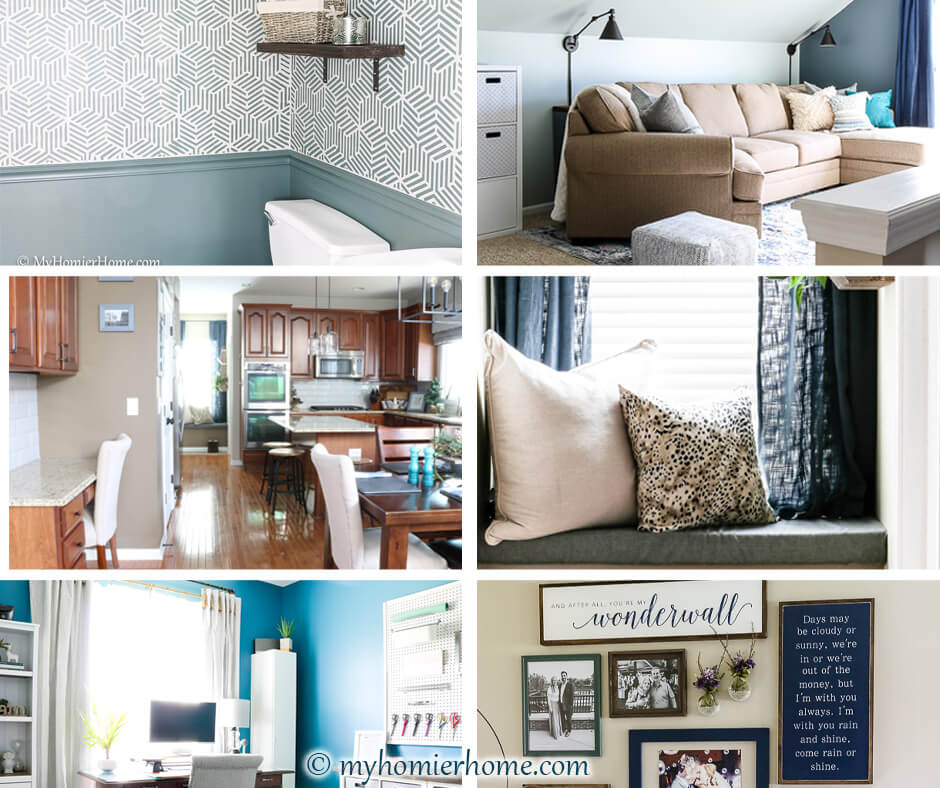
Small Bathroom Makeover Final Reveal
I turned my 90s small bathroom into a modern masterpiece for $100! This post will show you the before and afters of my small bathroom makeover final reveal.
The time has come!
Week 4 and the final reveal of the $100 Room Challenge is here!
Phase 1 of my small bathroom makeover was everything I hoped it would be and more.
I feel so much better about allowing people to use this main floor powder room now that it fits the vibe of the rest of my house.
Don't forget to check out before I show you all the angles, let me take you through a few before shots one more time for the full effect!
Week 1: Project Plan | Week 2: DIY Shelves | Week 3: Tips for Stenciling | Week 4: Final Reveal
Disclaimer: This post does include affiliate links for your convenience. This is at NO additional cost to you but earns me a small commission. To read more, check out our disclosure policy. As an
Before
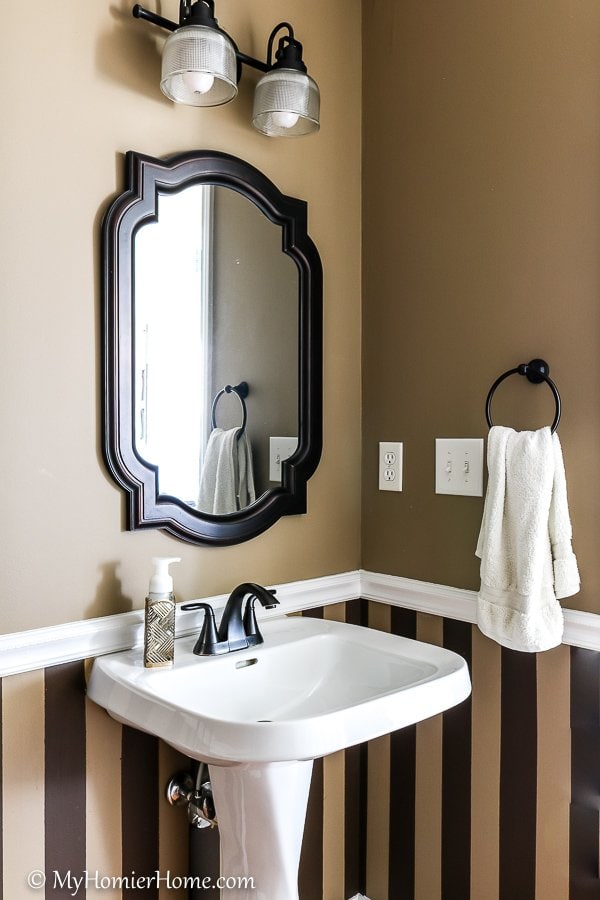
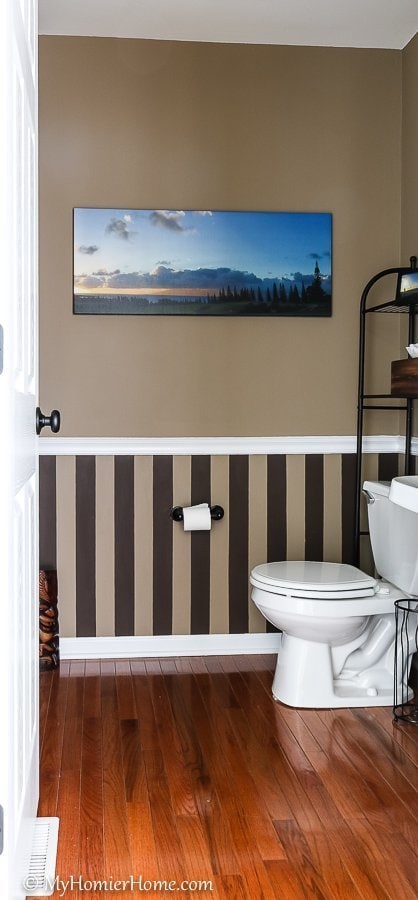
It's crazy to me that I let this small bathroom be this ugly for 4 whole years!
Looking at it now, I think I didn't realize how bad it actually was. I guess it's true what they say, you never know what you have until its gone… and I think the gone part is looking pretty good about now.
Check out the new and improved version!
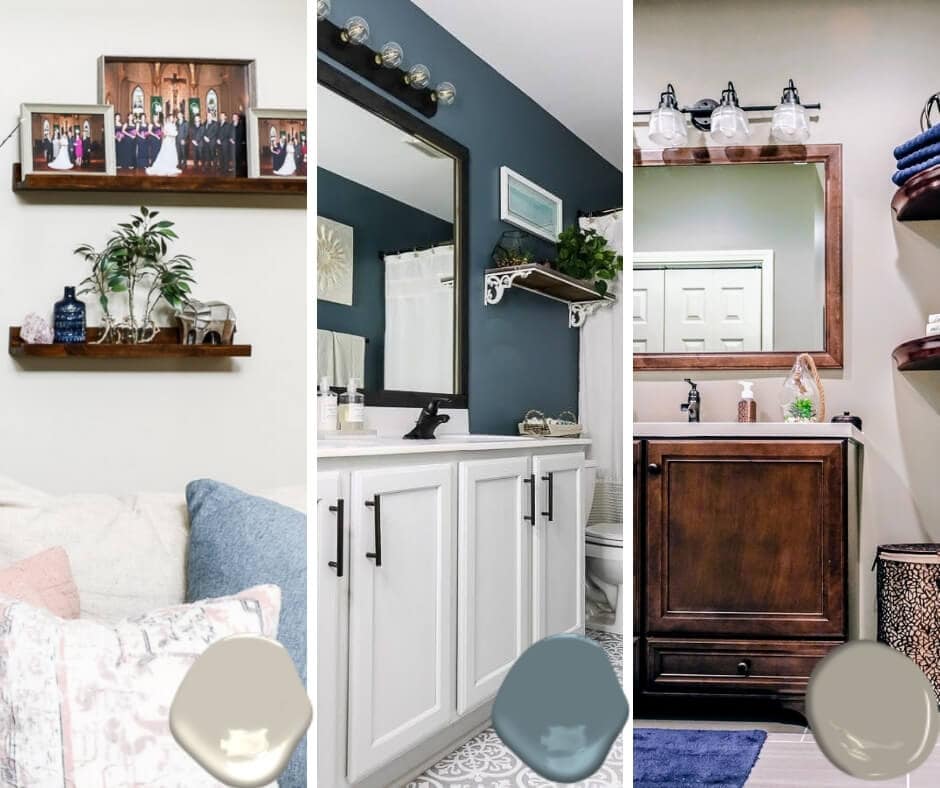
Samplize | Peel & Stick Real Paint Samples
I love using Samplize to help me get a better idea of what paint colors will look best in my home. You shop all the paint brands below and read our review for more tips on how to make choosing paint colors simple, easy, and dare I say, fun!
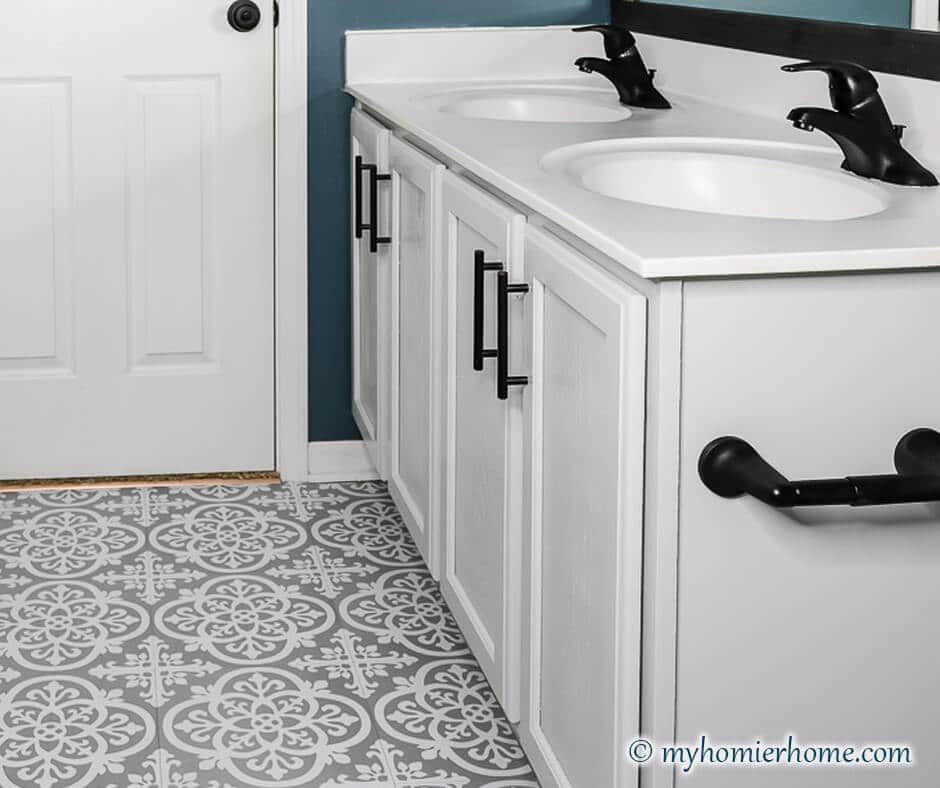
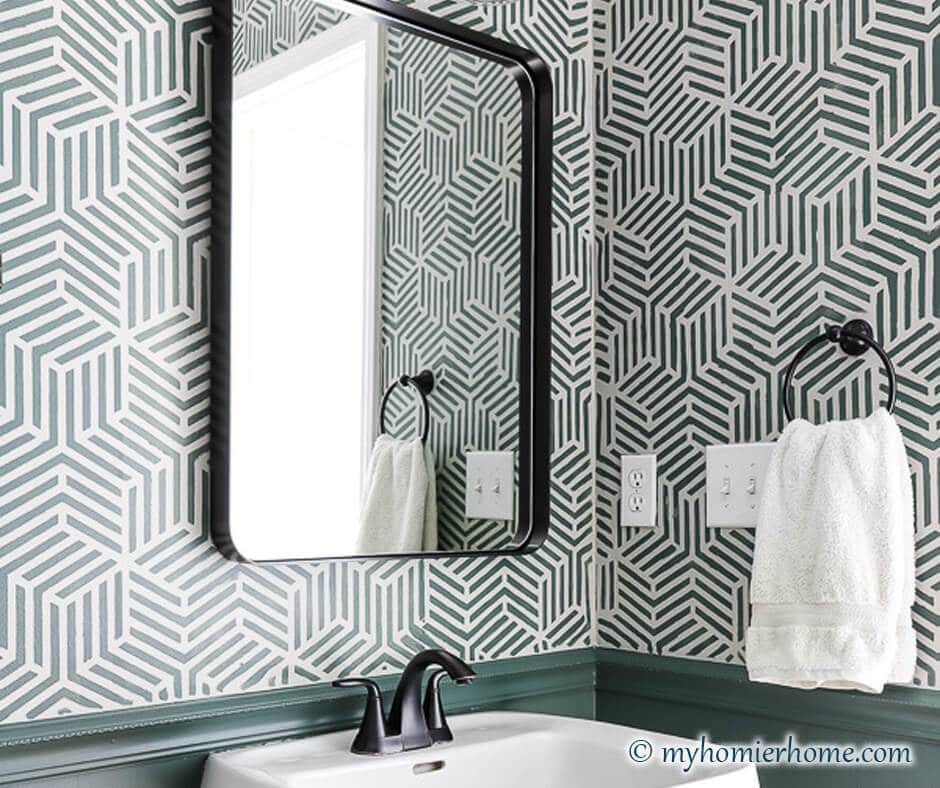
After
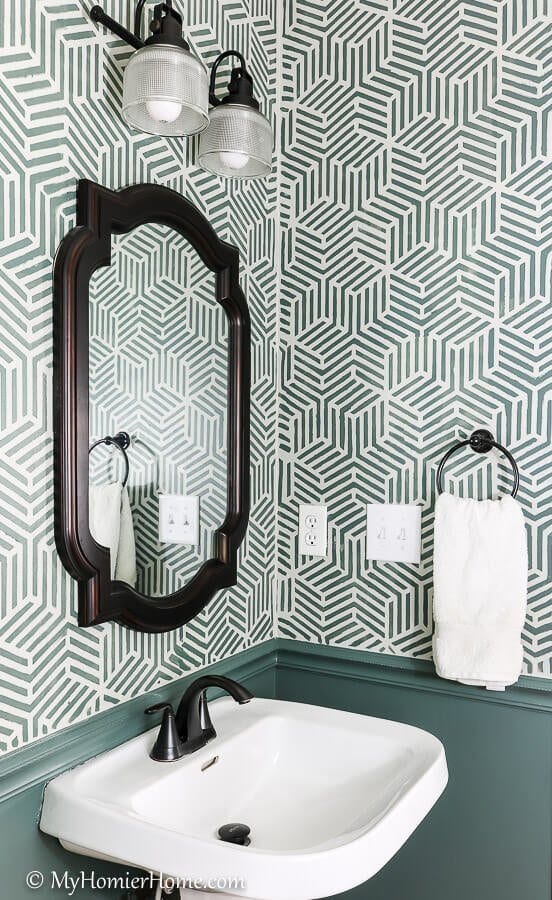

Isn't it such a change?
I'm totally obsessed.
Between the stencil and the paint color, it was well worth the effort.
I have included my source list and links to all the DIY projects including the DIY shelves and my tips for stenciling your bathroom below.
Week 1: Project Plan | Week 2: DIY Shelves | Week 3: Tips for Stenciling | Week 4: Final Reveal
Cost Breakdown for $100 Room Challenge
- $19.69 Paint (I already had the green paint, this was for the Mindful Gray behind the stencil)
- $9.12 Wood for Shelves (Made 4 shelves, but I only needed 2)
- $4.97 Foam paint roller for stencil
- $11.08 L Shelf Brackets (4 total – 2 per shelf)
- $2.30 Screws to Connect Brackets to Shelves
- $52.54 Large Stencil (the stencil comes in small and medium for a much lower cost)
- Items I already had
- Frog Tape
- Oil Rubbed Bronze Spray
- Stain for the Shelves
- Green Paint for Stencil
- Seal Spray for Shelves
- Wall Anchors to Attach Shelves
- Paint Tray
- Small Paint Brushes
- Laser Level
- Decor for Shelves
For a Grand Total of $99.70… Now that's taking the $100 budget seriously. I literally laughed out loud when I tallied up all my expenditures. I will say that it is great to have spare DIY materials lying around the house.
Samplize | Peel & Stick Real Paint Samples
I love using Samplize to help me get a better idea of what paint colors will look best in my home. You shop all the paint brands below and read our review for more tips on how to make choosing paint colors simple, easy, and dare I say, fun!
What's Next for this Room
The next phase of this room is going to include a 9-Grid set of acrylic frames with black and white pictures of golf courses we've played as well as a new, more modern mirror.
This is the one I've been eyeing: (affilate link) Modern Mirror from Amazon.
I would have added this in for the $100 room challenge, but it would have busted my budget by a lot.
So I will by saving up over the next few weeks to full finish this room to my liking.
I would love to know what you think on Phase 1!
Please leave a comment below and be sure to follow me on Instagram to get all the behind the scenes updates in my stories.
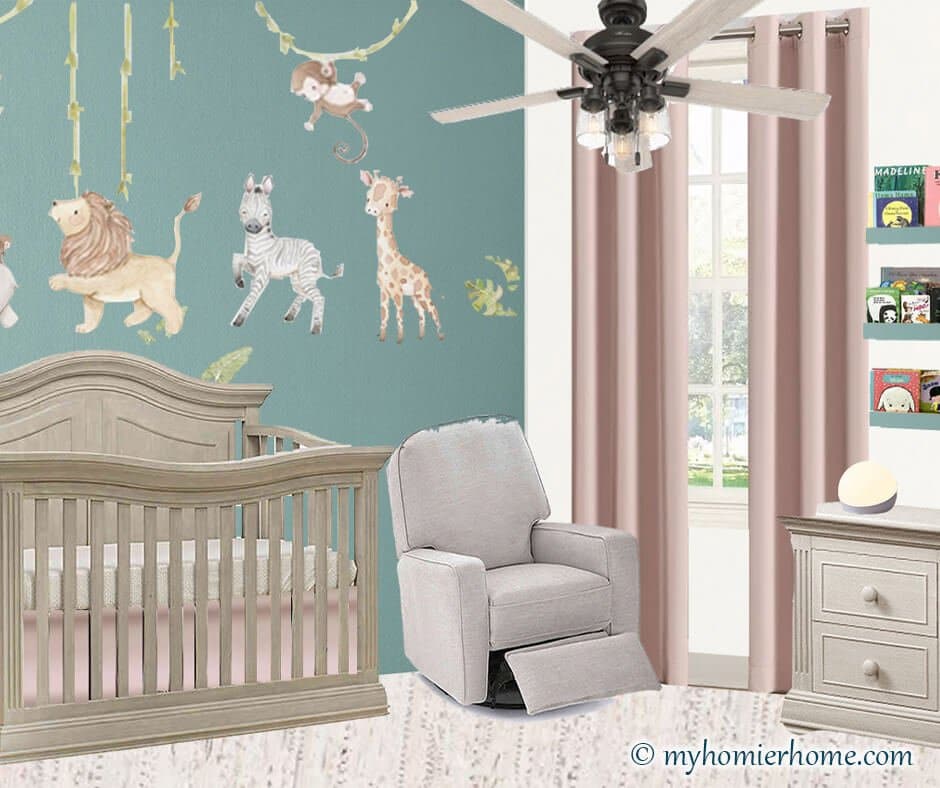
My next big project will be our bonus room for the one room challenge starting up next week.
I'm feeling energized now, but back to back projects has never been done by me.
Because my bathroom makeover only cost $100, I was able to slip in another project!
The joys of budgeting!
UPDATE: Phase 2 of the Powder Room Makeover is complete.

Disclaimer: This post does include affiliate links for your convenience. This is at NO additional cost to you but earns me a small commission. To read more, check out our disclosure policy.


I absolutely love your walls and paint color in that bathroom! Not sure I have the patience to do such a thing but it looks fantastic! Totally magazine worthy! Enjoy
Thanks so much, Cindy!! Honestly, if you use my tips from week 3 on how to use a wall stencil you could definitely do it! It took about two days to complete the paint and stencil part. If you give it a try, you’ll have to let me know!
Christin, Your bathroom looks so pretty. I love the stencil pattern and the color you choice to do the wall. So pretty!
Aww!! Thanks so much! It definitely needed an upgrade!
Christin, your bathroom is so pretty now. The before and after pics are amazing and I love what you did on the walls. Great job!
Thanks so much Sherry! Its such an improvement for sure! Feels good leaving the 90s bathroom in the past lol
Wow! I just love the stenciled walls. I can’t even tell it is the same room! This room is totally a testament to the power of paint. You did such an amazing job!
Thanks so much! Power of paint is no joke, right? I feel so much better about letting people use the bathroom now lol
Once again – such a dramatic difference with only a can of paint and some creativity. You must be a pro at stenciling – I thought it must be wallpaper at first with such crisp lines.
I’m hope you enjoy your “new” bathroom!
Thanks so much!! I wouldn’t say a pro, lol but it does take a little patience and some good music! And it’s so much more cost effective!
Wowza! I LOVE the stenciled walls and the new paint color! Please come help me do this to mine!! Everything looks so amazing that you can’t even tell it’s the same room! Way to go AND stay in budget!!
Thanks so much!! You can totally do this yourself! In week 3, I shared my tips for stenciling. Check it out and let me know how it goes!! If not, I do consulting work if you live near Indianapolis lol
Wow it looks amazing! I love the new colors, and that stenciling on the wall. And those shelves look perfect in here. Isn’t it amazing how long we’re willing to live with something before finally taking the plunge? You did a great job in here!
Thanks Meredith!! I finally feel like my first floor is presentable in its entirety! I totally agree! What was I doing for so many years? Lol
WOW!!! That stencil added SO much to this space, and I absolutely love the color you chose! What a HUGE difference… and with 30 cents to spare 🙂 I am so glad you joined the $100 Room Challenge this month. You did an amazing job!
Thank you!! I loved how cost-effective it was, but it did take some patience lol. Thanks for hosting this awesome challenge!
I just love the colors that you chose!! What a difference from the before – it looks like you added a window it’s so much brighter
Thanks so much! The difference is still so shocking to me every time I go in there. It really did brighten up so much!