
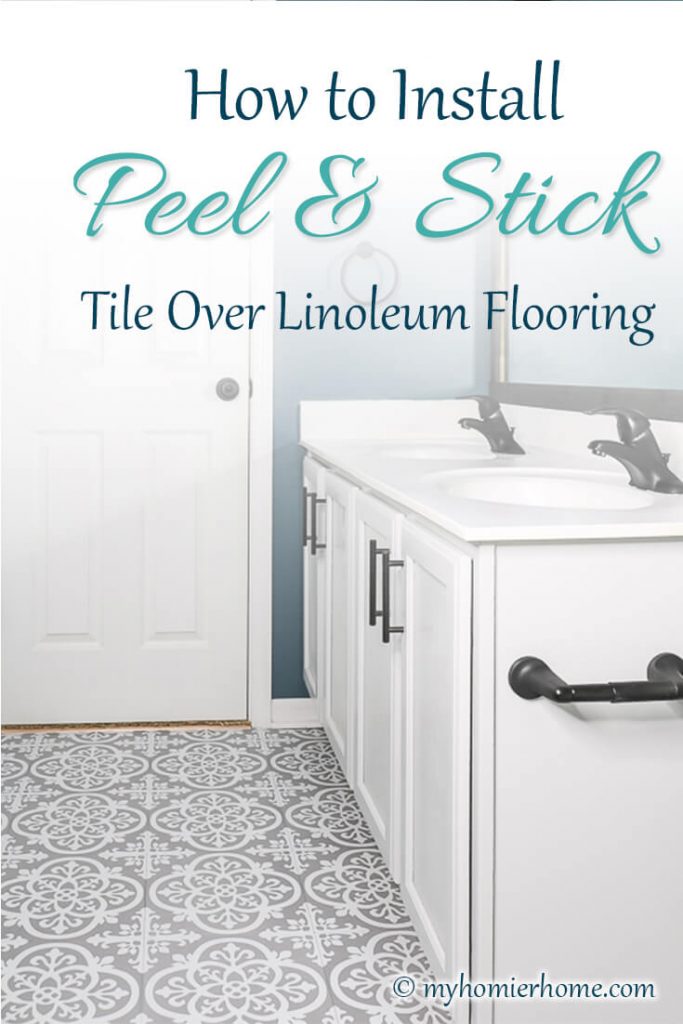
How to Install Peel and Stick Tile Over Linoleum
In this post, you'll learn how to install peel and stick tile over your existing linoleum flooring the easy way.
This project was way simpler than I thought it was going to be and as of today (4 months later), it's holding up quite nicely!
We've even had to turn the shower on high to make a pseudo steam room for one sick little baby and all is still going strong with the floor.
Please keep in mind, I am not a professional floor installer.
This entire post is based on my personal experience. So just note that there were some things on the instruction list I skipped.
However, everything I share below is exactly how I completed this project and it really was easy.
Steps to Install
Disclaimer: This post does include affiliate links for your convenience. This is at NO additional cost to you but earns me a small commission. To read more, check out our disclosure policy. As an
Clean the floor first.
I'm sure this goes without saying, but be sure to clean the floor before starting.
And allow it to dry before starting your peel and stick floor tile project.
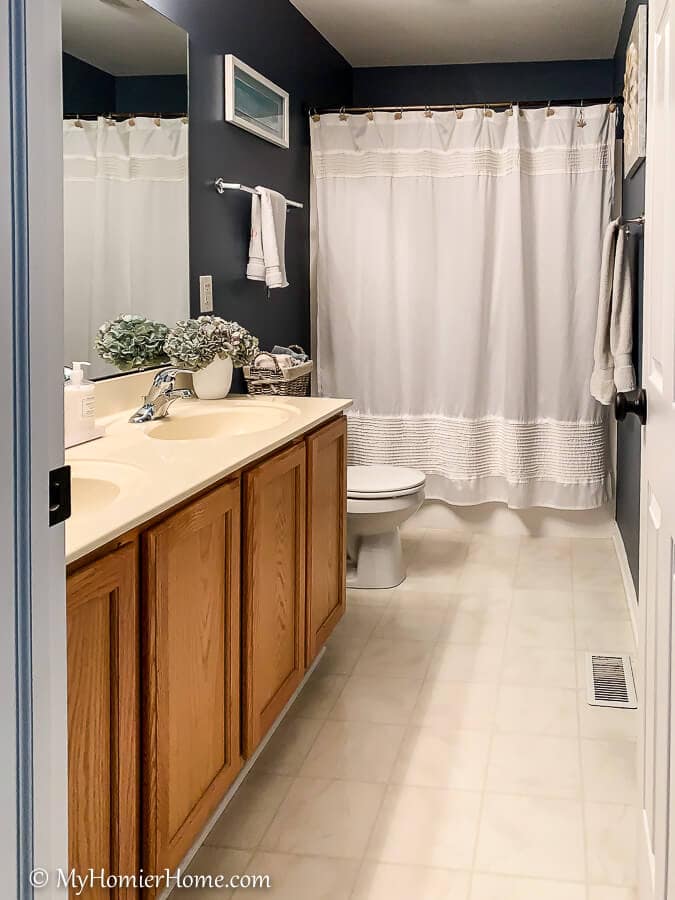
This is the before shot of how this bathroom looked before I started the $100 room challenge last September.
Nothing really to write home about as you can see.
Rather than remove this flooring, I decided I was just going to lay the peel and stick tile right over the top of it.
To be clear, this is not recommended by the company that sells this floor tile, but maybe I am a rebel after all lol.
Find the center of your room
The directions say to work your way from the center out.
I don't know for sure, but this is probably because your eye goes down the center of the room when you are in there.
My guess is because you don't want it to be all jacked… or another more profound reason lol.
Either way, I used my laser measurer (affiliate) and a regular tape measurer to figure out middle.
I used the laser measurer to measure the full width and length of the room and then the tape measurer to measure half way.
Layout all the tiles
Once you've determined your center, layout the tiles to get a feel for how it will look before you start peeling and sticking.
This will also help you see if you should shift it a little or not based on how it lines up with the edges.
It's not difficult to make the wall cuts, but if you can save tile by shifting it over a bit, that might be worth your while.
Mine were all not quite close enough, so I did stay in line with the middle.
Make grid lines or use existing tile lines
If you are using these tiles on a subfloor or a fresh floor like they recommend creating grid lines and I would second that.
Since I was using the linoleum that was already down, it had pseudo tile on it, so I used those lines as my guides.
This is definitely not a step I would skip.
It would be vary obvious (and hard to fix) if you started to slant, even just a little bit.
Gather your materials
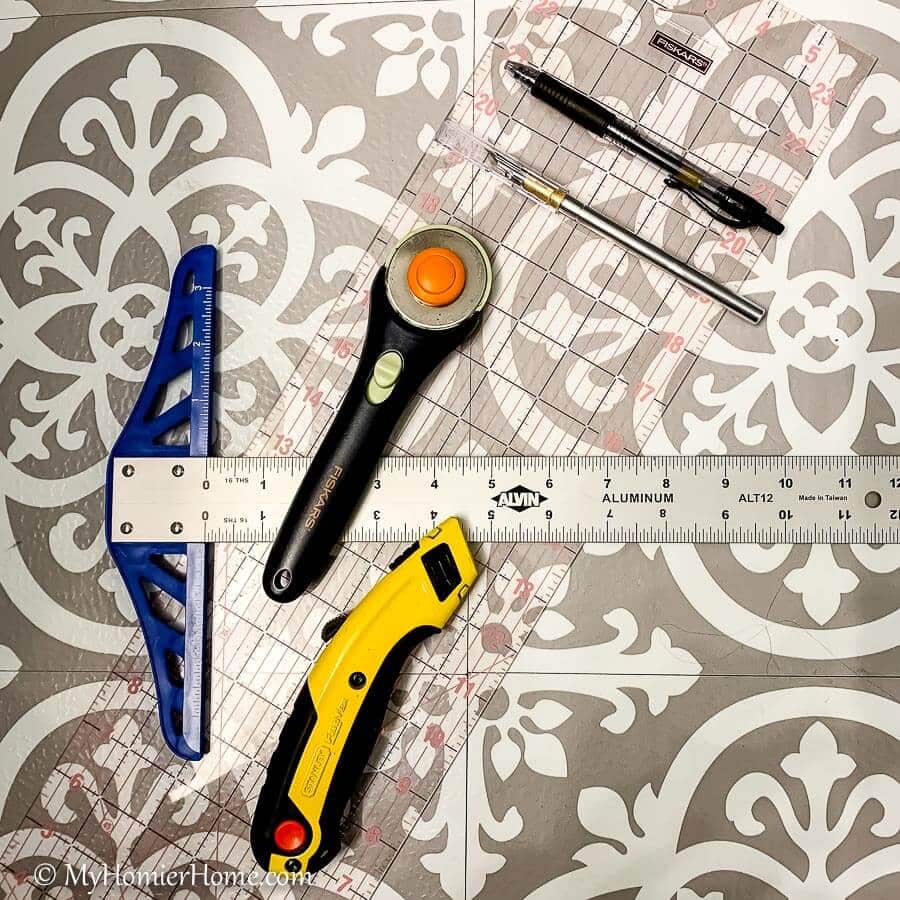
I'm sure you could get away with other similar materials, but these crafting tools worked like a charm.
At the very least, you'll need a ruler, straight edge and a box cutter.
Below are pictures with links to each of the items I used to complete this project.
You'll notice I included some spray adhesive, but I didn't actually use this.
I discovered later though that it would have been helpful when I encountered the “bubbled up” linoleum around the air vent.
So I included it here in case you encounter a similar issue.
[sharedvision_embed list_hash=”ae43bf9ebe765c12a810244fb956119b”]
(click on any of the images to shop the products)
Measure for each tile as you get close to the edge

As you can see in the picture above, my cuts weren't perfect, but I did caulk at the end.
However, you want to make sure you measure using your clear ruler before making any cuts.
You may think your vanity is square and the measurements all the way down will be the same, but let me tell you… that is not necessarily true.
I made one or two mis-cuts before I realized I had to measure every time.
The video shows this much better. Be sure to subscribe to my channel when you check it out, too!
Do cuts last
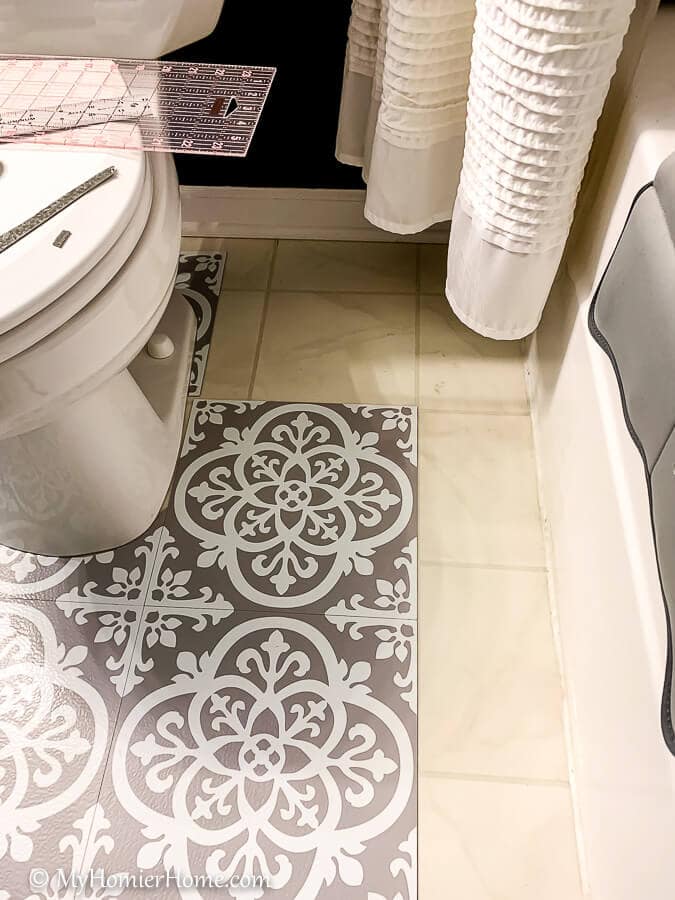
It's highly recommended by me that you do all of the full squares first and then worry about the cuts last.
I made the mistake of intricately measuring and mapping the pattern for around the toilet.
Just to find out, I didn't even need that much tile there.
Full squares first, then the cuts.
Again, you can see exactly how I made each of these cuts on the video.
Don’t forget to open and close the closet door.
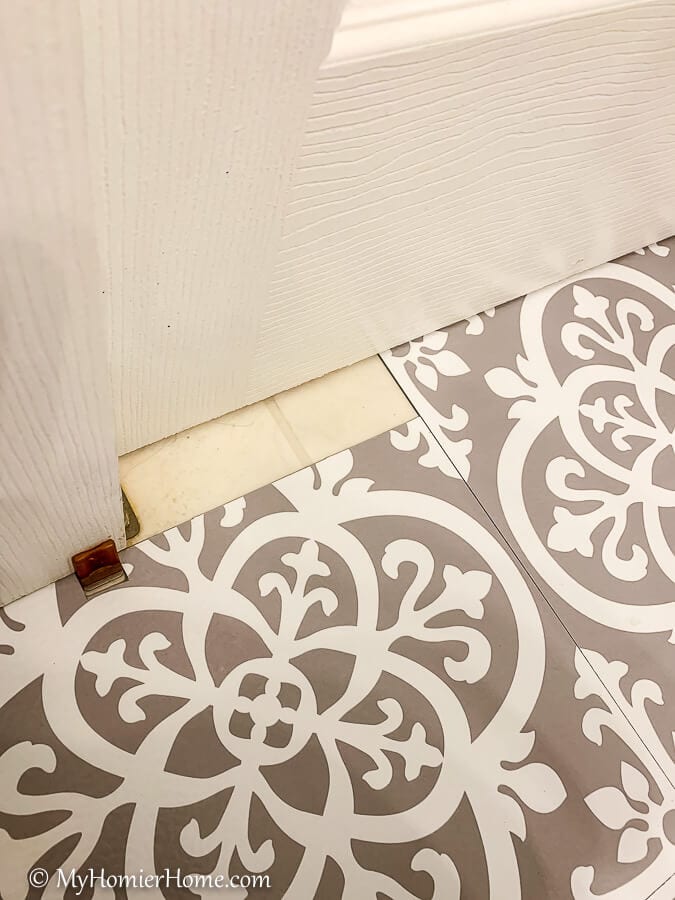
Do as I say not as I do lol…
Made a beautiful cut you can see two pictures up for around the closet.
Then I wanted to make sure the door would shut over the flooring, which it did, but I discovered what you see in the picture above.
Lucky for me, this was a rectangular piece that I was able to just set back in there without the seam showing too much.
Move the doors before cutting…. just to be sure.
Caulk the edges
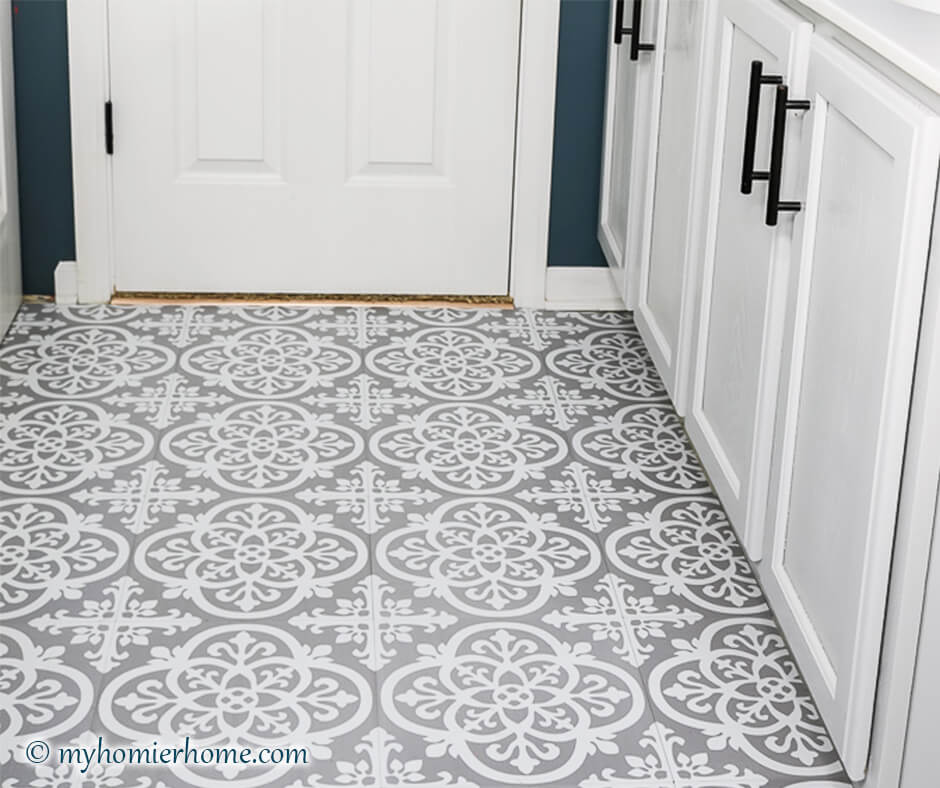
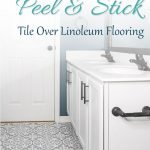
Kind of hard to tell in this finished product photo, but I caulked all the edges around the walls, the vanity, the tub, and the toilet to give it a more clean look.
One of these days I'll share with you an amazing tutorial on how to caulk with little mess and a perfect line…. but I can't do that now because I may be the worlds worst caulker.
I did it though and I am ever glad it's all hidden where you can't really tell how bad I did lol.
What do you think?
FAQs
I already had all the tools, but it cost me about $70 for the full floor (7 boxes of tile.
From start to finish, it took me about 5.5 hours.
As far as difficulty level, I would give it an easy to medium. It was time consuming and sitting on the floor hurt my body, but it was not particular difficult as long as you follow a straight line and make your cuts last.
When you go to buy the tile from WallPops.com, they give a great calculation tool. I broke my room into rectangles, determined the square footage of each, added them together, and purchased that amount. I did not take away the amount for the toilet just in case I needed some extra. I definitely had enough, but not a ton of extra.
According to the details on the website, they are water-resistant, not waterproof. All this means, in my experience so far, is put a rug down when you get out of the shower and don't “soak” the floor when cleaning.
I thought the xacto knife and utility knife combo along with my clear straight edge worked perfectly. I used a piece of paper to help me make a template for around the toilet, but I just measured for the cuts around the closet door and vanity.
According to the website, they recommend you wait 5 days for it to full adhere
So, removable in the sense of removable wallpaper? No. However, they are not necessarily permanent because you could pry them up if you wanted to change it down the road.


The floor looks amazing! I love the pattern of the tile! Thank you for sharing your experience! You did a great job!
I love this! I wish I’d known about this before I redid my floors! Great job. Thanks for sharing.
This looks so good! I am really thinking about doing peel and stick tile in my entry!
I am really loving it and for the price and the time, totally worth trying!
The floor looks great and I love the pattern and color. Your step by step instructions were good. Thanks for sharing!
Thanks so much Kim!
The color and pattern you chose is so pretty. Really elevates your bathroom look!
Thanks Marie!!
Love this idea! How are the holding up? Are the edges still stuck to Linoleum underneath? I really want to try this without having to take it down to the subfloor..
It’s holding up really well! Super secure and it’s our kid’s bathroom, so a lot of splashing out of the tub. So far, I’m super impressed. I put it down in September 2020, so almost a full year!
Thanks for sharing your experience! Did you put any adhesive down or prime the floors? You just cleaned and then put the peel and stick tiles down?
Just cleaned and put the tiles!! It was so easy!
I am contemplating installing floor pops over the linoleum in my bathroom. How are these holding up 5 years later? Did you degloss your linoleum at all before installing?
Yay!! The only prep I did was to clean and dry the linoleum. I did caulk the edges by the tub and toilet where I knew water had potential of getting under, but 5 years later it is holding up SO good!! I have no need to redo anything so far. I highly recommend it!