
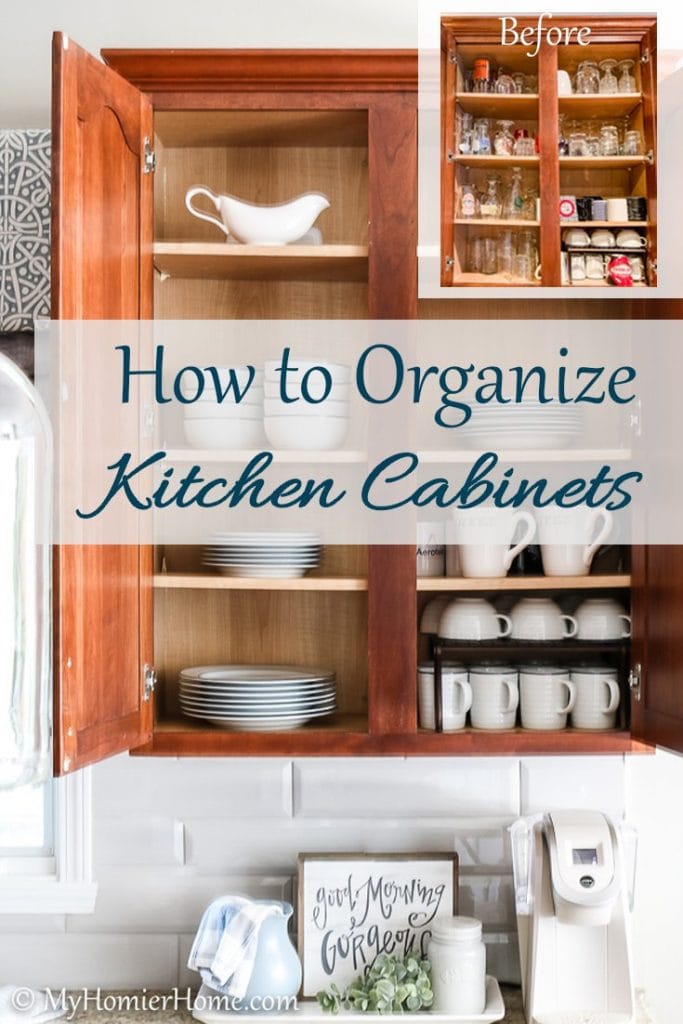
How to Organize Kitchen Cabinets
Learn how to organize your kitchen cabinets using clear and simple strategies to tackle cabinet dysfunction without losing your mind.
Have you ever walked past a closet or cabinet in your home and thought, “Please let me not have to open that door”? Ugh.
The idea that you know what’s waiting for you behind that door is a mess of dysfunction that's begging to be fixed… the guilt, the anxiousness, the avoidance…
This was how I felt about my kitchen cabinets every day!
Because we use our kitchen more than any other room in our home, it was time to tackle the dysfunction head on.
So today, I'm sharing with you how to organize your kitchen cabinets for good!
When we moved four years ago, my husband’s company moved us, so I didn’t pack my own things.
This may sound amazing to some and it did save a lot of headache for me at the time moving states, but I missed out on the process of decluttering before we moved.
When we got to the new house, I was so overwhelmed with the sheer amount of stuff everywhere that I unpacked quickly in a shove-everything-somewhere kind of way thinking I would get back to it later.
Well 4 years later, here I am!
So if you’re about to move, just moved in, or ended up years past the I’ll-do-it-later phase, today’s post is for you!
I’m going to give you my pointers on how to tackle your kitchen dysfunction without losing your mind.
Disclaimer: This post does include affiliate links for your convenience. This is at NO additional cost to you but earns me a small commission. To read more, check out our disclosure policy. As an
Table of contents
- 1. Enlist a buddy to help you organize your cabinets
- 2. Before you organize, gather these items first
- 3. Clean each kitchen cabinet and drawer as you go
- 4. Start small and group like items
- 5. Organize kitchen cabinets by how you use them
- 7. Be realistic
- 8. Take notes on items that need to be replaced from your kitchen cabinets
- 9. Know what organizational items you need to buy
1. Enlist a buddy to help you organize your cabinets
First things first… If you’ve been avoiding this project for, hmm, maybe like 4 years or have a tendency to procrastinate on organizational tasks, call a buddy, put a date on the calendar, and get to work.
Since my mom and I are both off for the summer, I enlisted her help for quickness, but also for a second opinion.
We chose a Tuesday at 9a.
It was on the calendar and there was no backing out.
Now, I suggest making sure you have breakfast first in some capacity because once you’re in the weeds, time flies.
We had to pause to grab a banana midway through the morning because we failed to eat prior to starting this project, but we made it!
I would make sure to section off at least 5 hours of “in the weeds” time for taking things out, wiping things down, and reworking everything.
Keep in mind that you will need to stop for lunch at some point (i’m all about the food… we were on a roll and didn’t make time… do as I say, not as I do lol).
Also, you may need to make a run to the store to get organizational bins depending on your current supply.
We were done sorting through the whole kitchen by 2:30p with no breaks, grabbed lunch, and then hit The Container Store.
We made it home by 4:45p and finished up with adding the bins we bought, labeling, moving all the donations to my car and purging items to the trash.
So needless to say, this is an all day event, but it definitely can be done in one day by dinner time if you start early enough.
2. Before you organize, gather these items first
Before diving into this project, it will be important to gather a few items and prepare your space.
First, I would definitely go grocery shopping beforehand if you plan to tackle the fridge or pantry with this day (however, I recommend saving these two spaces for last or their own day).
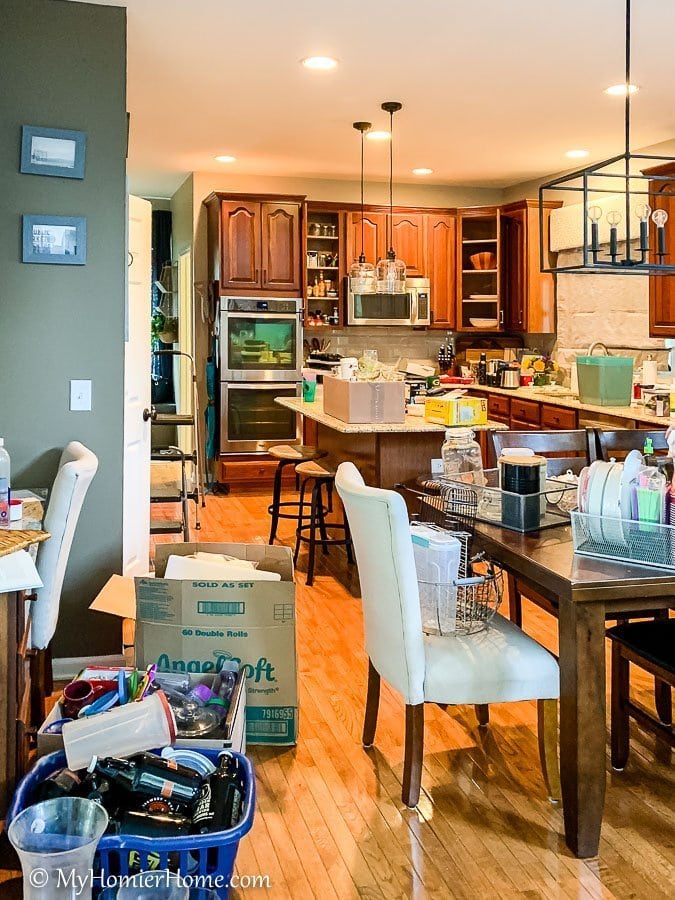
Second, I would clear and wipe down your kitchen table, countertops and island as much as you need to be able to have enough room to spread the items out to see.
You will want to be able to have different sections to sort as you go.
Third, do all the dishes before you start so you know what will need to go in the each space when you are at full stock.
Fourth, you will definitely need to figure out how you want to separate your donation items.
I originally started with baskets like many of the organizational books say to do, but I had sooo many donation items that we ended up grabbing boxes I had in the garage to gather the items.
I would highly recommend having at least two to three boxes for your donation items so you can easily take them right into your car when you’re done.
If you put them in baskets you want to keep, you will have to transfer all the stuff at the end and you definitely won’t have energy for that… hence why Goodwill gained a bonus laundry basket.
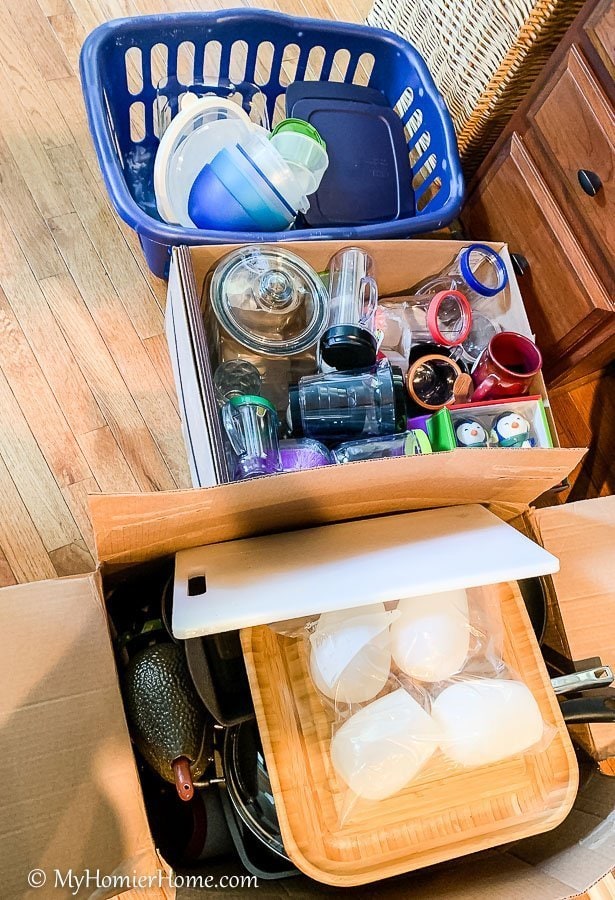
Fifth, I would have a big garbage bag or an empty garbage can with liner to put anything you are going to purge directly in the trash.
Sixth, consider if you need boxes for anything that needs to go to a different room of your home.
I had a two other boxes for items that needed to be housed elsewhere.
One was for items that needed to be in the dining room instead of the kitchen (i.e. wine glasses and scotch glasses) and the other was for glasses that needed to be housed in a bar area instead of the kitchen.
In our previous home, we had this amazing wet bar that was it’s own mini kitchen where we housed all of our bar specific glasses and utensils.
When we moved to this house, there was a tiny, portable, handmade bar the previous owners left us in the basement with no storage, so all of our bar items ended up shoved in various cabinets in the kitchen.
Seventh, make sure to have some ‘quick cleaning’ supplies handy to quickly wipe down the cabinets and drawers as you empty them.
Eighth, be sure to have a measuring tape to measure the space before heading out to buy any organizational tools.
Trust you-me that if you ‘eye-ball-it,’ you’ll get to the store and realize you have no idea if it will fit.
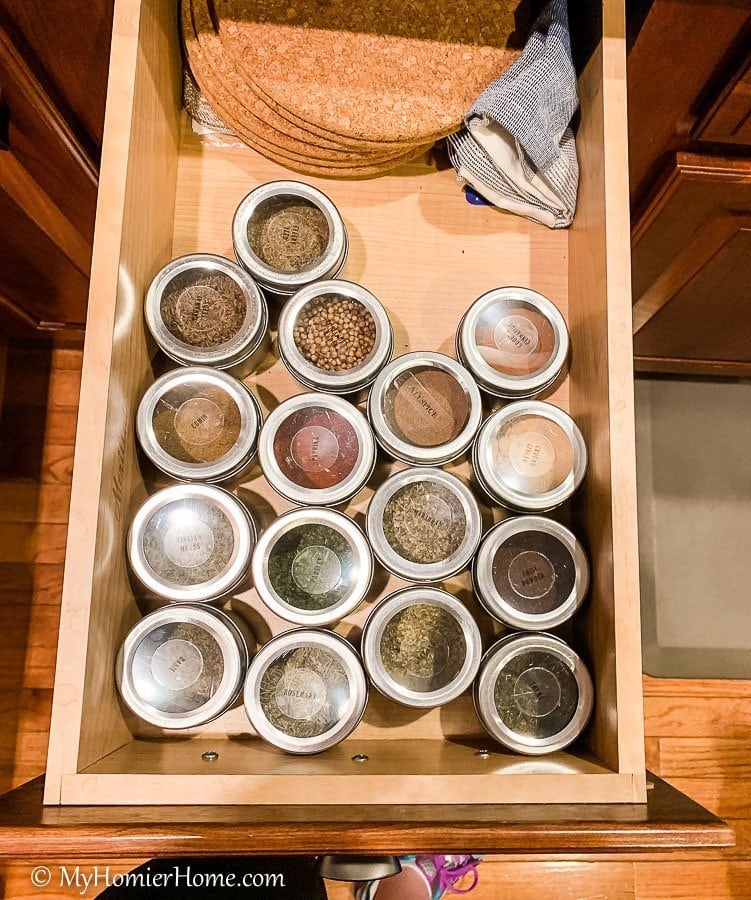
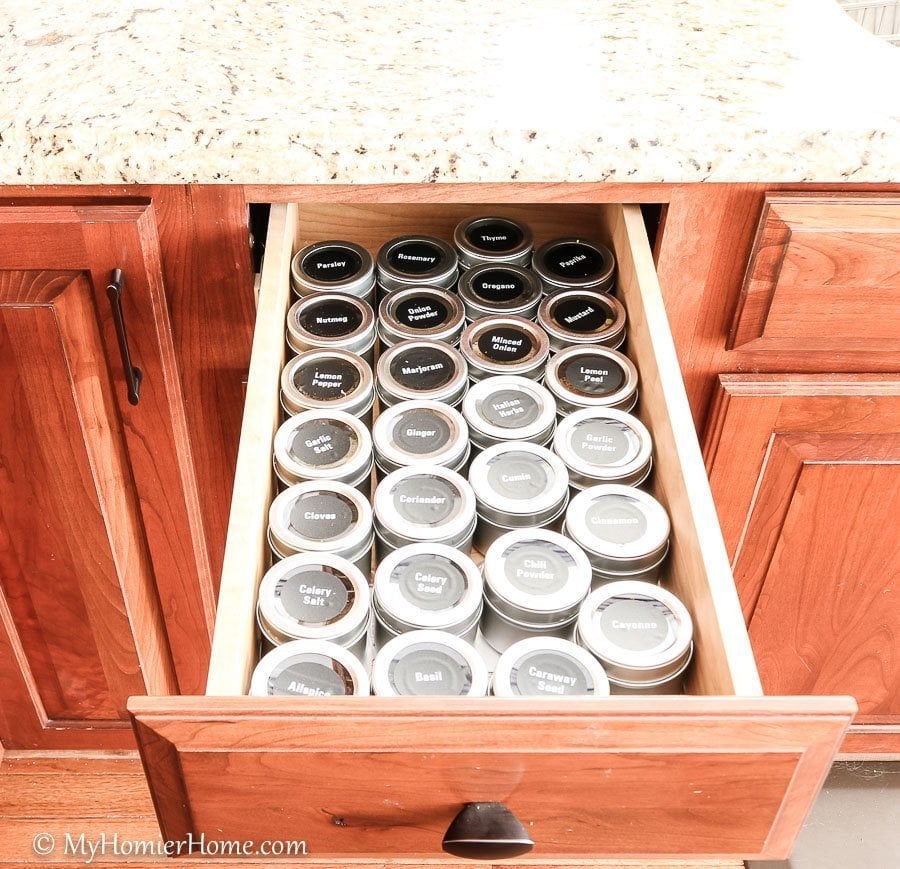
And Lastly, figure out a way to label your bins (mostly for pantry, fridge, and spices use).
The key to keeping your organizational work organized in real life is to label, so everyone knows what goes where!
3. Clean each kitchen cabinet and drawer as you go
With a roll of paper towels, some all-purpose pledge, and a portable vacuum, you will be all set to give your kitchen a nice once-over as a bonus.
How cabinets and drawers can get so dirty, I’ll never know, but be sure to wipe down the bottom, walls, and top of each cabinet and drawer before putting anything else back in there.
Not only will this make you feel like you’re really knocking some things off your to-do list, but it will feel so much better when you put the items back in knowing it's a nice, clean surface.
4. Start small and group like items
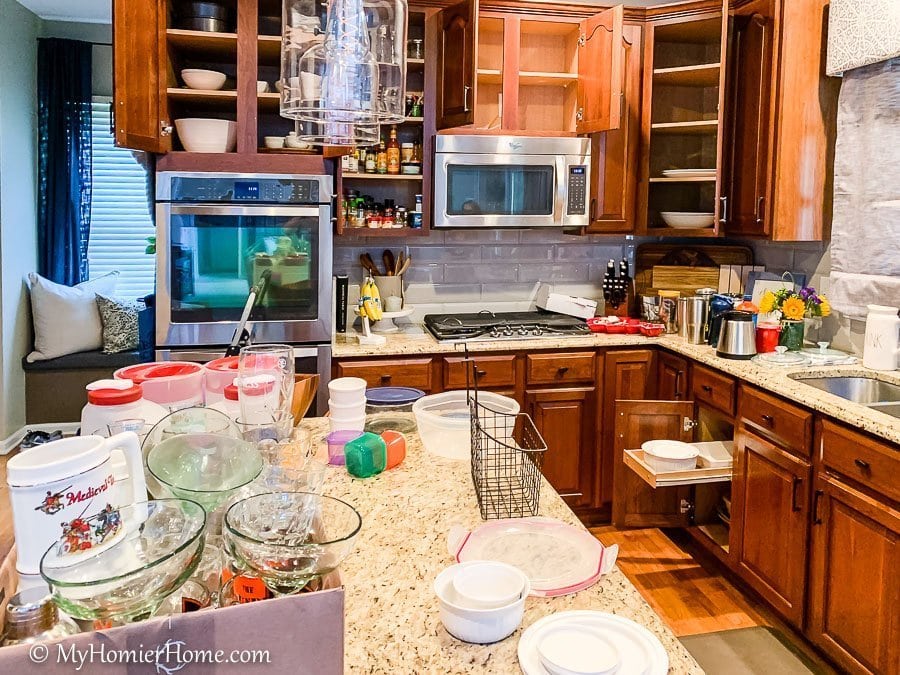
Before…
After…
This may seem like a no-brainer, but my first instinct when I began this process was to take everything out of every cabinet.
I figured I would need to see what I had… which I did need to do, but I have a better way for you after completing this project.
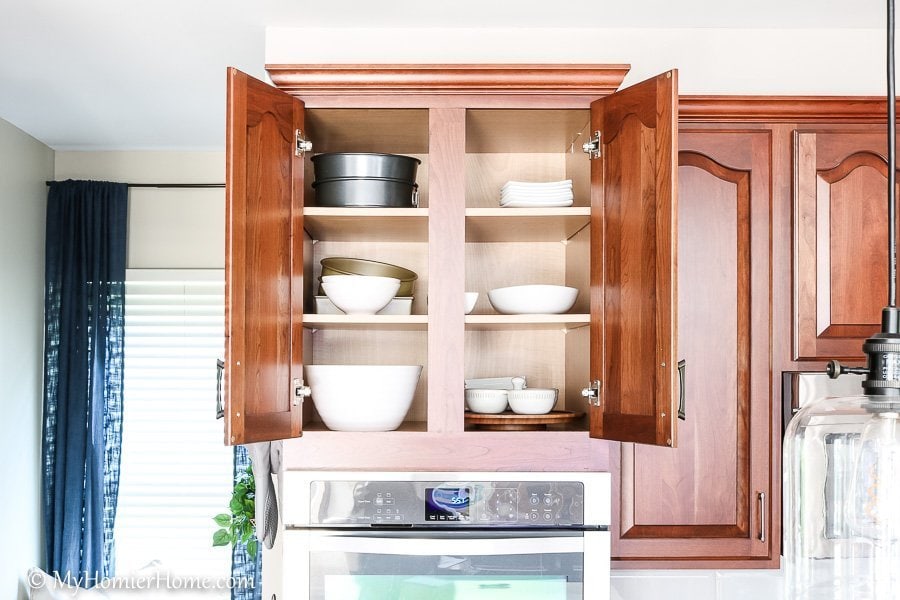
My tip here is to start with a few main cabinets, such as your plates and cups.
Once everything is empty from those one or two cabinets and you’ve wiped them down, pause and think about how you use these items and if there are any other “like” items in any other cabinet.
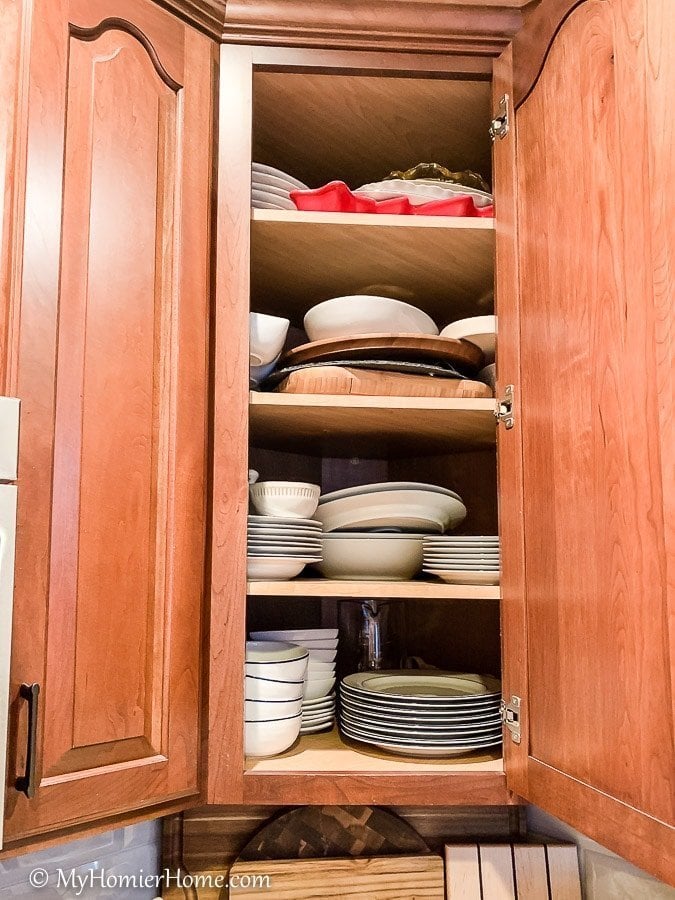
Our plates were originally in a very deep cabinet with a million other serving items as you can see above, but when I took those things out, I realized that really wasn’t the best place for them.
For one, the plates would work better closer to the table and dishwasher.
That meant that I had to rework where I put my cups because the better placement for the plates was where the cups had been.
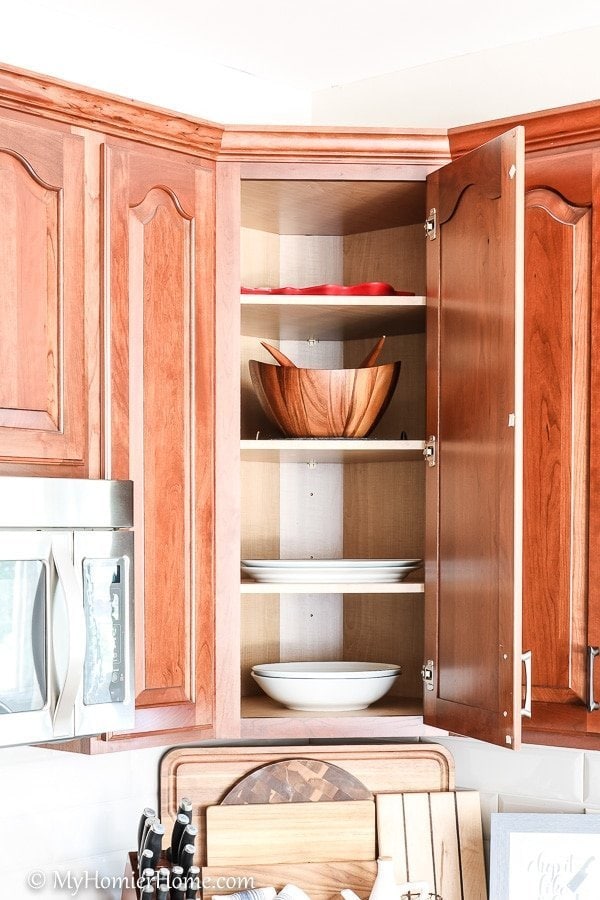
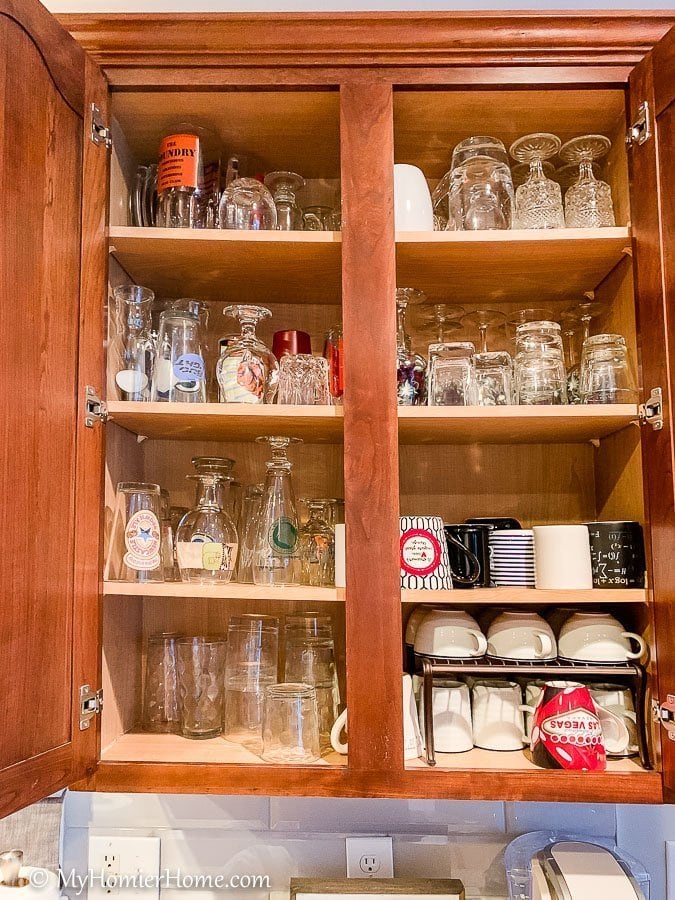
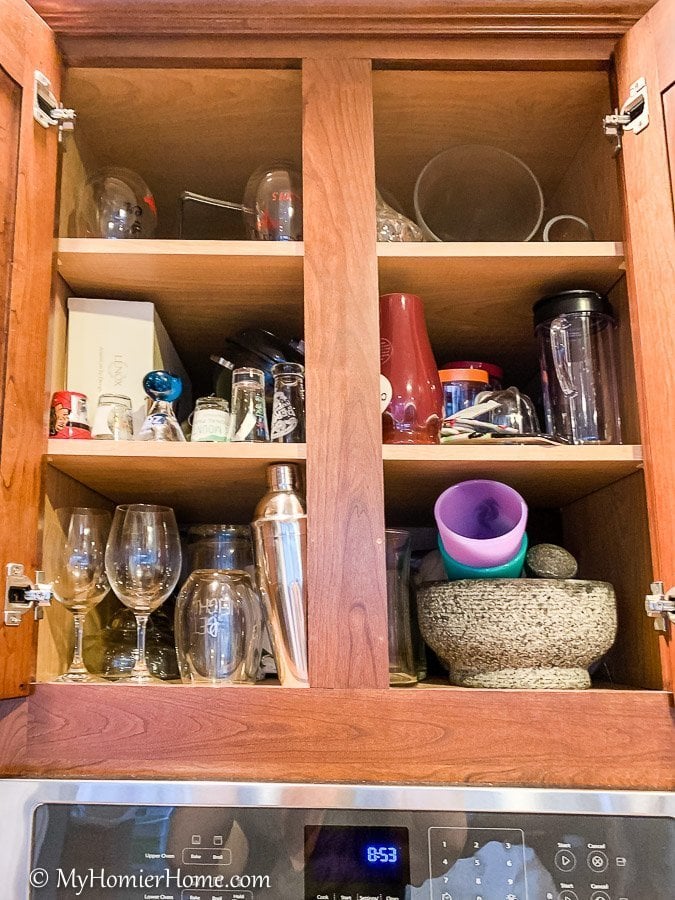
Before…
After…
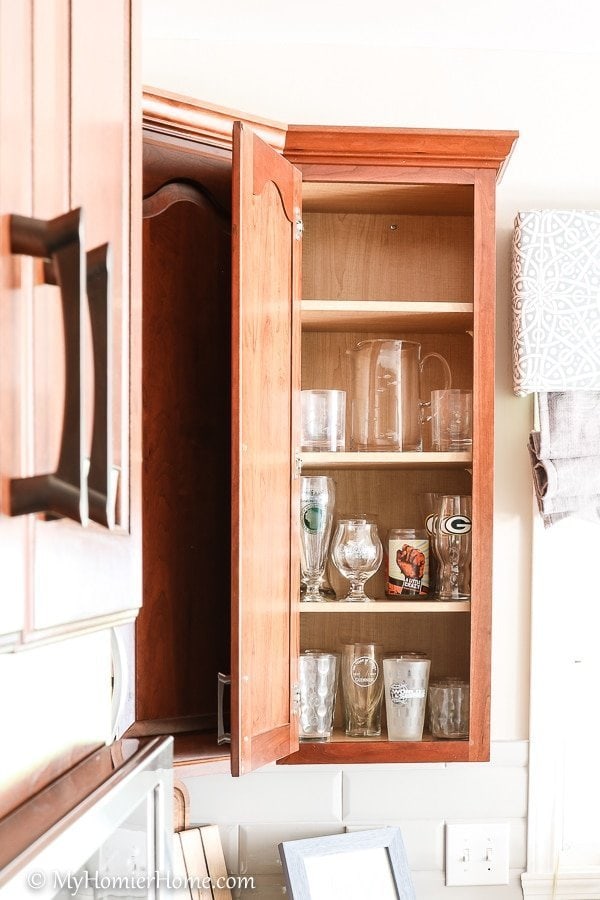
As we stared at all the cups, I realized we don’t use all of those cups on a regular basis.
In fact, the wine glasses and bourbon glasses would work better if they were near the wine and the bourbon in our dining room and front room.
And, the seemingly ten million beer pint glasses should go in our not-built-yet basement bar (Bonus: I now have more reasons for why we need a basement bar ASAP).
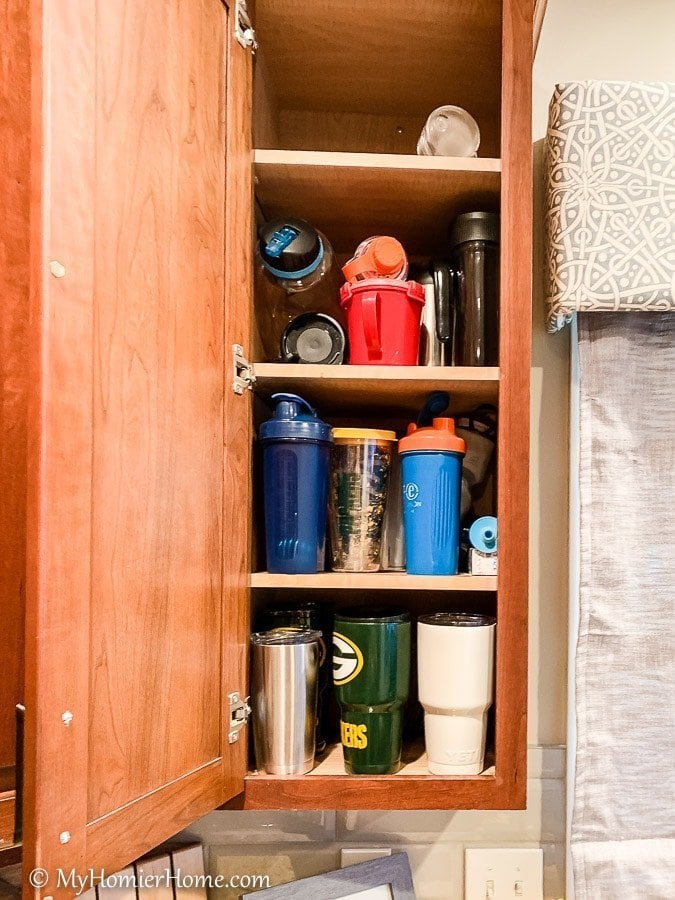
So, we sorted through the glasses and found the ones we use most often would fit perfectly in a cabinet that was once used for travel mugs.
This did mean that I then had to empty out the travel mug cabinet, but this is how the process will evolve.
I ended up moving the travel mugs to a large bin in our pantry near the protein powders and refrigerator.
Be prepared for organized chaos as you work your way through this.
Even though you aren’t taking everything out of every cabinet at once, before putting anything in any cabinet again, run through if there are any other pertinent cabinets to that grouping and empty those out before putting anything back.
Starting with plates and dishes was a great jump off point and moving to glasses and cups after that kept the most relevant items in prime locations.
The next step would be pots and pans, then serving ware, baking ware, big items, such as crockpots, and then utensil drawers all before even thinking about food, spices, and other consumable cabinets or junk areas.
5. Organize kitchen cabinets by how you use them
Before…
After…
This piggy-backs off tip number 4, but as you empty cabinets and drawers, keep in mind where the group of items should go for ease of use.
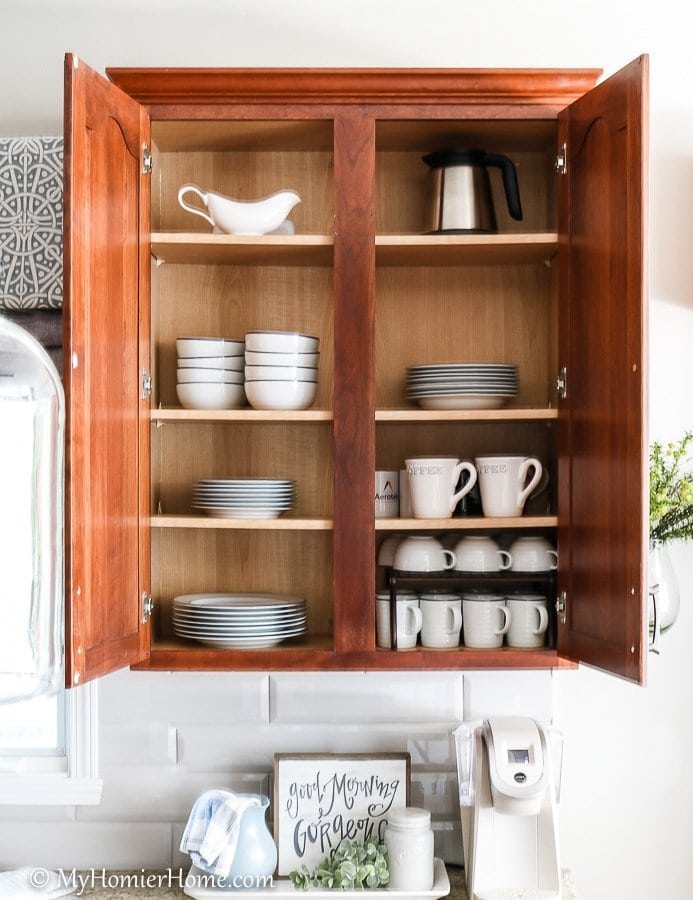
Since I changed where my plates were going as well as the cups, I was still left with all the coffee mugs.
It didn’t seem right to move the coffee mugs away from the coffee maker, so I kept them where they were.
The nice part is most of our coffee mugs are part of our every day set we got for our wedding so the whole cabinet matches pretty well even though there are plates and bowls with mugs.
Before…
After…
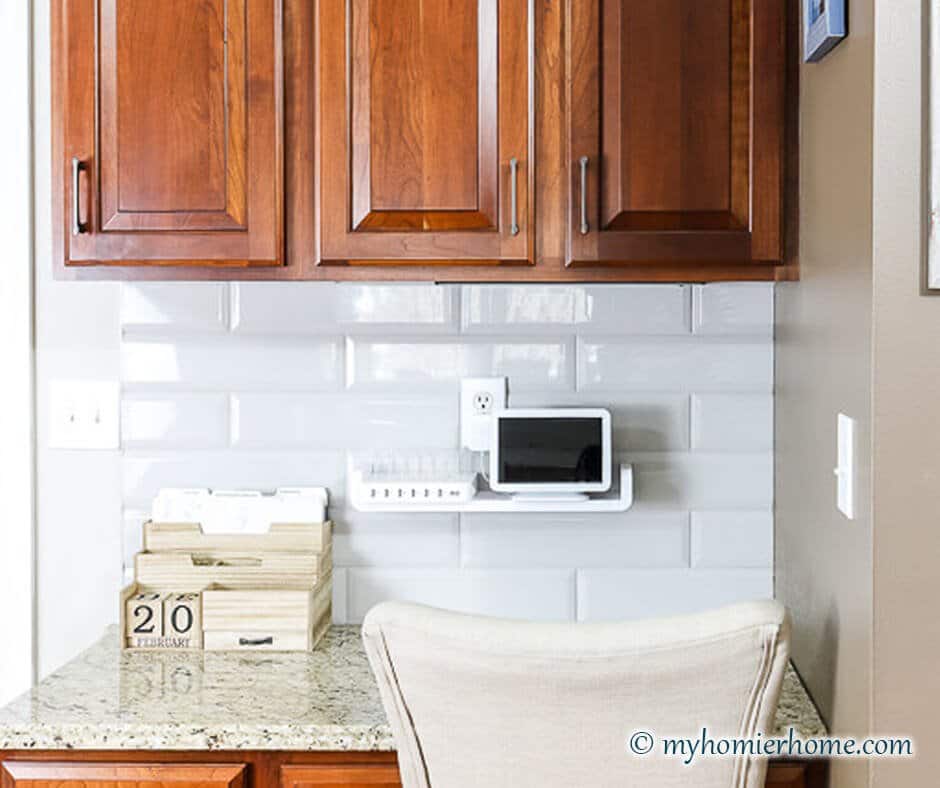
The other part of this was it didn’t make sense to have our coffee in the pantry when the pantry was on the opposite side of the kitchen.
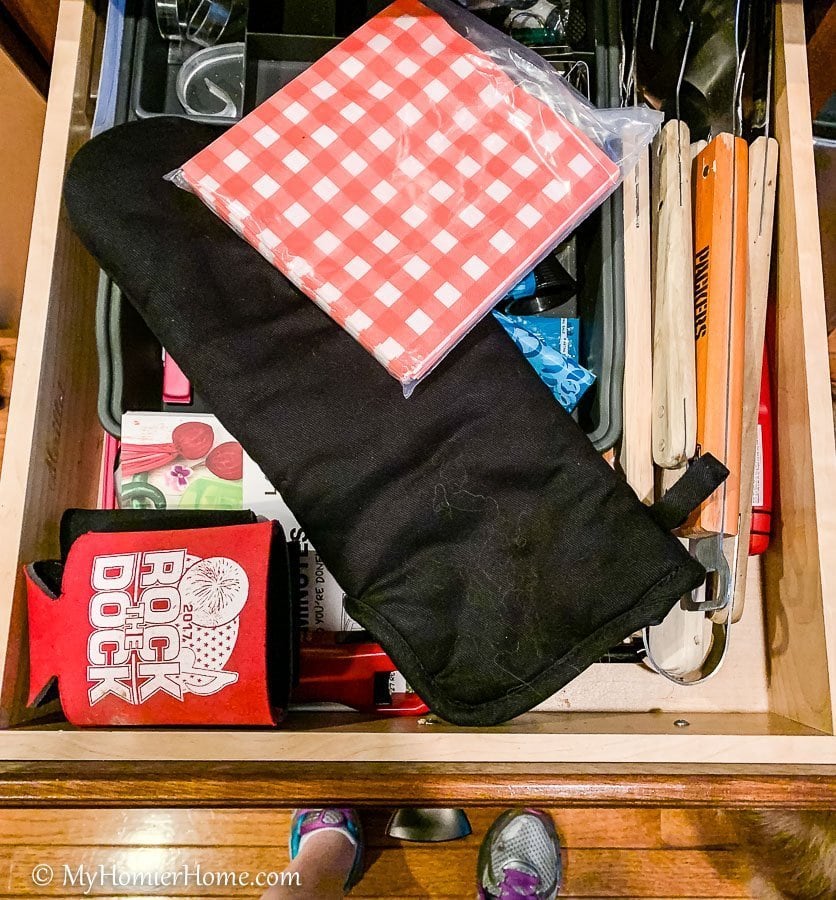
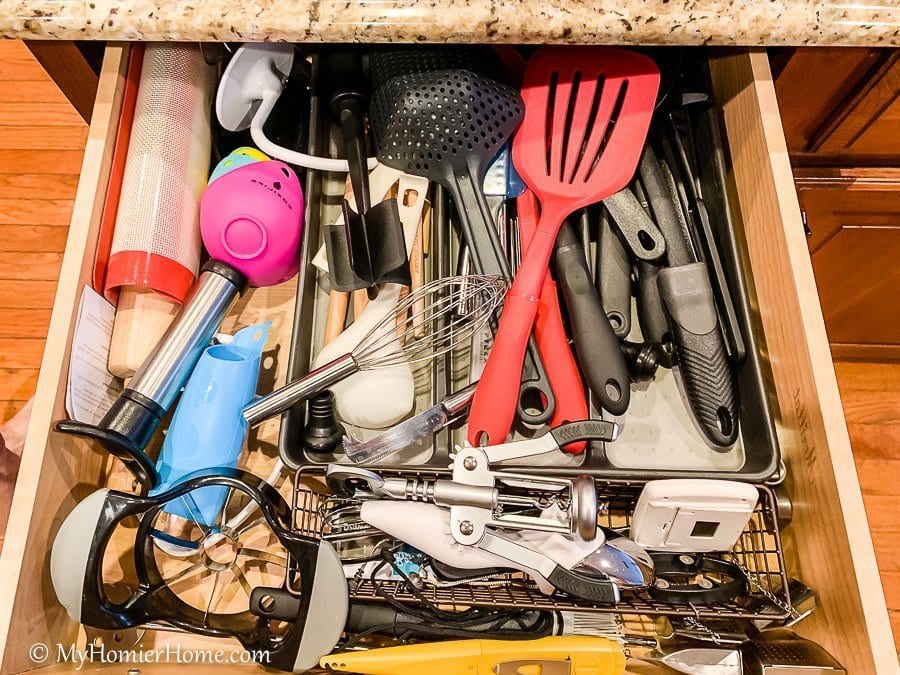
The drawer underneath the coffee machine was originally used as a pseudo junk drawer as you can see above.
It had an organizer that kept things straight, but besides going in there for my husband’s grilling tools, this was a wasted drawer.
We decided to empty it and find a new home for the organized junk bin and find a way to put my husband’s grill tools with the utensils.
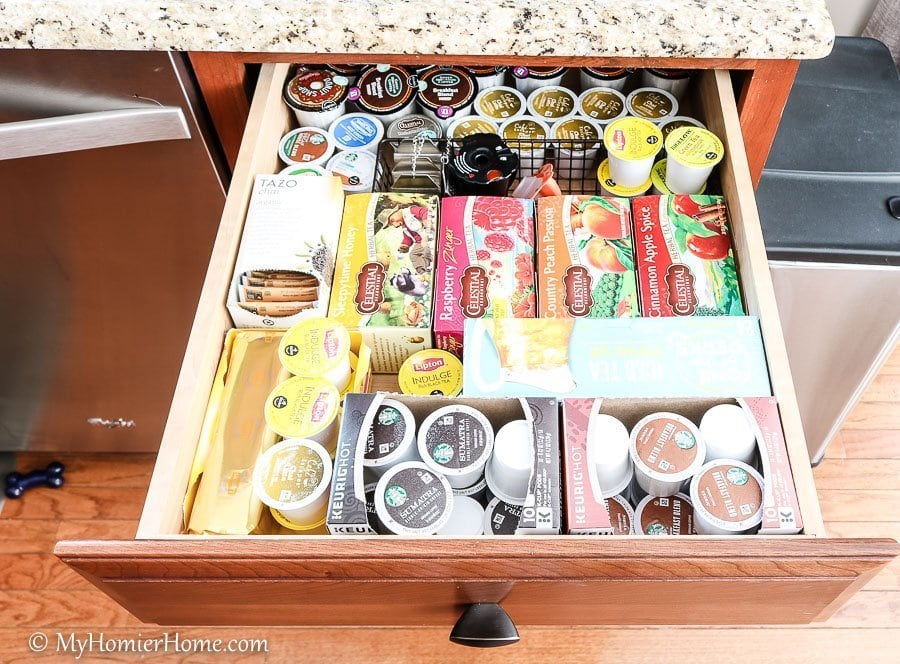
This made room to put all our coffee and tea in the drawer underneath the coffee machine which also lead us to clear the pantry of other things that really didn’t belong in there.
I was not ready to tackle the food side of things yet, but at least anything that wasn’t food was now visible.
So, when you are working your way around your kitchen, consider what makes sense for how you use it.
This will make your everyday kitchen experience that much better!
6. If you never use it, donate it
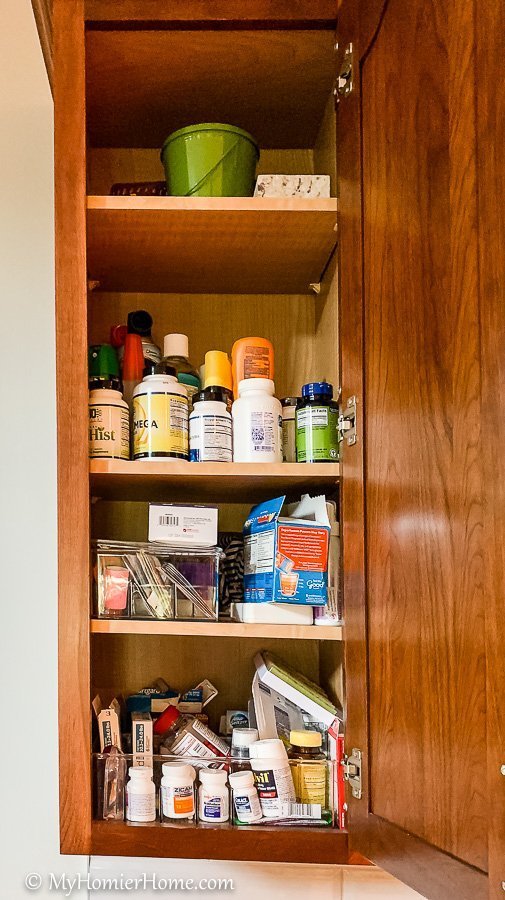
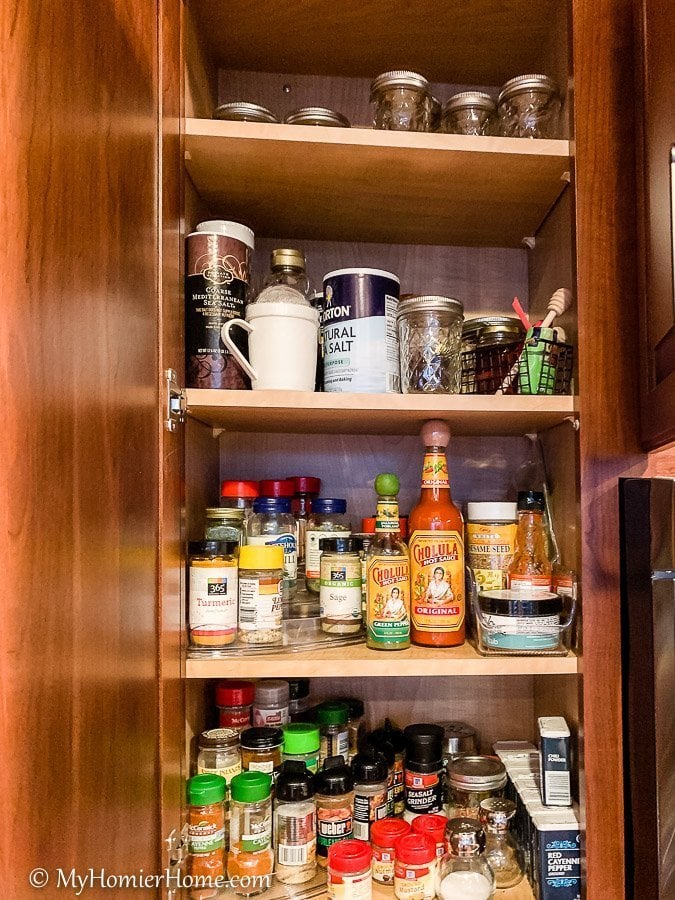
I’m a little embarrassed to show you this mess and this is the worst picture because it was so cloudy during this time, but it’s all in the name of helping my fellow home-lovers feel confident in the purging process, right?
The amount of crap we pulled from the cabinet above the oven and the cabinet above the stove was truly amazing.
These are really deep cabinets that we’re being used to store junk!
When we were all done, my mom said she really was surprised at the amount of junk I was housing in my kitchen.
Her words… “You’re so organized, but you had so much junk.
I just assumed every bit of your house was exactly how you want it.”
Well, let me spread the truth here… I love and need organization, but I’m human.
There. I said it. *lol*
Just like the rest of the population, I too get bogged down with every day life and end up shoving random stuff into a cabinet, drawer, or closet I never open.
I tell you this to remind you that you are not alone if your house is filled with weird junk that you hang on to because someone gave it to you a million years ago.
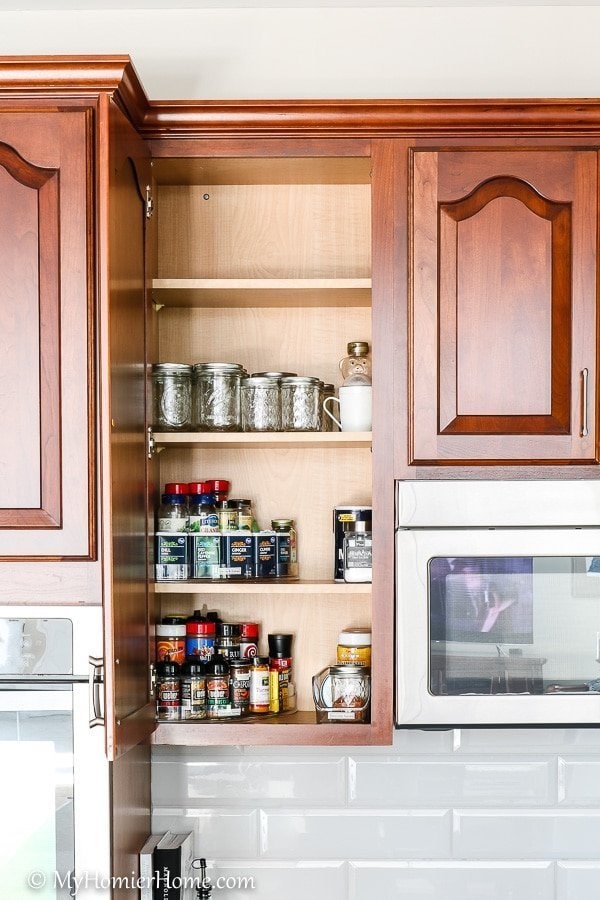
Before…
After…
As much as I need to declutter, I also need to be in the mood to do so.
If I’m feeling all touchy-feely, it’s not the time to declutter because I’ll end up keeping something I think is sentimental that in a year from now I’ll forget why it was even sentimental in the first place.
When you feel the purge bug, get to work. I donated 4 boxes worth of stuff and I’m certain there are plenty of people out there who will appreciate those items more than I did.
Now if you’re local garage sale is coming up, consider selling these items, but heed with caution.
If it is more than a couple months away, consider donating more than you save to sell.
However, in this day and age of online garage sales, you may be able to sell your items within a week, but the key there is to put a day on your calendar to take the pictures, post the items, and get them out of your house!
My mom kept saying, “Well, if you don’t know what to do with it, put it in a box and store it for later.”
For the love of all things holy, DON’T STORE IT FOR LATER!
I was mortified… okay, not really, but still! Moving junk from one part of your house to another is a recipe for disaster.
If you need to breakout the Marie Kondo Spark Joy tips, do it, but whatever you do, decide it’s gotta go and get rid of it!
DON'T STORE IT FOR LATER!… I'm sorry for yelling…
7. Be realistic
Before…
After…

It is very easy to get caught up in the aesthetics of cabinets and drawer organization.
And truly, I think it should definitely be part of the conversation while you are working on this project.
However, if you take out one item from your utensil drawer and the whole thing falls to hell, it’s not going to function.
Remember this, if it doesn't function when you’re busy, it doesn’t function!
So be realistic with yourself, how are you really going to use these items and are they easily accessible at all times no matter what else is in there.
You do want it to look aesthetically pleasing for your own sanity and to ensure you get those good feels when you open it up, but don’t sacrifice function for looks, ok?
You promise? Ok, we’re cool.
8. Take notes on items that need to be replaced from your kitchen cabinets
Without a doubt, you will find as you work your way through your kitchen that you have items that need to be replaced.
For instance, as I was going through my pots and pans, we noticed that many of them were beat up bad.
I also started to think back on how long we’ve owned these and I traced some of them back to my first apartment back in 2008!
Not only were they beat up and we are grown adults, but these pans were posing a health risk!
Here I am getting all kinds of healthy with AIP diets and what not and my pans are working against me!
Because of this, I made note to replace them ASAP.
Before…
After…
9. Know what organizational items you need to buy
Most likely, you will come across organizational items you have purchased previously, but no longer work for your kitchen and they will need to be replaced or more of them purchased.
The key to getting the right organizational items, in my opinion, is to, first, decide on an aesthetic.
Check out my favorite organizational books for inspiration, The Home Edit and Beautifully Organized.
They will give you great ideas on the types of things to buy that will create a cohesive look for you.
For my kitchen, I am a huge fan of clear bins because I like to be able to quickly see what I have and don’t have before running to the grocery store or when looking for a snack.
Clear bins also allow a flat surface for labels, too.
Now way back in the day when I thought I was getting organized, I hadn’t read one organizational book (mistake).
I also did willy-nilly purchases for organizational items before deciding what aesthetic I was after and what would be most useful for my needs.
Live and learn, but I’m also not made of money, so this time around, I opted to keep the two silver mesh baskets for the upper shelf of my pantry as well as some various wire baskets.
Most of these ‘go’ together, but if I were to do it all over again, I would go fully clear with a few white or one colored baskets for things I didn’t want to see every day.
Before…
After…
Before…

After…
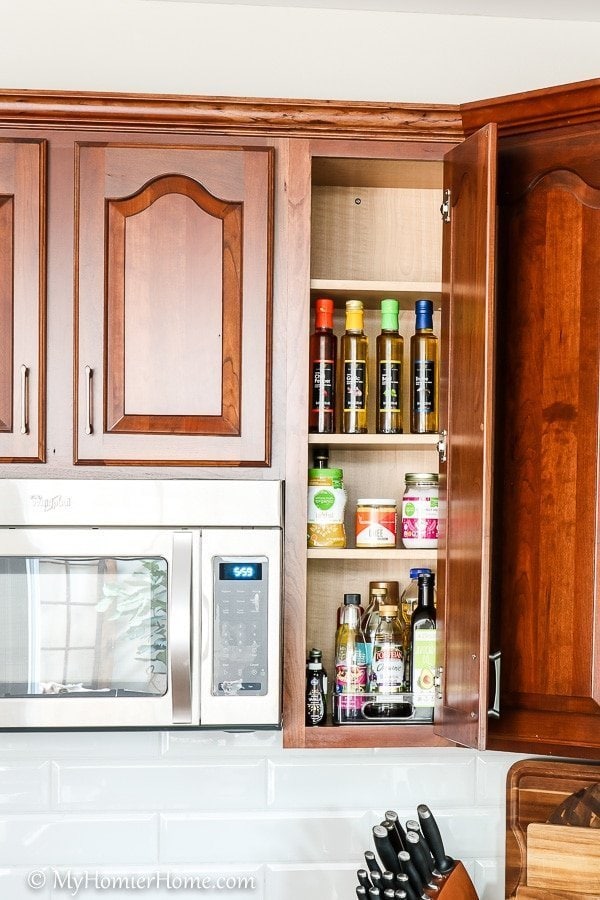
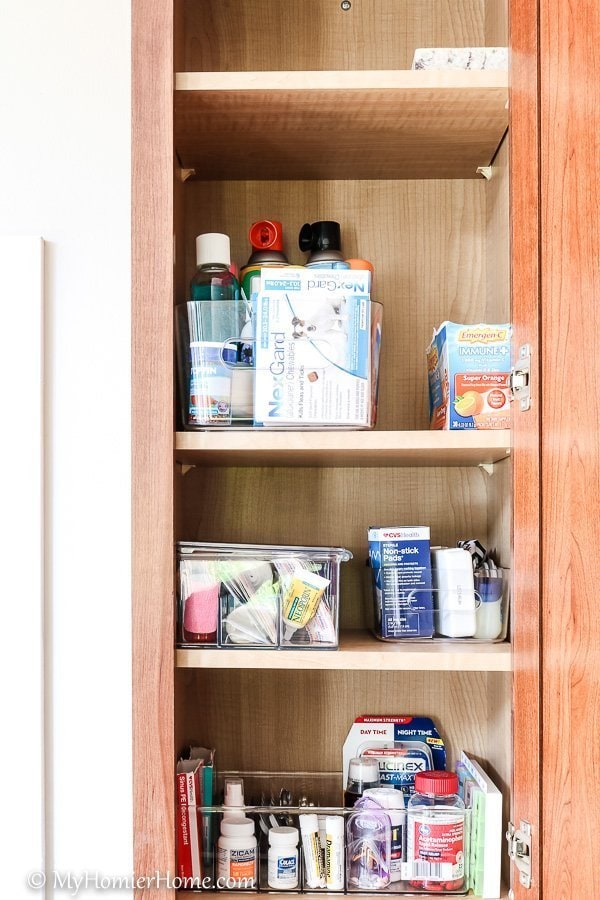
You will definitely need to invest in some kind of bins to help you reach the items in the back more easily.
It’s just like pull out cabinet shelves on a track.
They are super convenient because you can access what’s in the back with a quick pull of the shelf.
The same theory applies for ease of use with items stored at the back of the cabinet.
As you can see above, I like to use clear bins to gather the items and give me quick access to anything on the shelf.
But, before you can purchase these items, you ABSOLUTELY HAVE TO take measurements on the height, width, and depth of your cabinets.
If you think you’re going to walk in to any organizational store or aisle and just be able to eye-ball it, you are mistaken… believe you-me, I’ve tried.
Therefore, before you run to the store, figure out how big you can get in the cabinet, how big you actually need it to be, and what type you want (clear or not).
Before…
After…
Bonus Kitchen Organizing Tips
Now, before I go, I want to give you a few quick bonus tips before you start this adventure.
These are just suggestions, but if you are trying to knock this out in one day, consider saving these areas for last, so you can assess your progress and stamina at the end.
- Save the fridge for its own day after you’ve gone grocery shopping.
- Save the pantry and any food related cabinets for last or even their own day.
- Save your under the sink area for the very last or another day because it’s a bit tricky, in my opinion.


This would be such a cute way to keep the kitchen organized! Thank you so much for sharing! We are refinishing our kitchen cabinets this month and I want to make sure that after that we keep everything organized and tidy! We will definitely be using some of your tips! Thanks again!
Absolutely!