How to Choose the Perfect Kitchen Lighting
Looking to upgrade your kitchen lighting? Here are 8 steps to help you choose the perfect kitchen lighting the first time!
Raise your hand if you have ever been plagued with decision paralysis?
I think it literally happens to me on a daily basis, usually when it comes time to decide what’s for dinner.
More recently I dealt with this when I was choosing my kitchen lighting. I had no idea where to start and the possibilities seemed literally endless.
What did I want? What size? What aesthetic? What stores do I search? What if I choose the wrong one?
It can seem overwhelming and a little defeating when you see all these perfect kitchens and start falling into the comparison trap.
So, to save you some time and energy, this post will walk you through the process I took to overcome my kitchen lighting decision paralysis.
Remember, with a little guidance and a sound strategy, you too can purchase lighting with confidence and be proud of the outcome.
Let’s bust through the questions and get some answers!
Table of contents
Disclaimer: This post does include affiliate links for your convenience. This is at NO additional cost to you but earns me a small commission. To read more, check out our disclosure policy. As an
Step 1: Take a pictures of your space
When you are taking pictures of your kitchen, be sure that the room is well-lit by natural light.
It is best to take the pictures when the sun is angled in towards the opposite side of your house, if you can.
You want the natural light to be able to get a true view of what your room looks like, so you can use it when you are out shopping.
I would recommend you take three photos.
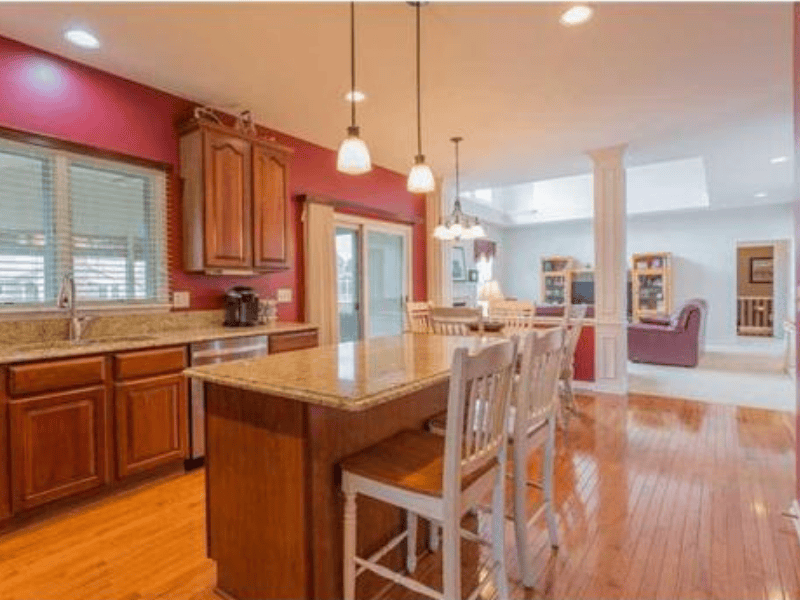
The first photo should be of the full room with all the lighting in view, so you can get the full feel of the room.
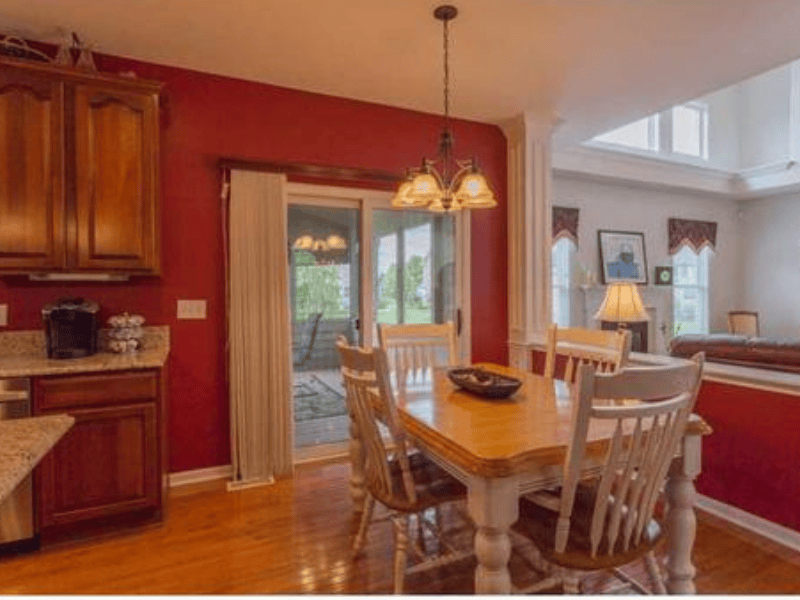
The second photo should be a picture of just the table and the fixture above it.
It is probably better to take this photo straight on and vertical including a part of the floor and a part of the ceiling to get a clear view of that specific area of your kitchen.
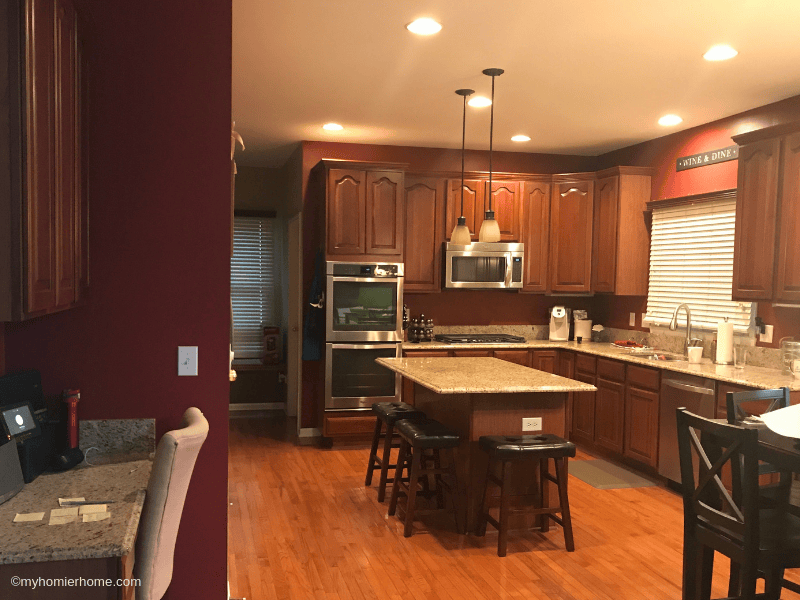
The third photo should be a picture similar to the second photo, but of your pendants.
Make sure you have these photos easily accessible in an album on your phone.
Step 2: Measure your space
This step is an absolute must.
Part of decision paralysis is having too many options.
By measuring, you can eliminate many of the choices you have in lighting just based on the size that you will need for your particular space.
When measuring for pendants, you want to measure the distance from the ceiling to your island and the length and width of the top of your island.
If you have pendants already there, measure the distance between them as well as the size of the opening of the pendant.
For the fixture above your kitchen table, you want to measure the size of your kitchen table or the size of table you are going to have.
I waited until I picked my kitchen table before picking my chandelier just to be sure, but keep in mind what may change if you choose a different table.
Here is a link to a lighting guide for all ceiling lights.
Once you have your measurements, use the guidelines to determine the appropriate size you will be searching for both the pendants and the chandelier.
You will want to write this down somewhere.
The linked photo below for the DIY & Decor Library will give you access to the fillable PDF worksheet I put together that has all of this laid out for you, so you don’t forget anything.
Remember, the guidelines are just that… guides.
So, if you want to shake up the status quo because you are in love with a particular light, do it!
But, be sure to consider all the things that could possibly go wrong and decide if that matters to you.
Step 3: Start a Lighting Board in Pinterest for inspiration
I am a huge fan of Pinterest for making home-centered decisions.
Many of the pins you find have links to the actual place to buy and if they don’t there is a way to search by image.
Keeping all your lighting likes in one place will make it easier to refer back when you get further along in the process.
This will also get your mind honed in on what kind of feel you want as it relates to the lighting.
Once you have a bunch of inspirational pictures, take note of what finish and type of lighting you are drawn to.

Step 4: Formally state your main goal and desired feels
If you’ve been following me for any length of time, you have probably started to get a sense that I’m really into the feels and the goals.
For someone who is a bit scatterbrained, as I sometimes can be, having a specific desired outcome actually stated somewhere helps me stay focused – especially when I’m in the store with all the pretty things.
For your lighting quest, consider what you pinned on your Pinterest board and decide what the common theme is that you like so much. Is it a unique statement piece, an airy feel, a rustic vibe?
Try to hone in on your desired feels.
Also, narrow down whether or not you are looking for mood or task lighting. Mood lighting will need to be dimmable.
Task lighting will need a higher wattage capability.
Ask yourself, “What is my main goal with this lighting?” Then, write it down!

Disclaimer: This post does include affiliate links for your convenience. This is at NO additional cost to you but earns me a small commission. To read more, check out our disclosure policy. As an
Step 5: Do your research
The research phase is the meat and potatoes of this process.
Keep in mind, this step may take you days or weeks.
While I was researching, I spent a solid week scouring the internet.
I would suggest starting with local hardware store sites, such as Menards, Lowes, and Home Depot.
I think Menards has the largest lighting section, but it would be worth it to check them all out.
In addition, I would take time to search some lighting specific websites as well.
My favorite is Ferguson Lighting.
This is where I purchased all my kitchen lighting, but there are tons of great options that may give you the right uniqueness you are looking for.
As you find things you like, either bookmark the page in your web browser or right click the image to save it to your desktop.
If you save the image, just be sure to copy the web address to attach to the picture so you know how to find it again.
The last thing I would do in the research phase is do a google search for lighting stores in your area.
There are some really cool local boutiques by my house that had a much wider variety than the regular box stores.
Add these stores to the list on the worksheet in addition to any stores from above that you found lighting you liked to visit later.
Step 6: Schedule visits to the stores
After writing your list of stores, schedule time to visit them.
Seeing lighting in person is oh so necessary.
Not only can you see the lights firsthand for their quality and aesthetic, but you can talk with real live people.
Be sure to have your three pictures from step one handy to show the salesperson.
The lighting rep at one of the stores I went to was so helpful in steering me towards what I was really after.
She kept me focused and even found a handful of options in a catalog of 1000’s of lights.
It was so helpful. I would never have been able to pick through a catalog that big without getting side-tracked.
Step 7: Try them on

Once I narrowed down my search to a handful of lights, I longed to see them in my room for real.
My biggest problem, as I would imagine most people face, is that I couldn’t buy them all, install them, and then choose after seeing them in person… Enter Photoshop.
I recently took a photoshop course at the local art center and it was worth its weight in gold.
With Photoshop, I was able to input my full room photo as well as the pictures of the lights I found online that I liked.
[Psst…. I can do this for you! It's a service I offer called “Try it On!” Design Boards.]
I tried each of the pendants and chandeliers in various orders to get a true idea of what they would look like in my actual kitchen.
This helped me decide which pendant and chandelier I liked best, but also what they were going to look like together.
Step 8: Make that purchase!
If you’ve made it this far, it’s time to make your decision!
If you have any hesitation, determine what it is that is holding you back.
I recommend trusting your gut. If your gut is telling you that it’s not the right one, consider listening.
However, if your choice is a little more bold than you normally go and gets you out of your comfort zone a bit, that could be a good thing.
Try to narrow down what it is that is weighing on you about the purchase and address it head on.
Sometimes your gut is telling you to be cautious for a good reason, but other times its keeping you back from taking a much needed risk.
If you have the ability to try it on, you should feel pretty good about how it’s going to look, but if your confidence is waning, don’t forget I can help you there.
You can find my full kitchen source list, including my lighting, in my kitchen before & afters post.
Alright, it’s your turn!
Download and print the worksheet to help keep you organized through this process and get the lighting juices flowing.
If you need any help at all with this process, you can reach out to me via email, Facebook, or by leaving a comment on this post below.
Combat the decision paralysis and get the upgraded kitchen through your lighting asap! You got this!