6 Tips for a Budget Kitchen Renovation + Before & Afters
Renovating a kitchen can be costly. With these 6 tips for renovating your kitchen on a budget, you can have the kitchen of your dreams for a lot less!
As we all know, kitchens are the first thing most homebuyers are checking out in a home because the cost of renovating a kitchen can be so costly. If your kitchen is already in decent shape, you open the chances for more buyers to consider your home as an option. If your kitchen is in need of fixing up, but you don’t have 10’s of 1,000’s of dollars to renovate, doing a few things yourself may be your best option.
My friend, Heather, was looking to rehab her kitchen without spending a fortune knowing she wasn’t going to be living in this home forever. After helping her organize her ideas for her Room Rescue, I thought it would be important to share with you what she has learned in the process of renovating her kitchen on a budget. Because there is so much valuable information, I have split this post in to two parts. Be on the lookout for next week’s post on how she painted her cabinets along with the tips and tricks to make your cabinet painting simpler.
Today, I am sharing the tips for your kitchen renovation from Heather's Q&A session!
Table of contents
- Before Photos
- Tip 1 : Make a list of items that need replacing and take note of those that can be done yourself in order to cut costs.
- Tip 2 : Create a mood board to articulate your vision to help drive the decisions related to your project.
- Tip 3 : Create a plan of attack for the order in which you will complete your project.
- Tip 4 : Take time to understand what you like and don’t like, but also what will work best with your specific space.
- Tip 5 : Bring a picture of your mood board to Lowes to articulate what you need to order.
- Tip 6 : When renovating for resale, consider budgeting in enough for granite countertops and upgraded appliances.
- After Photos
Before Photos
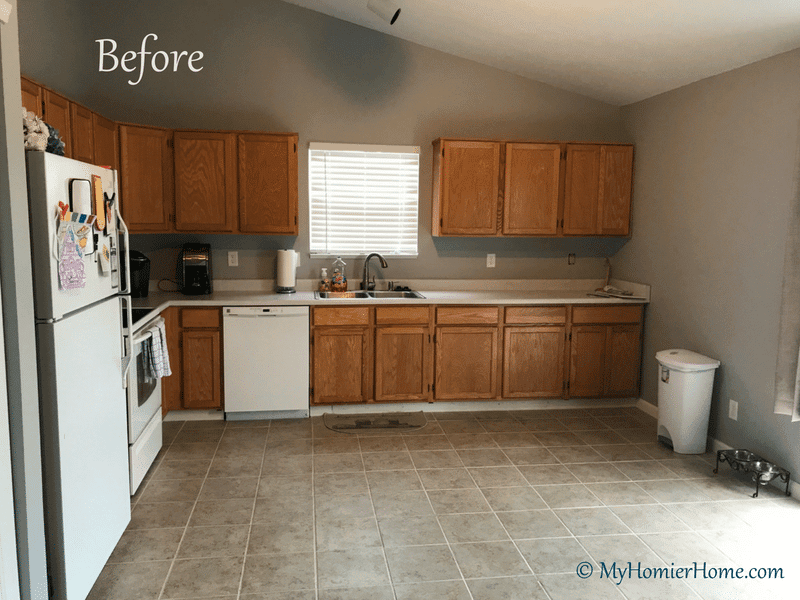
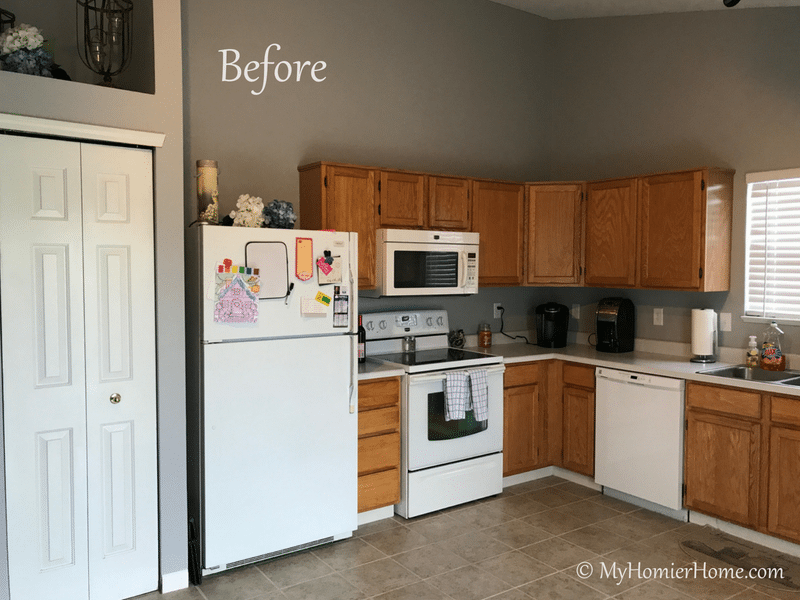
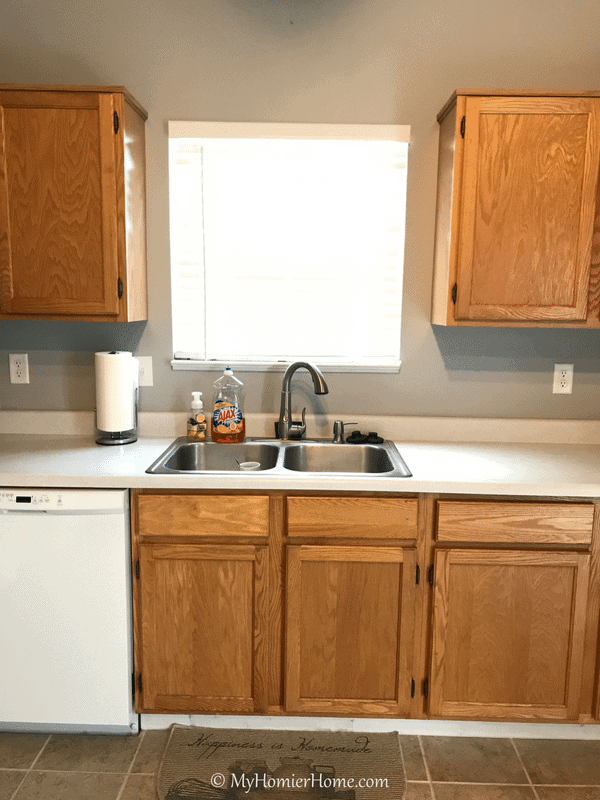
Question: When you knew your kitchen was your next project, what was your biggest pain point in trying to articulate your vision?
Answer: Initially, the only priority in the kitchen was new appliances since mine were starting to break down. I spent hours on Pinterest and visiting different appliance stores, but I quickly realized a complete remodel was a must.
The biggest pain point for me was that my ideas were costly and I knew I wasn’t going to be staying in this home long-term.
Therefore, I needed to find ways I could do certain portions of the kitchen myself. Having all these ideas and not knowing where to start was beginning to get frustrating until you came along!!!
Tip 1: Make a list of items that need replacing and take note of those that can be done yourself in order to cut costs.
Upon looking at Heather's before photos, things like cabinets, appliances, countertops, and lighting where the top items that needed to be replaced.
With that in mind, the only DIY-able to cut costs would be to paint the cabinets instead of replacing them.
This decision helped direct her kitchen project and open-up how much of the budget could apply to the rest of the project.
Tip 2: Create a mood board to articulate your vision to help drive the decisions related to your project.
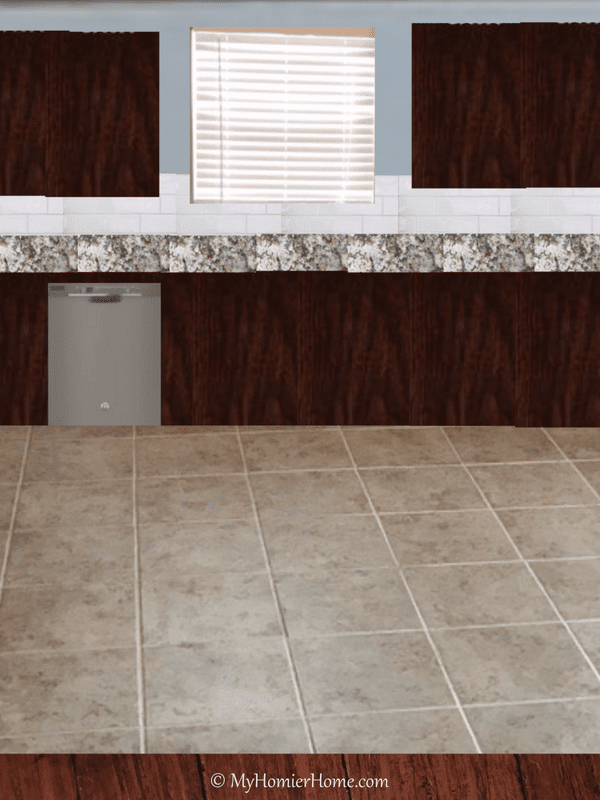
She had been going back and forth on what kinds of combinations of finishes for the various things in her kitchen.
She was debating between just upgrading her broken white appliances to stainless or just replacing with white again. She was deciding between white cabinets or staining her cabinets.
After we put her mood board together and took into consideration her fixed finishes (her flooring and wall color), it became much clearer that she should go with stained cabinets instead of white.
Also, after looking at the difference in price of stainless steel vs. white appliances and seeing the design in full, she decided it was worth a little extra for the newer looking appliances.
Disclaimer: This post does include affiliate links for your convenience. This is at NO additional cost to you, but earns me a small commission. To read more, check out our disclosure policy.
Question: Once I helped you visualize your space with a mood board, what were the steps you took to get the project rolling?
Answer: I was debating between staining my cabinets or painting them white.
After seeing both options together with my flooring in the mood board, I decided staining was definitely the way to go.
You gave the suggestion to use Rockler Woodworking & Hardware to purchase Java stain gel, which basically was like painting my cabinets.
I was glad to have made this decision before all others because I’m the person who would end up with stain all over everything.
Therefore, I was able to stain the cabinets before getting my new countertops and appliances which eliminated the stress of trying to be super careful.
Tip 3: Create a plan of attack for the order in which you will complete your project.
Because the biggest and messiest part was painting the cabinets, deciding to get this step out of the way first made the most sense to allow her to complete her DIY project without too much stress of affecting the other items.
Choosing the path of least resistance in any do-it-yourself situation will preserve your sanity as well as make your job easier.
Question: What suggestions would you give someone else doing a kitchen renovation on a budget?
Answer: I would suggest spending time researching not only what you want the kitchen to look like, but also how your kitchen will flow with the rest of your home.
Until I had contacted you for help, I never even considered how the lighting and space in the room along with my flooring and paint was going to affect my decisions for everything else.
You made sure the colors were all going to flow and match my style. When seeing the kitchen visually on the computer, I was able to see what I was envisioning in my mind and realized it wasn’t going to look the way I had imagined.
That was very helpful because it made me very confident in my choices as we continued to look at different drafts of the project.
And I absolutely love my kitchen in its final state!
Tip 4: Take time to understand what you like and don’t like, but also what will work best with your specific space.
Because Heather’s kitchen is open to her living room and dining room, it was important to consider what she wanted style-wise for her kitchen while also considering how those choices were going to play with the other rooms in the open-concept.
Being able to “try on” the options before committing was key to the success of her project.
Question: Any recommendations on where to get appliances, countertops, etc.?
Answer: I would recommend using Lowes’ Design & Remodeling Services.
Since I knew what I wanted after working through my ideas with you, I was able to have Lowes help me set up the orders for my appliances and countertops.
The cool part about working with Lowes for my orders was that the taxes are not charged. Ordering all my items together also allowed everything to run super smoothly.
Everything was very organized and I only spent about 2 hours with the consultant. Definitely the place to go.
Tip 5: Bring a picture of your mood board to Lowes to articulate what you need to order.
Question: Is there anything else you want to share about your experience renovating your kitchen?
Answer: I am so thankful you talked me into the slate appliances rather than the white ones.
I was trying to save money, but at the end of the day white appliances would not have as strong of a look for resale.
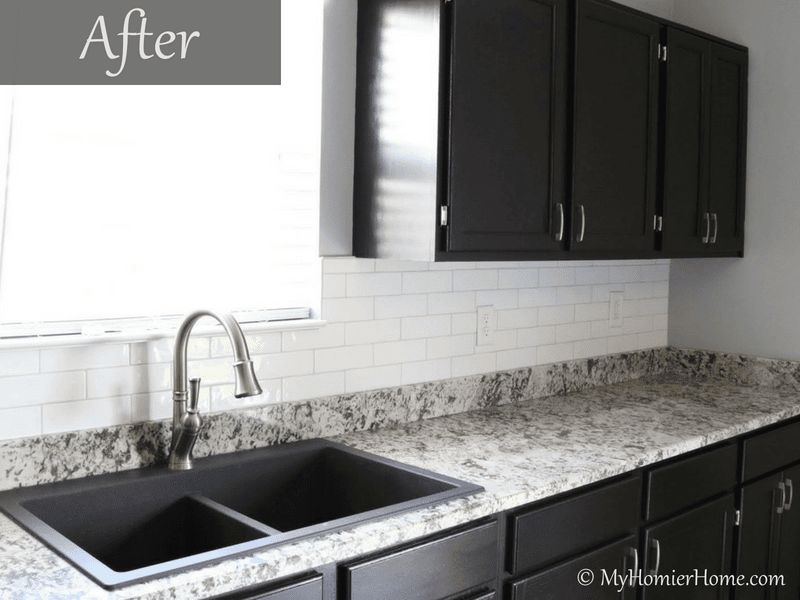
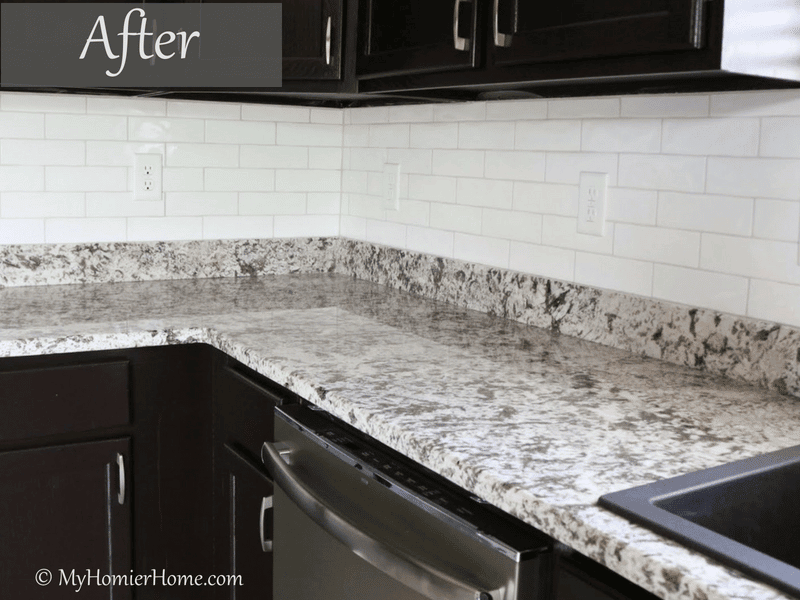
Also, initially I was leaning towards just updating my laminate countertops for another laminate, but after discussing with you the differences between them, I am so glad we went with the granite countertops. In hindsight, I know I would not have been happy otherwise.
It was so worth the money!!!
Tip 6: When renovating for resale, consider budgeting in enough for granite countertops and upgraded appliances.
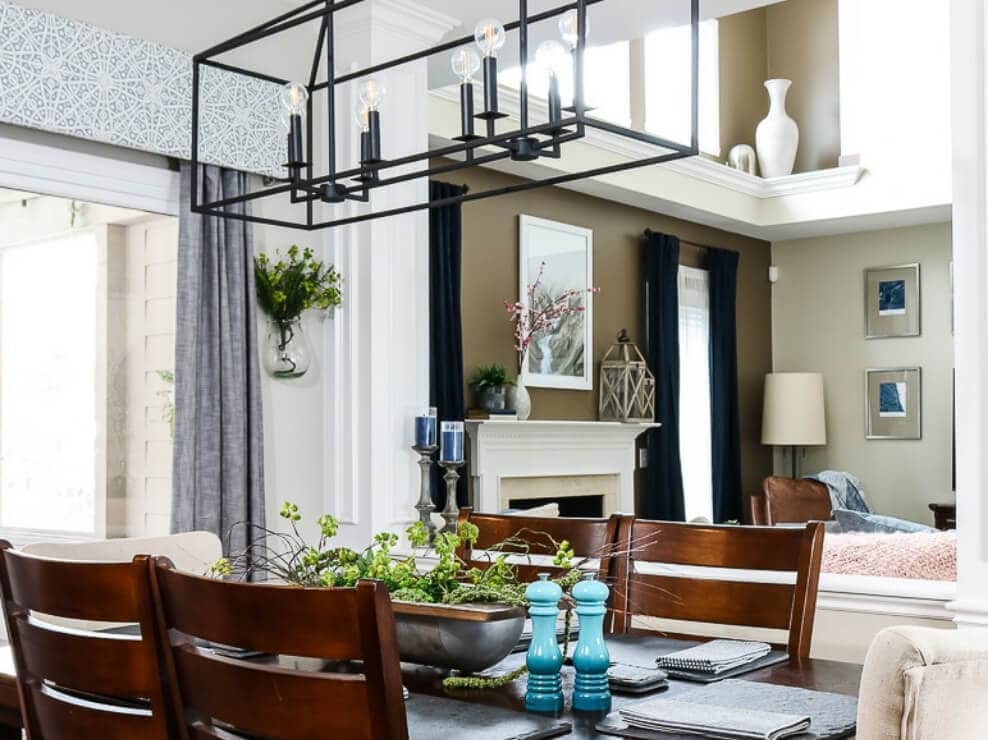
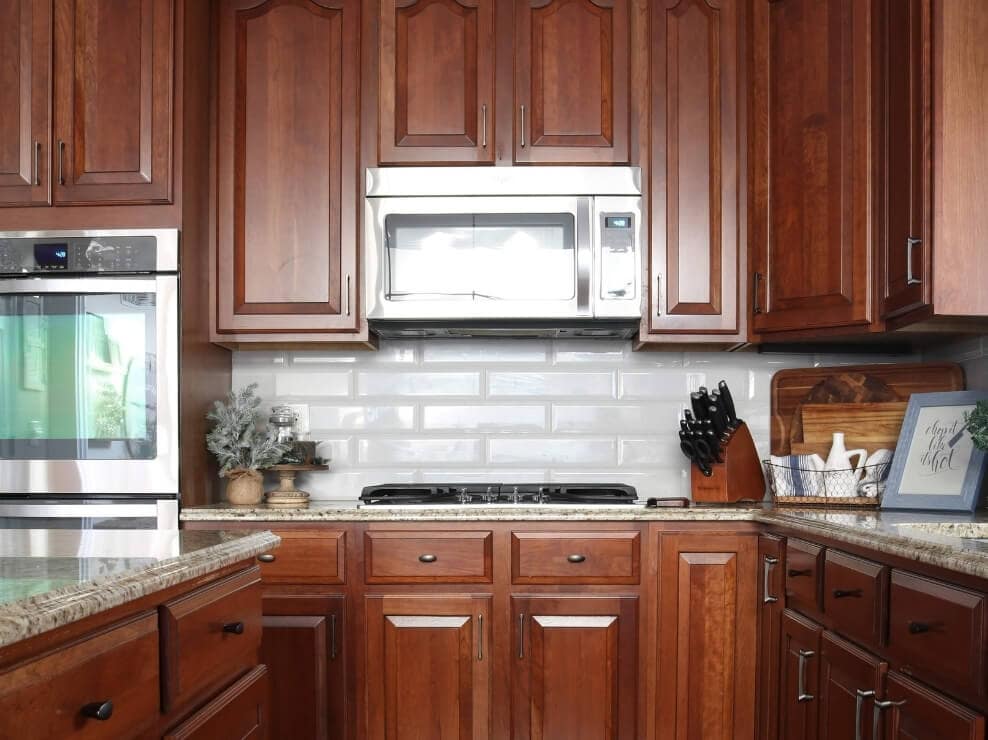
After Photos
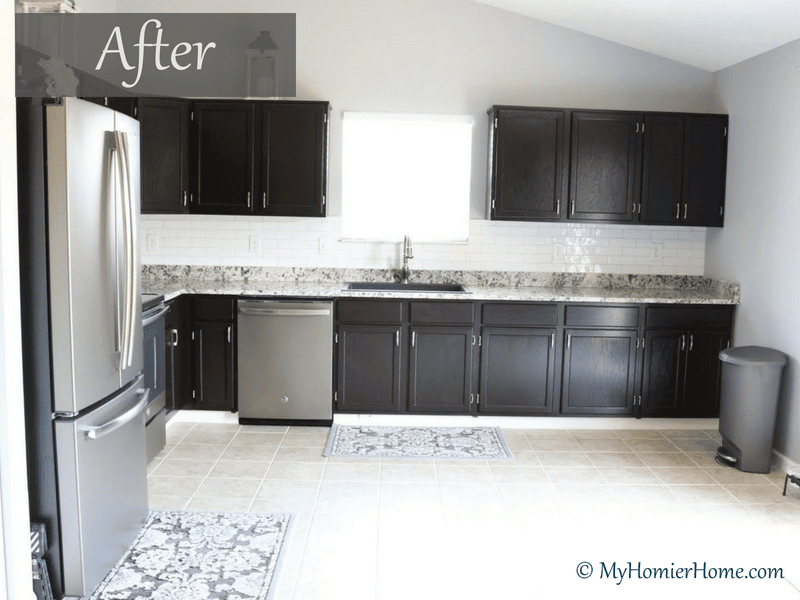
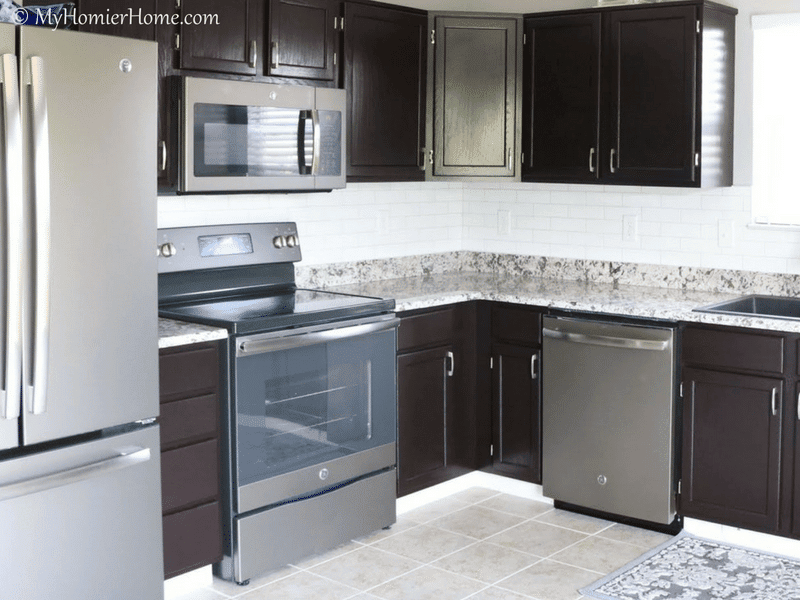
How about you… Would you take on a kitchen renovation DIY style?

