How to Install Super Sturdy Garage Wall Shelves
Move your heaviest stuff off the floor by installing the sturdiest garage wall shelves. Learn how here.
This post is sponsored by Proslat. All opinions are my own.
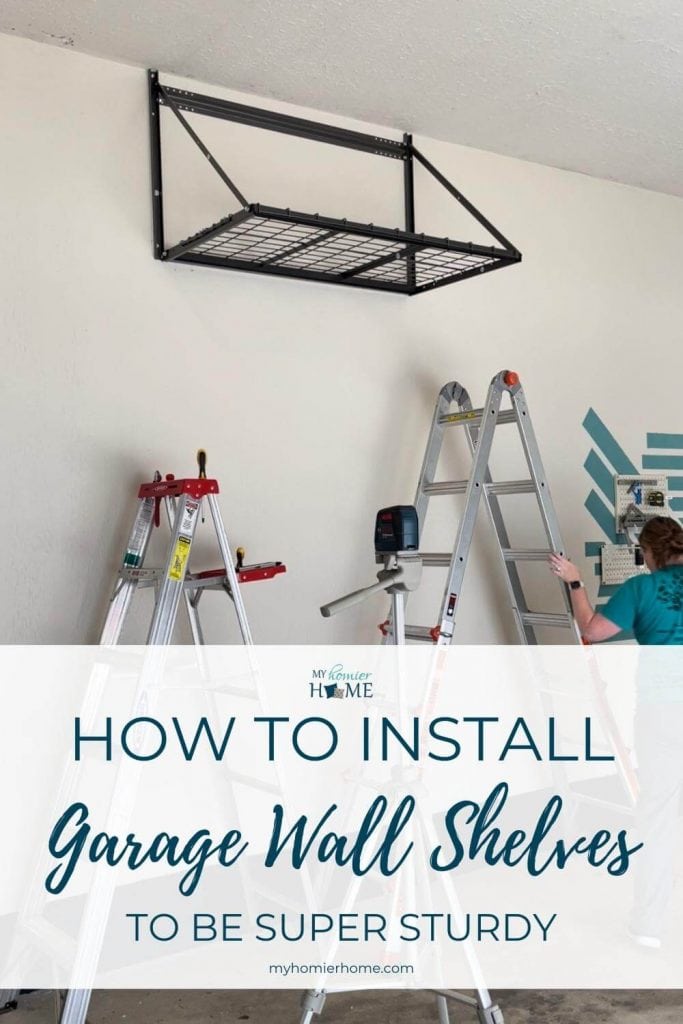
It's week five of the one room challenge and I am making slow, but steady progress. Today I'm sharing the heavy duty garage wall shelves we installed to give us more storage off the ground.

Week Three (Garage Paint Colors)
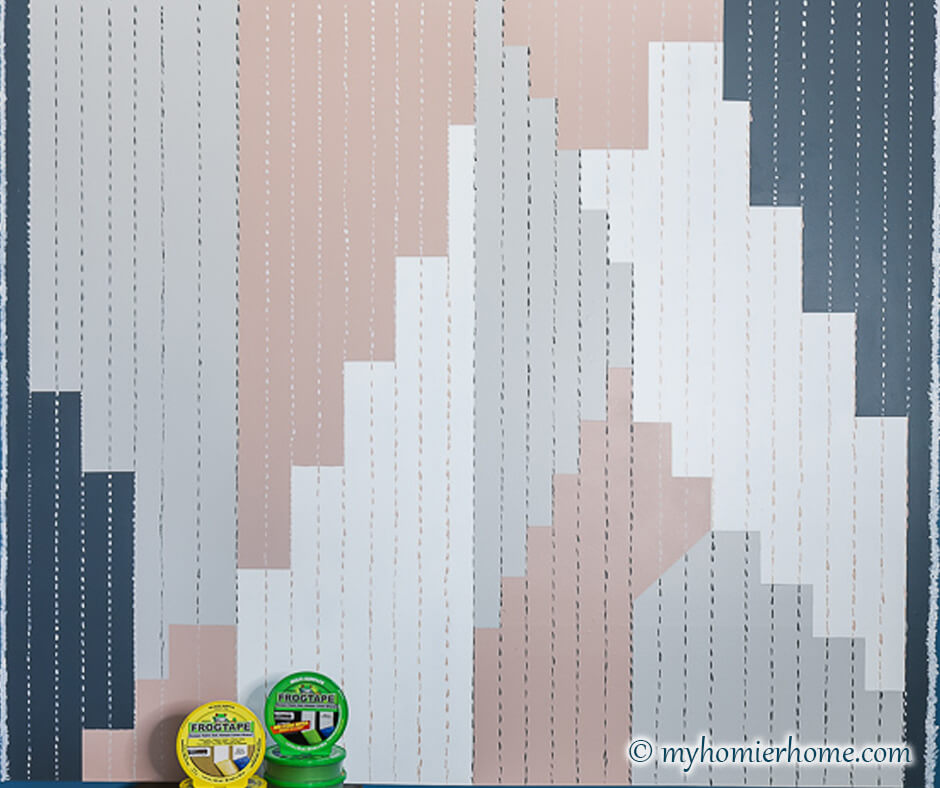
Week Four (Garage Tool Accent Wall)
Here's exactly why I would recommend the Proslat Prorack garage wall shelves and all my tips on how to properly install them after having hung 4 sets.
Jump to…
- Move your heaviest stuff off the floor by installing the sturdiest garage wall shelves. Learn how here.
- Why Proslat Prorack Garage Shelves
- How to Install These Super Sturdy Garage Wall Shelves
- Gather your materials and layout all pieces.
- Mark you studs on the wall and determine your wall position.
- Assemble the back of the shelf.
- Mark your holes on the wall and drill pilot holes.
- Secure the back Part of the Shelf to the wall.
- Build the side triangles of the shelf.
- Build the base of the shelf on the wall.
- Important Tips
- To-Do List
Disclaimer: This post does include affiliate links for your convenience. This is at NO additional cost to you but earns me a small commission. To read more, check out our disclosure policy. As an
Why Proslat Prorack Garage Shelves
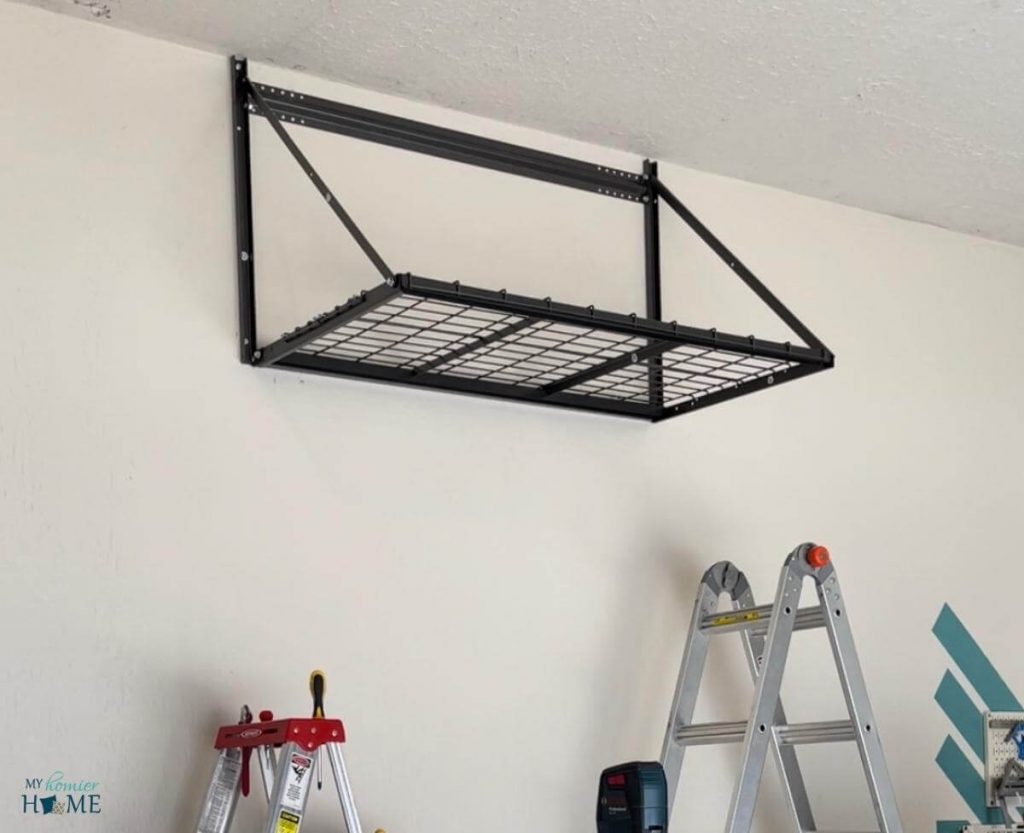
The Proslat Prorack garage wall shelves are great for so many reason, but most notably their ability to hold 800 pounds.
So much room for goodies up there.
The other thing I really love about these shelves is they are super versatile.
Not only can you hang them the way I have shown above, but you can have the grate on the top too.
AND you can make these one 8-foot long rack instead of 4-foot by attaching another rack directly to the same side bar.
Also, once we got into the groove (and for you after you read this post), they were super straightforward to install.
How to Install These Super Sturdy Garage Wall Shelves
Now let's talk about my tried-and-true tips on how to install these super sturdy garage wall shelves after we personally installed four of them.
Gather your materials and layout all pieces.
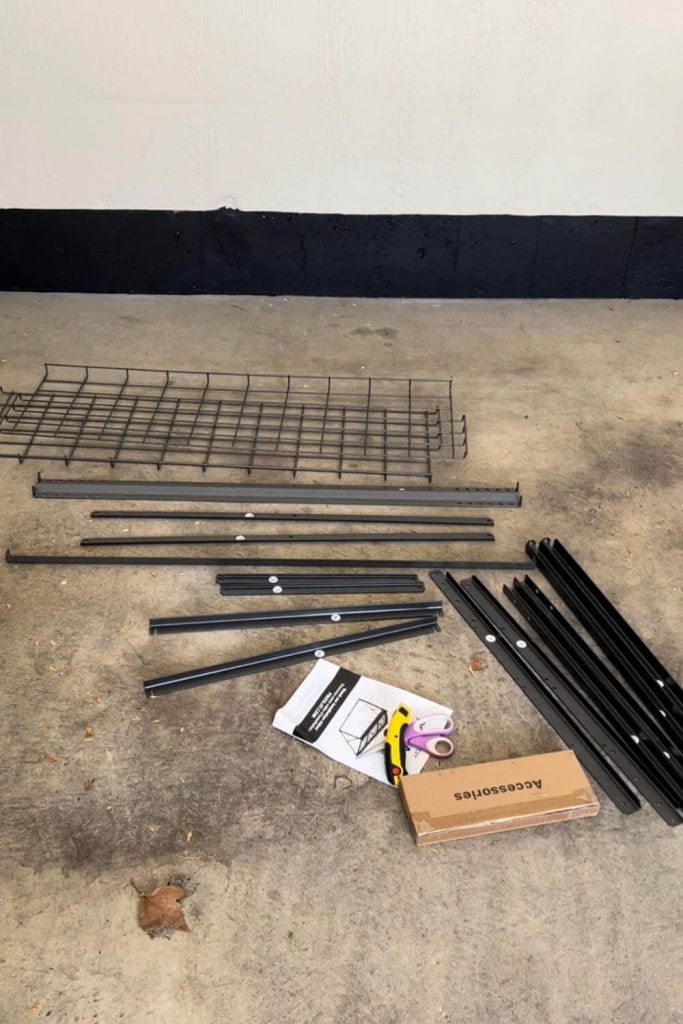
As with anything you assemble, it's always a good idea to set out the pieces to make sure everything they say should be in the box is ready to go.
Here are the materials you will need:
- Proslat Prorack
- 8-foot ladder (plus at least a 6-foot ladder for your helper)
- Stud finder (this one is my favorite)
- Punch Tool (a must-have for hanging anything ever)
- Pencil
- Laser Level
- Magnetic Level
- Ratchet
- Drill
- 5/32″ Drill bit
- Box Cutter/Scissors
Mark you studs on the wall and determine your wall position.
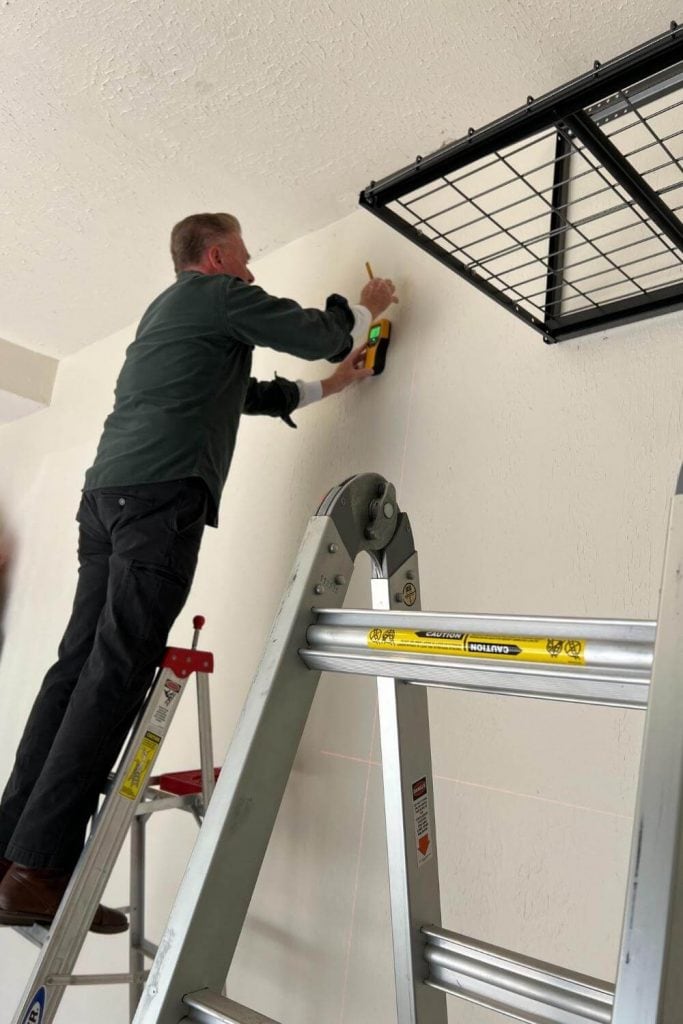
Use your stud finder and laser level to help you mark where your studs are.
We ended up using the top plate for our top screws and then for one of the four garage wall shelves, we secured one of the bottom two with heavy duty drywall anchors with screws that had a washer.
We did this because the positioning for one of them in relation to how we wanted to space them missed a stud.
Assemble the back of the shelf.
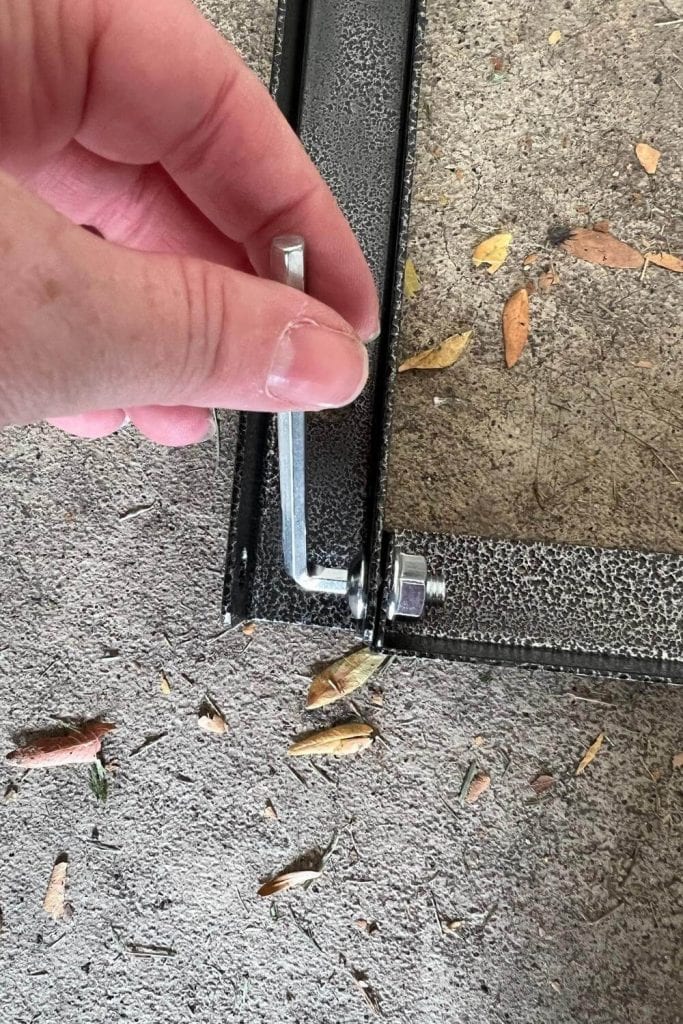
The directions are pretty straightforward, but it is important to note to not tighten too much, just hand tighten.
In later steps, you will need to remove this nut and bolt to attach the triangle side pieces.
I found that assembling the back rectangle first really did help make marking where our holes were going to go on the wall super simple.
I didn't love this little tool and would have loved to have the bolts use a square setup, so that we could have just worried about ratcheting the bolts instead of using this little guy, but I'm sure that'll be in the next round of these lol.
Mark your holes on the wall and drill pilot holes.
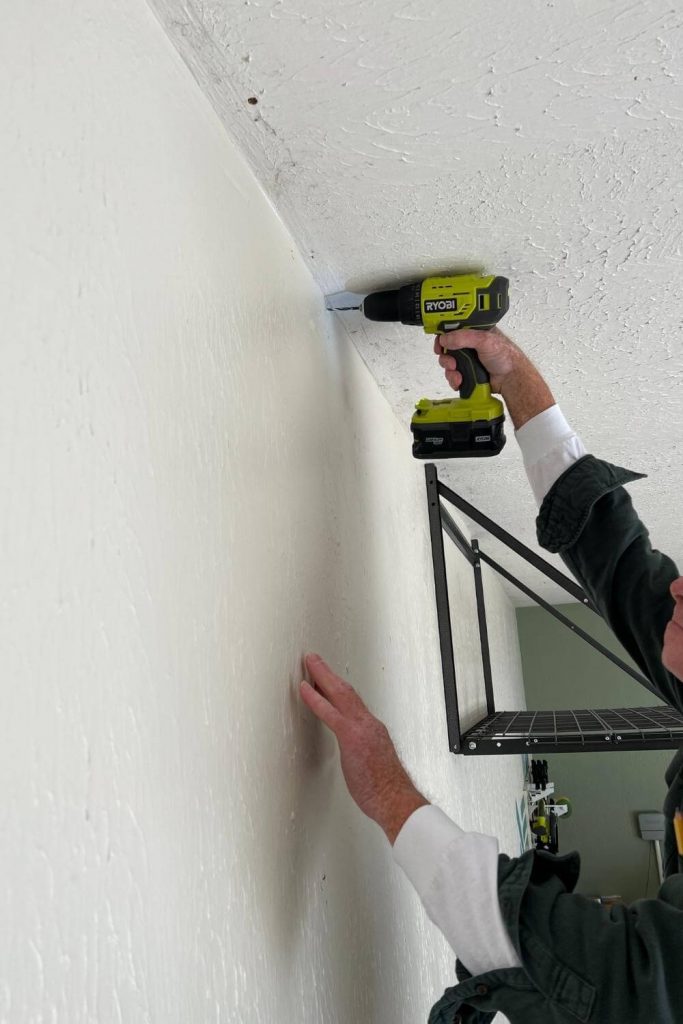
Once we marked our holes holding the back rectangle up and using the punch tool to mark, we drilled our pilot holes.
If you don't own a punch tool yet, I highly, highly recommend one. I have had it for a few years now and every single time I need to hang something, it is a God-send.
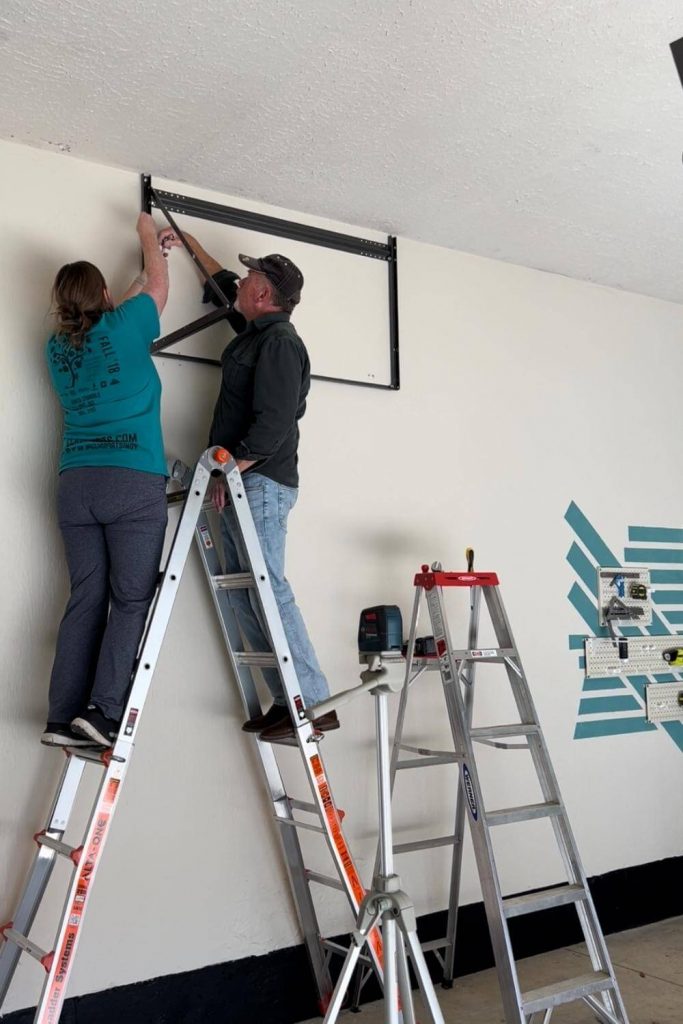
Secure the back Part of the Shelf to the wall.
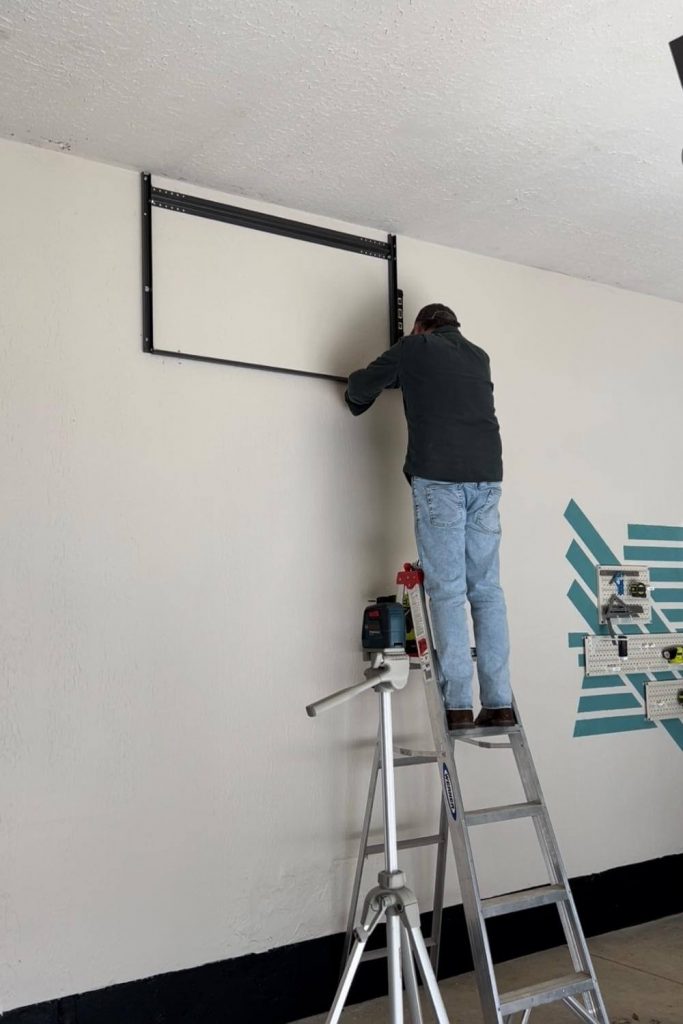
Once we had our pilot holes, we had me hold up one side will my dad used the ratchet to secure one side.
Then we repeated on the other side.
The reason I would highly recommend an 8-foot ladder is for if you are hanging these in an almost 11-foot ceiling like we are.
The 6-foot ladder was fine for the stuff we needed to do on the bottom row, but reaching to the top to ratchet those screws was taxing when your arms are straight above your head.
We had an 8-foot little giant ladder, but to be honest, it was so tough on the feet because of the way it extends. I would suggest getting or borrowing an 8-foot standard ladder to save your feet and your arms.
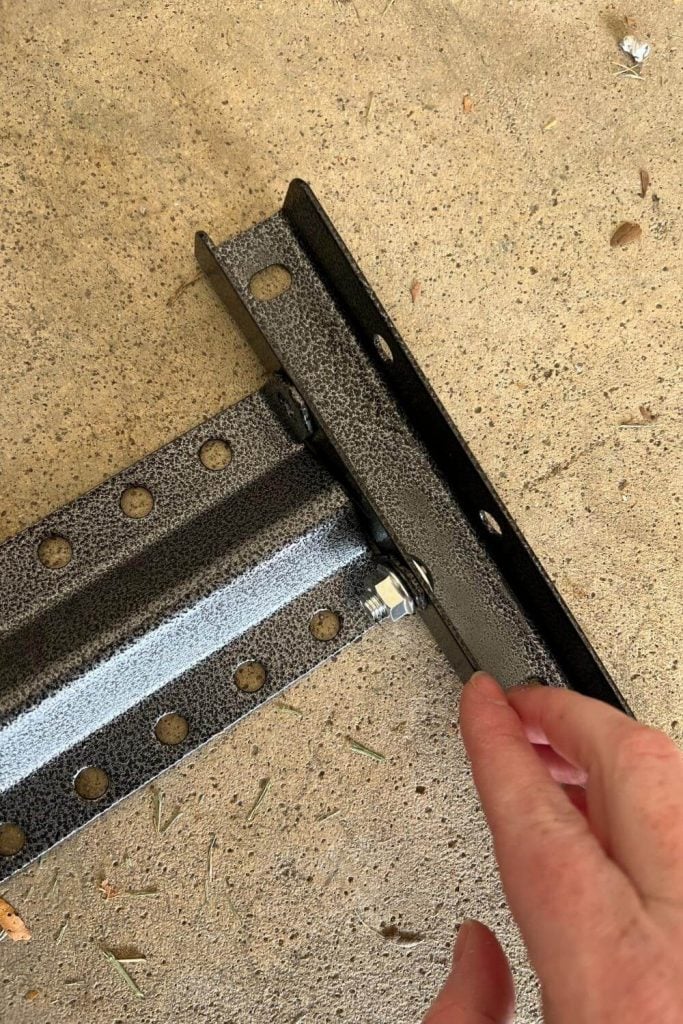
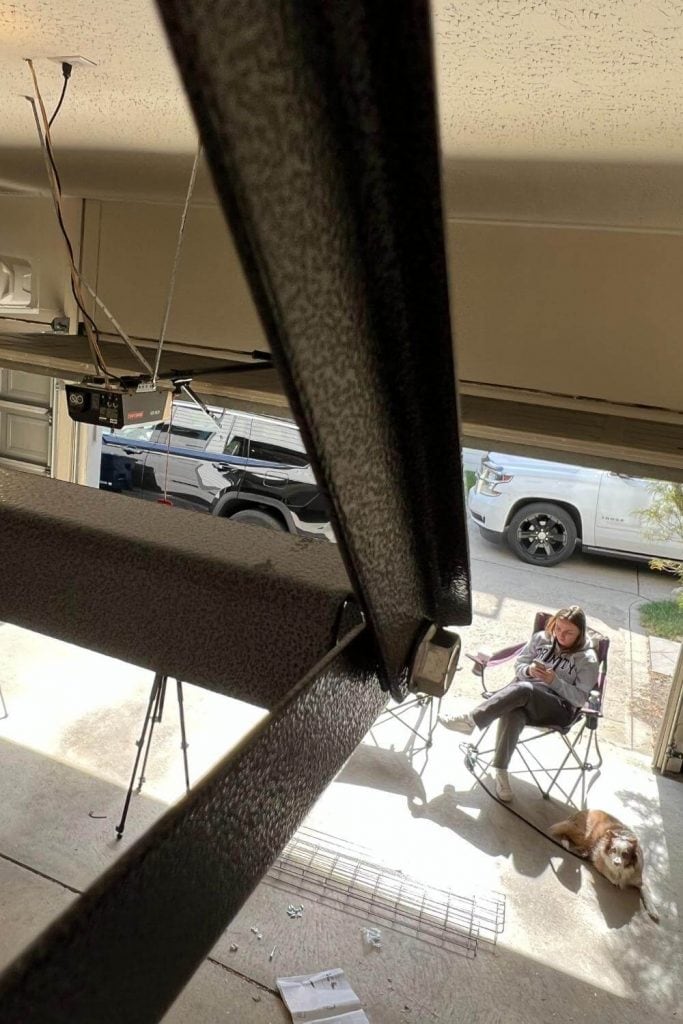
Build the side triangles of the shelf.
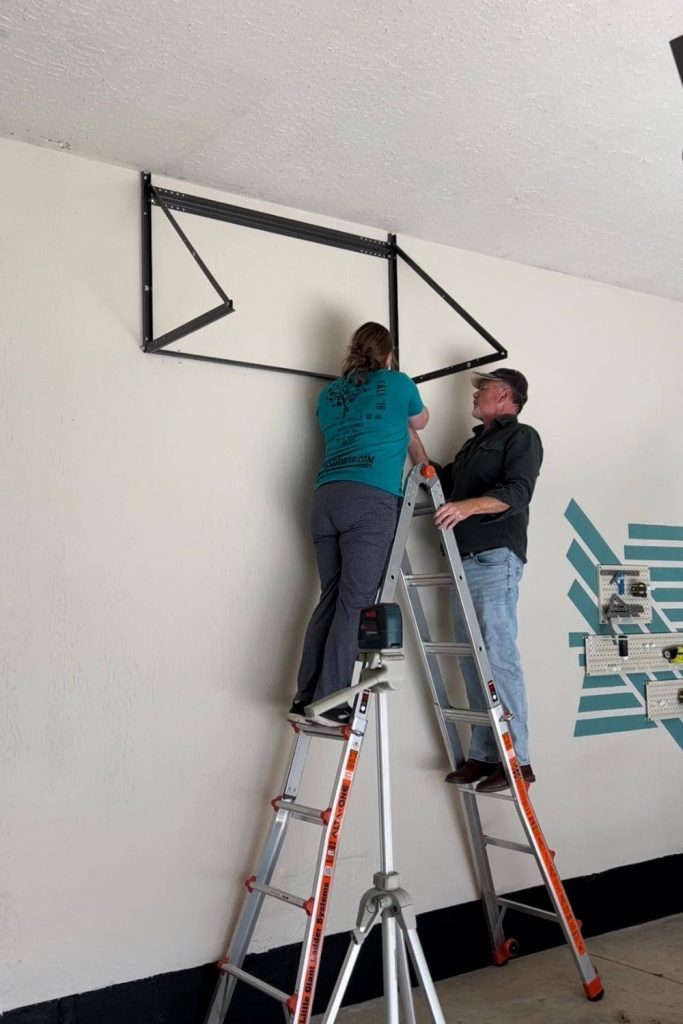
This part was a little tricky at first because I had a hard time deciding from the photo how these all connected… hence, I listed a few tips in a later section of this post to save you this struggle.
Spoiler alert: They have video instructions I should have watched lol.
Regardless, the key to making this part go smoothly is to have two sets of hands since you will be removing one of the nuts and bolts at the top to attach this top angled support bar.
Build the base of the shelf on the wall.
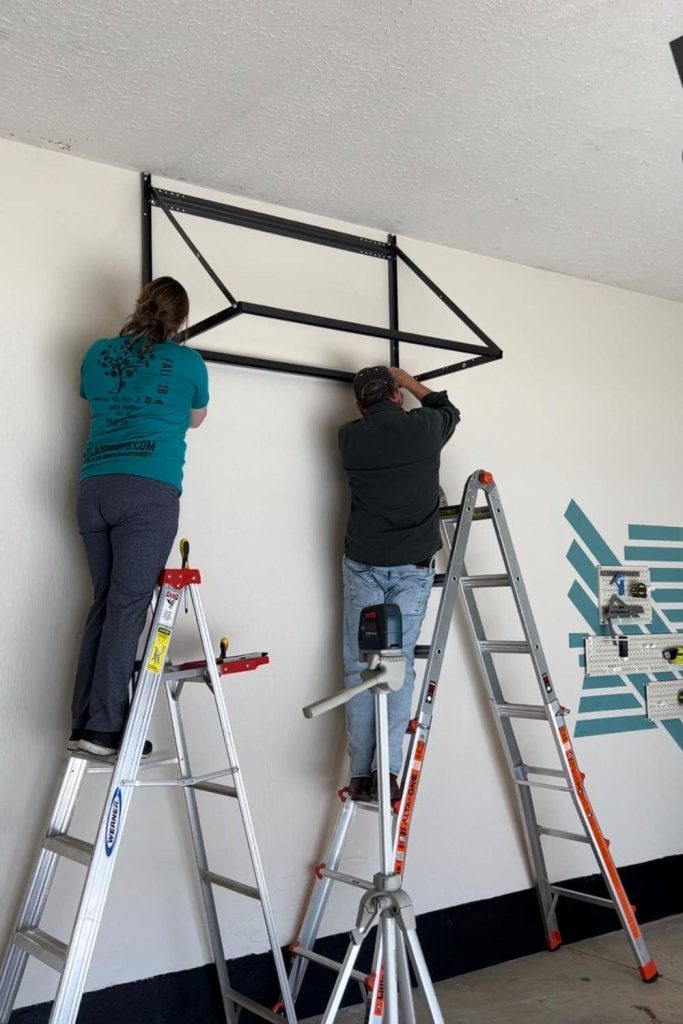
We tightened all the bolts to this point except the front part of each triangle will need to be removed and replaced to attach the crossbar (see the photo below).
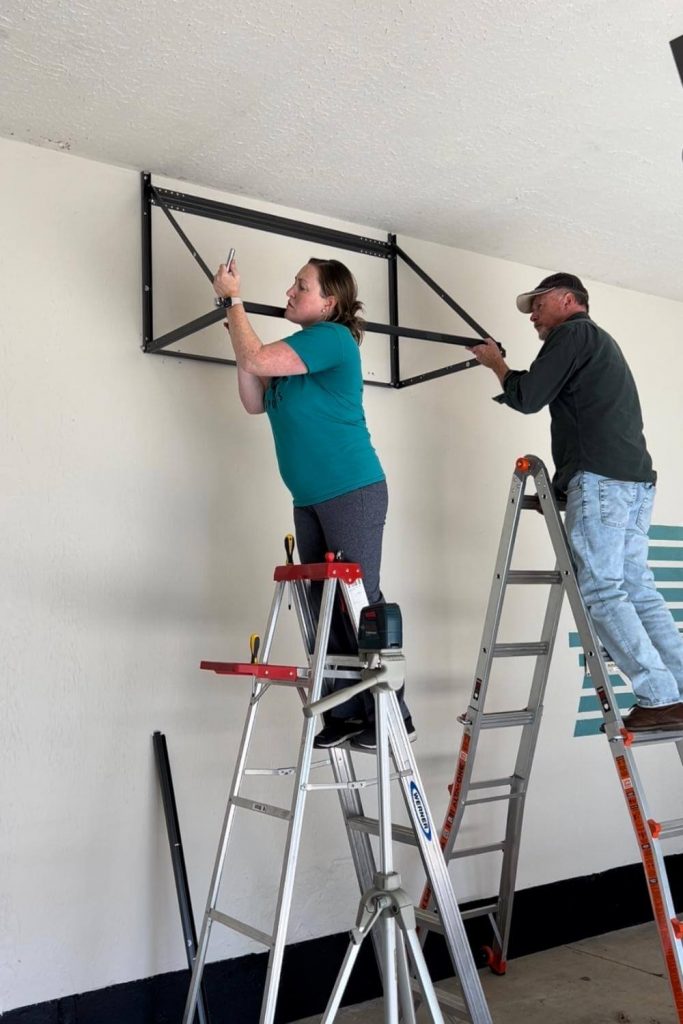
I have a close up of this step down in the tips section below, but just note that this is the only part of the assembly that I would recommend putting the nut part of the bolt on the outside.

The perpendicular bars to the crossbars just sit into notched slots and then the grates lay over the top and get secured with these cool pegs.
This was by far the easiest part of the assembly.
Important Tips
- Only hand tighten the assembly bolts until the very end. We made this mistake at first and really tightened all the bolts at every stage of the assembly, but there are at least four spots you'll need to undo the bolt to add a piece.
- Make sure you have all the nuts on the inside of the shelf shown two pictures above, except the crossbars that come out at the front shown in the above picture.

- You definitely need two people. If you're amazing, you may be able to hold up this 4-foot long rectangular piece and mark your holes, but I wouldn't recommend it. I held the back portion level while my dad marked the holes, which made it go way faster.
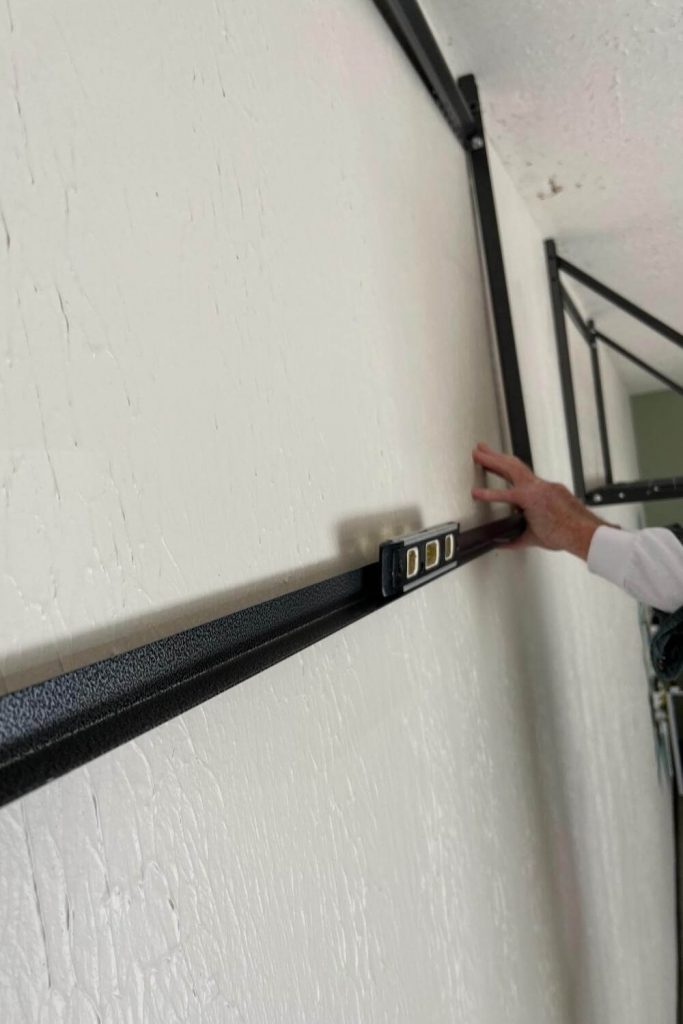
- Use a magnetic level. This was so clutch to making sure we weren't juggling 800 things while 11-feet up in the air trying to make sure the garage wall shelf was level.
- Have at least one 8-foot ladder. I mentioned this above too. I would recommend a standard 8-foot ladder versus the little giant version to save your feet.
- Watch the installation video. Simple tip, I know, but I didn't do this at first and boy oh boy, I wish I had. We originally hung the back part upside down. Good times lol.
- Have a set of drywall anchors, screws, and corresponding washers. This was helpful for the one garage wall shelf that we wanted to move over to center over our garage tool accent wall.
To-Do List
And that does it!
We now have a plethora of storage high above in a space that was formerly completely underutilized.
Here's what we still have left to complete before Thanksgiving:
Paint the roomPaint the tool accent wallHang the tool peg board- Hang the slat wall
Hang shelving- Hang ceiling storage
- Paint other accents
- Organize lawn care area
- Organize fishing nook area
- Hang lighting
- Build mobile workbench
- Update the flooring over the concrete
- Clean blinds
- Figure out how to hide the electrical box
- Hang the TV
Stay tuned from now until mid-November to see how I tackle this list and FINALLY get the garage of my dreams.

Pin any of the photos above for later too by hovering over the image and clicking the Pinterest logo.