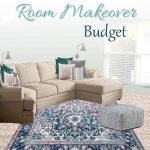
7 Steps to a Room Makeover Budget
Stuck on where to begin creating a room makeover budget? These 7 steps will guide you through the easy path of making your own room makeover budget.
It's week two of my One Room Challenge Bonus Room Makeover and my plans are in place!
My goal is to finish all the big stuff this weekend since I'm on fall break at school.
If you missed my plans, be sure to go back to the link for week 1 below and check out the vibes I'm trying to achieve in this space.
This room has been neglected for too long!
Be sure to check out all the other One Room Challenge participants here.
There are some amazing room transformations about to happen!

Back before I started blogging, any time I would tackle a project I would buy one thing here and there.
Sometimes it would all go together, sometimes it was a royal disaster.
It wasn't until I started researching my ideas first and making a solid plan both with the budget and the feels and functions for the room that I started to create rooms I loved.
Other than creating a visual plan, creating a budget for my room makeovers has really helped me gain some perspective on what I'm willing to spend and how to use research methods to really hone in on the important stuff and save on the non-important stuff.
So today, I want to share with you how I create a room makeover budget to keep my room and my wallet exactly where they need to be.
Get Clear on Your Plan to Create a Homier Home
If you are just starting out or haven't completed a full scope of your home yet, I highly recommend catching up on my steps for laying the foundation for pursuing a homier home, including:
- Define Your Homier Home
- What's your Why?
- Identify Feels & Functions
- Everything You Must Know About Color [Before Choosing Paint Colors] (Color Part 1)
- Create a Home Color Scheme (Color Part 2)
- Organize & Prioritize your Home & Room Task Lists with Trello
Each of these has action items that will help you ensure you create a cohesive look and feel throughout your home.
Before working through these steps, my home was so hodge-podge it felt like I needed to start over in every room all the time.
Following these steps (and the guiding worksheets attached) really made a difference in how I created individual rooms and I've never been happier with the result.
So, if you haven't set a plan for your home yet, I would highly recommend doing this first before moving forward in your room makeover.
And if nothing else, definitely work through the Identifying Feels & Functions guide because this one is the most relevant to the steps below.
Create an Estimated Budget
First things first, you want to know how much you are willing to part with to make this room makeover happen.
At our house, we allow each other $200 of play money each week to do what you want with.
Most of my room makeovers come out of this money, so I usually have a good idea of what I can afford before going into it.
If you are doing a major renovation, this can be tough, so I would recommend getting a general idea of what you hope to spend and then do some research on sites like Houzz and Home Advisor.
If you are mostly completing a room makeover in which you plan to paint, decorate, and DIY some things, I would recommend just getting a general idea of what you can afford, but also what you are willing to part with to make the room beautiful.
Remember, certain rooms have a more prominent place in your home, so keep in mind the amount of use, joy, and peace you'll get from making that room beautiful.
Make a List of Wants & Needs
This may seem like a no-brainer, but actually listing these out on paper gives you so much perspective on how much needs to be done and how much time and money you will need to complete the room makeover.
I started by divvying up the sections of my room (i.e. reading nook, closet area, couch area, overall room, etc.).
Then, I listed everything I needed or wanted to make the space function and feel the way I hoped.
Once I had a detailed list of the items I was looking for, I marked which one's I could DIY (circled) and which one's were the most important (starred).
Then, I moved on to the research phase.
Make a List of Online & In-Person Retailers You Love
If you are like me, you may already have a list of your favorites stores, both online and in-person.
However, if you don't, it's a good idea to get a running list of these for your own sanity.
There are times where I go rogue from my usual places, but choosing your favorite stores helps keep things cohesive and makes researching much more manageable.
Just remember, there is always room to add more stores you love, especially for personalized items, so this is definitely something you should build upon with each project.
Do Your Research
To begin your research, start with the items you listed as most important or must have's to make the room feel or function in the desired way.
I spent a few hours in front of the TV at night perusing my favorite online shops to get an idea of what I wanted.
As soon as I found a general idea of what I was after, I would write down the price.
If I liked a few items, I would write down the highest price next to that item on my checklist.
I would also be sure to save these items either in the cart of the store I was perusing or the link to that item in my Trello board.
Once I did all my research for the important pieces, I moved on to the price for my DIY projects.
This way, I would know how much I had leftover for the remaining items from my estimated budget and if I could do the rest of my research at Pottery Barn or
Continue going through your list and attaching amounts to each line item to get a feel for how much the overall room will cost you.
Tally Up the Cost Estimates
Once you've done all your research and you feel pretty good about the items you found, it's time to tally it up.
When I first tallied up my bonus room costs, I was $500 outside my estimated budget.
If this happens to you, the important thing is to work your way through your list and decide if you need to do more research at a more inexpensive retailer or if you need to scrap some items all together.
You can always add these items to your someday/maybe list, too.
Review & Adjust As Needed Before Making Final Purchases
Don't be afraid as you work through your list to make a “second round” makeover list.
I house these lists in Trello under my Someday/Maybe list from my Home Harmony Challenge.
There is nothing wrong with waiting on some fancy things until you have more budget to work with.
For instance, my Stikwood wall may take a backseat this round for the bonus room because of the budget, but I'm planning to replace it was an accent wall of paint.
It won't quite be the same, but it'll do the job for now.
All in all, creating a budget is all about doing your research and making sure you adjust accordingly.
If you can't do it all right now, add it to the “save for later” list.
For my Bonus Room Makeover, I still have the following on my to-do list:
To-Do List
Main Room
- Paint the room
- Purchase Stikwood
- Hang Stikwood wall
- DIY behind-the-sofa table & side table
- Call electrician to move cable box hook up & plug (coming Saturday)
- Buy new:
- Rug
- Drapes
- Curtain rod
- TV & mount
- IKEA storage
- Artwork for entry
- Throw pillows & blanket
Reading Nook
- Paint nook
- Make cushion
- Buy new:
- Step to get into nook
- Light fixture(s)
- Book holders for wall
- Cushion/Fabric for seat
- Pillows
Closet
- Remove closet doors
- Paint inside of closet
- Stain and install DIY countertop
- Stain and install shelving
- Paint & cut to size the pegboard
- Buy new:
- Mini Fridge
- Storage cubbies for underneath counter
- Lighting

