
6 Steps to Create a DIY Pin Board with Old Curtains
Want to upgrade your brown pin board? Learn how I used old curtains to make my very own DIY pin board.
Welcome back to ORC week 4!
I have knocked so many things off my list, but I keep coming up with more!!
My middle of the week surgery has set me back just a bit, but I was able to get a few things done beforehand, like my DIY pin board, solidifying my craft tool organization strategy, and purchasing the last of the accessories I knew I needed, for now.
There is still so much that needs to get done, with the most important being changing the ceiling light fixture, but I'm hoping I'm back to my ready-to-move self by the weekend.
Where there's a will there's a way, right?!
Don't forget there are over a hundred more guest participants of the ORC doing amazing things in their own rooms, so be sure to go check out their progress.
I feel like I say it every week, but the inspiration and tutorials are worth their weight in gold.
And they're all in one spot!
- Week 1: The Plan & Before Photos
- Week 2: Planning My Home Office with IKEA Furniture + My Room Color Choice
- Week 3: DIY Office Countertops + My Elfa Gift Wrapping Organizer
- Week 4: DIY Pinboard, Craft Tool Organization + Accessory Choices
- Week 5: 5 Tips for Choosing Office Lighting
- Week 6: The Reveal | Before & After
This week, I'm going to share with you how I made an ugly cardboard-colored, pin board into a pretty version using extra fabric from some Pottery Barn curtains I made into a roman shade in our kitchen.
The jury is still out on how much I like the roman shade, but after I give it some time to be used, I plan to share my thoughts.
Let me know if you'd be interested in how I did it.
But for now, here is how I created my DIY pin board!
Table of contents
Disclaimer: This post does include affiliate links for your convenience. This is at NO additional cost to you but earns me a small commission. To read more, check out our disclosure policy. As an
1. Gather your materials.
- Fabric of your choice
- Pin board you would like to cover
- Fabric scissors or rotary cutter
- Staple gun
- Upholstery Nails
- Hammer
- Optional: Cutting Mat and Ruler
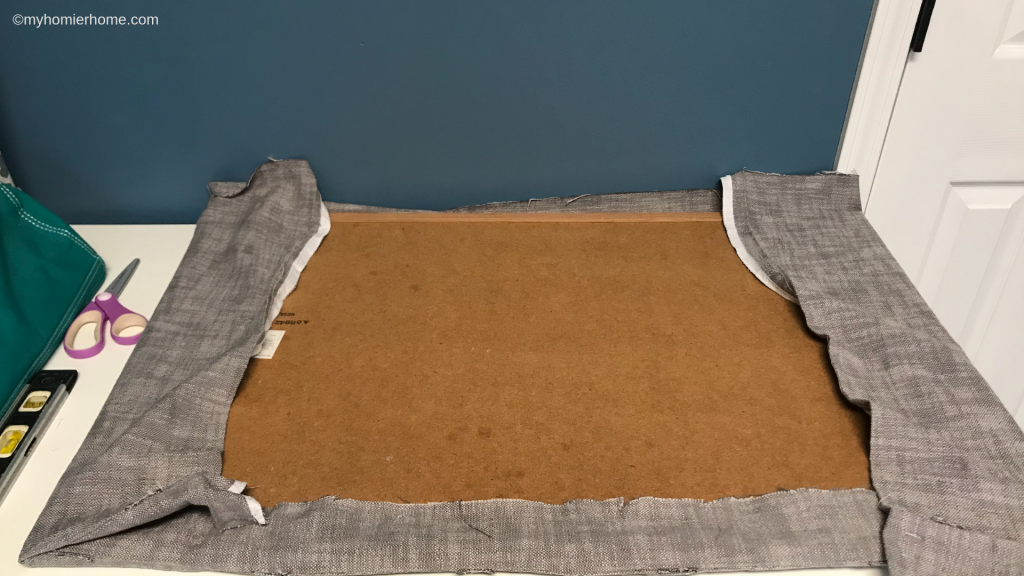
2. Align the fabric.
Before doing any cutting, I made sure I had enough to wrap around all four sides.
This fabric was left over from another project, so I wanted to be sure it would work.
If you are buying fabric for this project specifically, I would measure about 2″-3″ extra on all sides to wrap around the back.
You can always cut it down to size once you lay it out like the picture below.
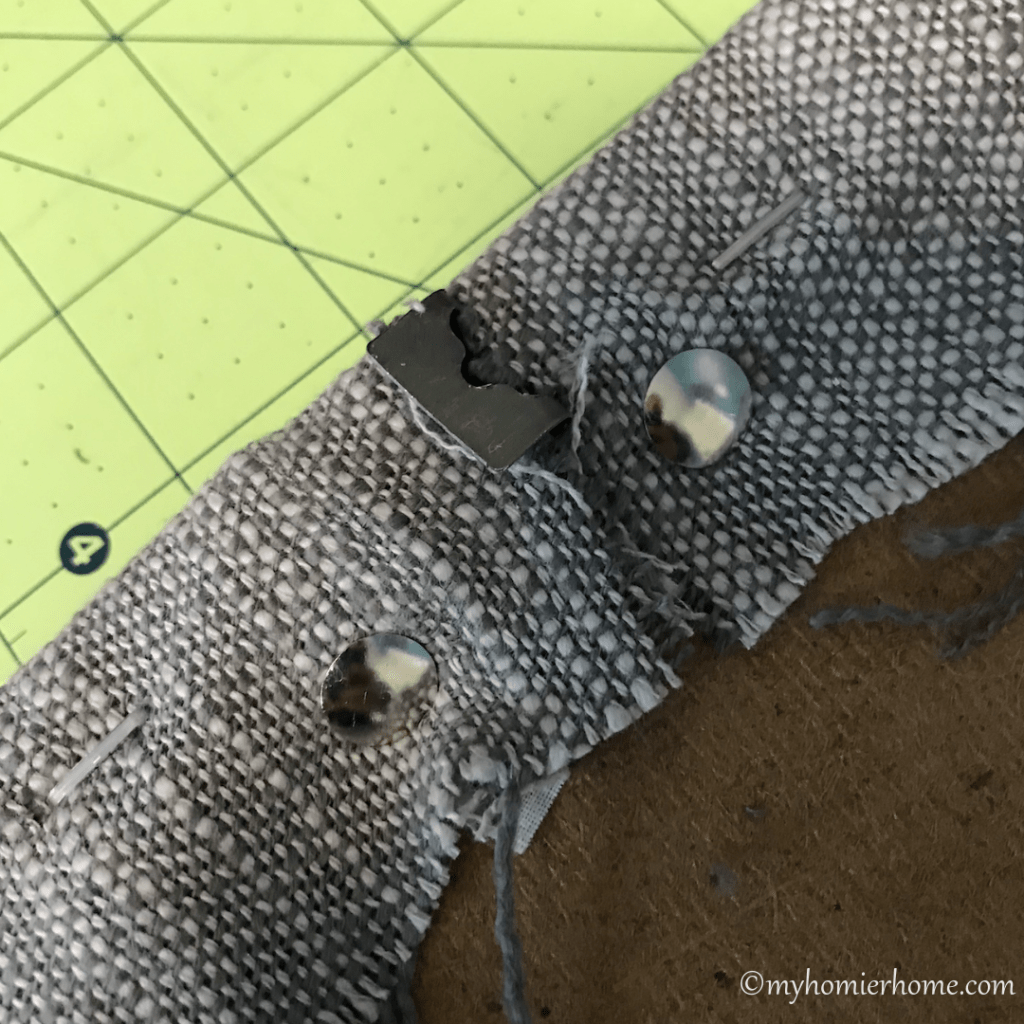
3. Hammer in the upholstery nails
Once I had the fabric positioned the way I wanted, I began hammering in my upholstery nails in to the sides of the pin board to act as a prettier border.
With step 3 and 4, if you feel like it would be easier to cut the fabric first and then put your upholstery nails in the side, that is definitely an option.
You could also opt to put the upholstery nails along the front as well instead of the sides.
The world is your oyster here! 🙂
Keep in mind, that you want to pull the fabric taut to make sure there aren't any weird bubbles when you flip it over and that it stays lined up, especially if you are working with a pattern.
4. Cut your fabric down to the correct size
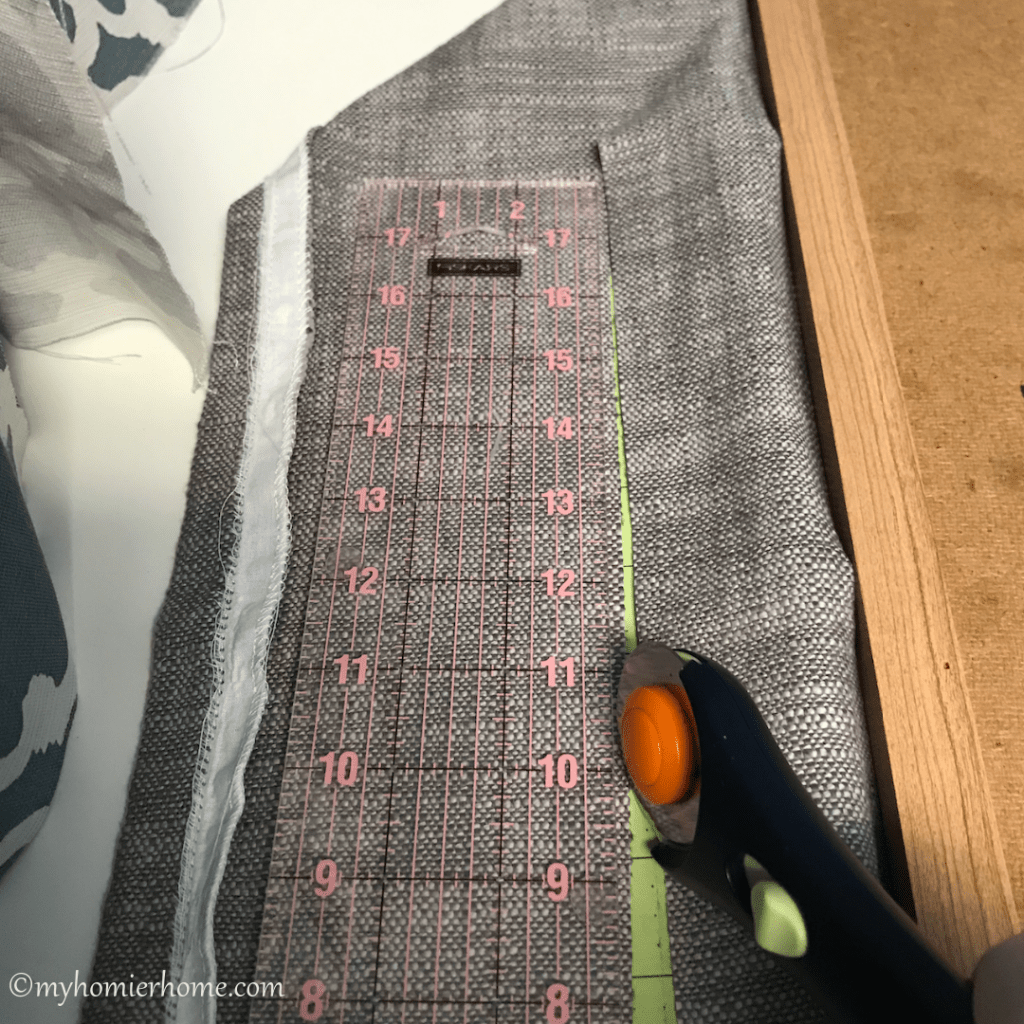
Once I had the upholstery nails in, I folded the fabric back and cut the excess.
I had a lot of extra as you can see above, so I used my rotary cutter and ruler to trim it up before stapling.
If it is already the right size or you don't have as much wiggle room, you can staple first and then trim the pieces using a cutting mat.
5. Staple along the edges
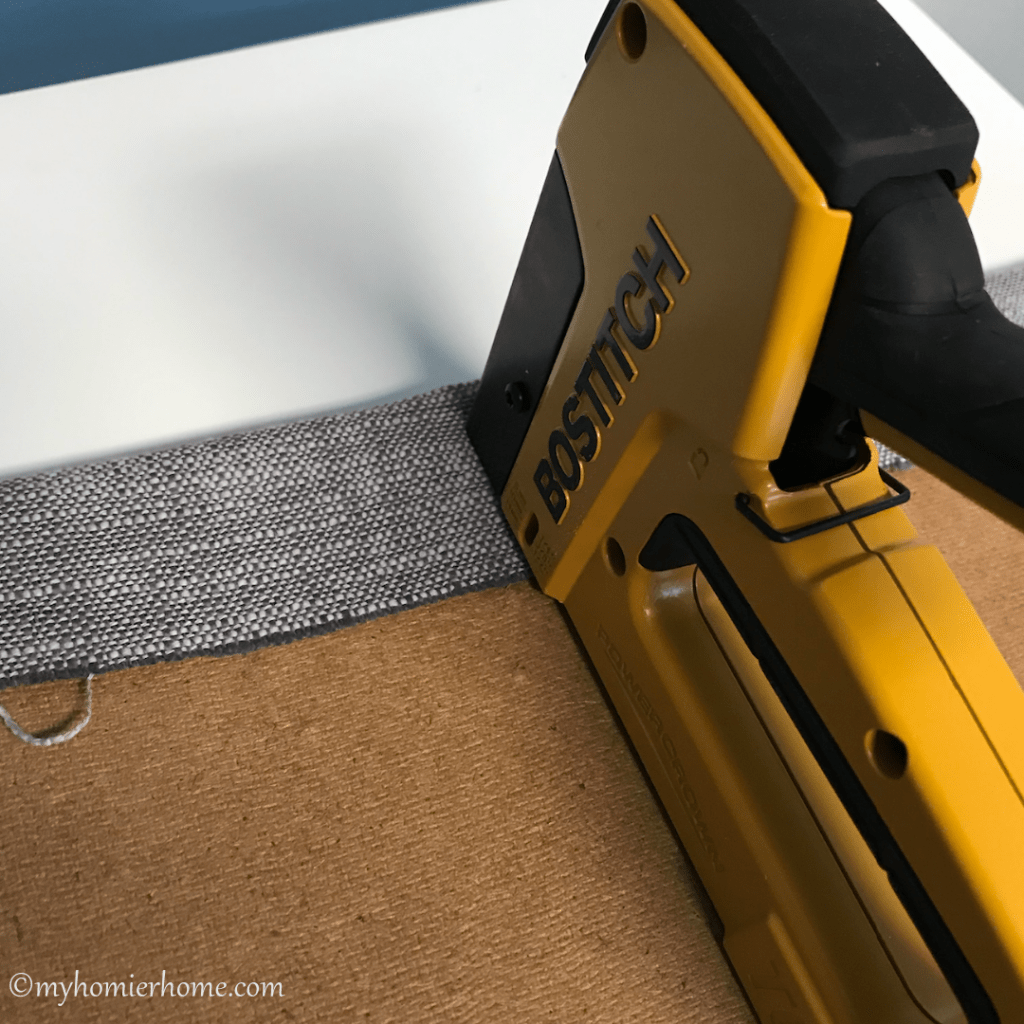
Investing in a real life staple gun has been one of my best DIY purchases in awhile.
It makes jobs like these so much easier!
Once I had the fabric in the correct position with the upholstery nails, I went around as close to the edges as I could with my staple gun. I started with the top, then the bottom.
Once those were stapled in, I went to the sides so that I could work with the corners last.
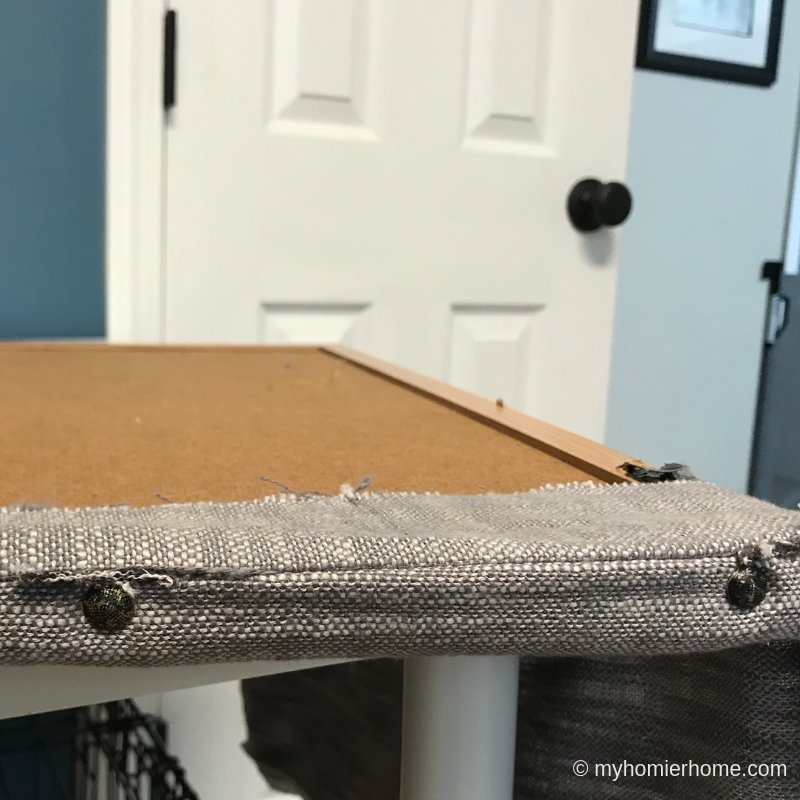
6. Make wall hooks visible & corners flat
You can see in the picture below I had to add some upholstery nails to the back in order to get the fabric to lay flat around the wall hooks.
I'm sure if you go to do this yourself, you could find a better way, but I was letting my jimmy-rigging abilities shine through! lol…
The goal is to have the wall hooks visible enough to hang properly on the wall.
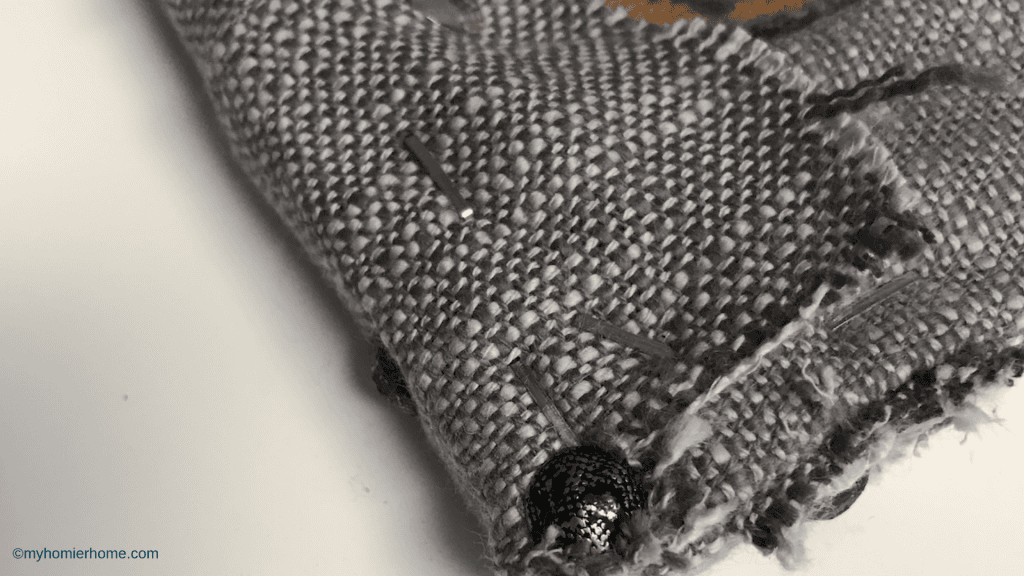
As for the corners, I had a similar issue, as you can see in the picture above.
At the very corner, the fabric wouldn't lay flat, so I added another upholstery nail.
You want to be careful as to not have too much fabric bunch up here.
You want to make sure it still has the opportunity to lay flat on the wall. I had to cut away some fabric before stapling it down all the way.
7. Hang it up!
Once the pin board was covered, it was time to hang it!
A simple trick I learned somewhere is to use painters tape to get the right distance between the wall hangers.
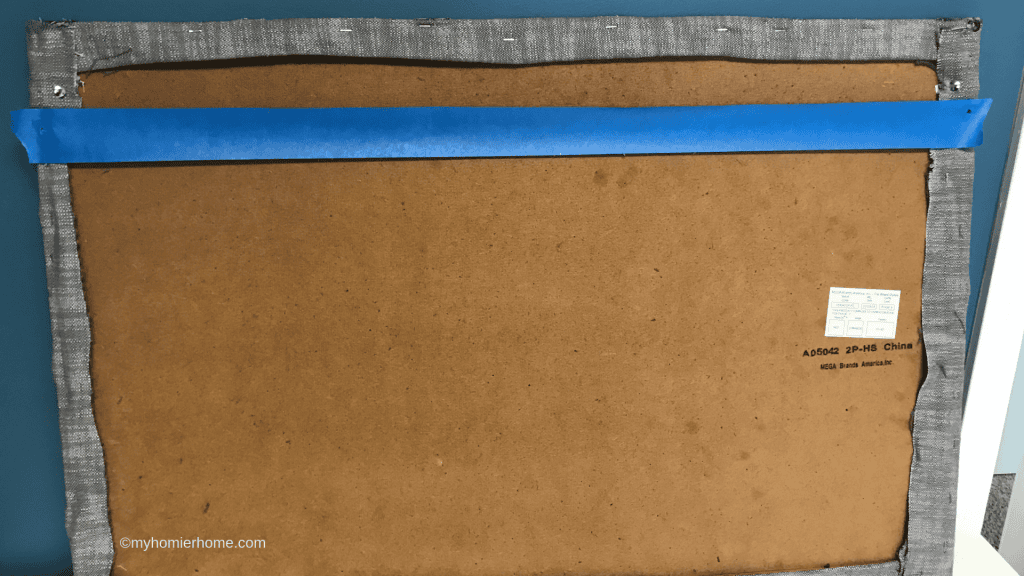
Then, you can transfer your painter's tape to the wall using a self-leveling level.
You can see in the picture below, I used my punch tool to transfer the hole to the wall.
I could not live without these tools. You can find all of them in my favorite tools section.

I'm going to save the final reveal until week 6 because I don't want to give too much away, but I will tell you, I'm very excited to show you what it looks like!
I have also decided that I am going to use the same craft tool organization I used when I first redid this room when we moved in 4 years ago, but instead of teal, I'm going to go with a white peg board.
I'm still trying to figure out how to “cover it” in a way, so I can keep the clean, beauty of the room in tact.
If you have any tips on how to do that, I'm all ears!
I also found some wall storage ideas from wayfair that I think will work perfectly to help me organize my projects.
I found a couple of goodies from home goods, like a marble look dry erase board and some fun desk accessories.
The big reveal is coming soon!! Two more weeks! [UPDATE: Check out the reveal here]
Here's what I have left to do…
MY TO-DO LIST
Choose PaintBuy PaintClear the roomPaint the roomResearch & Purchase IKEA itemsBookshelf with cabinet doors to fit the depth of a binderFiling cabinetPhotography equipment storageLegs for craft tableSewing storageCountertop to go over my IKEA Kallax shelves – *DIY'd*White cabinet doors for IKEA Kallax shelvesBuild the IKEA furnitureBuy new canvas drawer cubes for IKEA Kallax shelvesBuy new drapesTake down blindsHang drapes and sheersClean up antique sewing tableBuy a bigger garbage canResearch office lighting- Hang new office lighting – absolute must
- Research statement ceilings (not sure if i'll have time for this)
- Change the ceiling (not sure i'll have time for this)
Cover existing pin board with fabricHang pin boardFind wall organization- Hang wall organization
- Hang new white board
- Organize desk drawers
Buy new desk chair- Buy new lamp(s)
Find organizer for gift wrappingPurchase accessories for desk and shelf- Hang shelf above craft table
- Find different fabric to cover miscellaneous crafting supplies
- Possibly hang curtain rod and lightweight curtains to cover craft tool organization


Me and my nieces made some fabric pin boards together for their rooms – it was so much fun going to the fabric store and letting them pic out their own prints! It’s such a great way to add a different texture to the room and something on the wall that isn’t artwork : )