
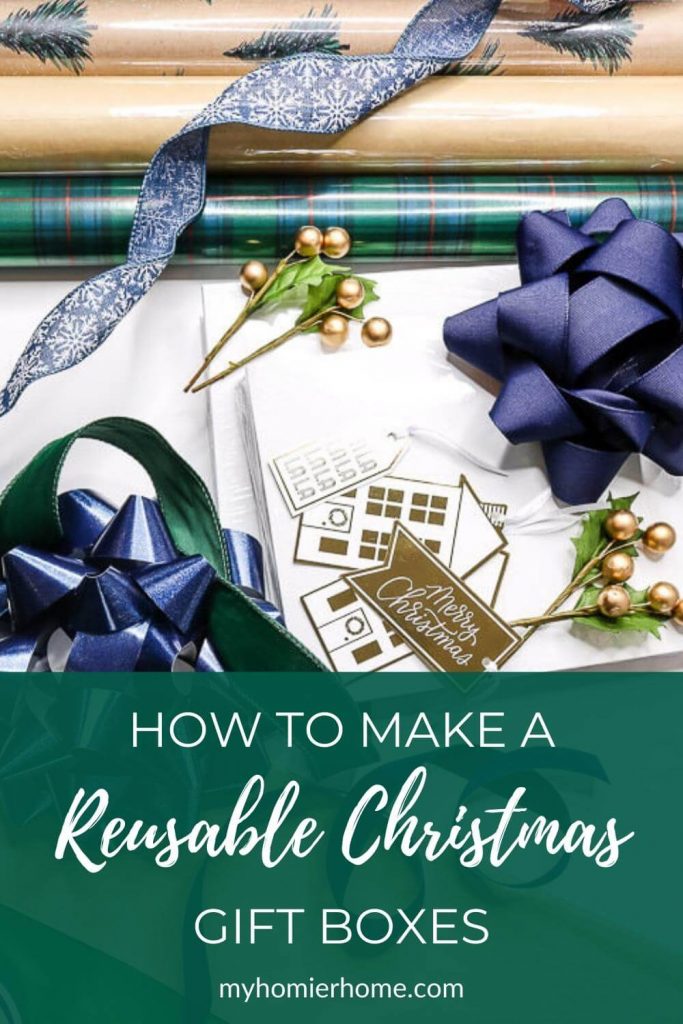
How to Make a Reusable Christmas Gift Box
Tired of wrapping gifts every year? Why not create your very own reusable Christmas gift box to use year over year! It's way easier than you think!
When I asked the My Homier Home VIP group what they would ask for if they could wave a magic wand before the holidays, so many said someone to wrap all the presents for them.
Now I can't come to your house and do it for you, but I think I found the next best thing!
Today I'm sharing with you how to create reusable Christmas gift boxes so you only have to do the work once!
And in even more fun news today’s post is one part of the amazing Deck the Halls blog hop from my Thistlewood mastermind!
This is a seriously talented group of home decor, DIY, and craft bloggers!
So, if you’re coming from Make Every Day Count with her easy Christmas dessert ideas, weren't they great?
Be sure to stick around to the end to see who’s up next on this blog hop.
Now on to the tutorial!
Jump to…
- Materials
- How to Make a Reusable Christmas Gift Box
- 1. Cut paper to make a slight overlap when folded over.
- 2. Mark box position with a pencil and Spray.
- 3. Fold up all sides.
- 4. Squeeze corners to make points at each corner.
- 5. Cut a slit at each corner.
- 6. Fold in and tape down the flat side.
- 7. Fold in and tape down the corner sides.
- 8. Garnish with bows, ribbon, Gift tags and/or stems.
- 9. Fill with goodies.
Materials
Disclaimer: This post does include affiliate links for your convenience. This is at NO additional cost to you but earns me a small commission. To read more, check out our disclosure policy. As an
First things first, you want to gather all of your materials.
I bought most of my stuff from Target since they seemed to have the best in-person inventory, but I did link all of what I bought in the list below.
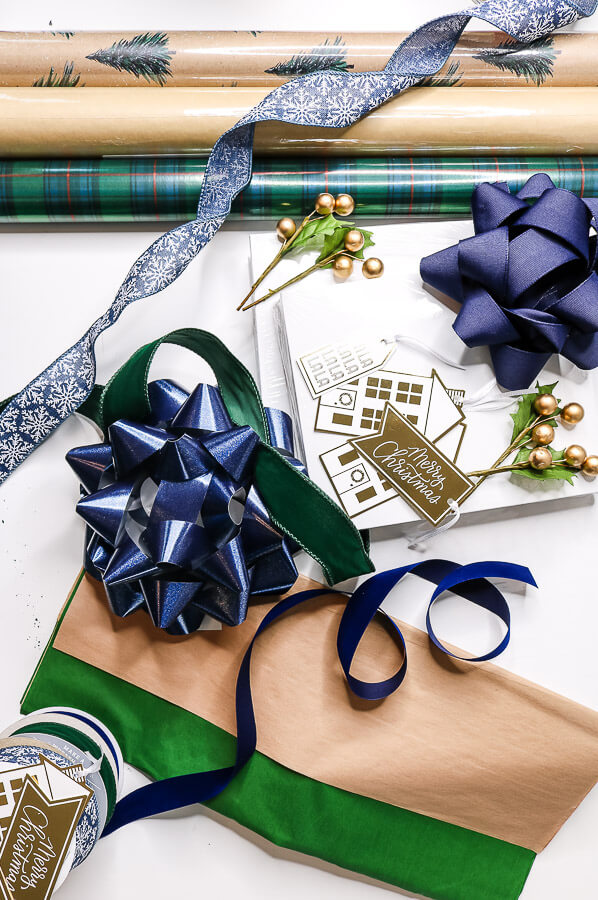
Here's what you'll need
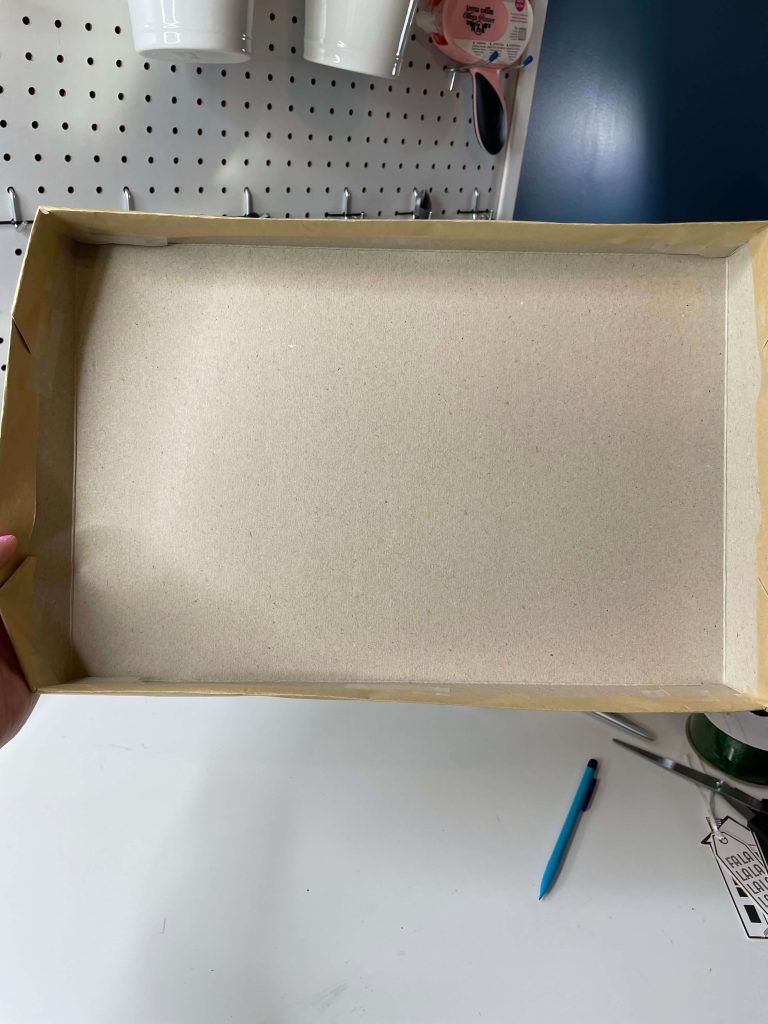
- White gift boxes with lids (Any gift boxes with lids will do including old shoe boxes and what not)
- Wrapping paper (Pick your favorite that goes with your Christmas color scheme and theme)
- Spray adhesive (I used a similar repositionable stencil spray adhesive)
- Double-sided tape (I didn't have this at first, bu it does make a better seam when wrapping the paper around the box)
- Clear tape (This works best for taping the paper inside the box)
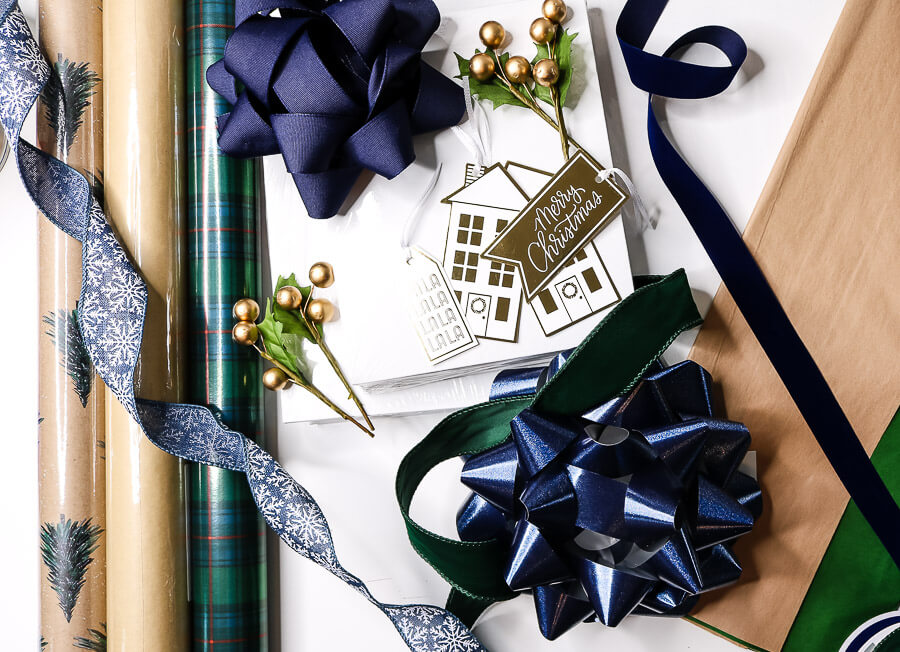
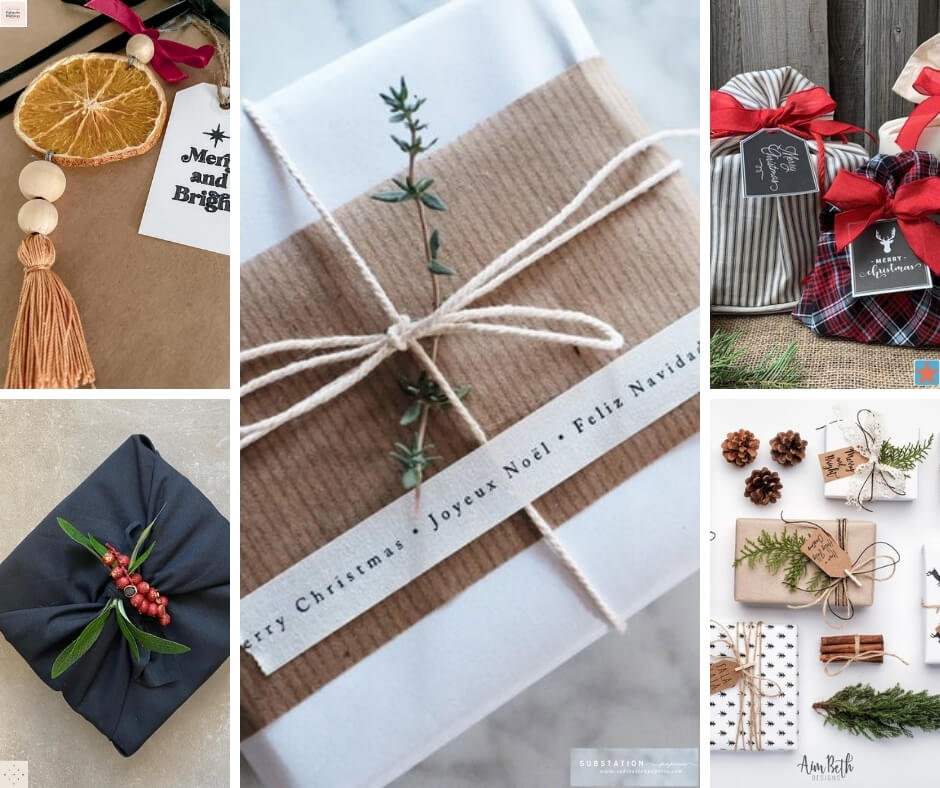
- Ribbon (Choose any ribbon you'd like… this is the snowflake one shown above)
- Bows (Bows are a great way to up the style of the box)
- Stems (These are the ones I used in this tutorial and they gave a great addition to the box)
- Gift Tags (I used tie ones so that I could remove them each year. I tied them to the stems I used above)
- Paper cutter (This is such a handy tool!)
- Pencil
- Scissors
Shop All My Amazon Gift Wrapping Essentials

How to Make a Reusable Christmas Gift Box
Now let's talk about how I made each of these reusable Christmas gift boxes.
Keep in mind, you can mix and match paper from the top part of the box from the bottom part.
You can garnish with just bows or just ribbon.
The steps I'm giving you today are how to get the paper on to the box so you can reuse it each year.
The rest is completely up to you.
On to the steps!
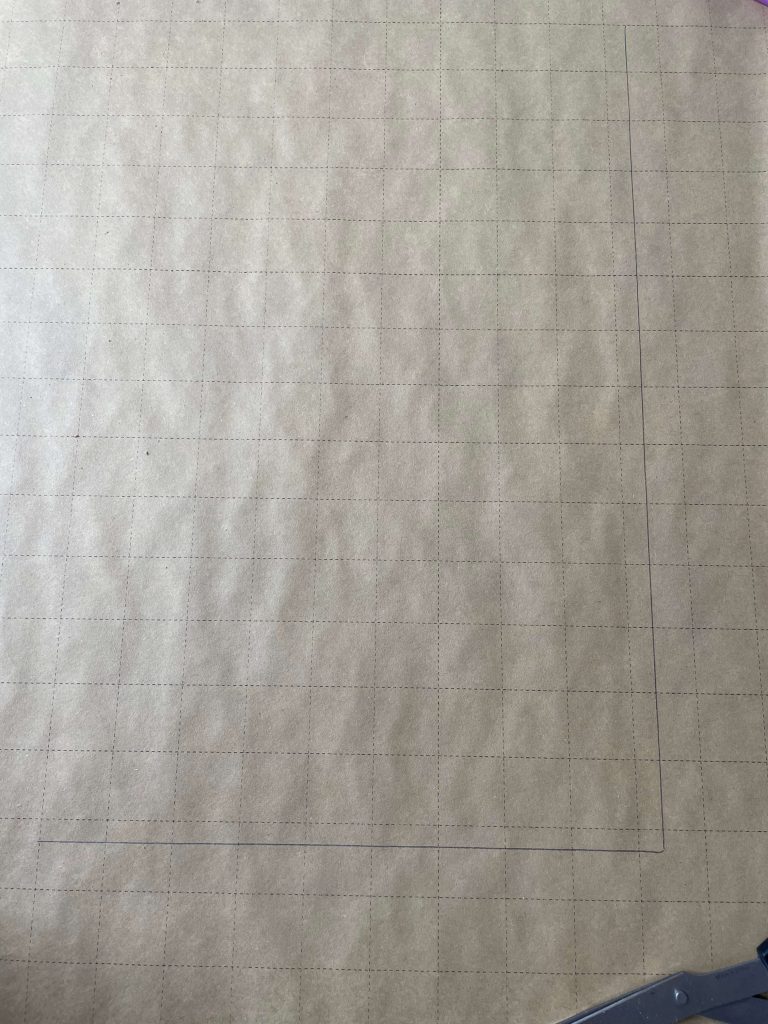
1. Cut paper to make a slight overlap when folded over.
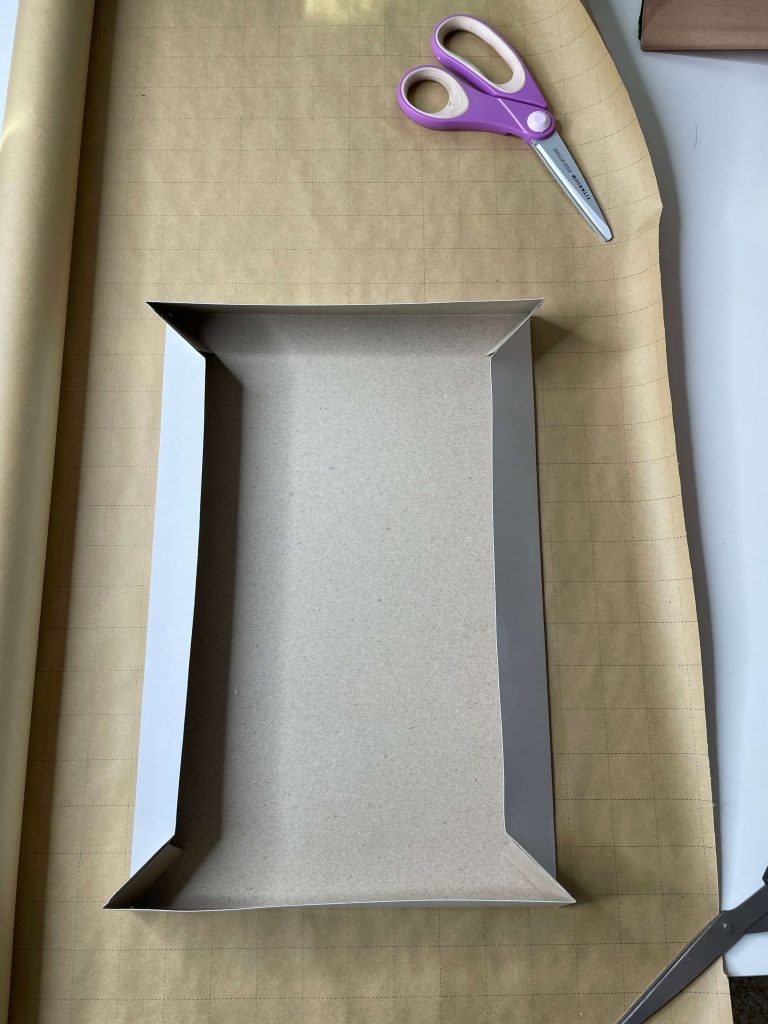
I start by measuring out the squares on the back of the paper I'll need on each side of the box to make it so there is overlap when folded over the edge of the box.
Then I used my scissors to cut a slit and my fancy paper cutter to cut a straight line around the box.
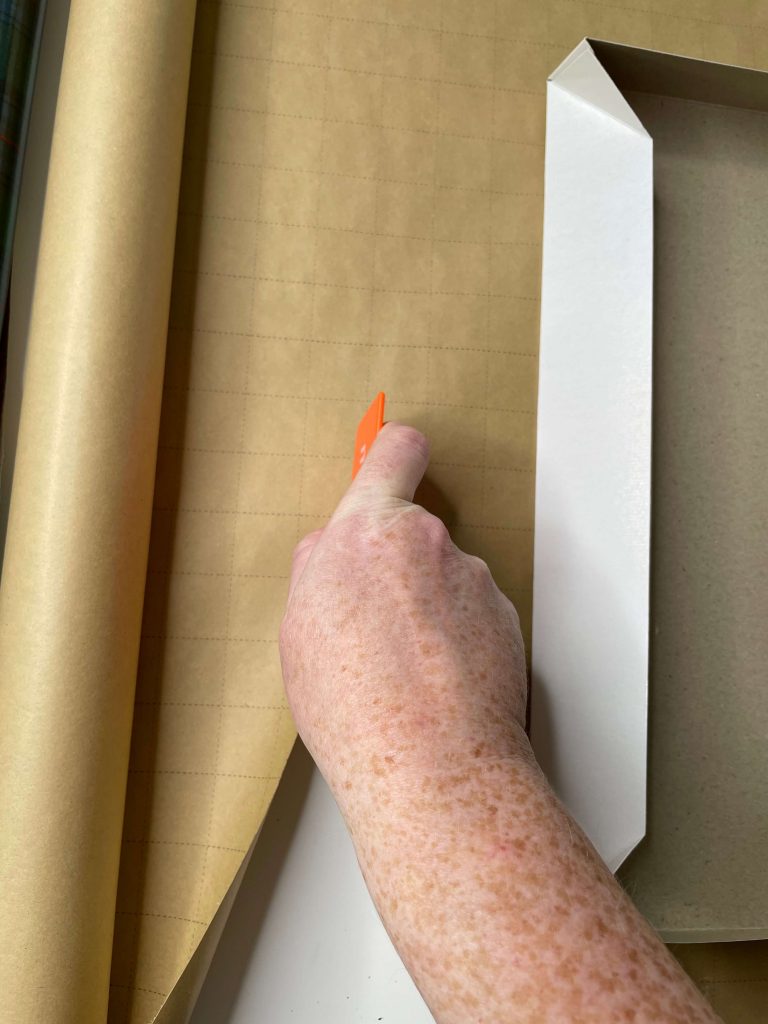
2. Mark box position with a pencil and Spray.
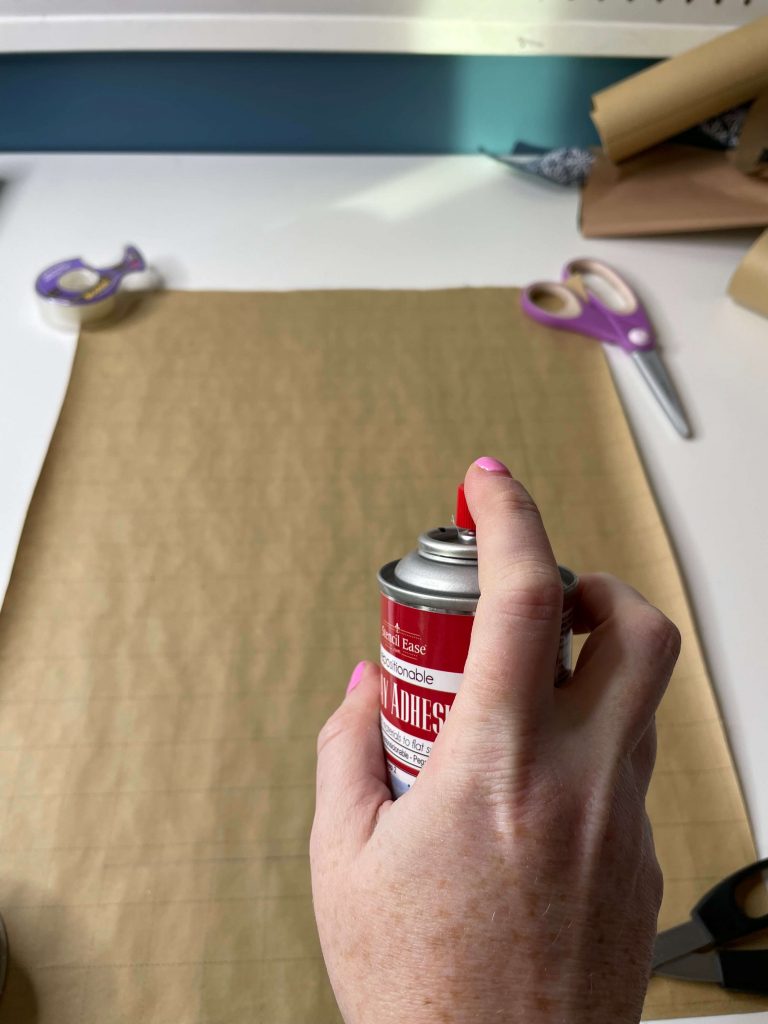
Once you have the correct size paper, center your box and draw a line in pencil around the sides of the box.
This is to help you know exactly where to replace the box after you apply the adhesive.
Next, spray a light mist of the spray adhesive.
Spray adhesive is a little stinky, so make sure you have a mask on or are in a well-ventilated area.
It's not super bad, but the initial spray will hit your nose.
Spray adhesive can also produce a bit of overspray, so make sure there is nothing in the path of the spray that you care about (ahem… your cell phone).
You do not need a ton of this spray to do the job.
A light mist is perfect.
You can catch the video below on how I did a quick dusting to apply the spray adhesive to the paper.
Once you have your spray down, line up the box with your pencil marks and press firmly.
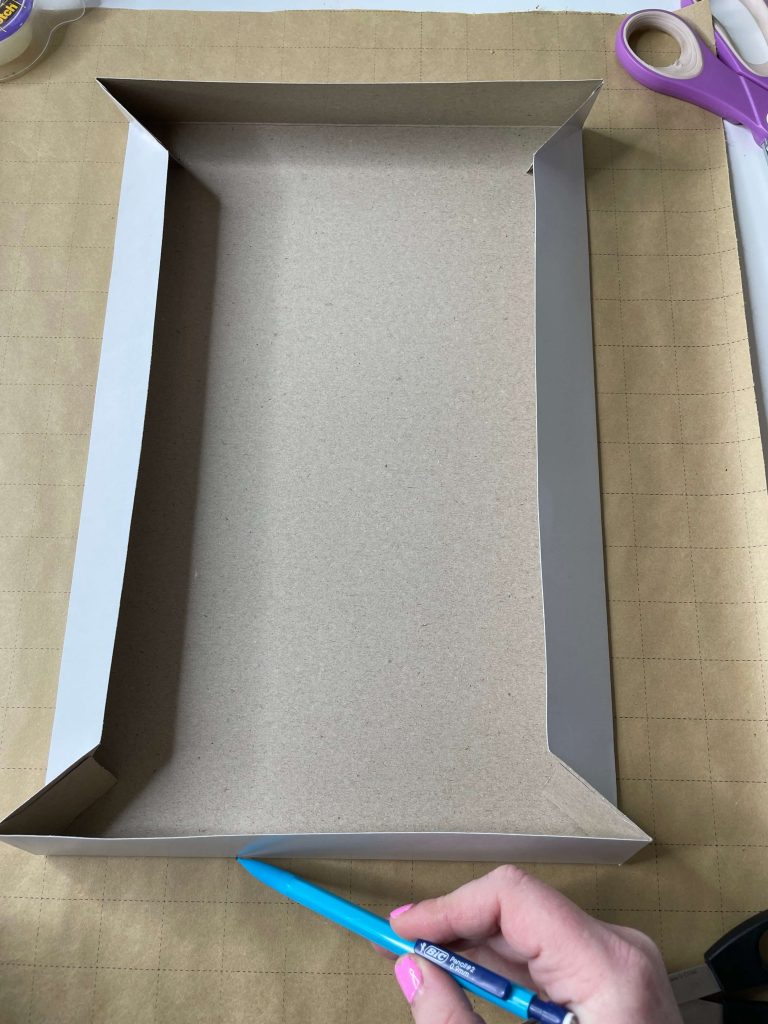
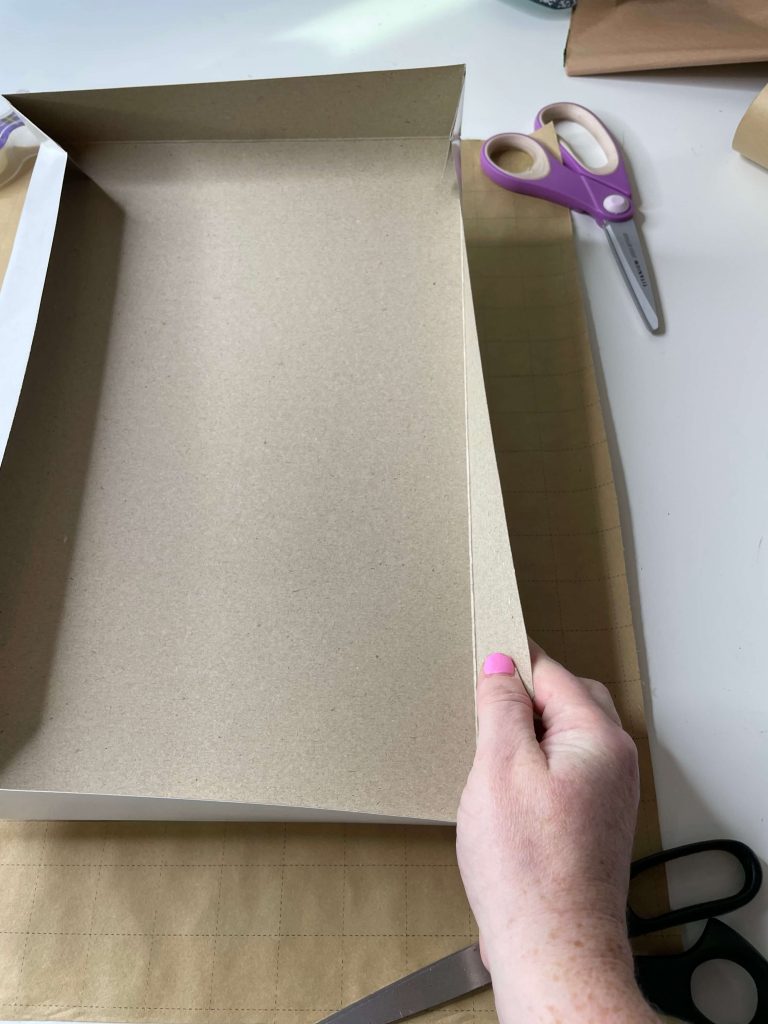
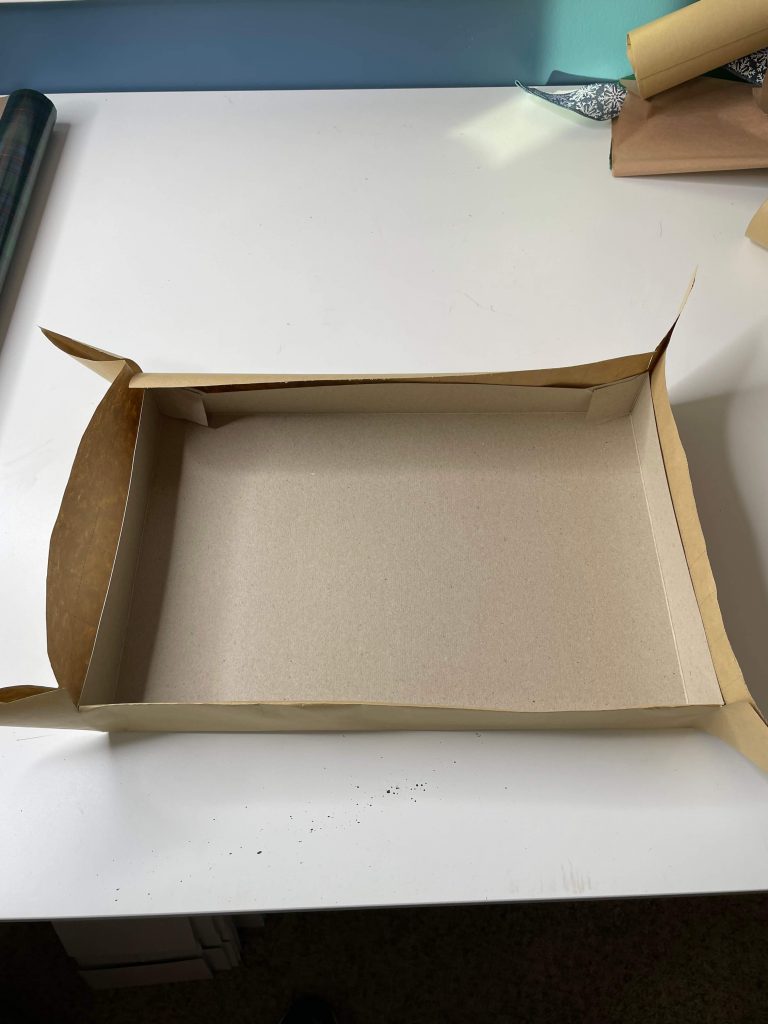
3. Fold up all sides.
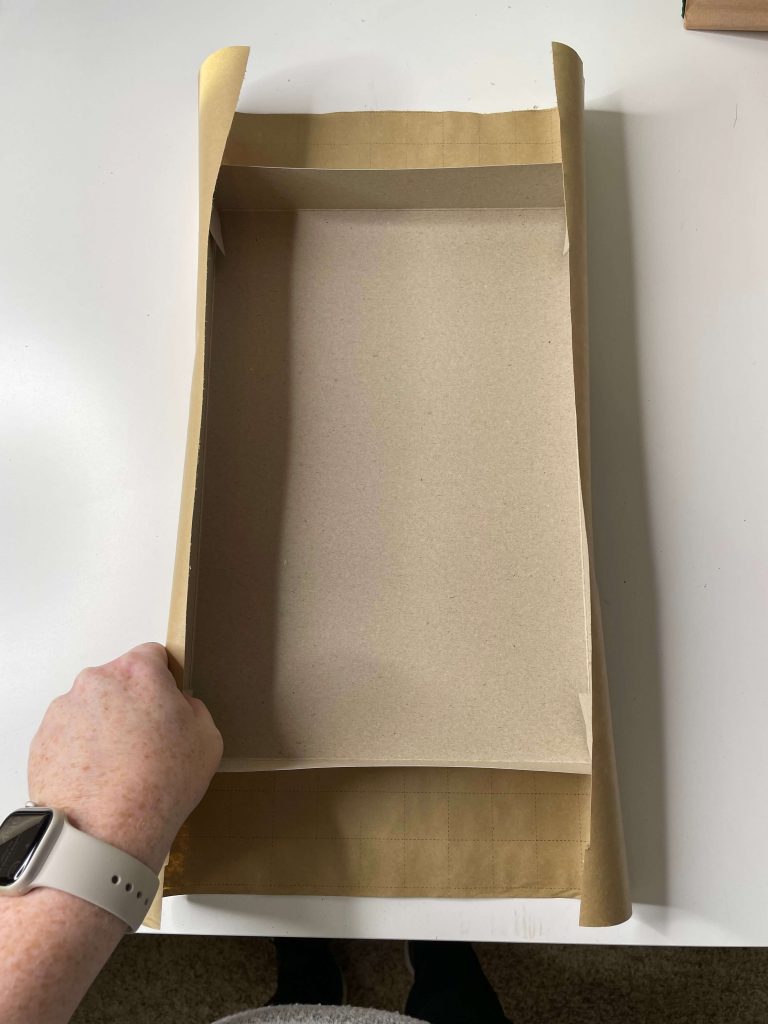
The next step is to fold up all the sides.
I did this by folding up the two longer sides.
Since there was residual spray adhesive on the paper, I pressed firmly to adhere the paper to the box.
Make sure you smooth it out from the bottom up so you don't get any ripples in your paper.
Then, you can fold up the shorter sides the same way.
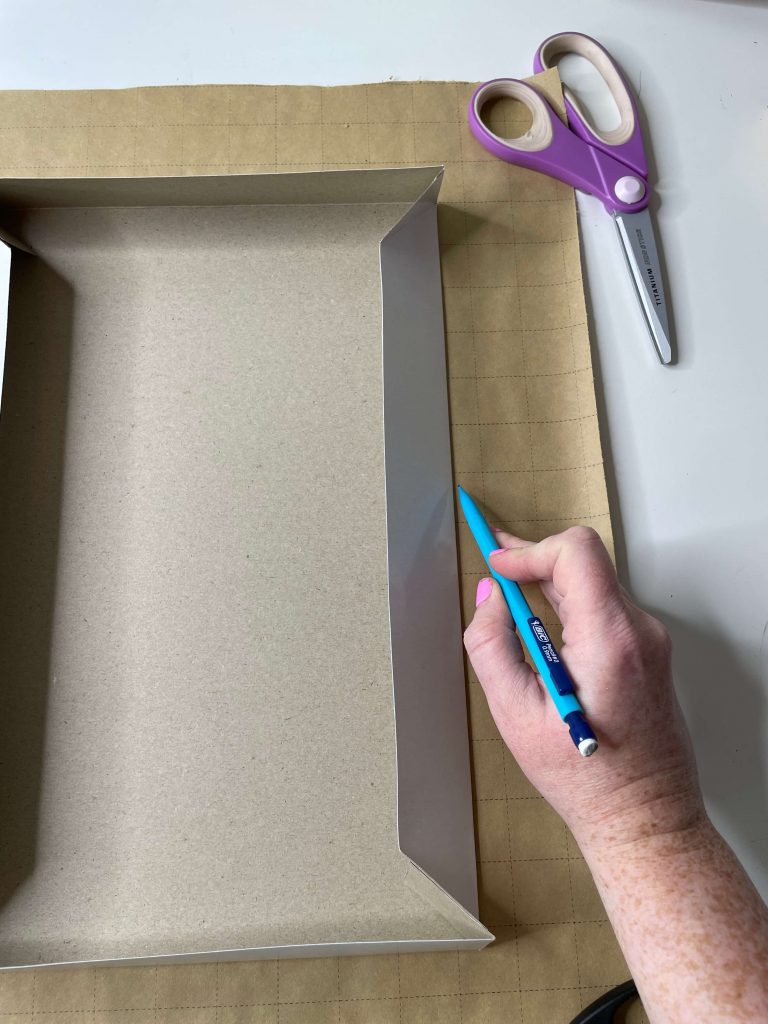
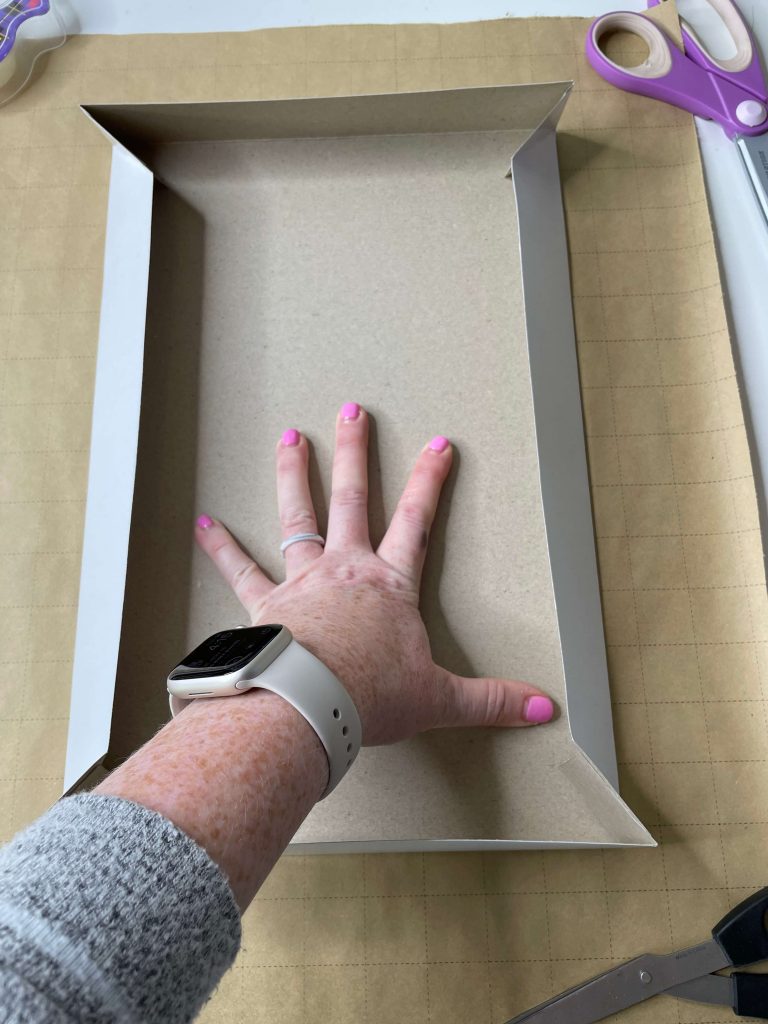
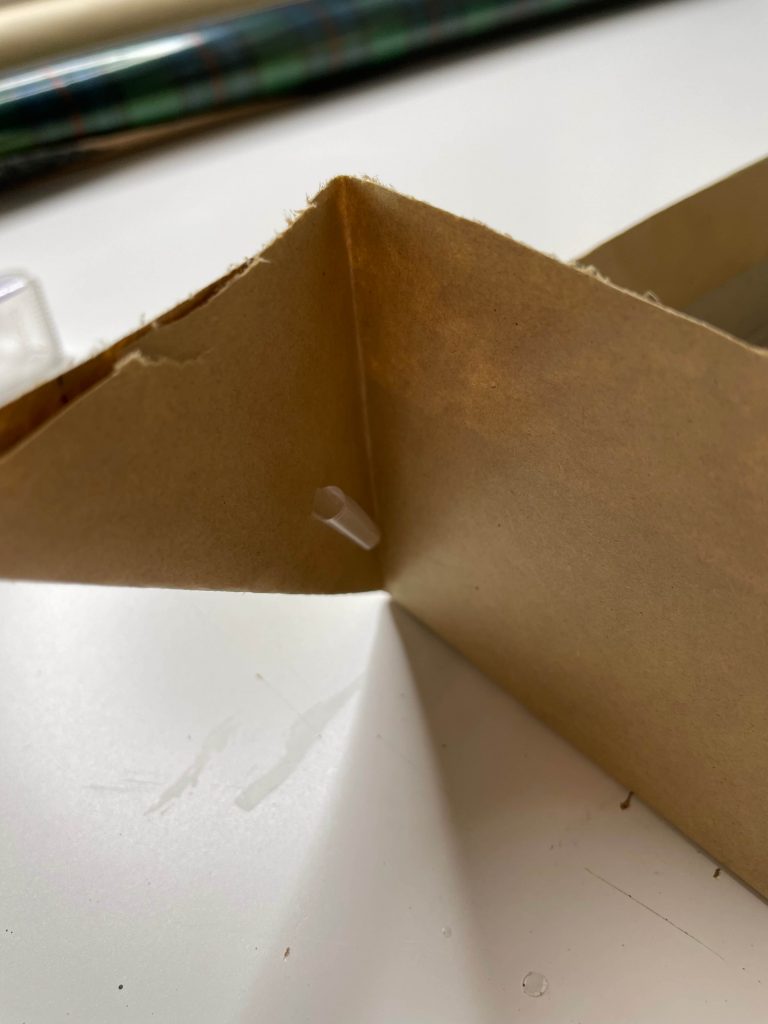
4. Squeeze corners to make points at each corner.
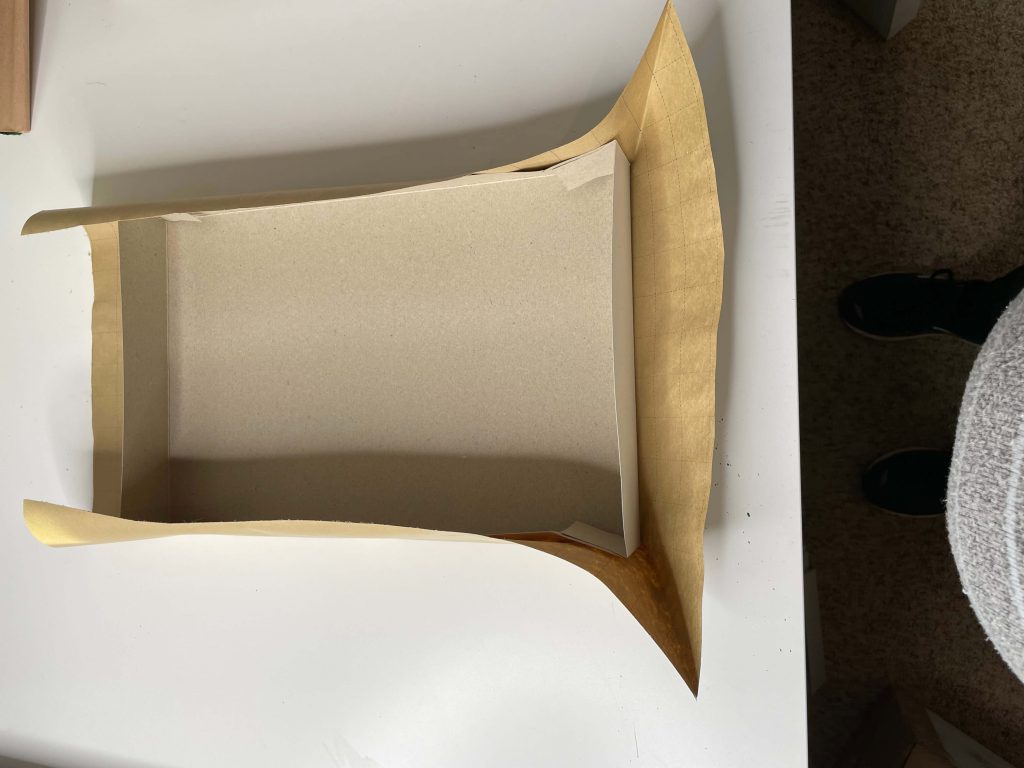
Once all sides are up, you'll have the paper meet at the corners.
Start by pinching the paper to make the corners flat and stick out.
Repeat this for all four corners.
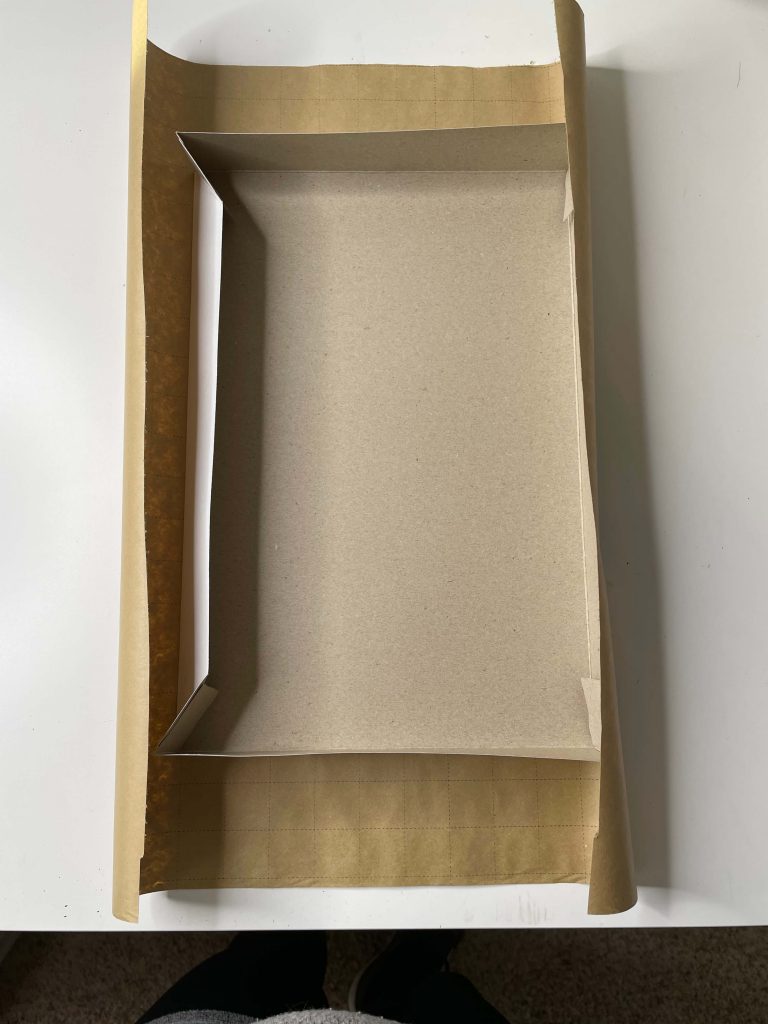
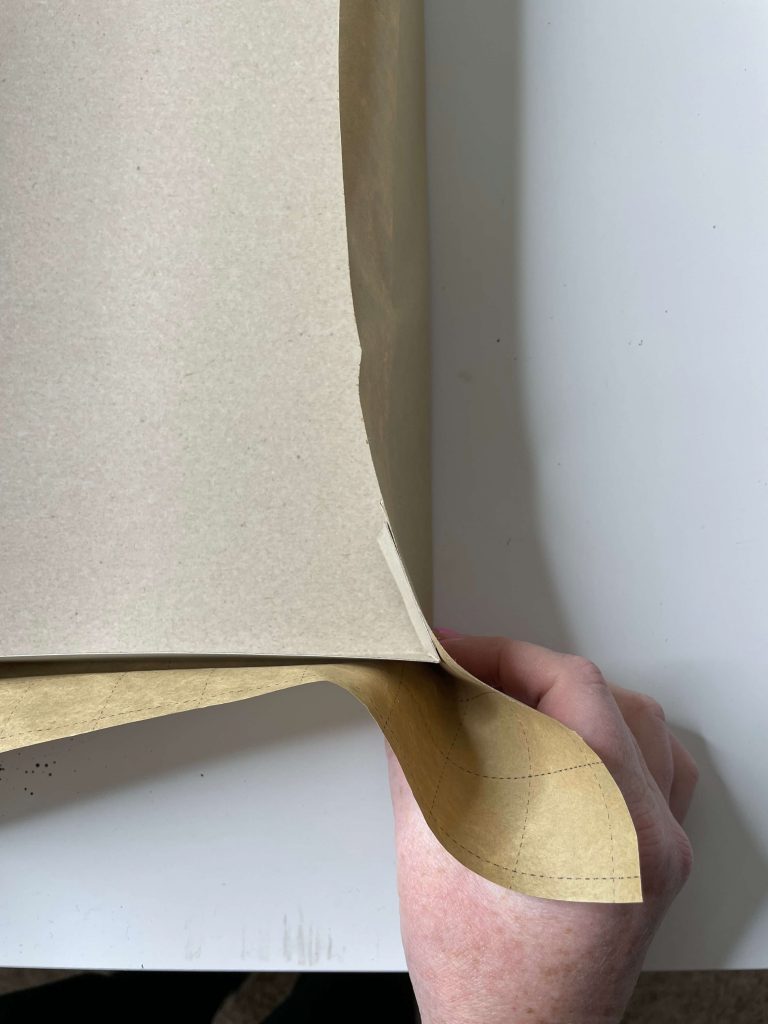
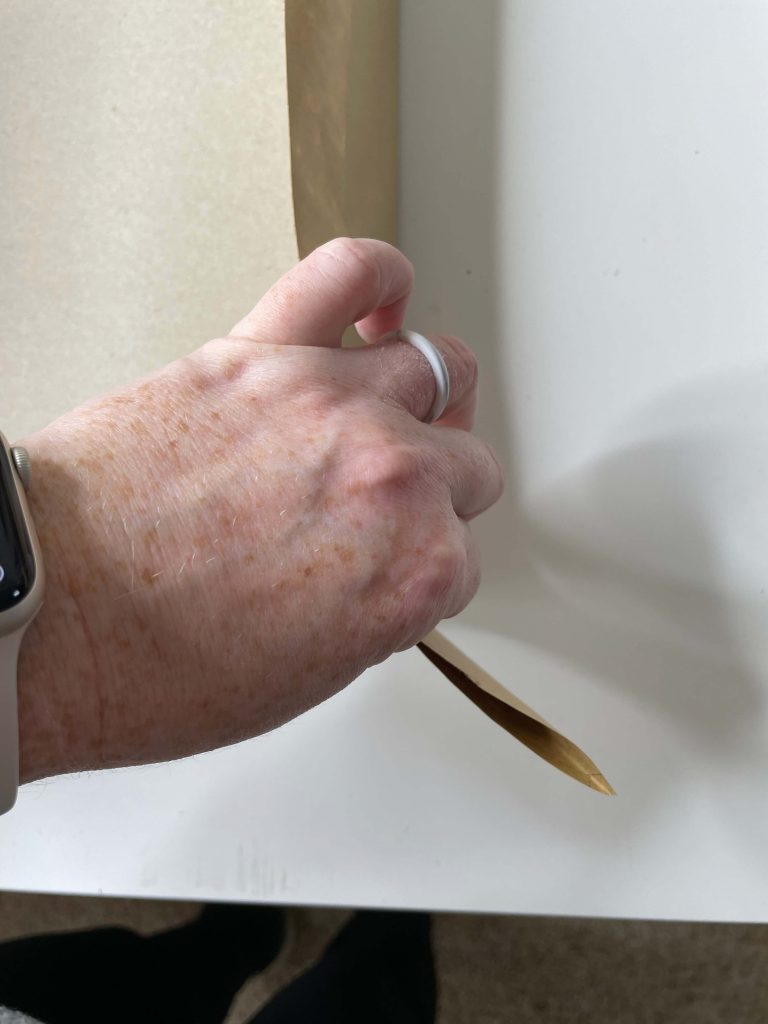
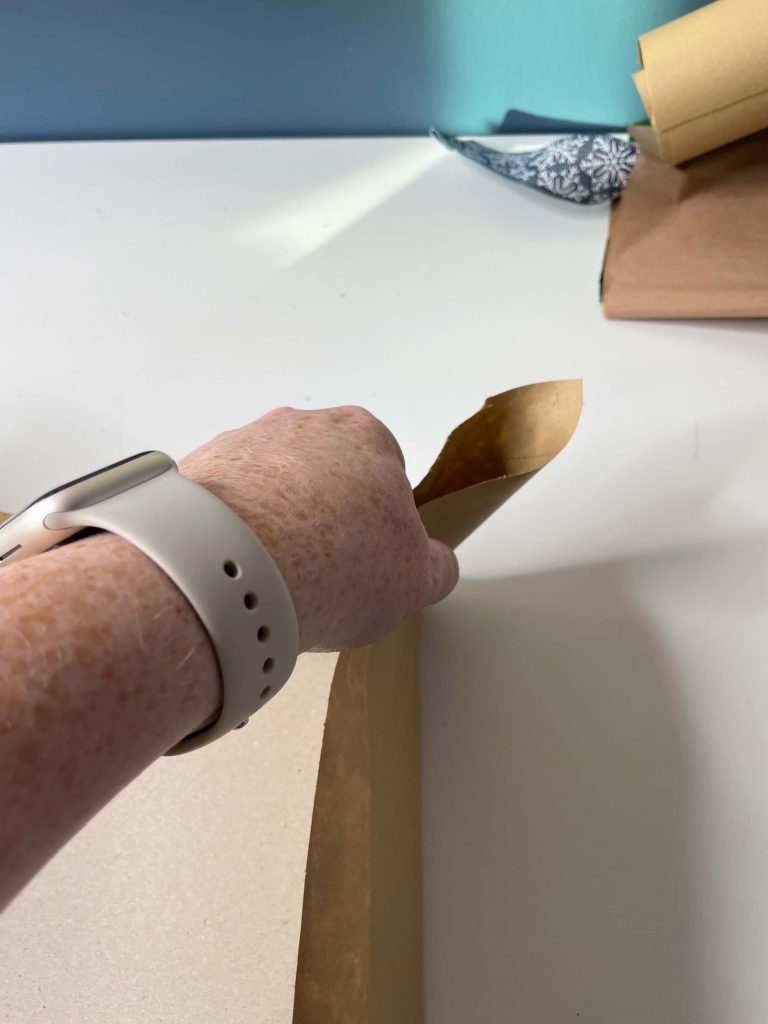
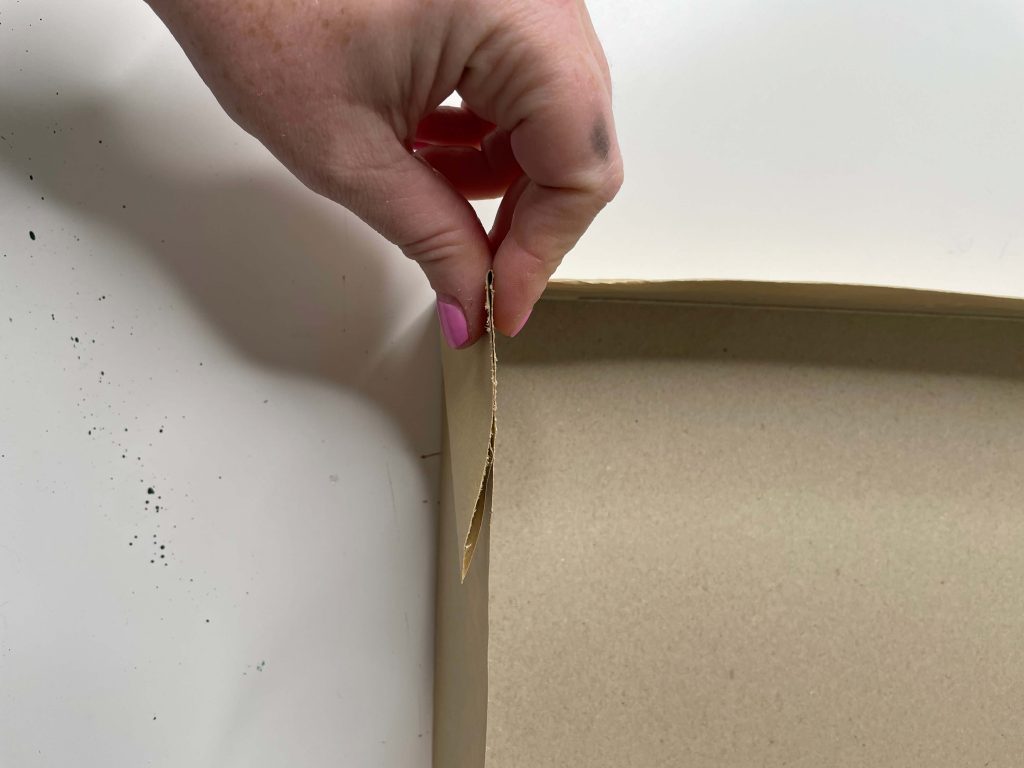
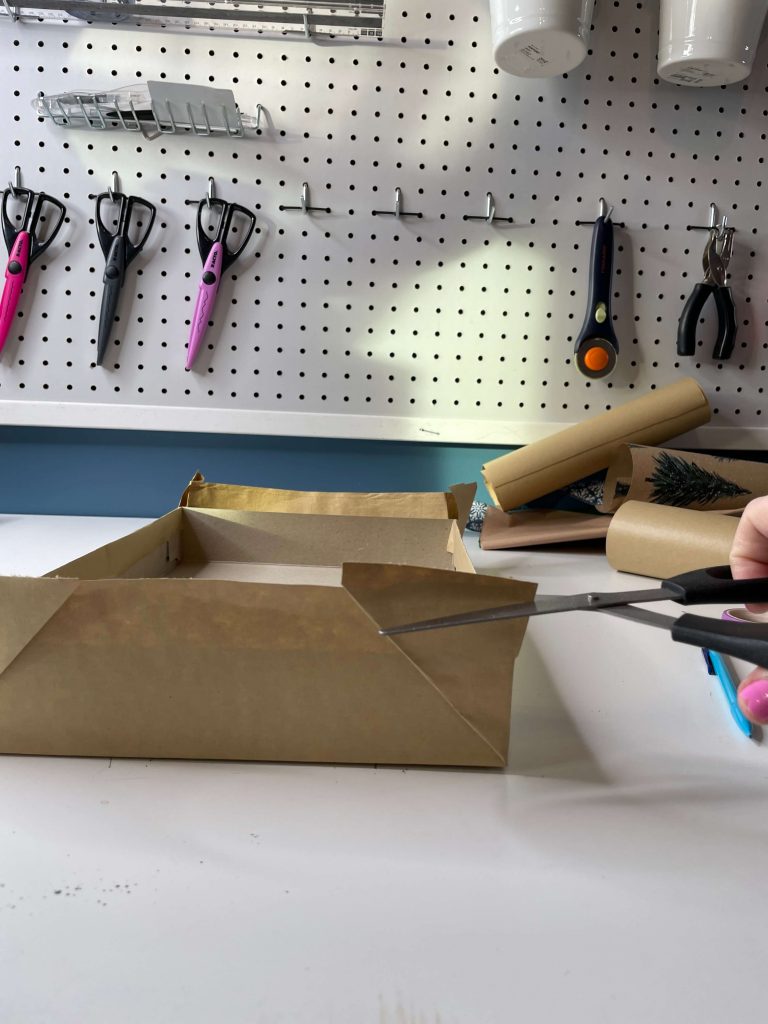
5. Cut a slit at each corner.
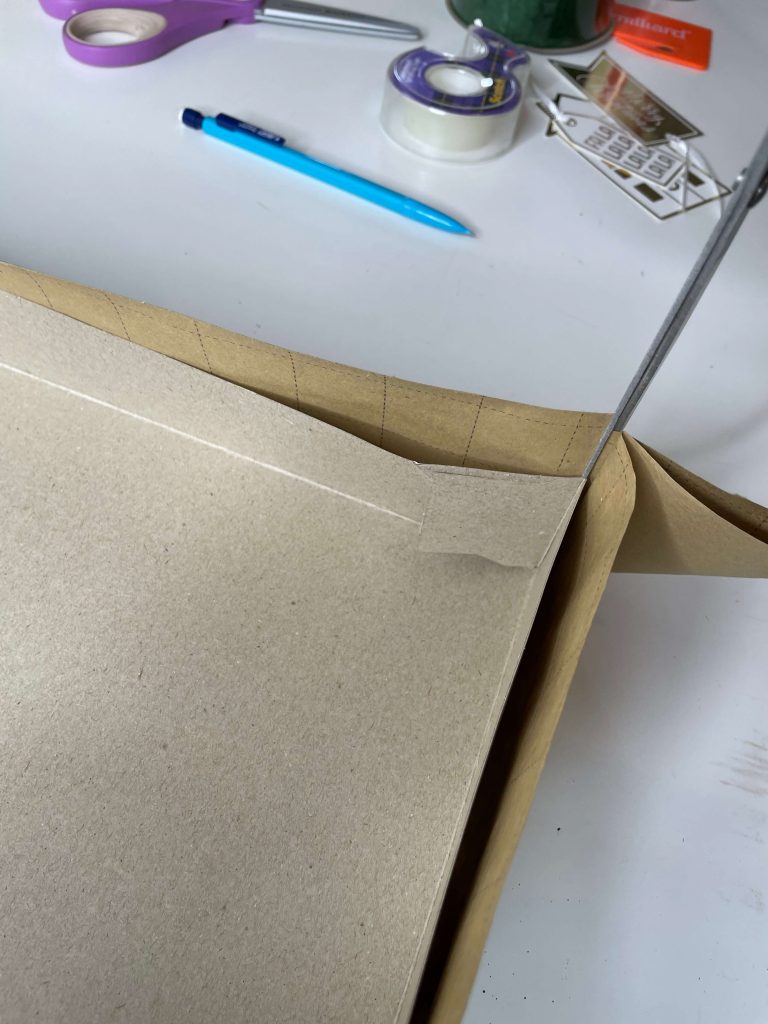
Once you have your pointed corners, you'll want to cut a tiny slit on the long edge side of the paper.
This is so the longer edge can fold into the box without disturbing the shorter edge.
You only want to cut your slit down as far as the top of the box.
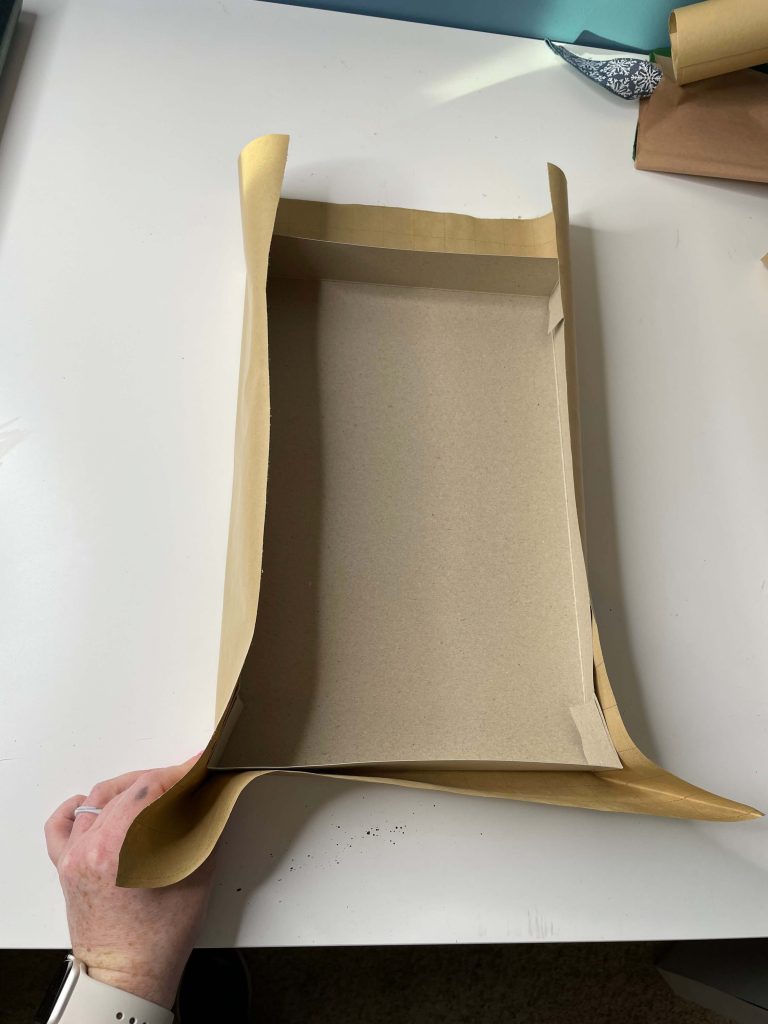
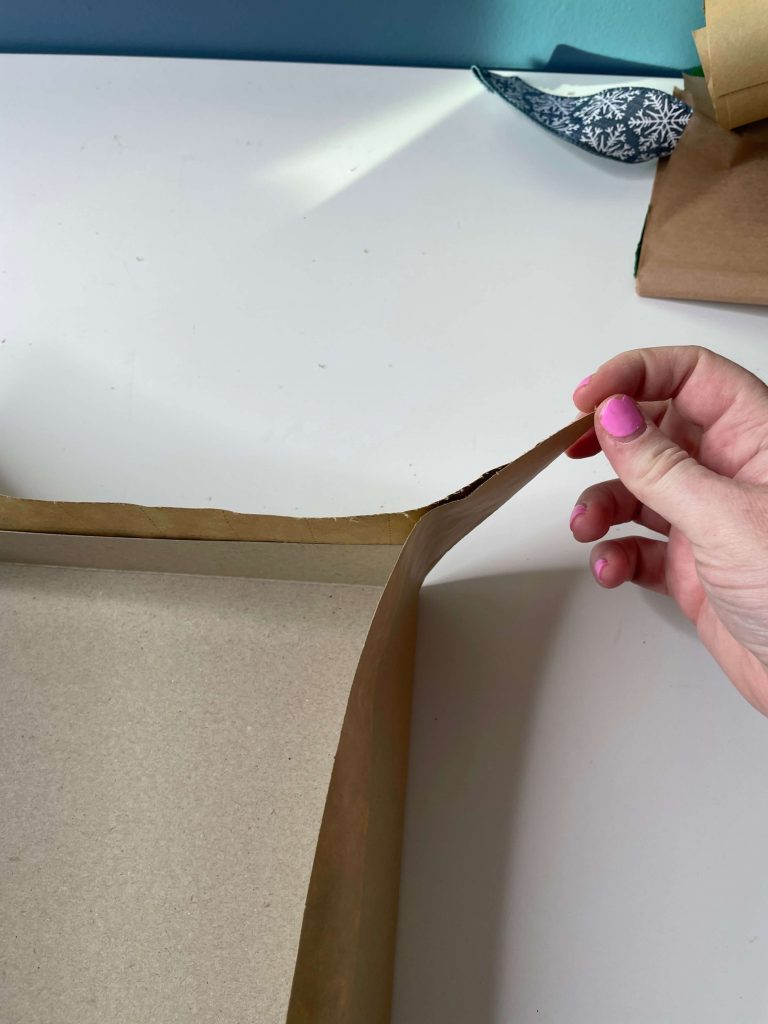
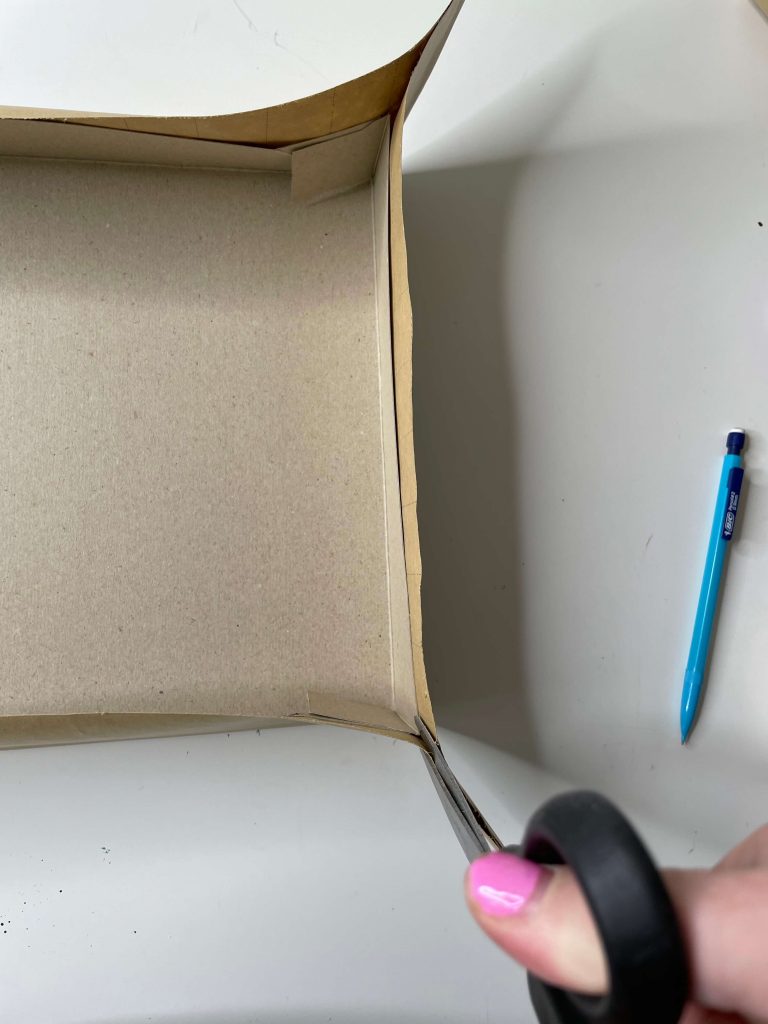
6. Fold in and tape down the flat side.
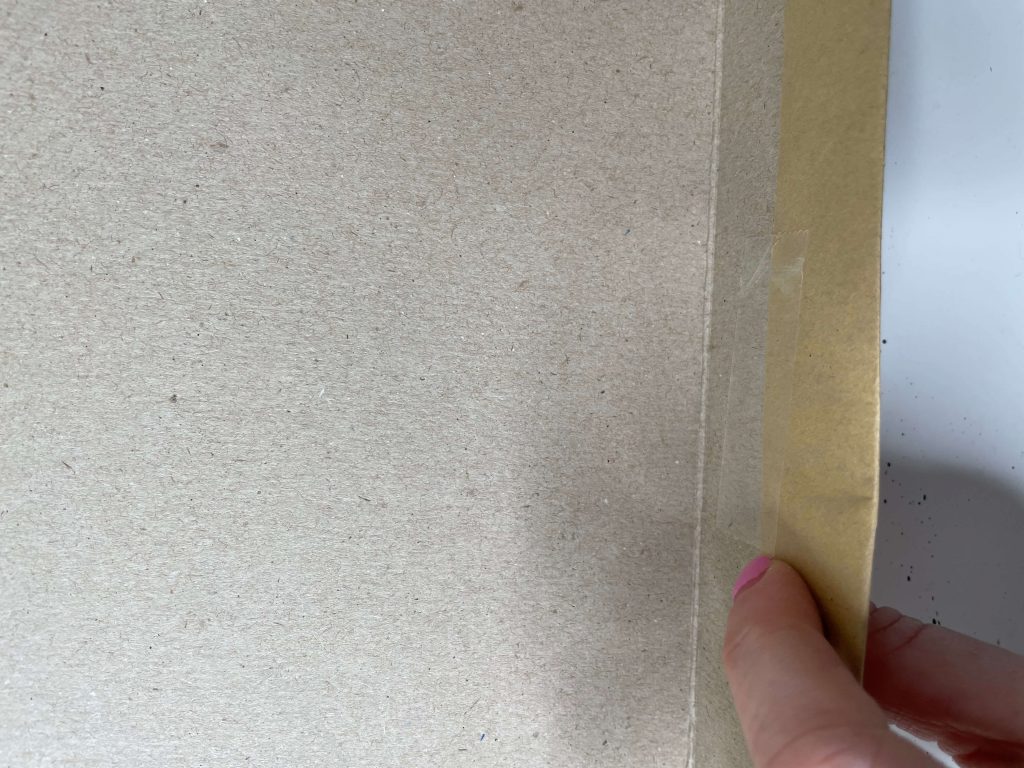
After cutting the slits, you'll now be able to fold the longer edges down into the box without disturbing the shorter sides.
Once you've folded both longer sides down, tape them to the inside of the box using your clear tape.
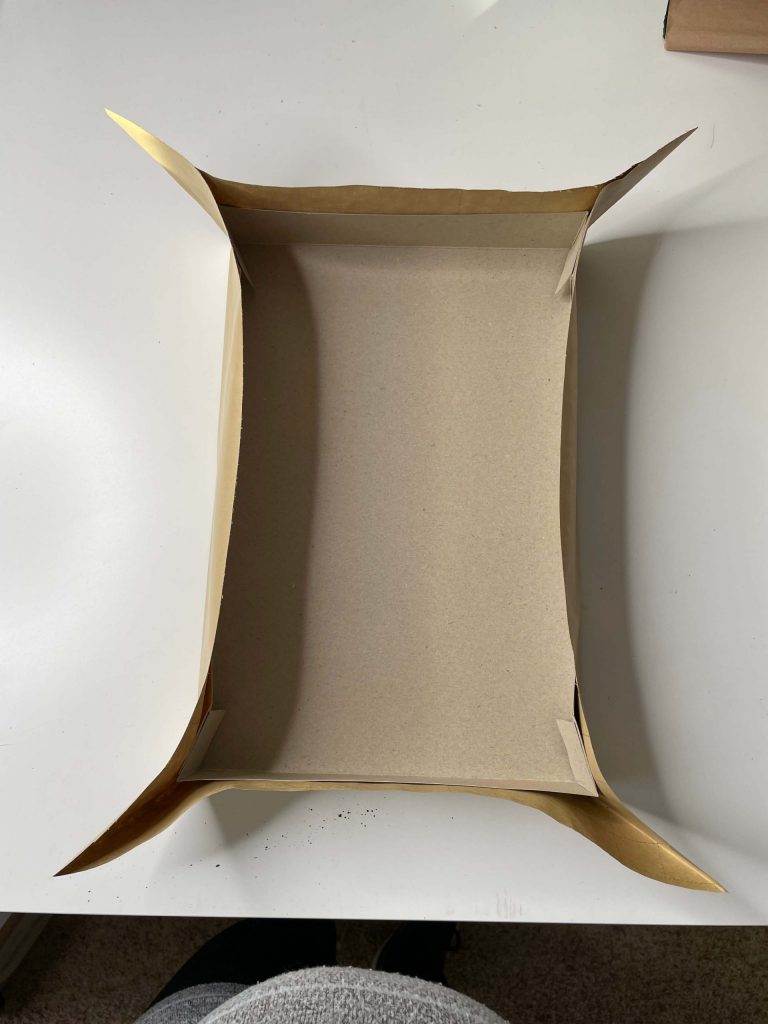
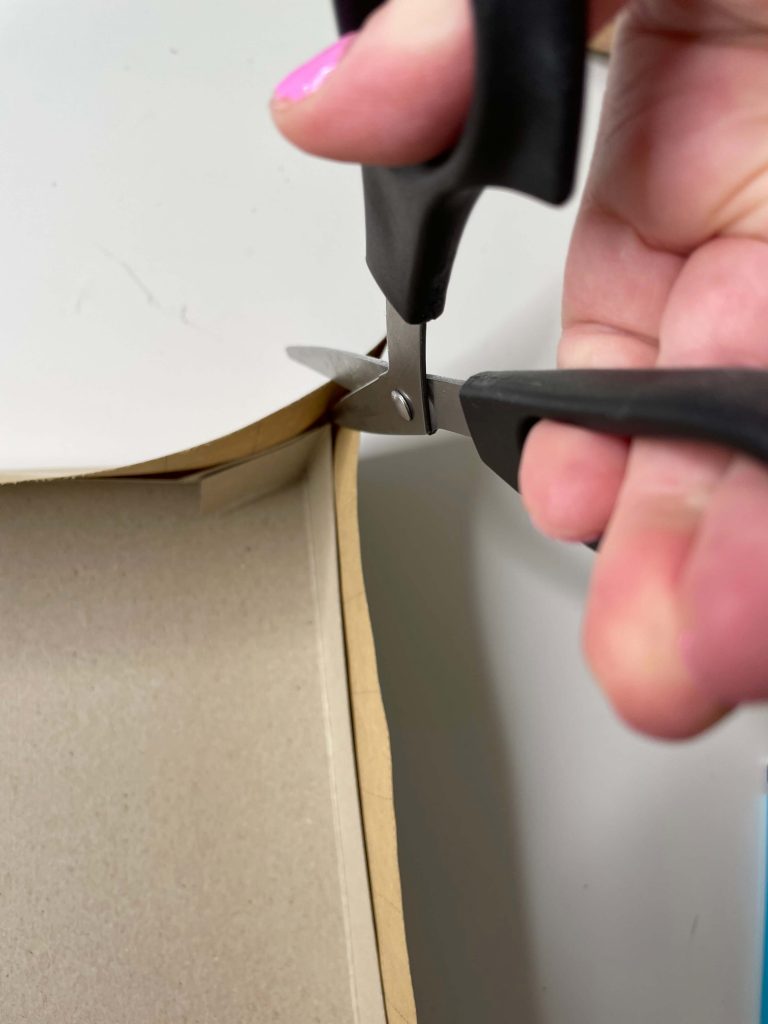
7. Fold in and tape down the corner sides.
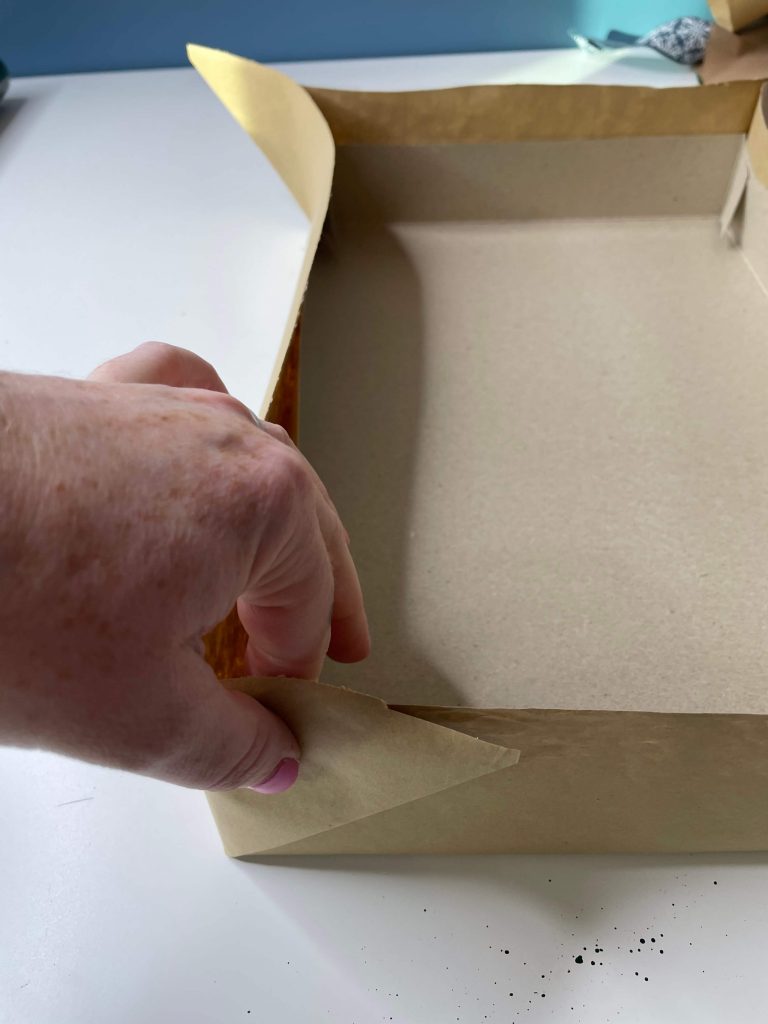
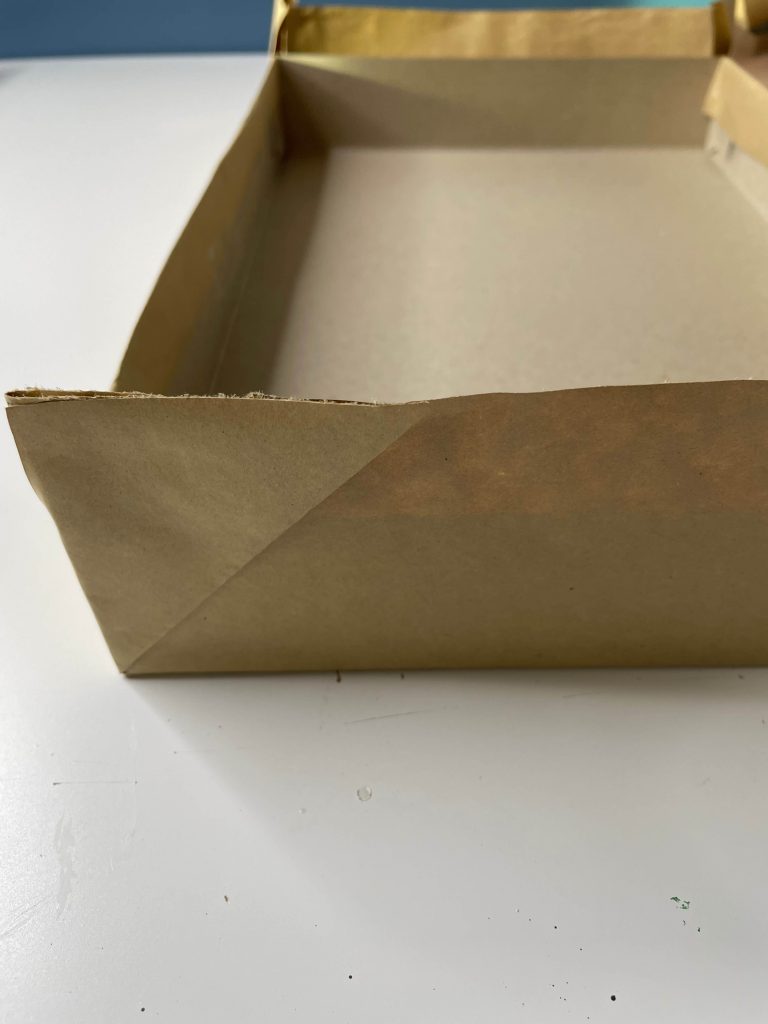
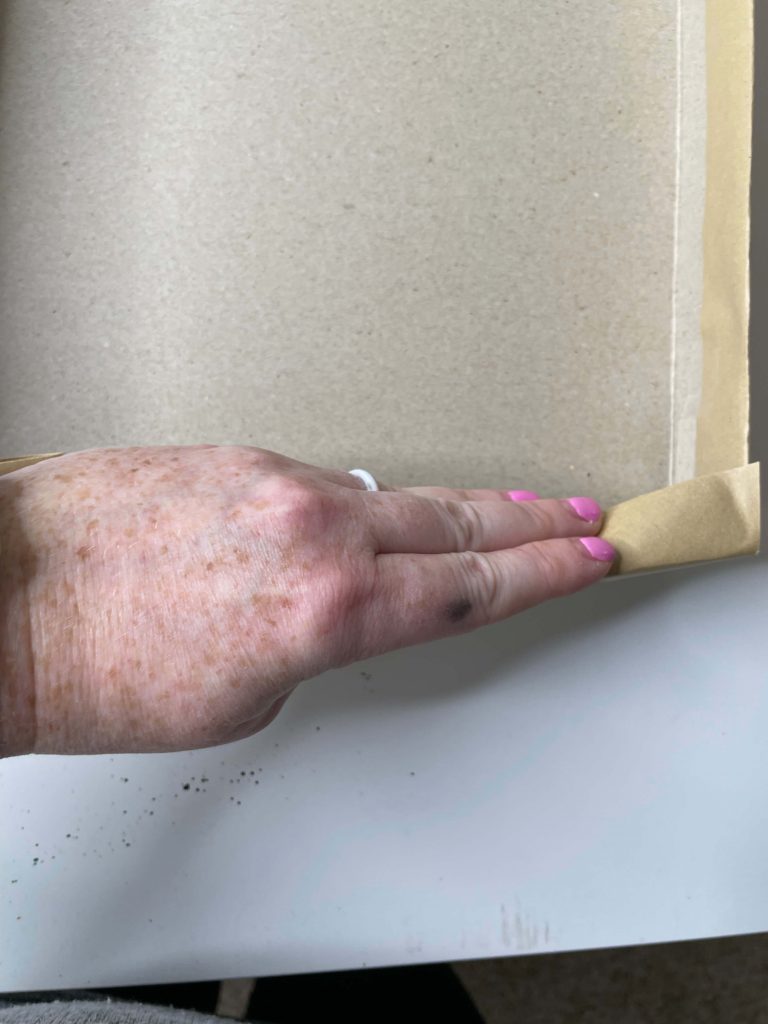
For the shorter sides that have the pointed corners, you'll want to start by adding a piece of double-sided tape to the angled edge of the triangle you created at the corner.
I didn't have double-sided tape when I made this tutorial, so I just rolled up a piece of clear tape.
Keep note, double-sided tape would have been much easier and works way better to keep the seam flat.
Once you have your tape on there, fold it on to the short edge as shown in the picture above.
Repeat the same step on the other side as well.
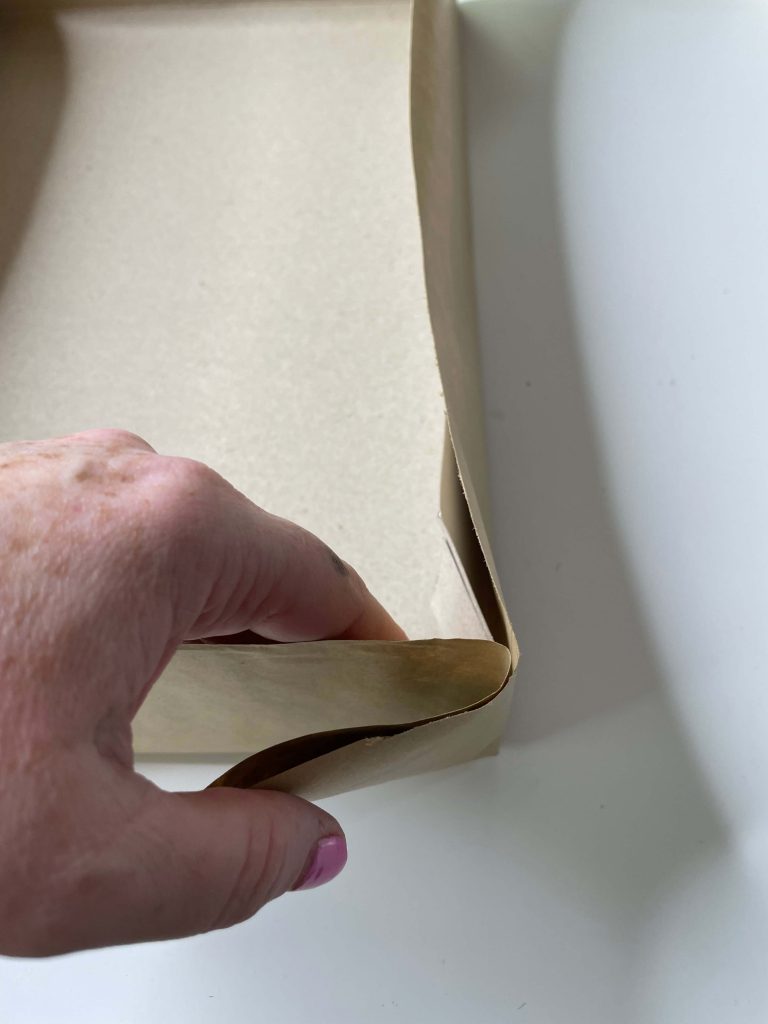
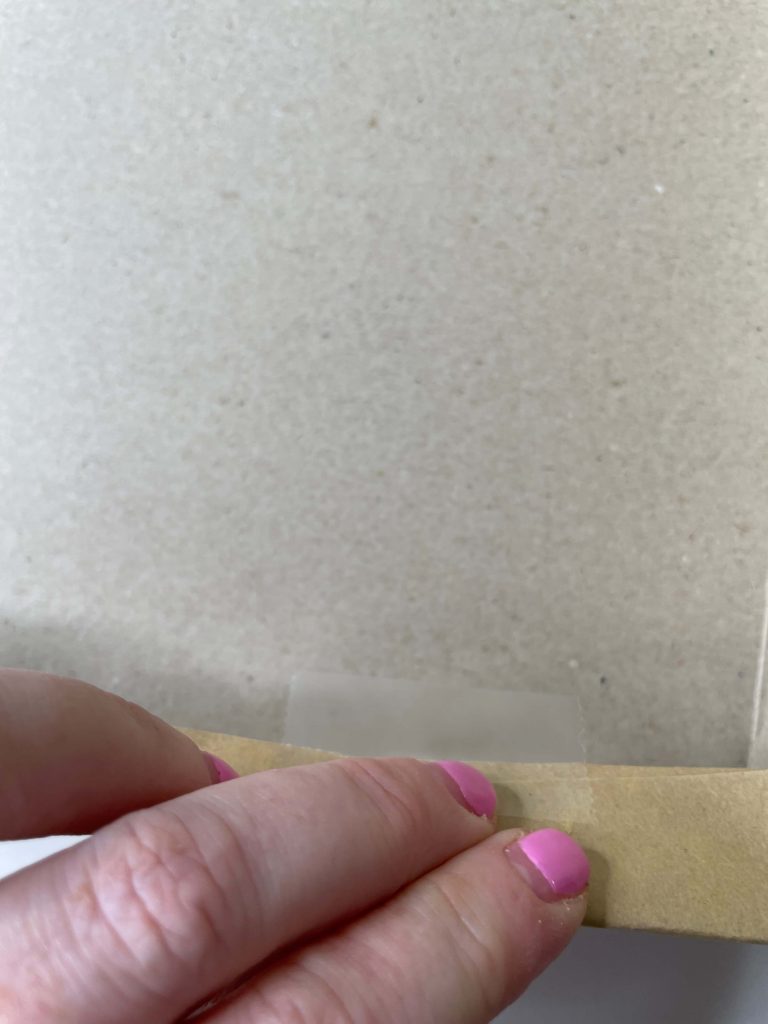
If the top of the paper doesn't have a nice even line, you can use your scissors to cut off the excess.
Once the triangle edges are adhered to the side, fold the paper over the box edge and tape it down on the inside of the box.
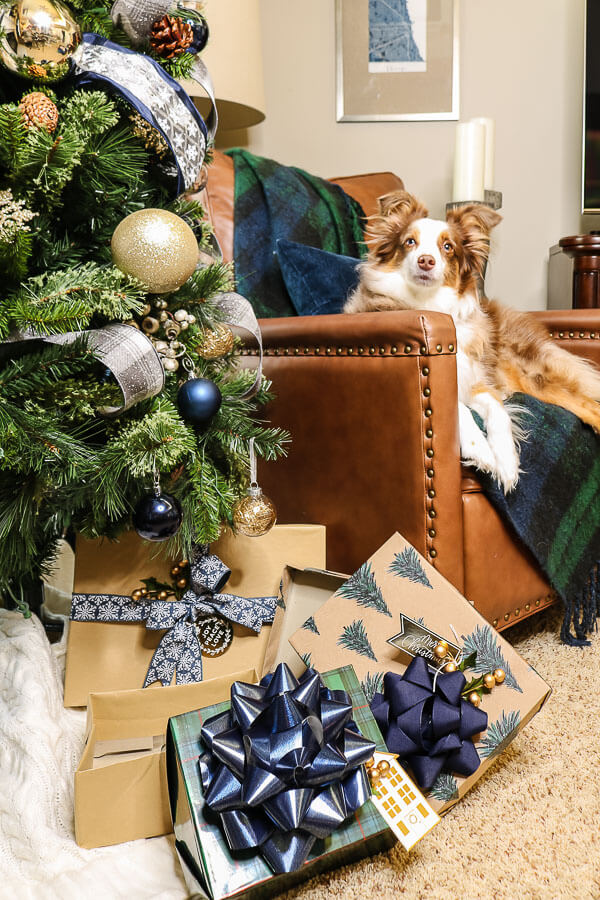
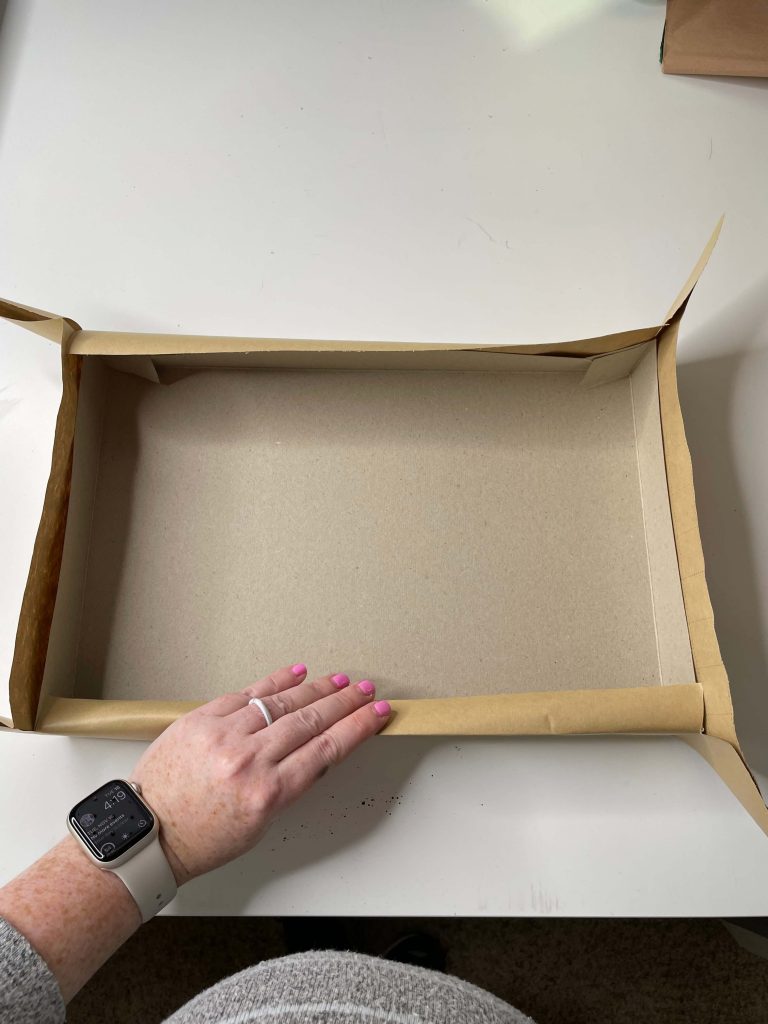
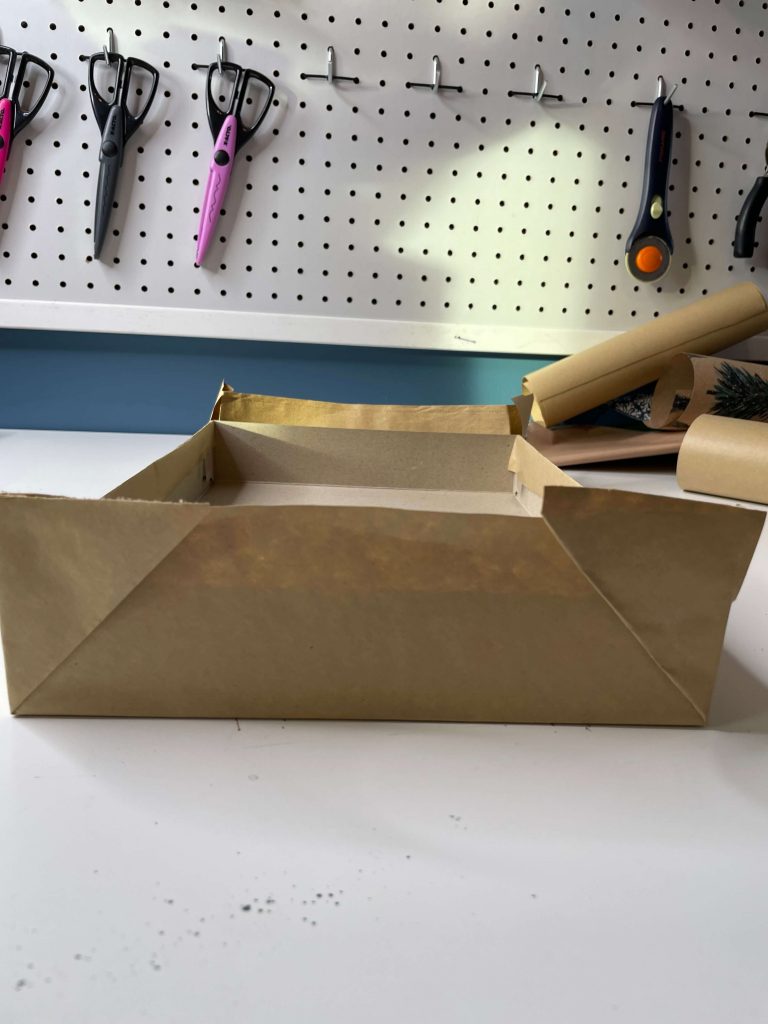
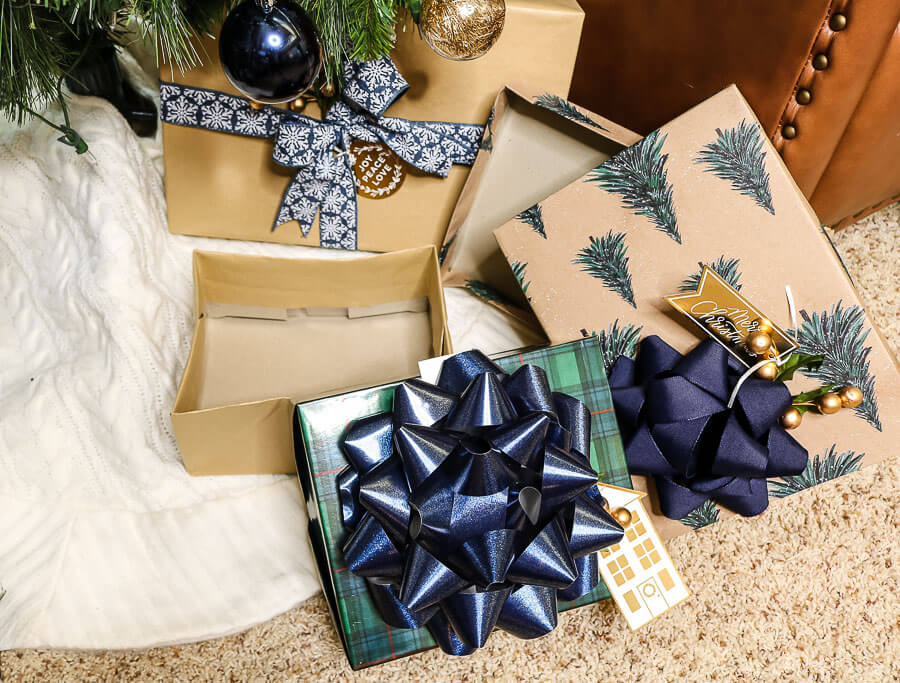
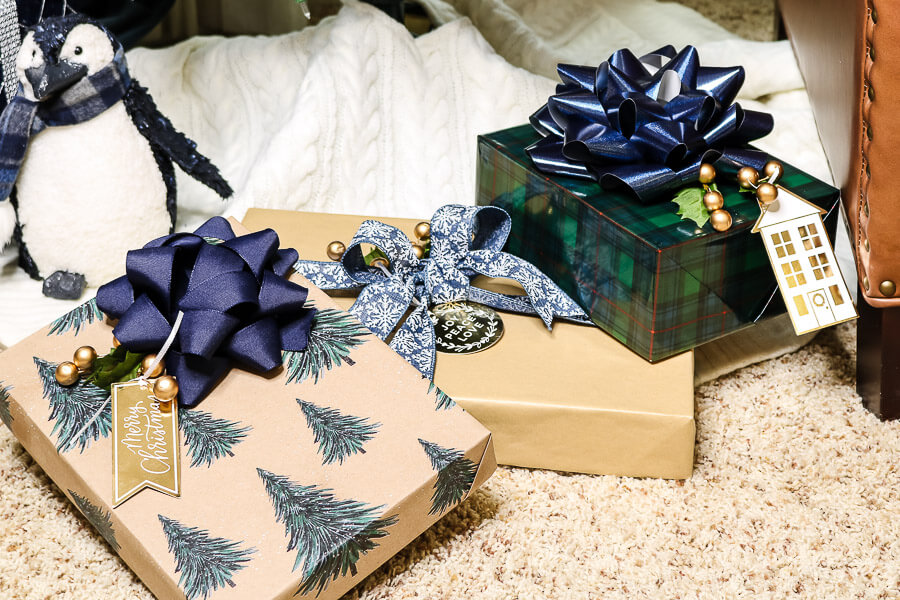
8. Garnish with bows, ribbon, Gift tags and/or stems.
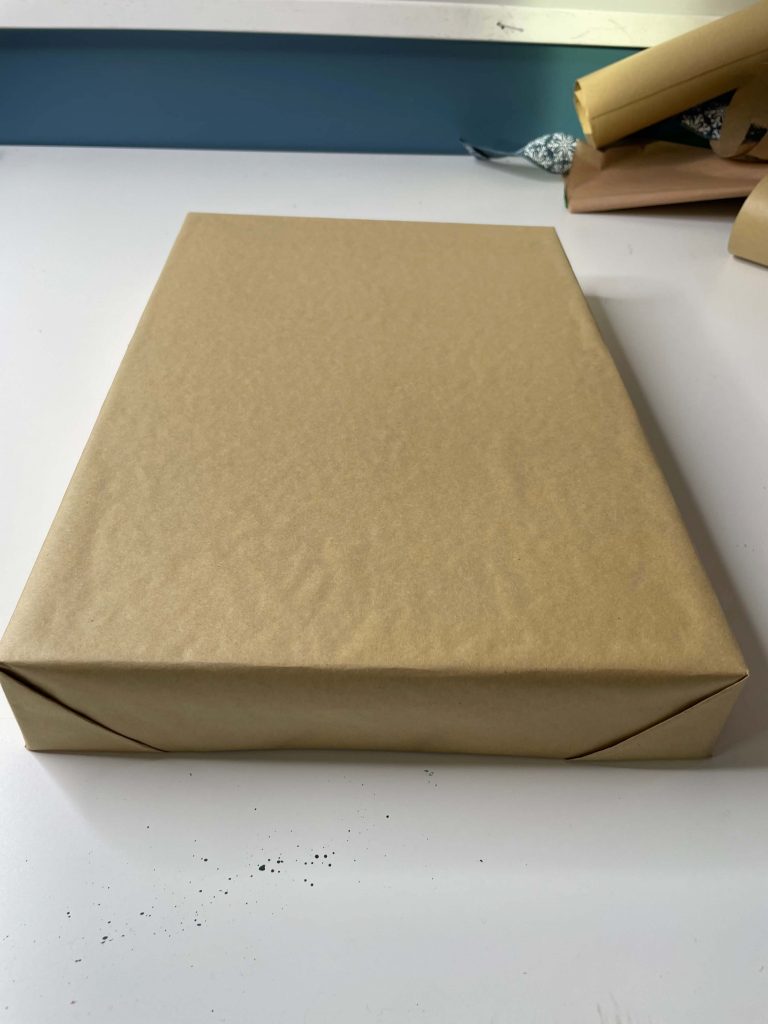
You can see what the finished inside and outside of the finished box look like above.
Once you have your reusable Christmas gift box wrapped, you can garnish your box with anything you'd like!
I like the stick on bows the best along side some stems, so that I have somewhere to tie the gift tag on.
I recommend using tie gift tags so that you can easily remove them year over year without damaging the box.
9. Fill with goodies.
Last, but not least, you want to fill your box with the beautiful presents you purchased for your loved ones!
Add your favorite colored tissue paper to the inside, place your gift on top, fold the tissue over, and close the box.
Don't forget to add the info to the gift tag and your done!
Voila!
Now you have reusable Christmas gift boxes to help you save time wrapping year over year!
Alright, the next stop on this “Deck the Halls” Blog Hop is over to Robyn from Robyn's French Nest.
Her post will be live Nov. 19th at 8AM EST. Don't miss it!
She's amazing!

I love this idea! As a kid, seeing all of the department store boxes my mom reused each is one of my favorite memories. And these are a lot cuter!!!
Aww thanks!!
I love how you created this box so it can be re-used! Brilliant, my friend. I genuinely love it.
I am doing a live-on wrapping and will be sharing your great idea if you are good with that.
Of course, I will be the first to say where I heard all about this great idea.
For sure!! Thanks for the share!!
Sustainable and pretty- a great combo! Happy hopping with you!
Thanks Marie!! Same!!
They turned out so beautiful! What a great project! It has been fun blog hopping with you!
I should do this. We don’t buy a lot of gifts so sometimes I have fake packages under the tree, and this would work great for that. Especially since I’m using blue for a couple of years.
Great idea! Your wrapped packages are so pretty!!
Thanks Kim!
This is such a good idea! What a time and money saver! Happy holidays!
What an excellent, thorough tutorial, thank you for sharing it.
Thanks!! I love detail lol
These are fantastic! Great tutorial. Will definitely be trying this out.
What a good tutorial! I appreciate your breaking this down step-by-step. And how nice it would be to have some already wrapped boxes just waiting to be filled–a beautiful alternative to gift bags.
Thanks so much for joining the Grace at Home party at Imparting Grace. I’m featuring you this week!