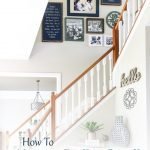
How to Hang a Gallery Wall on Stairs
This tutorial will show you exactly how to hang a gallery wall on stairs to make this daunting task a breeze!
Welcome back to part two of my perfect gallery wall series!
If you missed part one, check out how to create the gallery wall plan here.
There are so many tutorials on how to hang a gallery wall, but while I was researching,
I couldn't find one that addressed my needs of how to hang the gallery wall that's towering above your staircase.
Have you seen the tutorials that have you take brown paper the size of your frame and use it to get the layout right on the actual wall?
Great idea except, my gallery wall was towering about 20 feet above the ground and about 12 feet from the nearest step.
No way was I going to be able to hang the paper and casually move it around to see how the layout was going to look.
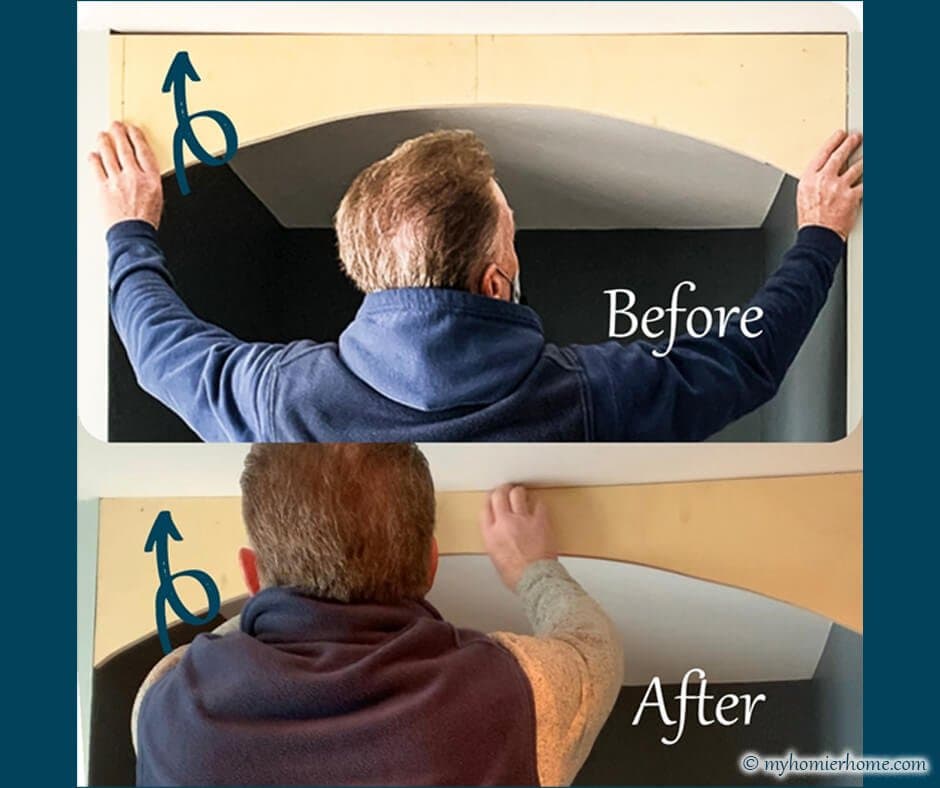
In addition to worrying about how to get the perfect layout on the wall, I was also battling how to actually reach this area to actually hang the items.
Not only was it so high up, but the staircase was definitely cramping my style.
So, in an effort to tackle this big, bad wall as easily as I could, I devised my own plan of attack to figure out how to space the frames perfectly and how to make sure they didn't move once they were up there… because getting up there was going to be interesting.
After actually completing this gallery wall, I am happy to say that I figured out a simple way to make all of these problems a non-issue.
This tutorial is one of my favorites to share because it was a very daunting task that turned out to be a breeze.
Depending on how many items you have, you should be able to complete the hanging of your gallery wall on a Saturday morning and still have energy and time to enjoy the day. Let's dive in!
Table of contents
- Materials Needed
- Step 1: Map the Usable Space for Your Gallery Wall on the Floor (Video 0:10)
- Step 2: Layout your Artwork on the Floor (Video 1:04)
- Step 3: Record the Exact Distances Between Frames (Video 1:30)
- Step 4: Attach Sawtooth Picture Hangers to Artwork (Video 3:08)
- Step 5: Mark Center on the Wall (Video 3:36)
- Step 6: Hang Center Item (Video 3:46)
- Step 7: Use Command Velcro Picture Hanging Strips to Keep Art Straight (Video 4:55)
- Step 8: Measure and Hang All Other Frames (Video 5:17)
- Extra Tips (More tips found throughout the video)
- Want to watch the video for this post?

Disclaimer: This post does include affiliate links for your convenience. This is at NO additional cost to you but earns me a small commission. To read more, check out our disclosure policy.
Time to Complete: 4 hours
Materials Needed
(linked items are affiliate links)
- Your Mapped Out Plan (From Part 1 of this Gallery Wall Series)
- Frogtape
- Pencil
- Hammer
- Screwdriver
- Tape Measure
- Flat Ruler (or the optional carpenter's ruler listed below)
- Sawtooth Picture Hangers
- Screws & Anchors (make sure they fit your frames – these are what i used)
- Small Laser Level
- Command Picture Hanging Strips
- Little Giant Ladder
- 6′ Ladder (you may need an additional ladder for your buddy in certain areas)
- DIY Stair Extension
- DIY Art Hangers (two home depot stir sticks and two screws)
- Laser Level with Tripod
- A Buddy (never hang alone… Danger, Will Robinson)
Optional Materials:
- Folding Carpenter’s Ruler
- Only needed to make measuring easier when you are on a ladder
- Brown Kraft Paper
- Only needed instead of the Frogtape to mark your usable space, if desired
- Magic Eraser
- Only needed for erasing the pencil marks you don't want to see after you've hung the items
Note: This video is the process I have defined below. Please don't hesitate to send me any questions for when you use this tutorial for your own gallery wall.
Step 1: Map the Usable Space for Your Gallery Wall on the Floor (Video 0:10)
Try to find some open space on the floor where there is no carpet, if possible.
Using your map from part one, section off the usable space dimensions on the floor using FrogTape or brown kraft paper.
You will want to use your measuring tape to get close to the exact measurements. Think of this like moving the part of the wall you're going to use on to the floor.
The purpose is to do all the calculations on the floor before going up on a ladder.
Step 2: Layout your Artwork on the Floor (Video 1:04)
Take all of your frames and artwork that will go on your gallery wall and place them in the usable space you just mapped out on the floor.
Use the drawing you made in part one to help guide you. Imagine the floor is the wall and try to get an accurate picture of how you want it when it is hung.
Step 3: Record the Exact Distances Between Frames (Video 1:30)

Once you get the layout you feel comfortable with, grab your measuring tape or your ruler and make sure each piece is spaced the way you want.
You want to make sure to leave yourself about 2 inches between frames.
The goal is to get a true feel for how you want it to look and then record the measurements between photos to help with the actual hanging process.
Once you decide the distances between each frame, record them on your usable space picture one last time.
When you go to hang these pictures, you want to be able to say, “the next picture is 4.5″ off the right of the center picture and 2” down from the center picture.
You also want to take note of how the frames/pictures are aligned.
To show yourself how they are lined, draw a rough sketch with dashed lines to mark it.
For instance, I wanted the bottom edge of our wedding lyrics artwork to be aligned with the center of the middle frame.
Also, I wanted the top edge of the prayer artwork to be aligned with the center of the middle frame.
The key is to note exactly how each piece fits to the other. See the picture above for more clarification.
Step 4: Attach Sawtooth Picture Hangers to Artwork (Video 3:08)
Many of these frames had the double hook in the back.
Of all the things that were easy in this project, we regretted one thing… not putting the single sawtooth picture hangers on all the frames.
When people think about hanging pictures, your first thought is two hangers are better than one because it won't shift or move on you.
I completely disagree after having hung this gallery wall. As long as you have a level, the DIY art hanger, command velcro picture hangers, and a single sawtooth picture hanger, you can make your life so much easier when you go to hang this stuff because you eliminate the guesswork of trying to get both of those floppy hooks to attach to the screw.
If you have no choice, but to use the double hooks on the back of your picture frame, be sure to make two DIY art hangers.
You can find my tutorial on how to make one here.
The purpose of these art hangers is to allow you to place your level on top of the picture frame and punch tiny holes in the wall where your screw should go.
This secret tip came from the Staging Studio's Art Hanging Hack. You can see their video on how to use it here.
It's definitely a must for double hooked frames.
Step 5: Mark Center on the Wall (Video 3:36)
In order to find the center marking on your wall, you will need a tape measure, a pencil, and your laser level.
One person will need to measure the center you found from step 1 part d in my previous post and mark it with a pencil.
The other person will need to alight the laser level horizontally and vertically with the red lines to mark center on your wall.
Throughout the whole process, we didn't move the laser level, so we always knew exactly where center was throughout the whole process.
This was super helpful because many of my gallery items are based on that center as you can see above in step 3.
Step 6: Hang Center Item (Video 3:46)
Once you've determined where center is, it's time to hang the center item.
I would suggest starting in the center because it allows you to know that the entire gallery wall is perfectly in the middle rather than starting from the top and potentially missing the mark by a couple inches.
This is the part where your DIY stair extension will come in handy.
The tutorial on how to build one can be found here.
Once you've built this once, you will have it forever.
The purpose of this is to allow you to even out the stairs to make your ladder able to work properly.
The uneven stairs will make the hanging very difficult without this DIY stair extension.
Some tips for hanging the center item would be to measure the items length and width again (video 4:06).
Cut those measurements in half.
Then, take your measuring tape or ruler and measure out from your center with half of the width, make a pencil mark, and measure up from the center with half of the length, make a pencil mark.
Then, use your handheld level to make another pencil mark where the length and width mark would meet (video 4:39).
When we did this, we drew a little L shape pencil mark to know where the corner of the frame would go.
With your DIY art hanger hooked on to the hook(s) of your frame, align your frame with the L shaped pencil mark.
Make sure to have your handheld level resting on top of the frame so you can see if it is level.
Once you have it aligned and level, push the DIY art hanger(s) and the frame into the wall to make a tiny punch hole.
This will be where you put your anchor and screw.
We used the screw and a hammer to get the screw started. If it went quickly through the drywall, we knew there was no stud, so we removed the screw and inserted an anchor in that same spot, then the screw, and then hung the item.
Step 7: Use Command Velcro Picture Hanging Strips to Keep Art Straight (Video 4:55)
You can attach the Command Velcro picture hanging strips on the the frame before you hang it or add them while the picture is hung.
You will want to make sure the Command velcro strips are on a part of the frame that will adhere on the wall without being seen or bulging the frame.
We tended to only add one per frame to make sure it didn't move, but you could add more if you feel it necessary.
To add these to the frames, I took off both stickers to reveal the adhesive and then slipped the strip where I wanted it on the frame.
Then, I pushed the front of the frame where the strip was to make sure it adhered to both the frame and the wall.
Within a minute, I was able to remove and adjust the frame if it moved from level.
Because they are velcro, if you do need to adjust the frame, it will pop right off and velcro back however you want it.
Step 8: Measure and Hang All Other Frames (Video 5:17)

Using your recorded distances from step 3 above, choose one of the next frames off of the center frame to hang next.
For instance, as you can see from the order of which we hung the pictures above, it was easiest to hang the one labeled with a 2 next because it was 2″ from the center frame and the bottom of it was aligned with the center of which we already had marked with our laser level.
The next easiest to hang was the one labeled with a 3 above because I knew this frame was 2″ down from the center frame and 4.5″ out horizontally from the center frame.
Work your way around the gallery to decide which frame would make the most sense to put up next.
Keep in mind where your ladder will need to be placed to hang each one.
When we went to hang the wood frame (#8) above the center frame, the blue center frame was actually in our way for where we needed the ladder to go.
This particular frame only had a sawtooth hanger and a velcro strip, so it was no big deal to take it down, but keep that kind of thing in mind as you decide the order you will hang your gallery wall.
Extra Tips (More tips found throughout the video)
In addition to the tips above, definitely make sure you have a second set of hands.
If you're afraid of heights, this is not the project for you, so find someone who feels comfortable on a ladder to help you.
My dad is my go to sidekick for all projects like this.
Also, make sure you play some good tunes while you're working and have fun!
The results of your efforts will be well worth the time you took to create this.
If you have any questions, don't hesitate to reach out by leaving a comment below or emailing me.
Happy Gallery Walling!
Want to watch the video for this post?
You're in luck!
I put together a video tutorial to add to this post, so you can see the full scope in real time!
Check it out below and while you're there, be sure to hit the subscribe button and turn on the bell notifications to make sure you never miss a new My Homier Home video!